
Amidst the hustle and bustle of the holiday season, finding quick yet festive treats can feel like an uphill battle. Enter Little Debbie Christmas Tree Cake Balls—a delightful answer to your sweet-tooth cravings that come together in just over an hour. These charming little bites combine the nostalgic flavors of the iconic Little Debbie cakes with creamy richness from cream cheese, offering a comforting touch that’s perfect for any gathering. Not only are they a showstopper at parties, but they also make for easy, no-bake fun that you can whip up with friends or family. So, roll up your sleeves and let’s create some holiday magic together!
Ingredient notes
When crafting your Little Debbie Christmas Tree Cake Balls, every ingredient plays a special role in achieving that perfect festive bite. Let’s dive into what makes each component shine, ensuring your treats turn out as delightful as you envision.
For the Cake Base
- Little Debbie Christmas Tree Cakes – These iconic cakes provide the uniquely sweet and nostalgic flavor base; feel free to experiment with different varieties if desired!
- Cream Cheese – Adds creamy richness and helps bind the cake crumbs together; room temperature cream cheese mixes more easily, ensuring a smooth texture.
For the Chocolate Coating
- White Chocolate Melting Wafers – Essential for that beautiful coating; you can substitute with almond bark or semi-sweet chocolate for a different taste.
- Coconut Oil (optional) – Helps thin the chocolate for easier dipping; simply adjust based on the desired consistency of your coating.
For the Decorations
- Red Candy Melts – Perfect for festive drizzling; these can easily be swapped out for any color candy melts to match your celebration theme.
- Green Christmas Sprinkles – Adds a festive touch to your cake balls; try using edible glitter or different shaped sprinkles for some fun variety!
With these Little Debbie Christmas Tree Cake Balls, each ingredient enhances the overall experience, making them a deliciously joyful treat for any occasion.
Step-by-Step Instructions for Little Debbie Christmas Tree Cake Balls
Step 1: Prepare the Cakes
Start by removing the wrappers from all five Little Debbie Christmas Tree Cakes. Place the cakes into a large mixing bowl. Using clean hands or a fork, break the cakes into smaller pieces. Continue crumbling them until they form fine, moist crumbs that hold together well.
Step 2: Mix with Cream Cheese
Add the softened cream cheese to the cake crumbs in the bowl. Using a hand mixer or sturdy spatula, mix the cream cheese and cake crumbs together until completely combined. Scrape down the sides of the bowl as needed to ensure all ingredients are integrated, creating a thick and smooth dough.
Step 3: Shape the Balls
Scoop approximately 1 tablespoon of the cake mixture at a time and roll it between your palms to form a smooth round ball. Repeat this process until all the cake mixture has been shaped into balls. You should have about 20 delightful Little Debbie Christmas Tree Cake Balls.
Step 4: Chill the Cake Balls
Arrange the shaped cake balls on a parchment-lined baking sheet. Cover the baking sheet loosely with plastic wrap and refrigerate them for 30 to 45 minutes until they are firm to the touch. This chilling step helps the cake balls maintain their shape during dipping.
Step 5: Melt the White Chocolate
While the cake balls are chilling, place the white chocolate melting wafers in a microwave-safe bowl. Microwave in 20 to 30-second intervals, stirring thoroughly after each interval until the chocolate is completely melted and smooth. If the chocolate is too thick, add 1 teaspoon of optional coconut oil and stir until fully incorporated.
Step 6: Dip the Cake Balls
Remove the chilled cake balls from the refrigerator. Dip one ball at a time into the melted white chocolate, using a fork or dipping tool to turn each ball until it’s completely coated. Lift the coated ball above the bowl, allowing excess chocolate to drip back into the bowl before placing it on a parchment-lined tray.
Step 7: Decorate with Candy Melts
Allow the white chocolate coating to begin setting for a few minutes. Meanwhile, place the red candy melts in a separate microwave-safe bowl and microwave in 20-second intervals, stirring until completely melted and smooth. Transfer the melted red candy into a small piping bag and drizzle thin lines across the tops of the white chocolate cake balls.
Step 8: Add Festive Sprinkles
While the red drizzle is still soft, sprinkle green Christmas sprinkles over each cake ball. This adds a festive touch that enhances the visual appeal of your Little Debbie Christmas Tree Cake Balls. Allow the decorations to set completely.
Step 9: Final Chill and Serve
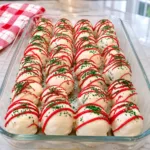
Refrigerate the finished cake balls for 15 to 20 minutes until firm. Once set, arrange the Christmas Tree Cake Balls in a rectangular glass serving dish. Keep them refrigerated until you’re ready to serve, enjoying a delightful treat that’s festive and sure to impress!
Variations and swaps
Feel free to get creative with your Little Debbie Christmas Tree Cake Balls—there are so many fun ways to customize them to suit your taste!
Dairy-Free: Opt for a dairy-free cream cheese alternative and use dark chocolate melting wafers to create a deliciously rich version that everyone can enjoy.
Flavor Boost: Add 1 teaspoon of peppermint extract to the cake mixture for a festive minty twist that pairs perfectly with chocolate.
Nutty Crunch: Incorporate chopped nuts, like walnuts or pecans, into the cake mixture for added texture and a delightful crunch in every bite.
Different Cakes: Try using other varieties of Little Debbie cakes, like Swiss Rolls or Zebra Cakes, for a unique spin on the classic recipe. Each swap brings its own flavor profile!
Spiked Chocolate: For a grown-up version, mix a splash of rum or vanilla liqueur into the melted white chocolate for an extra depth of flavor.
Colorful Drizzles: Swap red candy melts for other colors to match your celebration theme, such as blue or gold, bringing a festive flair to your dessert table.
Heat Things Up: Add a sprinkle of cayenne pepper or chili powder to the cake mixture for a surprising sweet and spicy kick that will tantalize your taste buds.
Seasonal Sprinkles: Change up the sprinkles depending on the holiday; use orange and black for Halloween or pastel shades for spring, making them perfect for year-round enjoyment!
These variations allow you to experiment and personalize your Little Debbie Christmas Tree Cake Balls, ensuring they're a hit at every gathering.
Tips for the best results
Chill Thoroughly: Allow the cake balls to firm up in the refrigerator for at least 30 minutes to maintain their shape during dipping.
Measure Precisely: Use a tablespoon to scoop the mixture for uniformity. This helps each Little Debbie Christmas Tree Cake Balls stay even in size and ensures they all set properly.
Melting Chocolate: Melt the white chocolate in small intervals to prevent overheating. Stir well after each interval for a smooth, even consistency, and add coconut oil if it thickens too much.
Decorate Quickly: Drizzle the red candy melts and sprinkle green decorations while the white chocolate is still tacky; this helps toppings adhere better.
Store Properly: Keep any leftovers in an airtight container in the refrigerator to preserve freshness and flavor. Enjoy up to a week later!
These tips will ensure your Little Debbie Christmas Tree Cake Balls turn out beautifully every time!
Make-ahead notes
These Little Debbie Christmas Tree Cake Balls are a dream when it comes to meal prep! You can easily prepare the cake balls up to 24 hours in advance by following the first three steps and then refrigerating them. Just chill the formed balls, cover them tightly with plastic wrap, and store them in the fridge. When you’re ready to indulge, simply finish them by melting the white chocolate and dipping the chilled balls—a task that takes only about 10–15 minutes. To maintain quality, ensure they’re wrapped tightly to prevent drying out. You'll have a festive treat ready in no time, perfect for those busy holiday weeks!
How to store leftovers
Fridge: Store leftover Little Debbie Christmas Tree Cake Balls in an airtight container in the refrigerator for up to 1 week. This keeps them fresh and prevents them from drying out.
Freezer: For longer storage, place the cake balls in a freezer-safe container, separating layers with parchment paper. They can last up to 3 months in the freezer without losing flavor.
Thawing: When you’re ready to enjoy the frozen cake balls, simply transfer them to the fridge for a few hours or overnight to thaw slowly and retain their texture.
Serving: Allow the thawed cake balls to come to room temperature before serving for the best flavor and creaminess. Enjoy them as a delightful treat anytime!
Little Debbie Christmas Tree Cake Balls Recipe FAQs
How should I choose my Little Debbie Christmas Tree Cakes?
Absolutely! When selecting your Little Debbie Christmas Tree Cakes, look for packages that are free of damage or tears. The cakes should be moist and fresh without any dark spots or signs of staleness. Checking the expiration date can also help ensure they are at their best for flavor and texture.
How long can I store leftover cake balls?
Store your leftover Little Debbie Christmas Tree Cake Balls in an airtight container in the fridge for up to 1 week. To maintain their freshness, keep them away from strong odors, as cakes can absorb scents easily. For longer storage, consider freezing them.
Can I freeze my Little Debbie Christmas Tree Cake Balls?
Definitely! To freeze, arrange the cake balls in a single layer on a baking sheet and place them in the freezer until firm. Then, transfer them to a freezer-safe container, layering them with parchment paper to prevent sticking. They’re good for up to 3 months! When you’re ready to enjoy, thaw them in the fridge overnight.
What should I do if my chocolate coating is too thick?
Very! If your chocolate coating is too thick, add 1 teaspoon of coconut oil to the melted chocolate and stir until fully incorporated. This will help achieve a smoother consistency for easier dipping. If you encounter further issues, microwaving the chocolate for a few seconds more can re-thin it as well.
Are these cake balls suitable for people with allergies?
It's essential to be cautious! Little Debbie Christmas Tree Cakes contain common allergens like wheat and dairy, and the white chocolate coating usually includes dairy as well. If you're making these for someone with allergies, consider using allergy-friendly alternatives for both the cakes and the coatings to ensure everyone can enjoy them safely.
How can I make these cake balls more festive or themed?
The more the merrier! You can customize your Little Debbie Christmas Tree Cake Balls by using different colors of candy melts for drizzling or swapping out the green sprinkles for themed ones like gold or silver to match your party. Experimenting with flavored melting chocolate could also create unique taste combinations that suit different occasions!
Little Debbie Christmas Tree Cake Balls You’ll Love
- Total Time: 1 hour
- Yield: 20 cake balls
Description
Make delightful Little Debbie Christmas Tree Cake Balls easily for your holiday festivities.
Ingredients
For the Cake Base
- 5 pieces Little Debbie Christmas Tree Cakes
- 8 ounces Cream Cheese (softened)
For the Chocolate Coating
- 12 ounces White Chocolate Melting Wafers (can substitute with almond bark or semi-sweet chocolate)
- 1 teaspoon Coconut Oil (optional for thinning)
For the Decorations
- 4 ounces Red Candy Melts (for drizzling)
- 2 ounces Green Christmas Sprinkles (for decoration)
Instructions
Step-by-Step Instructions
- Start by removing the wrappers from all five Little Debbie Christmas Tree Cakes. Place the cakes into a large mixing bowl. Using clean hands or a fork, break the cakes into smaller pieces until they form fine, moist crumbs.
- Add softened cream cheese to the cake crumbs. Mix until completely combined, creating a thick and smooth dough.
- Scoop approximately 1 tablespoon of the cake mixture and roll it into a smooth round ball, continuing until all mixture is shaped.
- Arrange the cake balls on a parchment-lined baking sheet and refrigerate for 30 to 45 minutes until firm.
- Melt white chocolate melting wafers in a microwave-safe bowl in 20 to 30-second intervals until smooth. If thick, add coconut oil.
- Dip each cake ball into the melted chocolate, allowing excess to drip back before placing on a parchment-lined tray.
- Melt red candy melts in another bowl and drizzle over the chocolate-coated cake balls using a piping bag.
- Sprinkle green Christmas sprinkles over each ball while the red drizzle is still soft.
- Refrigerate the finished cake balls for 15 to 20 minutes until firm, then arrange in a serving dish.
Notes
Store leftovers in an airtight container in the refrigerator for up to 1 week or freeze for up to 3 months.
- Prep Time: 15 minutes
- Category: Dessert
- Cuisine: American