
There’s something magical about the glossy finish of Peppermint Brownie Truffles, their smooth texture inviting you in with each festive sprinkle of crushed peppermint. These decadent bites, coated in rich dark chocolate and drizzled with white chocolate, make them not just a treat for the taste buds but a visual feast perfect for holiday gatherings. What I love most is how incredibly easy they are to whip up, transforming a simple box of brownie mix into an elegant dessert that impresses every time. Plus, they’re a delightful way to satisfy your chocolate cravings while adding a fun, minty twist. Whether served at a party or savored during cozy evenings, these truffles are sure to bring smiles to anyone lucky enough to enjoy them!
What makes it special
Irresistible Flavor: These Peppermint Brownie Truffles combine the rich, fudgy taste of chocolate with a refreshing peppermint kick, creating a uniquely delightful flavor profile that dances on your palate. Effortless Elegance: With just a box of brownie mix, you can impress your guests with a sophisticated dessert that looks as good as it tastes.
Time-Saving Treat: Ready in only 1 hour and 20 minutes, these truffles are perfect for last-minute gatherings or cozy evenings at home. Festive Appeal: Their vibrant colors and festive presentation make them an ideal addition to holiday parties, bringing warmth and joy to your celebrations. Whether enjoyed solo or shared with loved ones, these truffles are sure to be a hit!
Ingredient breakdown
For the Brownie Base
• Chocolate fudge brownie mix – This provides a rich, fudgy texture; opt for a gluten-free mix to accommodate dietary restrictions.
• Large eggs – These bind the ingredients together, making the truffles moist and delicious.
• Vegetable oil – It adds moisture and helps to achieve a soft, tender brownie; can be replaced with melted butter for additional richness.
• Peppermint extract – This gives the truffles their signature minty flavor; for a twist, try using almond extract instead.
For Coating
• Semi-sweet chocolate chips – A decadent choice that complements the sweetness of the brownie; dark chocolate can be used for a richer flavor.
• Vegetable shortening – This helps achieve a smooth melting consistency; coconut oil is a tasty substitute that adds a hint of flavor.
For Garnishing
• Crushed peppermint candies – These not only enhance the festive look but also offer a delightful crunch; any type of crushed mint candy works well.
• White chocolate chips – Melting these to drizzle on top adds a lovely contrast in flavor and color; try dark chocolate drizzle for a richer finish.
These Peppermint Brownie Truffles not only shine in taste but also look stunning on any dessert table. With simple ingredients and a bit of love, you can create a memorable treat that everyone is bound to enjoy!
Making it, step by step
Step 1: Preheat and Prepare
Preheat your oven to 350°F (175°C) and grease a 9×13-inch baking pan. Line the pan with parchment paper for easy removal of the brownies later. This step ensures your baking surface is ready, preventing any stickiness and allowing for a clean finish.
Step 2: Mix the Brownie Batter
In a large mixing bowl, combine the chocolate fudge brownie mix, 2 large eggs, and ¼ cup of vegetable oil. Stir in 1 teaspoon of peppermint extract until smooth and well-blended. The batter should have a glossy sheen and be free of lumps, signaling that it’s ready for the pan.
Step 3: Bake the Brownies
Pour the brownie batter into the prepared pan, spreading it evenly with a spatula. Bake in the preheated oven for 20 to 25 minutes. Check for doneness by inserting a toothpick; it should come out with a few moist crumbs, indicating a fudgy texture perfect for your Peppermint Brownie Truffles.
Step 4: Cool and Crumble
Once baked, remove the brownies from the oven and let them cool completely in the pan. This cooling step is crucial; when fully cool, crumble the brownies into a large mixing bowl. Aim for fine, moist crumbs to ensure the truffles hold together beautifully.
Step 5: Form the Truffles
Press the brownie crumbs together until they form a thick mixture. Scoop small portions and roll each portion into a smooth ball between your palms. Aim for uniformity to ensure consistent sizes and a beautiful finish for your Peppermint Brownie Truffles.
Step 6: Chill the Truffles
Place the formed brownie balls on a parchment-lined baking sheet and refrigerate for 30 minutes. Chilling firms them up, making it easier to coat them later without losing shape.
Step 7: Melt the Chocolate
In a microwave-safe bowl, combine 1 cup of semi-sweet chocolate chips and 1 tablespoon of vegetable shortening. Microwave in short bursts, stirring after each interval, until completely smooth and glossy. This melted chocolate will provide a decadent coating for the truffles.
Step 8: Coat the Truffles
Dip each chilled brownie ball into the melted chocolate, ensuring they are fully coated. Use a fork to lift them out, allowing excess chocolate to drip off. Place the coated truffles back on the prepared baking sheet, creating a lovely base for the toppings.
Step 9: Garnish with Peppermint
While the chocolate coating is still wet, sprinkle crushed peppermint candies over each truffle. This adds a festive touch and enhances the delightful mint flavor of your Peppermint Brownie Truffles.
Step 10: Drizzle with White Chocolate
Melt ½ cup of white chocolate chips in a separate microwave-safe bowl, stirring until smooth. Drizzle the white chocolate over the coated truffles, creating a beautiful contrast and adding an extra layer of flavor.
Step 11: Set and Refrigerate
Allow the chocolate coating to set completely at room temperature. Then, refrigerate the truffles for 20 minutes before serving. This final chilling helps solidify everything and enhances the overall texture.
Step 12: Store and Enjoy
Store the Peppermint Brownie Truffles in an airtight container in the refrigerator. They’re perfect for a special gathering or as a delightful homemade treat to enjoy at home!
What to Serve with Peppermint Brownie Truffles
What’s more delightful than a cozy evening filled with festive flavors and sweet treats?
- Rich Hot Chocolate: A warm mug of hot chocolate complements the minty truffles perfectly, enhancing their decadent chocolate flavor.
- Vanilla Ice Cream: The creamy texture of vanilla ice cream offers a refreshing contrast to the rich fudge of the truffles, creating a delicious balance.
- Minty Tea: A cup of peppermint tea enhances the refreshing notes in the truffles, making for a soothing and aromatic pairing.
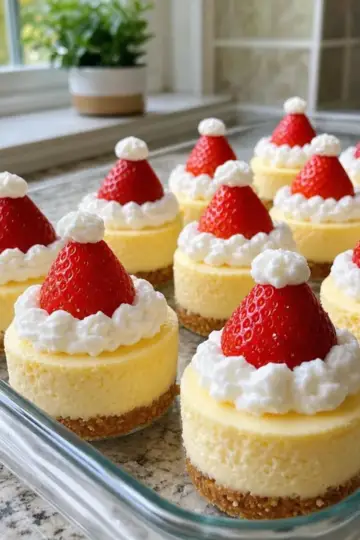
- Festive Cheesecake Bites: Mini cheesecake bites provide a tangy sweetness that offsets the intense chocolate flavor, adding variety to your dessert table.
- Chocolate-Covered Strawberries: These sweet treats add a contrasting fresh fruit element, brightening up the plate visually and flavor-wise.
- Espresso or Coffee: The bold flavors of coffee or espresso cut through the sweetness of the truffles, making each bite even more enjoyable.
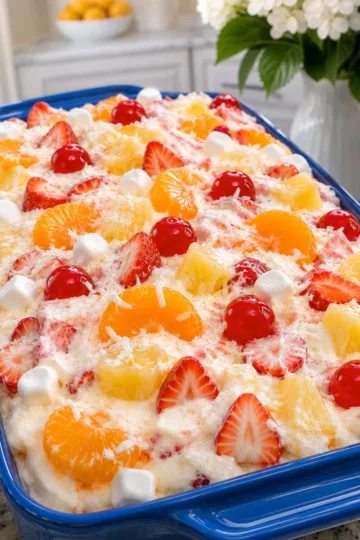
- Holiday Fruit Salad: A colorful mix of seasonal fruits brings freshness to the meal, pairing nicely with the rich, chocolatey dessert while enhancing the festive theme.
- Spiced Gingerbread Cookies: The warm spices in gingerbread cookies harmonize beautifully with the peppermint, creating a cozy holiday atmosphere with each bite.
- Nuts and Dried Fruits Platter: A crunchy and healthy element, assorted nuts and dried fruits offer a delightful texture contrast to the soft truffles, enhancing your dessert experience.
Easy variations
Don’t hesitate to get creative and make these Peppermint Brownie Truffles your own with these delightful twists!
Gluten-Free: Use a gluten-free brownie mix to ensure everyone can indulge without worries. It still delivers that fudgy texture you love!
Vegan: Swap the eggs with a flaxseed mixture (1 tablespoon flaxseed meal + 2.5 tablespoons water) and use plant-based chocolate chips for a completely vegan delight.
Nutty Cravings: Add chopped nuts like walnuts or pecans to the brownie mixture before baking. The added crunch pairs beautifully with the fudgy truffles.
Decadent Caramel: Inject a bit of caramel in the center of each truffle before coating them in chocolate. The gooey surprise will elevate each bite to a whole new level.
Spicy Kick: For a surprising heat, add a pinch of cayenne pepper or a dash of chili powder to the brownie mix. It creates an exciting flavor contrast with the sweet peppermint!
Mint Chocolate Chip: Mix in a handful of mini chocolate chips to the brownie batter for extra chocolatey goodness and texture.
Peppermint Cream Filling: Instead of crumbling the brownies, blend them with cream cheese and extra peppermint extract for a creamy filling, resembling a peppermint patty!
Chocoholic Dream: Use dark chocolate for both the brownie mix and the coating for an ultra-rich chocolate experience. Pair this with a hint of espresso for added depth in flavor.
Feel free to experiment with any of these ideas to create a batch of truffles that resonate with your taste buds. Enjoy the process, and bring friends and family along for a fun baking adventure!
Storing and reheating
Room Temperature: Allow the Peppermint Brownie Truffles to sit out for no more than 2 hours if serving. They taste best when slightly chilled.
Fridge: Store truffles in an airtight container in the refrigerator for up to 1 week. This keeps them fresh and enhances the minty flavor.
Freezer: For longer storage, freeze them in a single layer, then transfer to a freezer-safe container for up to 3 months. Thaw in the refrigerator before serving.
Reheating: To enjoy them warm, microwave each truffle for about 10-15 seconds. This softens the chocolate coating, reviving the rich flavor without compromising texture.
Make-ahead notes
These Peppermint Brownie Truffles are perfect for meal prep, allowing you to enjoy their indulgent flavor with minimal fuss! You can prepare the brownie base and crumble it up up to 24 hours in advance, storing the crumbs in an airtight container in the refrigerator to maintain freshness. Additionally, once the truffles are formed and chill for 30 minutes, you can freeze them for up to 3 days before chocolate coating; simply thaw before dipping. To finish the recipe, follow the melting and coating steps, then drizzle with white chocolate right before bringing them to the table for a stunning, fresh treat that's just as delicious!
Common mistakes to avoid
• Overmixing Batter: Mixing the brownie batter too much can lead to tough truffles. Stir just until combined for a fudgy texture.
• Ignoring Cooling Time: Skipping the cooling step before crumbling the brownies can result in a mushy mixture. Allow them to cool completely for best results.
• Inconsistent Size: Rolling the truffles in varying sizes can lead to uneven cooking and coating. Aim for uniform balls for a polished finish.
• Not Chilling Enough: If you don’t refrigerate the brownie balls long enough, they may lose shape during coating. Chill for a full 30 minutes to ensure they hold together well.
• Skipping the Peppermint: Missing out on the crushed peppermint candies can diminish the festive flavor. Don’t forget this essential garnish for your Peppermint Brownie Truffles!
FAQ
How do I select the right brownies for this recipe?
Absolutely! Choose a chocolate fudge brownie mix that appeals to your taste. Look for one with a glossy finish on the package for a richer, fudgier texture. If you want a gluten-free option, many brands offer suitable mixes. Also, ensure the package is within its expiration date for the freshest results!
How should I store the Peppermint Brownie Truffles?
The truffles can be stored in an airtight container in the refrigerator for up to 1 week. This keeps them fresh while enhancing the minty flavor. Just remember to let them sit at room temperature for about 10-15 minutes before serving to enjoy their delightful texture.
Can I freeze Peppermint Brownie Truffles?
Yes, you can freeze these delightful treats! Place the truffles in a single layer on a baking sheet and freeze until solid. After that, transfer them to a freezer-safe container, where they can last for up to 3 months. When you’re ready to enjoy, simply let them thaw in the refrigerator for a few hours.
What should I do if my truffle mixture is too crumbly?
If your brownie mixture is too crumbly, it may be due to insufficient binding. Try adding a teaspoon of melted butter or cream cheese to help hold it together. Mix gently until fully integrated. If it's too sticky, add a little more crumbled brownie until you achieve the right consistency.
Are Peppermint Brownie Truffles safe for my pets?
No, chocolate and peppermint can be toxic to pets, especially dogs and cats. Keep these truffles safely out of reach and opt for pet-friendly treats if you want to spoil your furry friends during the holidays!
Is there an alternative to peppermint extract?
Very! If peppermint isn’t your thing, you can substitute with almond extract for a unique flavor twist or even vanilla extract for a classic taste. However, make sure to adjust the amount to your preference, as other extracts can be more potent.
Advertisement

Decadent Peppermint Brownie Truffles You’ll Love
- Total Time: 1 hour 20 minutes
- Yield: 24 truffles
Description
Indulge in peppermint brownie truffles, a delightful fusion of fudgy chocolate and refreshing mint, perfect for holiday gatherings.
Ingredients
Brownie Base
- 1 box chocolate fudge brownie mix (Opt for gluten-free if needed.)
- 2 large eggs (Bind the ingredients together.)
- ¼ cup vegetable oil (Can replace with melted butter.)
- 1 teaspoon peppermint extract (For minty flavor.)
Coating
- 1 cup semi-sweet chocolate chips (Dark chocolate can be used.)
- 1 tablespoon vegetable shortening (Coconut oil is a tasty substitute.)
Garnishing
- 1 cup crushed peppermint candies (Enhances festive look.)
- ½ cup white chocolate chips (For drizzling.)
Instructions
Making it, step by step
- Preheat your oven to 350°F (175°C) and grease a 9×13-inch baking pan. Line with parchment paper.
- Combine the chocolate fudge brownie mix, 2 large eggs, and ¼ cup of vegetable oil in a large mixing bowl. Stir in 1 teaspoon of peppermint extract until smooth.
- Pour the brownie batter into the prepared pan and bake for 20 to 25 minutes. Check for doneness with a toothpick.
- Remove the brownies from the oven and let them cool completely in the pan. Crumble the brownies into a large bowl.
- Press the brownie crumbs together until they form a thick mixture. Roll into uniform balls.
- Refrigerate the brownie balls on a parchment-lined baking sheet for 30 minutes.
- In a microwave-safe bowl, combine 1 cup of semi-sweet chocolate chips and 1 tablespoon of vegetable shortening. Microwave until smooth.
- Dip each chilled brownie ball in the melted chocolate until fully coated. Place back on the baking sheet.
- While the chocolate coating is still wet, sprinkle crushed peppermint candies over each truffle.
- Melt ½ cup of white chocolate chips and drizzle over the coated truffles.
- Allow the chocolate coating to set at room temperature, then refrigerate for 20 minutes before serving.
- Store in an airtight container in the refrigerator.
Notes
Ensure not to overmix the batter or skip the cooling time for best results.
- Prep Time: 20 minutes
- Cook Time: 25 minutes
- Category: Dessert
- Cuisine: American