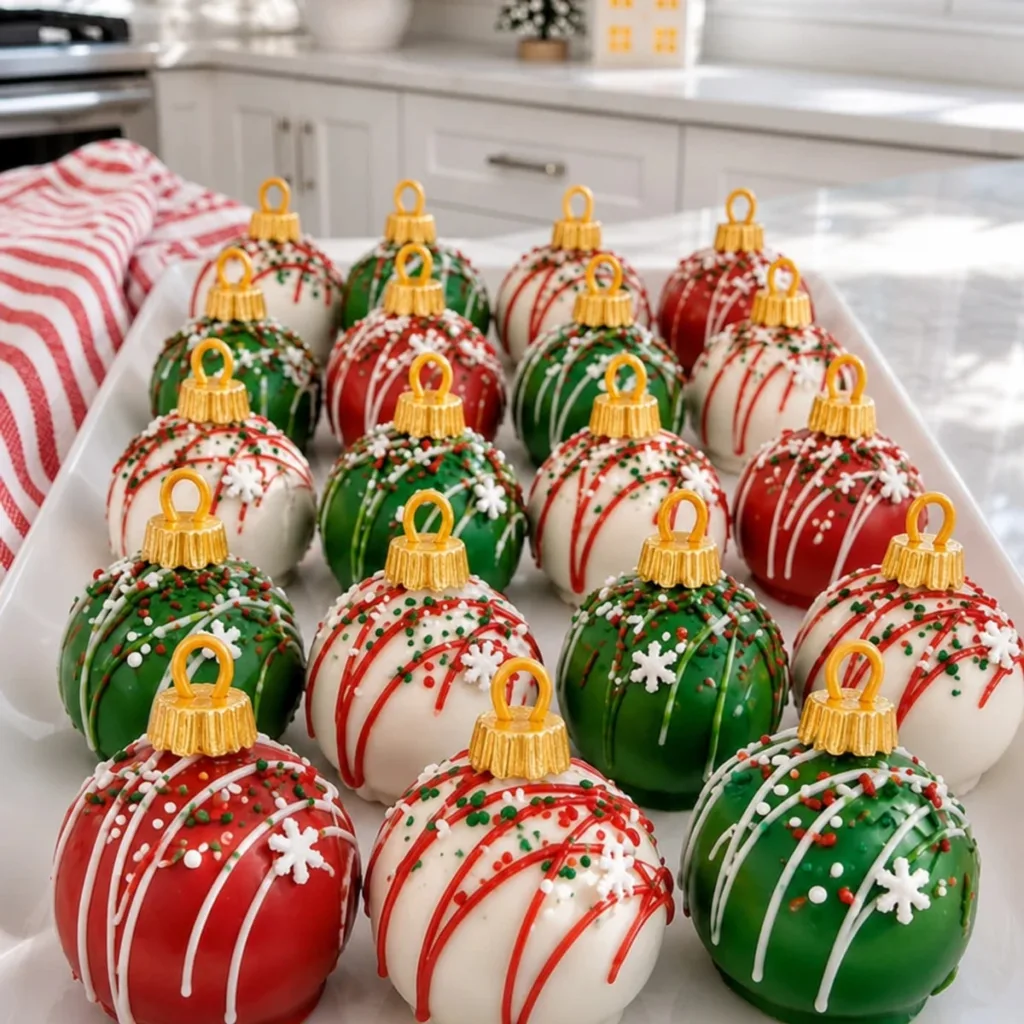
As the holiday season twinkles into view, there's something irresistibly charming about transforming your kitchen into a festive wonderland. These Ornament Oreo Balls not only capture the spirit of the season, but they also resemble delightful little Christmas ornaments that are almost too pretty to eat! Crafted with simple ingredients like chocolate sandwich cookies and cream cheese, this easy no-bake treat comes together in no time, making it an ideal addition to your holiday gatherings. Plus, they’re perfect for sharing—that is, if you can resist snagging a few for yourself! With a colorful array of chocolate coatings and festive sprinkles, these sweet bites are sure to spread joy and cheer to all who indulge. Let's dive into this deliciously fun recipe together!
What makes it special
- Festive Appeal: These Ornament Oreo Balls resemble delightful holiday ornaments, making them a perfect centerpiece for any gathering.
- Easy Preparation: With just a few simple ingredients and no baking required, even novice cooks can create these impressive treats!
- Variety of Flavors: The rich cream cheese blended with chocolate cookies offers a delightful contrast to the sweet candy coatings.
- Customizable Decor: Feel free to swap out sprinkles or use different colors to match your holiday theme!
- Family Fun: Making these treats is a wonderful way to get family and friends involved in holiday festivities.
You'll love how quickly these gorgeous bites come together, adding both flavor and charm to your celebrations!
Ingredient breakdown
Creating the perfect Ornament Oreo Balls is a delightful process that starts with some simple yet essential ingredients. Each component plays a crucial role in crafting these festive treats.
For the Base
• Chocolate Sandwich Cookies – These provide a rich, sweet foundation; substitution with gluten-free cookies is possible for a different dietary option.
• Cream Cheese – Softened for easy mixing, adding a creamy tang that balances the sweetness; consider using vegan cream cheese as a substitute if desired.
For the Coating
• White Chocolate Melting Wafers – The smoothness of these wafers gives a beautiful finish; if unavailable, use high-quality chocolate chips melted with a bit of shortening.
• Red Candy Melts – These add a vibrant splash of color and sweetness; feel free to swap for other colors if you wish to match your holiday decor.
• Green Candy Melts – Provide that festive holiday hue; alternative colors can be used for a different theme.
• Gold Candy Melts – Gives an elegant touch reminiscent of ornate decorations on a holiday tree; chocolate or caramel in golden hues could work here as well.
For the Decorations
• Christmas Sprinkles – A fun way to add a pop of color and holiday cheer; use any festive sprinkle mix you have on hand!
• White Snowflake Sprinkles – Perfect for a wintery touch that enhances the overall look; substitute with edible glitter for a sparkling finish.
• Small Pretzel Loops – Resembling ornament hangers, these add a salty crunch; regular pretzels can be used if you prefer a different shape.
Optional Thinning Agent
• Coconut Oil – A great addition to thin the chocolate if necessary; vegetable oil or shortening can be used in its place for a similar effect.
With these ingredients gathered, you're all set to dive into creating these charming Ornament Oreo Balls!
How to make it
Step 1: Prepare the Baking Tray
Line a rectangular baking tray with parchment paper, creating a smooth surface for your finished Ornament Oreo Balls. Ensure the parchment extends slightly over the edges for easy removal later. This preparation will keep your workspace tidy and ready for the creamy goodness you’ll create.
Step 2: Crush the Cookies
In a food processor, add 36 chocolate sandwich cookies and pulse until they become fine crumbs, resembling sand. This should take about 30 seconds. Once fully crushed, transfer the cookie crumbs into a large mixing bowl, appreciating the rich aroma that fills the kitchen.
Step 3: Mix in Cream Cheese
Add 8 ounces of softened cream cheese to the cookie crumbs in the bowl. Use a sturdy spatula or mixer to mix thoroughly. Blend until a thick, smooth dough forms, taking about 1-2 minutes. The mixture should hold together nicely, with an enticing, creamy texture.
Step 4: Portion the Dough
Using a small cookie scoop, divide the mixture into 24 equal portions. Each portion should be about the size of a walnut. Roll each scoop between your palms to form smooth, round balls, ensuring they are uniform in size for even coating later.
Step 5: Chill the Balls
Arrange the rolled Oreo balls evenly on the prepared tray, giving them a little space between each. Refrigerate for 30 minutes until firm. This step is crucial to ensure the balls maintain their shape during dipping in chocolate.
Step 6: Melt the White Chocolate
Place 12 ounces of white chocolate melting wafers in a microwave-safe bowl. Heat in 20-second intervals, stirring between each, until completely smooth—this usually takes about 1 to 1.5 minutes total. The glossy, melted chocolate should gently coat the back of a spoon when ready.
Step 7: Melt Other Coatings
Using the same method, melt the red and green candy melts in separate bowls until smooth. If the coating appears thick, add a teaspoon of coconut oil to thin it out. This will ensure a better dip and a more appealing finish on your Ornament Oreo Balls.
Step 8: Dip the Oreo Balls
Dip 8 chilled Oreo balls into the white chocolate coating, making sure they are evenly covered. Allow excess coating to drip off before placing them back on the tray. Repeat this process with the red and green coatings for each remaining batch of Oreo balls, creating a vibrant collection of colors.
Step 9: Decorate the Balls
Once the chocolate coating sets slightly but is still tacky, drizzle contrasting red, green, and white melted chocolate over each Ornament Oreo Ball. Immediately sprinkle with your festive Christmas and snowflake decorations, allowing a dazzling display of colors to form.
Step 10: Prepare the Pretzel Loops
Melt the gold candy melts until smooth. Dip each small pretzel loop partially into the melted gold coating. This creates the look of hanging ornaments and adds a delightful crunch to your decorated Oreo balls.
Step 11: Attach the Pretzels
Place one coated pretzel loop on top of each Oreo ball to resemble an ornament hanger. Pipe a small ring of gold coating around each pretzel loop to give the impression of a decorative hanging cap, making your Ornament Oreo Balls truly festive.
Step 12: Final Chill
Refrigerate the finished Oreo balls for an additional 20 minutes, allowing all the coatings to firm up completely. Once set, store them in an airtight container in the fridge until you’re ready to serve these delicious holiday treats!
Storage and freezing
- Fridge: Keep your Ornament Oreo Balls in an airtight container in the refrigerator for up to 2 weeks. This will maintain their freshness and creamy texture.
- Freezer: For longer storage, freeze them for up to 3 months. Ensure they're in a freezer-safe container to prevent freezer burn.
- Thawing: When ready to enjoy, transfer the frozen Oreo balls to the fridge and allow them to thaw for several hours before serving.
- Reheating: There's no need to reheat these treats; enjoy them chilled for the best flavor and texture!
What to serve with it
As you prepare to delight family and friends with these festive treats, complementing them with the right sides can elevate your holiday spread.
Rich Hot Chocolate: Serve a warm cup alongside for a cozy pairing that enhances the chocolate notes of the Ornament Oreo Balls.
Sugar Cookies: Their buttery, sweet flavor makes for a delightful contrast; everyone can enjoy decorating their own!
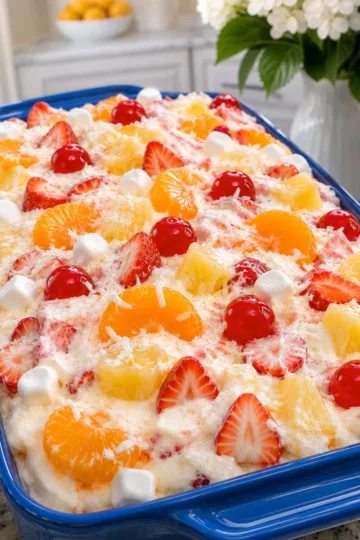
Fruit Platter: Fresh fruits like strawberries and oranges provide a refreshing balance to the sweetness, brightening up your dessert table.
Spiced Eggnog: This classic holiday beverage offers a creamy richness that complements the chocolatey treats perfectly.
Peppermint Bark: A crunchy, festive addition that echoes the colors of your Oreo balls, creating a delightful textural contrast.
Marshmallow Poppers: These fun, bite-sized treats add a playful element to the dessert table and offer a lovely chewy texture.
With these suggestions, you'll create a beautifully festive spread that will have everyone reaching for seconds!
Common mistakes to avoid
- Crushing Too Coarsely: Ensure your chocolate sandwich cookies are crushed into fine crumbs for a smooth mix; larger chunks can hinder the dough's integrity.
- Not Chilling Long Enough: Skimping on the refrigeration time may cause the Ornament Oreo Balls to lose their shape during dipping, leading to messy coatings.
- Overheating Chocolate: When melting coatings, avoid overheating as it can seize the chocolate; stick to 20-second intervals and stir frequently for a perfect consistency.
- Skipping the Coconut Oil: If your melted coating is too thick, don't skip adding coconut oil; it helps achieve a smoother dip and better finish on the balls.
- Rushing Decorations: Let the chocolate set slightly before sprinkling decorations; if you rush, the sprinkles may not adhere well, affecting the festive look.
- Ignoring Storage Conditions: Store your finished Ornament Oreo Balls in an airtight container in the refrigerator to maintain freshness and prevent them from becoming too soft.
Prep ahead tips
The Ornament Oreo Balls are a fantastic choice for busy home cooks looking to streamline their holiday preparations! You can prepare the cookie dough and roll it into balls up to 24 hours in advance, storing them in an airtight container in the refrigerator to maintain freshness. Additionally, the chocolate coatings can be melted and stored separately for up to 3 days; just reheat gently before dipping to prevent thickening. When it's time to finish, simply dip each ball in your desired chocolate coating, decorate with sprinkles and pretzels, and chill again for 20 minutes to set. This method ensures they remain delicious and visually appealing, making holiday entertaining a breeze!
Ornament Oreo Balls Recipe FAQs
How do I select the best chocolate sandwich cookies?
When choosing chocolate sandwich cookies, look for ones that are fresh with no visible damage. If you spot dark spots or a dry texture, opt for a new package. Fresh cookies will crush better and ensure a delightful taste in your Ornament Oreo Balls.
What’s the best way to store leftover Ornament Oreo Balls?
Store your Ornament Oreo Balls in an airtight container in the refrigerator for up to 2 weeks. This will keep them fresh and maintain their creamy texture. For prolonged storage, consider freezing them, which can keep them delicious for up to 3 months!
Can I freeze these treats? If so, how?
Absolutely! To freeze your Ornament Oreo Balls, place them in a single layer on a baking sheet and freeze until solid for about 2 hours. Then, transfer them to a freezer-safe container, separating layers with parchment paper to avoid sticking. When you're ready to enjoy, simply thaw them in the fridge for several hours before serving.
What should I do if my chocolate coating is too thick?
If your chocolate seems too thick to coat the Oreo balls evenly, I recommend adding about a teaspoon of coconut oil to your melted chocolate while stirring. This helps create a smoother consistency, making your coating easier to work with. You can also heat it slightly longer in 20-second intervals, but be careful not to overheat!
Can I make these Oreo Balls nut-free?
Yes! The traditional recipe is already nut-free since it uses chocolate sandwich cookies and cream cheese. Just double-check the labels to ensure the cookie brand you choose is manufactured in a nut-free facility if you have severe allergies.
Do I need to use specific sprinkles for decorating?
While festive sprinkles add a lovely touch, feel free to use any colorful sprinkles you have on hand! Whether they’re stars, hearts, or even festive edible glitter, they’ll make your Ornament Oreo Balls visually delightful and unique.

Ornament Oreo Balls: Festive Treats to Impress!
- Total Time: 1 hour 20 minutes
- Yield: 24 balls
Description
Delightful Ornament Oreo Balls that capture the holiday spirit, perfect for festive gatherings and sharing.
Ingredients
For the Base
- 36 cookies Chocolate Sandwich Cookies (substitute with gluten-free cookies if needed)
- 8 ounces Cream Cheese (softened or use vegan if desired)
For the Coating
- 12 ounces White Chocolate Melting Wafers (or high-quality chocolate chips melted with shortening)
- 1 cup Red Candy Melts (can substitute for other colors)
- 1 cup Green Candy Melts (can substitute for other festive colors)
- 1 cup Gold Candy Melts (or use golden chocolate or caramel)
For the Decorations
- 1 cup Christmas Sprinkles (substitute with festive mix on hand)
- 1 cup White Snowflake Sprinkles (or edible glitter for sparkle)
- 24 pieces Small Pretzel Loops (or use regular pretzels if preferred)
Optional Thinning Agent
- 1 teaspoon Coconut Oil (substitute with vegetable oil or shortening if needed)
Instructions
How to make it
- Prepare the Baking Tray: Line a rectangular baking tray with parchment paper.
- Crush the Cookies: In a food processor, pulse 36 chocolate sandwich cookies until fine crumbs. Transfer to a large bowl.
- Mix in Cream Cheese: Add 8 ounces of softened cream cheese and mix until a thick dough forms.
- Portion the Dough: Use a small cookie scoop to divide into 24 portions and roll into balls.
- Chill the Balls: Refrigerate the rolled Oreo balls for 30 minutes.
- Melt the White Chocolate: In a microwave-safe bowl, melt 12 ounces of white chocolate wafers in 20-second intervals.
- Melt Other Coatings: Melt red and green candy melts in separate bowls. Add coconut oil if too thick.
- Dip the Oreo Balls: Dip chilled Oreo balls into the white chocolate, allowing excess to drip off.
- Decorate the Balls: Drizzle melted chocolate over each ball and immediately sprinkle with decorations.
- Prepare the Pretzel Loops: Melt gold candy melts and dip pretzel loops partially into the coating.
- Attach the Pretzels: Place a pretzel loop on each Oreo ball and pipe gold coating around for decoration.
- Final Chill: Refrigerate for an additional 20 minutes before serving.
Notes
Store finished Oreo balls in an airtight container to maintain freshness.
- Prep Time: 30 minutes
- Category: Dessert
- Cuisine: American