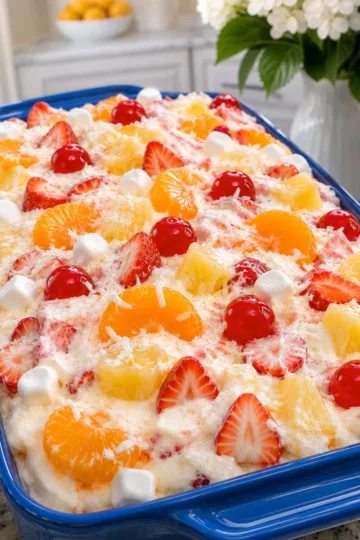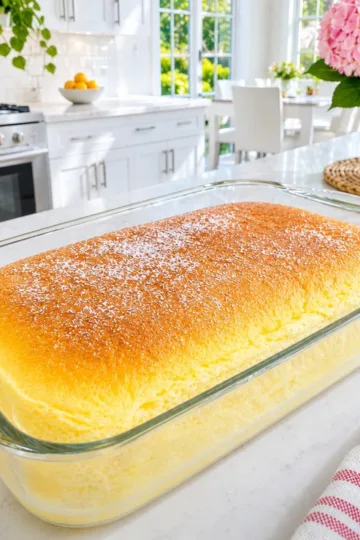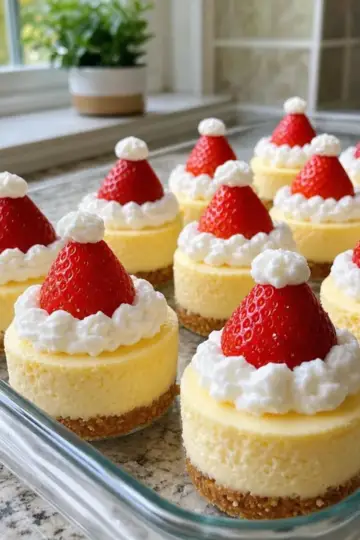
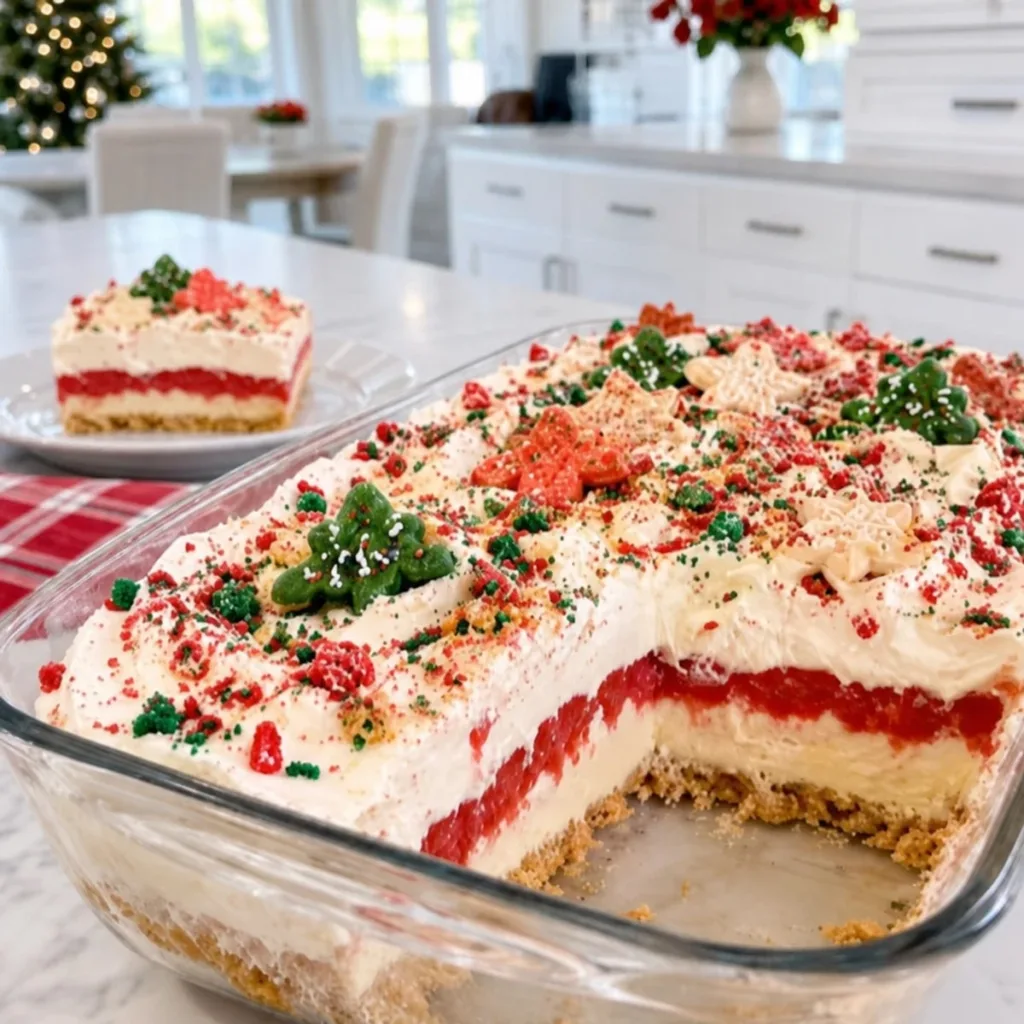
Glistening with vibrant red and green sprinkles, the Christmas Cookie Lasagna is a festive masterpiece that captures the magic of the holiday season. Imagine slicing through layers of creamy filling, velvety vanilla pudding, and a delightful cherry topping, all resting on a buttery cookie crust that feels like a warm hug. This dessert isn’t just a treat for the eyes; it’s a celebration on a plate, perfect for holiday gatherings, office parties, or cozy family moments. Best of all, with little time spent in the kitchen, you’ll have a stunning centerpiece that tastes as good as it looks, making it a crowd favorite. Get ready to impress those you love with every decadent bite of this Christmas Cookie Lasagna.
Choosing your ingredients
Selecting the right ingredients is key to creating the best Christmas Cookie Lasagna! Each layer contributes to the overall flavor and texture, so let’s break it down and discover how to make your holiday dessert even more delicious.
For the Crust
• Vanilla sugar cookies – These are essential for that sweet, buttery base; feel free to swap in gingerbread cookies for a festive twist.
• Unsalted butter – This adds richness to the crust; if preferred, you can use coconut oil as a dairy-free alternative.
For the Cream Cheese Filling
• Cream cheese – This creamy layer is the heart of the dessert; opt for low-fat cream cheese if you're looking to lighten it up.
• Powdered sugar – Used to sweeten the filling evenly; don’t skip this, as it helps achieve that smooth texture.
• Vanilla extract – A touch of this enhances the flavor—always use pure extract for the best taste.
For the Layers
• Heavy whipping cream – Key for making the filling light and fluffy; if you're aiming for lower fat, consider using whipped topping.
• Instant vanilla pudding mix – This gives structure and creaminess; chocolate pudding works well too for a different flavor.
• Cold whole milk – Needed to prepare the pudding; almond milk can be a good dairy-free substitute.
• Cherry pie filling – The crowning jewel of this lasagna; if cherries aren't your favorite, consider using blueberry or strawberry filling for a delightful change.
For the Toppings
• Red and green Christmas sugar cookies – Adds a beautiful and festive crunch; you can substitute with crushed nuts for a more traditional finish.
• Holiday sprinkles – These provide a sprinkle of color; swap for edible glitter if you're feeling extra festive!
• White chocolate shavings (optional) – A touch of sweetness to elevate your dessert; leave these out if you prefer a lighter topping.
Choosing the right ingredients not only influences the flavor but also enhances the joy of sharing this Christmas Cookie Lasagna with loved ones. Each bite carries the spirit of the season—happiness, warmth, and a touch of sweetness!
Step-by-Step Instructions for Christmas Cookie Lasagna
Step 1: Prepare the Cookie Crust
Place 24 vanilla sugar cookies in a food processor and pulse until they turn into fine, evenly sized crumbs. Then, transfer the crushed cookies to a medium mixing bowl and pour in 6 tablespoons of melted unsalted butter. Stir thoroughly until all crumbs are coated, resembling wet sand. Lightly grease a 9 x 13 inch glass baking dish and evenly press the cookie mixture into the bottom. Refrigerate for 20 minutes to firm up the crust.
Step 2: Make the Cream Cheese Filling
In a large mixing bowl, place 8 ounces of softened cream cheese, adding 1 cup of powdered sugar and 1 teaspoon of vanilla extract. Beat with an electric mixer on medium speed until the mixture becomes smooth and creamy, with no lumps remaining. In a separate chilled bowl, pour in 2 cups of cold heavy whipping cream and beat until stiff peaks form, indicating it's ready. Gently fold this whipped cream into the cream cheese mixture until fully combined and fluffy.
Step 3: Assemble the First Layers
Remove the chilled cookie crust from the refrigerator and spoon the cream cheese filling evenly over it. Use an offset spatula to carefully spread the filling into a smooth layer. Once even, return the baking dish to the refrigerator while preparing the vanilla pudding, allowing the filling to set slightly.
Step 4: Make the Vanilla Pudding
In a medium mixing bowl, pour 1½ cups of cold whole milk and add 3.4 ounces of instant vanilla pudding mix. Whisk continuously for about 2 minutes until the mixture thickens to a pudding-like consistency. Let it rest for another 5 minutes, allowing it to firm up into a soft, spreadable texture.
Step 5: Layer the Pudding
Take the baking dish out of the refrigerator, and spoon the thickened vanilla pudding over the cream cheese layer. Spread it gently with a spatula, ensuring not to disturb the cream cheese filling beneath. Return the dish to the refrigerator while you prepare the cherry layer, allowing it to chill further.
Step 6: Prepare the Cherry Pie Filling
In a separate mixing bowl, place 21 ounces of cherry pie filling and stir in ½ teaspoon of optional almond extract to enhance the flavor. Mix gently to ensure the extract is well dispersed. Remove the baking dish from the fridge and carefully spoon the cherry filling over the vanilla pudding layer, spreading evenly with the back of a spoon without pressing down too hard.
Step 7: Chill to Set Layers
Place the assembled baking dish back into the refrigerator for 15 minutes so the layers can settle properly. This step ensures that each delicious layer maintains its distinct look while firming up to create the perfect Christmas Cookie Lasagna.
Step 8: Make the Whipped Cream Topping
In a clean, chilled mixing bowl, pour the remaining 1 cup of cold heavy whipping cream and add ½ cup of powdered sugar. Beat the mixture until thick and fluffy, and stiff peaks form, indicating it’s ready to layer.
Step 9: Final Assembly
Remove the layered dessert from the fridge and spoon small dollops of whipped cream across the cherry layer. Gently spread it using an offset spatula to fully cover the cherries, creating soft swirls for a beautiful finish.
Step 10: Add Festive Toppings
Sprinkle the crushed red and green Christmas sugar cookies evenly over the whipped cream layer before scattering holiday sprinkles on top. Carefully arrange small decorative Christmas sugar cookies over the surface for that festive flair. For added sweetness, sprinkle with optional white chocolate shavings.
Step 11: Chill and Set
Loosely cover the baking dish with plastic wrap, ensuring it doesn’t touch the whipped cream, and place the Christmas Cookie Lasagna in the refrigerator for at least 4 hours to firm up. For best results, refrigerate overnight to develop the flavors and make slicing much easier.
Step 12: Serve the Dessert
When ready to serve, remove the dessert from the refrigerator. Use a sharp knife to slice it into 12 even squares, wiping the knife clean between cuts for neat layers. Use a wide dessert spatula to lift each piece carefully, preserving the beautiful, layered effect, and transfer them to individual dessert plates. Serve immediately while cold for the best experience!
Practical tips
Keep it Cool: Making sure all your ingredients are chilled before starting will ensure a light and fluffy filling in your Christmas Cookie Lasagna.
Layer Wisely: Spread each layer gently to maintain distinct textures; pressing too hard could mix them, affecting the final look.
Let it Set: Refrigerate the dessert for at least 4 hours—overnight is best—for clean slices and a more developed flavor.
Decorative Touches: Add your favorite festive toppings just before serving to keep them fresh and vibrant; sprinkles and decorative cookies enhance visual appeal.
Sharp Knives: Use a hot knife for cutting the lasagna; dip it in hot water and wipe it dry for clean, beautiful slices without squishing the layers.
Ways to change it up
Feel free to get creative and put your own spin on this delightful Christmas Cookie Lasagna! Each variation offers a unique twist that can elevate your dessert experience.
Gluten-Free: Substitute vanilla sugar cookies with gluten-free options or crushed almond flour cookies to make this treat gluten-free.
You’ll still enjoy that buttery base, but with a nutty flavor that’s equally delicious!Berry Delight: Swap out the cherry pie filling for mixed berry compote for a refreshing twist.
The vibrant flavors of strawberries, blueberries, and raspberries will bring a lovely brightness to each bite!Chocolate Lovers: Use chocolate pudding instead of vanilla for a decadent touch.
Chocolate paired with the creamy layers adds a rich, satisfying depth—pure bliss for chocoholics!Nuts for Crunch: Add chopped nuts, like pecans or walnuts, to the cookie crust for a delightful crunch.
It not only provides texture but also a delicious nutty flavor that complements the sweetness beautifully.Seasoned with Spice: Incorporate a teaspoon of cinnamon or nutmeg into the cream cheese filling for warm holiday notes.
These spices will bring cozy, aromatic qualities that evoke memories of seasonal baking.Frozen Delight: Freeze individual squares for a delightful summer treat!
Simply layer and freeze, then enjoy a frozen bite of Christmas magic any time of year!Vegan Version: Substitute cream cheese with a dairy-free alternative and use coconut cream for the whipped topping.
This keeps the festive spirit alive while catering to a plant-based diet—delicious for everyone!Maraschino Magic: Top with maraschino cherries instead of chocolate shavings for a pop of color and a sweet cherry flavor.
This will not only look festive but also reinforce the cherry sweetness throughout the dessert!
Experimenting with these variations can make your Christmas Cookie Lasagna even more memorable. Whether it’s a family favorite or a new twist, each bite is bound to delight!
Planning ahead
The Christmas Cookie Lasagna is a fantastic choice for busy home cooks looking to save time while crafting a festive dessert. You can prepare the cookie crust and cream cheese filling up to 24 hours in advance—simply store them tightly covered in the refrigerator to maintain freshness. Additionally, the assembled lasagna can be refrigerated overnight for optimal flavor development; this is highly recommended for cleaner slices. Just remember to loosely cover the dessert to keep the whipped cream topping intact while chilling. When you’re ready to serve, add your festive toppings like sprinkles and cookies right before cutting into the layers for maximum visual appeal and freshness. Enjoy the time-saving benefits of this delightful holiday treat!
How to store leftovers
Room Temperature: Do not leave the Christmas Cookie Lasagna at room temperature for more than 2 hours to prevent spoilage.
Fridge: Store any leftover dessert in the refrigerator, covered, for up to 3 days. This will help maintain the flavors and creaminess of the layers.
Freezer: For longer storage, you can freeze the Christmas Cookie Lasagna, though the texture may change. Wrap it tightly in plastic wrap and then place it in an airtight container for up to 2 months.
Reheating: It’s best to enjoy this dessert chilled, so no reheating is necessary. Just slice and serve straight from the fridge!
Perfect pairings
What to serve with Christmas Cookie Lasagna?
Complete your holiday experience with delightful pairings that elevate every bite of this festive dessert.
- Rich Hot Chocolate: A warm, cozy mug of hot chocolate enhances the creamy layers, making each slice feel indulgent and comforting.
- Vanilla Ice Cream: The cool, creamy texture of vanilla ice cream complements the layered dessert, creating a heavenly contrast on your palate.
- Spiced Apple Cider: This warm, fragrant drink beautifully contrasts the sweetness, bringing a seasonal warmth that sings of holidays past.
- Gingerbread Cookies: Pairing gingerbread adds a traditional holiday spice that harmonizes perfectly with the sweet flavors of the lasagna.
- Peppermint Bark: A crunchy, minty treat that balances the creamy layers, creating an exciting flavor experience with a festive touch.
- Sugary Cranberry Sauce: This tangy accompaniment enhances the dessert's sweetness while adding a pop of color and flavor variety to your table.
- Walnut Brownies: The fudgy richness of brownies provides a delightful contrast to the lightness of the lasagna, perfect for chocolate lovers.
- Molten Lava Cake: To take the indulgence up a notch, the gooey center of lava cake pairs beautifully with the creamy, fruity layers of the lasagna.
- Sparkling Cider: For a festive drink alternative, sparkling cider brings a celebratory fizz, making every bite feel like a special occasion.
Common questions
What should I look for in ripe cherries for the topping?
Absolutely! When selecting cherries for the pie filling, look for firm, plump cherries that are deep red in color. Avoid any with dark spots or bruises, as these can indicate overripeness or spoilage. Fresh cherries will enhance the flavor of your Christmas Cookie Lasagna!
How should I store the Christmas Cookie Lasagna?
Very simply! Cover any remaining Christmas Cookie Lasagna loosely with plastic wrap and store it in the refrigerator for up to 3 days. This will keep all the layers fresh and maintain the creaminess you crave. Remember, the longer it sits, the flavors will meld beautifully, making it even better!
Can I freeze the Christmas Cookie Lasagna?
Yes, you can! To freeze your Christmas Cookie Lasagna, wrap it tightly in plastic wrap and then place it in an airtight container or a freezer-safe dish. It can be frozen for up to 2 months. When you’re ready to serve it, simply transfer it to the refrigerator to thaw overnight. Note that the texture might change slightly after freezing, but it’ll still be delicious!
What do I do if my layers mix together during assembly?
No worries at all! If you accidentally press too hard while layering or spreading, it can cause some mixing. To avoid this in the future, gently spoon and spread each layer, taking care not to disturb the one underneath. If they mix, just embrace the unique presentation, as it will still taste fantastic!
Can I make the Christmas Cookie Lasagna gluten-free?
Absolutely! You can use gluten-free vanilla cookies for the crust to make your Christmas Cookie Lasagna gluten-free. Simply check labels to ensure all other ingredients, like the pudding mix and whipped cream, are gluten-free as well. This way, everyone can enjoy this delightful dessert!
Advertisement
What if I have a nut allergy?
For folks with nut allergies, just ensure that all your ingredients are nut-free. You can use almond extract for flavor in the cherry layer, but if it's a concern in your household, simply leave it out. Your Christmas Cookie Lasagna will still be delicious and festive without any nut ingredients!

Layered Christmas Cookie Lasagna: A Festive Treat
- Total Time: 4 hours 45 minutes
- Yield: 12 slices
Description
This Christmas Cookie Lasagna is a vibrant, layered dessert that combines creamy fillings, a buttery cookie crust, and festive toppings, making it perfect for holiday gatherings.
Ingredients
For the Crust
- 24 cookies vanilla sugar cookies (Gingerbread cookies can be substituted.)
- 6 tablespoons unsalted butter (Melted; coconut oil can be used as a dairy-free alternative.)
For the Cream Cheese Filling
- 8 ounces cream cheese (Use low-fat for a lighter option.)
- 1 cup powdered sugar
- 1 teaspoon vanilla extract (Use pure extract for best flavor.)
For the Layers
- 2 cups heavy whipping cream (Can substitute with whipped topping.)
- 3.4 ounces instant vanilla pudding mix (Chocolate pudding works for a different flavor.)
- 1.5 cups cold whole milk (Almond milk can be used as a dairy-free substitute.)
- 21 ounces cherry pie filling (Substitute with blueberry or strawberry filling if desired.)
For the Toppings
- 1 cup red and green Christmas sugar cookies (Crushed; nuts can be a traditional substitute.)
- 1 cup holiday sprinkles (Edible glitter can be used for extra festivity.)
- ½ cup white chocolate shavings (Optional.)
Instructions
Step-by-Step Instructions for Christmas Cookie Lasagna
- Prepare the Cookie Crust by processing cookies until fine crumbs, mix with melted butter, press into greased baking dish, and refrigerate for 20 minutes.
- Make the Cream Cheese Filling by mixing cream cheese, powdered sugar, and vanilla until smooth, then fold in whipped heavy cream.
- Assemble the First Layers by spreading cream cheese filling over chilled crust, then refrigerate to set.
- Make the Vanilla Pudding by whisking cold milk and pudding mix until thick, then let it rest.
- Layer the Pudding by spreading the thickened pudding over the cream cheese layer and return to the refrigerator.
- Prepare the Cherry Pie Filling by mixing filling with almond extract (optional) and spread over the pudding layer.
- Chill to Set Layers for 15 minutes to ensure distinct layers.
- Make the Whipped Cream Topping by mixing cold heavy cream and powdered sugar until fluffy.
- Final Assembly involves spreading whipped cream over cherry layer and topping with sugar cookies and sprinkles.
- Chill and Set by covering the dish loosely with plastic wrap and refrigerating for at least 4 hours.
- Serve the Dessert by slicing into even squares and transferring to dessert plates.
Notes
Ensure ingredients are chilled for a light filling and allow for proper refrigeration for best results.
- Prep Time: 45 minutes
- Category: Dessert
- Cuisine: American