While rummaging through my pantry last week, I stumbled upon a bag of chickpea flour just waiting to be transformed. That’s when the idea for these crispy baked chickpea chips sparked to life! If you’re on the lookout for a gluten-free, vegan snack that’s not only easy to make but also deliciously satisfying, you’re in for a treat. With just a handful of ingredients, you can whip up these light and crunchy chips in under 15 minutes. Perfect for late-night cravings or to impress guests at your next gathering, these chickpea chips offer a fun twist on traditional snacks. Plus, the flavor possibilities are endless with your choice of herbs and spices! Curious about how to elevate your snacking game? Let’s dive into the recipe!
Why are Chickpea Chips a Must-Try?
Flavorful Variety: These baked chickpea chips are a blank canvas for your culinary creativity! Customize each batch with your favorite herbs and spices, from zesty garlic powder to smoky paprika.
Guilt-Free Snack: Enjoy a healthier alternative to traditional chips that’s both gluten-free and vegan, ensuring you can satisfy your snack cravings without compromise.
Quick & Easy: Whip up these chips in just 15 minutes! Minimal prep work means you can enjoy fresh snacks in no time, making it perfect for busy days.
Crowd-Pleaser: Whether for a cozy night in or a gathering with friends, these chips appeal to everyone—kids and adults alike will love their satisfying crunch!
Nutrient-Dense: Packed with plant-based protein and fiber, these chickpea chips are a hearty snack that fills you up while keeping you guilt-free. Give them a try with a dip, and you’ll see why they’re a hit!
Chickpea Chips Ingredients
For the Chips
• Chickpea Flour – This is the star ingredient providing structure and a delightful crunch; feel free to mix with rice flour for a unique texture.
• Water – It hydrates the chickpea flour to create a smooth and pourable batter.
• Salt – A pinch enhances the flavor; adjust according to your taste preference.
For Flavor Customization (optional)
• Herbs/Spices – Get creative! Options like rosemary, garlic powder, smoked paprika, oregano, basil, cumin, or chili flakes add delightful flavor variations to your chickpea chips.
Step‑by‑Step Instructions for Crispy Baked Chickpea Chips
Step 1: Preheat the Oven
Begin by preheating your oven to 400°F (200°C). This temperature ensures that your crispy baked chickpea chips will become perfectly golden and crunchy. While the oven heats, it’s a great time to gather your ingredients and set up your workspace, making the process smooth and enjoyable.
Step 2: Prepare the Batter
In a mixing bowl, combine chickpea flour, water, and a pinch of salt. Whisk them together for 2-3 minutes until the mixture is smooth and lump-free, creating a pourable batter that glistens. This step is crucial, as a well-mixed batter contributes to the texture of your chickpea chips, making them irresistibly crunchy.
Step 3: Line the Baking Sheets
Line two baking sheets with parchment paper to prevent the chickpea chips from sticking. Make sure the parchment is flat against the sheet for even baking. This simple preparation will help ensure that your chips release easily and maintain their beautiful shape as they bake to perfection.
Step 4: Shape the Chips
Using a spoon, pour a small amount of the batter onto the lined baking sheets. Gently spread each scoop into thin circles, aiming for a diameter of about 3 inches. Keeping them thin not only enhances the texture but also allows for quicker and more even baking, leading to wonderfully crispy chickpea chips.
Step 5: Add Seasonings
If you’d like to elevate the flavor, sprinkle your choice of herbs and spices over the batter before baking. Options like smoked paprika or garlic powder can add a burst of flavor. Be creative! This is your chance to personalize your crispy baked chickpea chips, so don’t shy away from trying out different combinations.
Step 6: Bake the Chips
Place the baking sheets in the preheated oven and bake for about 10 minutes. Keep an eye on the chips, and look for the edges to turn a light golden brown. At this stage, they should lift easily from the parchment, indicating they are ready for the next step of cooling.
Step 7: Cool for Crunchiness
Once baked, carefully remove the sheets from the oven and let the chickpea chips cool for 15-20 minutes. As they cool, they will continue to crisp up, achieving that satisfying crunch you desire. Be patient during this step; it’s essential for the ultimate snacking experience!
Step 8: Store or Serve
After cooling, enjoy your crispy baked chickpea chips immediately or transfer them to an airtight container. They can be stored at room temperature for up to 4 days. If they lose their crispness, simply pop them back into the oven for a few minutes to re-crisp, keeping your snacking needs fulfilled!
Chickpea Chips: Flavorful Twists Await!
Feel free to unleash your creativity and tailor these chips to please your palate with delightful twists and swaps!
-
Spicy Kick: Add cayenne pepper or red pepper flakes to the batter for a fiery flavor that livens up your snack time. Just a pinch can elevate the taste, offering a delightful heat that wakes up your taste buds.
-
Garlic Lovers: Mix in garlic powder for an aromatic touch that pairs beautifully with the nutty base of chickpeas. This boost of flavor will remind you of your favorite homemade dips, making these chips irresistible!
-
Cheesy Flavor: Sprinkle in nutritional yeast for a savory, cheesy essence without the dairy. The addition not only enhances flavor but also offers a nutritional boost, perfect for satisfying those cheesy cravings.
-
Savory Herbs: Incorporate fresh or dried herbs like thyme or dill into your batter for a fresh, fragrant twist. These herbs bring a garden-fresh taste that brightens each chip—perfect for those sunny days!
-
Crispy Edges: For extra crunch, add sesame seeds or flaxseeds to the top of your chips before baking. These seeds not only increase texture but also provide a nutritious boost, adding healthy fats and a lovely nuttiness.
-
Sweet Option: Craving something sweet? Mix in a bit of cinnamon and a dash of maple syrup or agave nectar for a unique treat. Serve these with dairy-free yogurt for a satisfying dessert that’s still healthy and delicious.
-
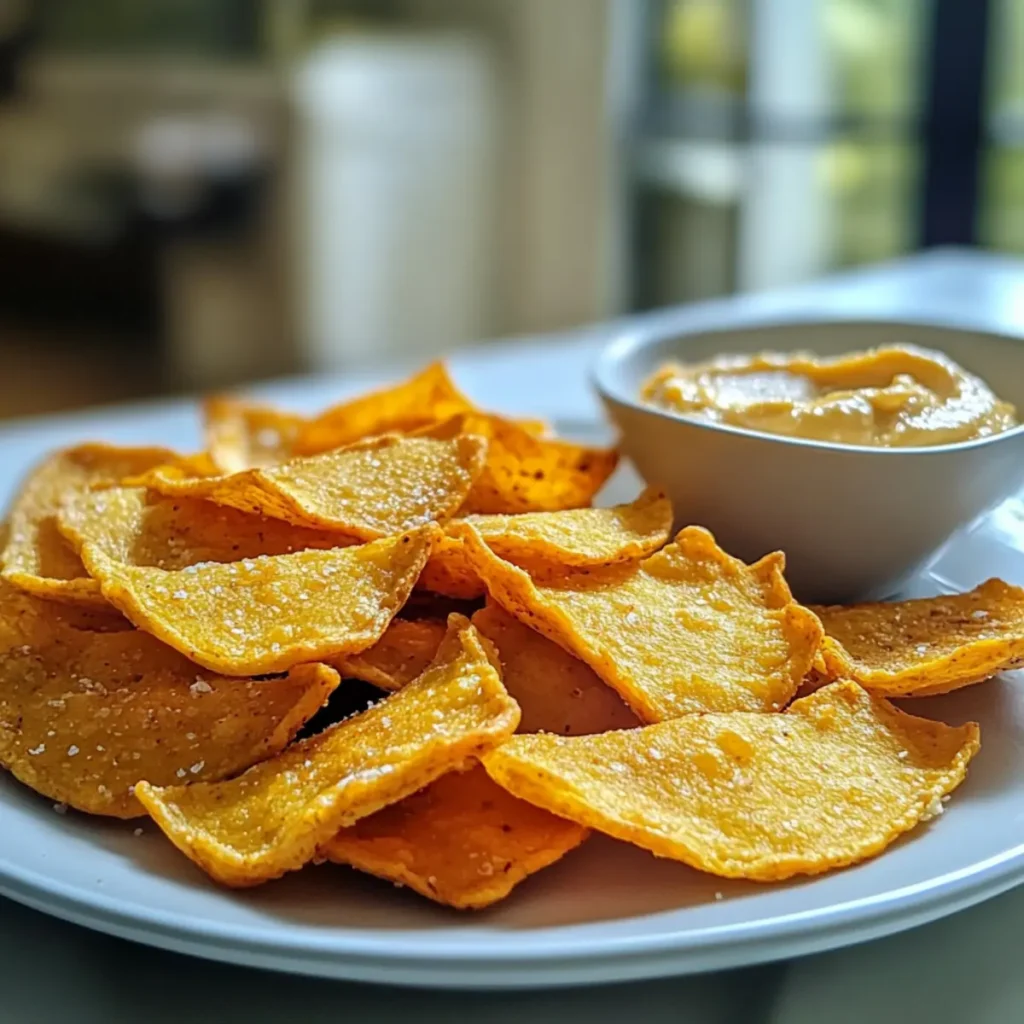
Satisfy Your Dipping Cravings: Pair your chickpea chips with creamy hummus, zesty guacamole, or a spicy salsa for a snacking experience that’s out of this world. Dips can really change the vibe; try them with different flavors for variety.
-
Mixed Flour Magic: Use oat flour alongside chickpea flour for a different texture that’s still gluten-free. This swap adds a hint of sweetness and a chewy texture. A great way to experiment if you’re looking for something new!
By exploring these variations, you can keep each batch of chickpea chips exciting, ensuring your snack time is never dull! Want more ideas? Consider checking out homemade dips to pair with your chips or discover how to make your own guacamole. Happy snacking!
Expert Tips for Crispy Chickpea Chips
- Whisk Well: Ensure the batter is smooth and lump-free. A well-mixed batter leads to evenly baked chickpea chips with that perfect crunch.
- Spread Thin: For maximum crispiness, spread the batter as thin as possible. Thicker chips tend to remain chewy rather than becoming delightfully crunchy.
- Patience is Key: Allow your chips to cool fully after baking. This cooling time is crucial for achieving that satisfying crunch.
- Flavor Variety: Experiment with various herbs and spices to discover your favorite flavors. Don’t be afraid to get creative with your chickpea chips!
- Proper Storage: Keep your chips in an airtight container at room temperature. If they soften, re-crisp in the oven to revive their delightful crunch.
Storage Tips for Chickpea Chips
- Room Temperature: Store your crispy chickpea chips in an airtight container to maintain their crunch. They’ll stay fresh for up to 4 days when kept this way.
- Recrisping: If your chips soften, simply place them back in the oven at 350°F (175°C) for 5-7 minutes to regain their crunchy texture.
- Make-Ahead: Feel free to prepare a larger batch of chickpea chips in advance; they make for an easy and healthy snack option throughout the week.
- Freezer: While best enjoyed fresh, you can freeze the batter before baking. Store in a sealed container for up to 1 month, then thaw and bake when cravings strike!
Make Ahead Options
These crispy baked chickpea chips are incredibly convenient for meal prep! You can prepare the batter and store it in the refrigerator for up to 24 hours before baking, keeping it fresh and ready to go. Simply ensure it’s tightly covered to prevent drying out. Alternatively, if you bake a batch in advance, let them cool completely and store the chips in an airtight container at room temperature for up to 4 days. To enjoy them at their crispiest, simply pop the cooled chips back in the oven for a few minutes to re-crisp before serving. This way, you can have healthy snacks on hand without any last-minute rush!
What to Serve with Crispy Baked Chickpea Chips?
These delightful baked chickpea chips can easily elevate your snacking experience when paired with fresh and flavorful accompaniments.
-
Hummus: A creamy, protein-packed dip that complements the chips’ crunch. Its luscious texture adds a delightful contrast to every bite.
-
Guacamole: This rich, creamy avocado dip brings a burst of flavor that beautifully contrasts the chips’ nutty notes while adding healthy fats to your snack.
-
Salsa: Fresh salsa provides a zesty kick and refreshing flavors. The acidity from tomatoes and citrus brightens the overall experience and keeps your palate excited.
-
Greek Yogurt Dip: A cool, tangy dip made with herbs can add a refreshing element. It’s perfect for those who love a slightly tangy contrast to the chickpea chips.
-
Roasted Vegetables: Pair your chips with a side of roasted veggies for a hearty and colorful plate. The sweetness of roasted carrots or bell peppers adds a nice balance.
-
Nutty Trail Mix: A handful of nutty trail mix alongside your chickpea chips brings texture and flavor variety, making it a perfect on-the-go snack combo.
-
Iced Herbal Tea: Enjoy your chips with a chilled, refreshing herbal tea. The lightness of the tea complements the crunchy texture and enhances your snacking experience.
-
Dark Chocolate Pieces: For a sweet finish, pair your chips with small squares of dark chocolate. The rich bitterness offers a delightful contrast that many will love.
Crispy Baked Chickpea Chips Recipe FAQs
What should I look for when selecting chickpea flour?
When choosing chickpea flour, ensure it’s fresh and has a light yellow to beige color. Avoid any bags with dark spots or a rancid smell, which indicates that the flour may be stale. I recommend buying from a reputable source or bulk bins for the freshest options!
How should I store leftover chickpea chips?
Store your crispy chickpea chips in an airtight container at room temperature. They will stay fresh and crunchy for up to 4 days. If they start to soften, you can quickly re-crisp them in the oven at 350°F (175°C) for about 5-7 minutes. Always let them cool completely before storing to maintain optimal texture.
Advertisement
Can I freeze the baked chickpea chips?
Absolutely! Although best enjoyed fresh, you can freeze the cooked chips. To do this, allow them to cool completely, then place them in a single layer on a baking sheet and freeze until solid. Once frozen, transfer them to an airtight container or a zip-top freezer bag for up to 3 months. When you’re ready to enjoy, bake straight from the freezer at 350°F (175°C) for about 10 minutes to re-crisp.
What if my batter is too thick or too runny?
If your batter is too thick, simply add a bit more water, one tablespoon at a time, until you achieve a smooth and pourable consistency. On the other hand, if it’s too runny, add a little more chickpea flour to thicken it. The batter should have a silky, slightly thick texture that spreads easily on the baking sheet but isn’t soupy.
Are chickpea chips safe for people with allergies?
Chickpea chips are a great gluten-free snack, but always double-check the product labels, especially if you have allergies. Ensure that the chickpea flour is processed in a gluten-free facility if you have celiac disease. As for other allergens, feel free to customize your herbs and spices to avoid common allergens like garlic or certain seeds.
How can I make these chickpea chips spicier or more flavorful?
To amp up the flavor, try adding spices like chili powder or cayenne pepper to your batter. You can also experiment with seasoning blends that include curry powder or za’atar. Mix your chosen spices directly into the batter, or sprinkle them on top before baking for an extra kick. The more the merrier—get creative with your flavor combinations!

Crispy Chickpea Chips: Your New Favorite Healthy Snack
Ingredients
Equipment
Method
- Preheat your oven to 400°F (200°C),
- Combine chickpea flour, water, and a pinch of salt in a mixing bowl. Whisk for 2-3 minutes until smooth.
- Line two baking sheets with parchment paper.
- Pour a small amount of batter onto the lined baking sheets and spread into thin circles with a diameter of about 3 inches.
- Sprinkle your choice of herbs and spices over the batter.
- Bake for about 10 minutes, watching for edges to turn golden brown.
- Remove from oven and let cool for 15-20 minutes.
- Enjoy immediately or transfer to an airtight container for storage.