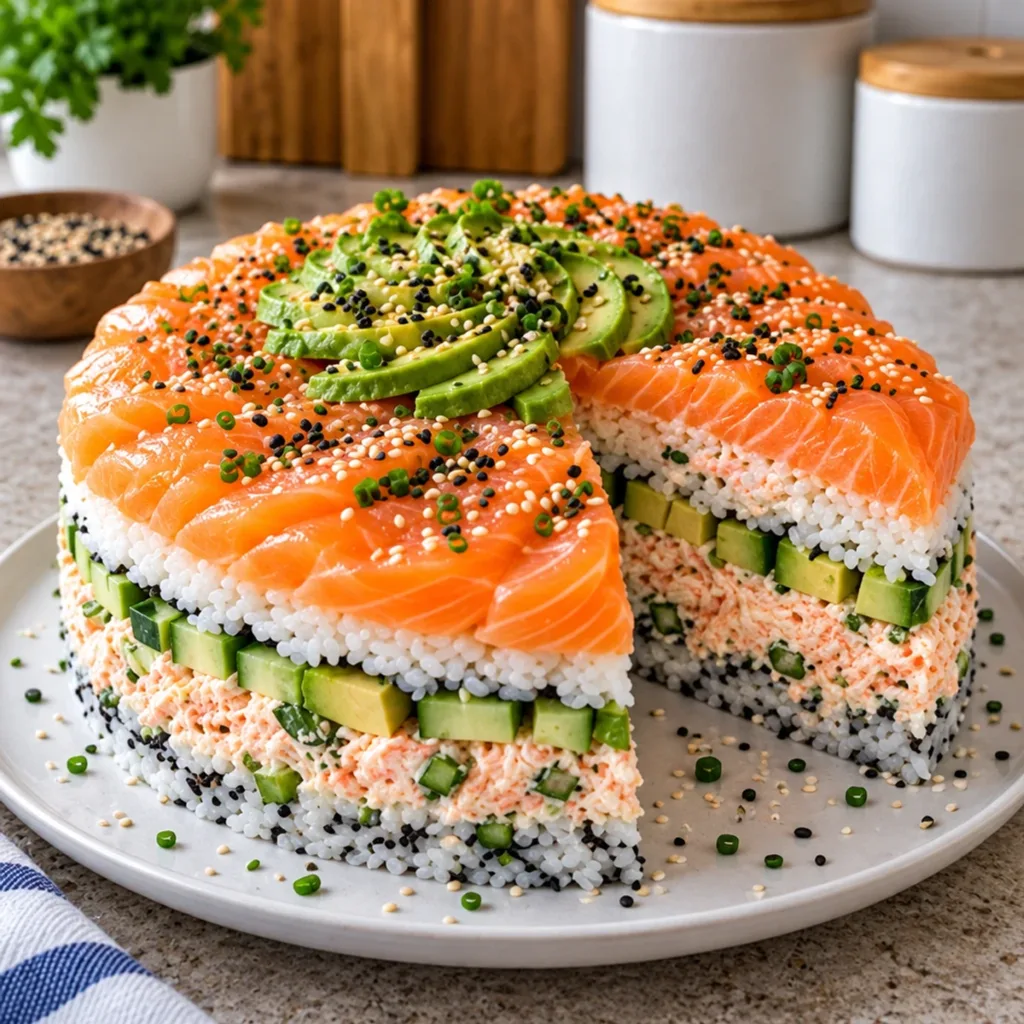
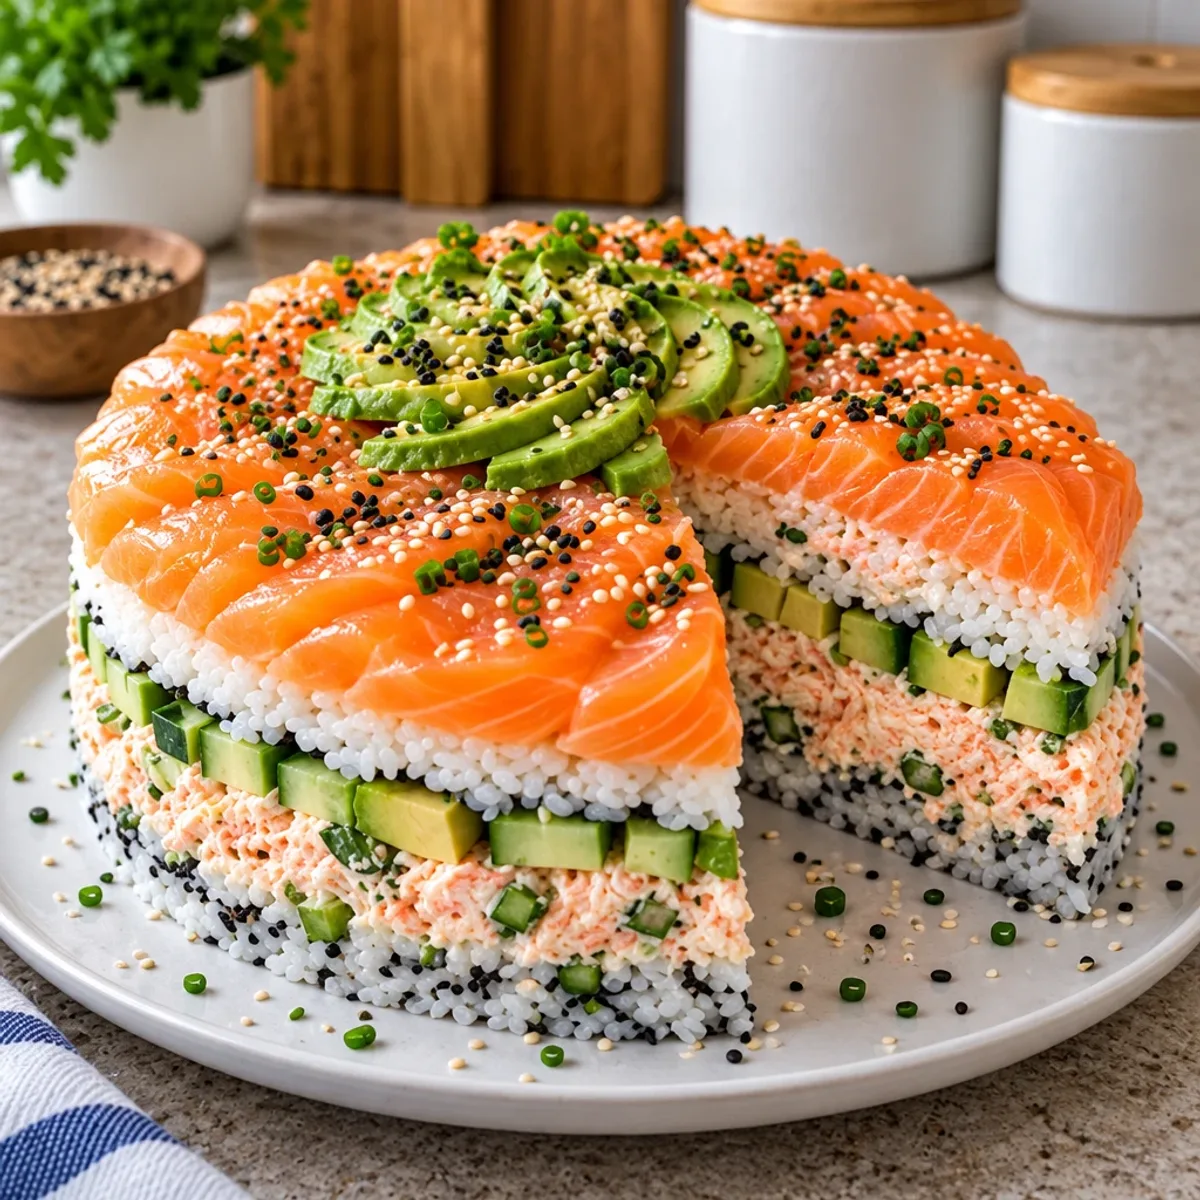
Amidst the clinking of chopsticks and the rustle of nori, I stumbled upon a showstopper: Sushi Cake. This culinary masterpiece turns the traditional sushi experience into a delightful layered creation that’s as delicious as it is visually stunning. Not only is this dish surprisingly simple to assemble, but it also welcomes customization, making it a perfect fit for any gathering. The rich juxtaposition of flavors—from savory seafood to creamy avocado—offers a fresh twist on a classic favorite. Whether you’re a seasoned home chef or just stepping into the kitchen, this Sushi Cake will impress every palate at your table. Are you ready to roll up your sleeves and elevate your next meal with this crowd-pleaser?
Why is Sushi Cake the ultimate dish?
Delightfully Unique: This dish takes traditional sushi to the next level, offering a stunning presentation that’s bound to impress.
Easy Assembly: With straightforward steps, even novice cooks can create this masterpiece without hassle.
Flavor Harmony: The combination of succulent seafood, creamy avocado, and zesty sriracha creates a flavor explosion in every bite.
Customizable Layers: Feel free to swap ingredients based on your preference—easily adapt this recipe to suit different tastes!
Perfect for Gatherings: Serve this vibrant cake at parties or potlucks, and watch it disappear faster than any ordinary sushi platter.
Serve Chilled: The refreshing nature of this dish makes it an ideal choice for warm days or as a cool appetizer!
Whether you're planning a cozy dinner or a festive gathering, this Sushi Cake is sure to steal the show.
Sushi Cake Ingredients
For the Sushi Rice
- 2 cups uncooked sushi rice – This specific type of rice is sticky, allowing the cake layers to hold together perfectly.
- 2 and 1/4 cups water – Essential for cooking the rice; precise measurement matters for texture.
- 1/4 cup rice vinegar – Adds a tangy flavor that balances the richness of the cake.
- 2 tablespoons granulated sugar – A hint of sweetness helps to enhance the overall flavor profile.
- 1 teaspoon salt – Enhances the flavors of the rice.
For the Seafood Mixture
- 8 ounces imitation crab meat, finely shredded – Offers that classic seafood taste without the price of real crab.
- 6 ounces cooked salmon, flaked – Adds depth and richness; using cooked salmon is a safety choice.
- 8 ounces sushi-grade salmon, thinly sliced – Elevates the dish with a fresh and vibrant presentation.
- 4 tablespoons Japanese mayonnaise – Provides creaminess and richness; perfectly complements the seafood.
- 2 teaspoons sriracha sauce – Adds a delightful kick, making your Sushi Cake unforgettable!
For the Vegetables and Garnish
- 2 ripe avocados – Creaminess adds a beautiful layer; one diced and one sliced for garnishing.
- 1 medium cucumber, finely diced – Delivers a refreshing crunch in every bite.
- 2 sheets nori seaweed, finely chopped – Enhances the authentic sushi flavor and texture.
- 2 tablespoons toasted sesame seeds – Offers a nutty crunch and visual appeal on top.
- 2 tablespoons green onions, finely chopped – Adds a fresh, oniony note to elevate the dish.
- 1 tablespoon fresh lemon juice – Prevents avocado from browning and adds a zesty brightness.
For Serving
- 2 tablespoons soy sauce – A must for dipping, enhancing flavor with every bite.
- 1 teaspoon wasabi paste (optional) – For those who enjoy a spicy kick alongside the meal.
- 2 tablespoons salmon roe (optional) – A luxurious touch that finishes the dish beautifully.
With all these ingredients, your Sushi Cake will be a splendid delight, making every gathering a bit more special. Enjoy crafting this masterpiece!
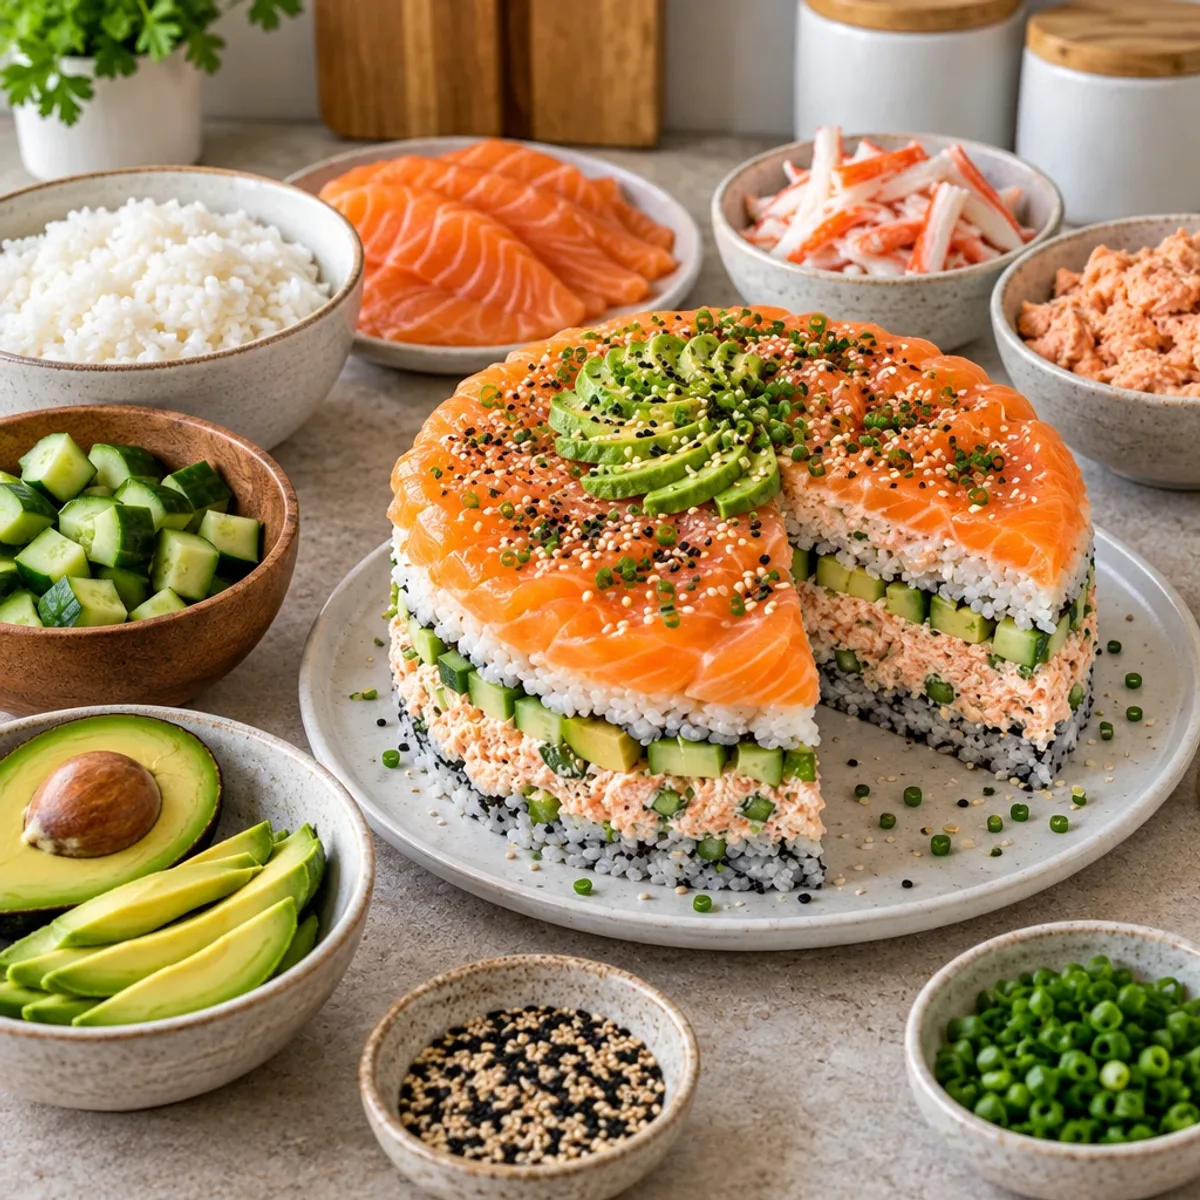
Step-by-Step Instructions for Sushi Cake
Step 1: Rinse the Sushi Rice
Begin by placing 2 cups of uncooked sushi rice into a fine mesh strainer. Rinse it under cold running water for about 2-3 minutes, or until the water runs almost clear. This step removes excess starch and ensures a perfect texture for your Sushi Cake.
Step 2: Cook the Sushi Rice
Transfer the rinsed rice to a medium saucepan and add 2 and 1/4 cups of water. Bring the mixture to a gentle boil over medium heat, then cover the saucepan tightly and reduce the heat to low. Cook the rice for 15 minutes, then remove from heat and let it rest covered for 10 minutes to steam.
Step 3: Season the Sushi Rice
In a small bowl, mix together 1/4 cup rice vinegar, 2 tablespoons granulated sugar, and 1 teaspoon salt until the sugar dissolves. After the rice has rested, transfer it to a large shallow bowl and pour the vinegar mixture evenly over the warm rice. Use a rice paddle to gently fold the rice until evenly seasoned.
Step 4: Prepare the Seafood Mixture
In a mixing bowl, combine 8 ounces of shredded imitation crab meat, 6 ounces of flaked cooked salmon, 4 tablespoons of Japanese mayonnaise, and 2 teaspoons of sriracha sauce. Mix gently until the ingredients are creamy and well combined, creating a flavorful filling for your Sushi Cake.
Step 5: Dice the Vegetables
Thoroughly wash and finely dice 1 medium cucumber. Cut one ripe avocado into small cubes and sprinkle them with 1 tablespoon of fresh lemon juice to prevent browning. Slice the remaining avocado thinly and brush the slices with the remaining lemon juice for a vibrant look.
Step 6: Assemble the Sushi Cake
Prepare an 8-inch round springform pan by lining the bottom with parchment paper and placing a strip of parchment around the inside. Spread half of the seasoned sushi rice evenly across the bottom and press gently to form a firm layer. Sprinkle half of the chopped nori over the rice.
Step 7: Layer the Fillings
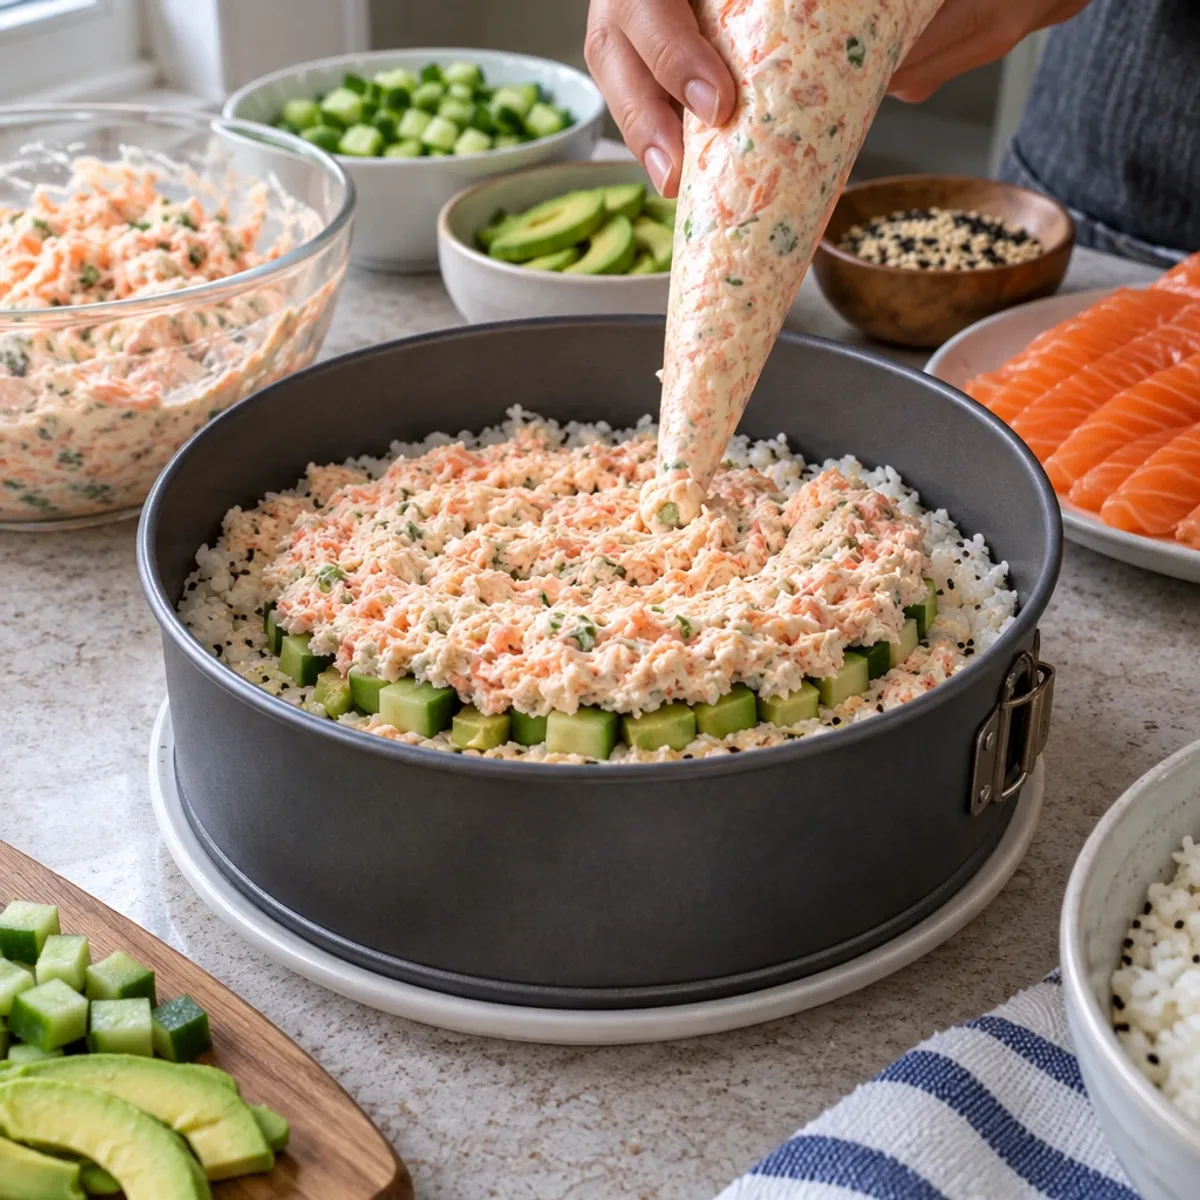
Spread the creamy crab and salmon mixture evenly over the nori layer, then scatter the diced cucumber on top. Arrange the cubed avocado over the cucumber. Finish this layer with the remaining chopped nori, followed by the rest of the sushi rice, pressing gently to form a compact cake.
Step 8: Chill the Sushi Cake
Cover the springform pan tightly with plastic wrap and refrigerate for 30 minutes. This cooling period allows the layers to firm up, ensuring a beautiful presentation when you slice the Sushi Cake.
Step 9: Garnish the Top
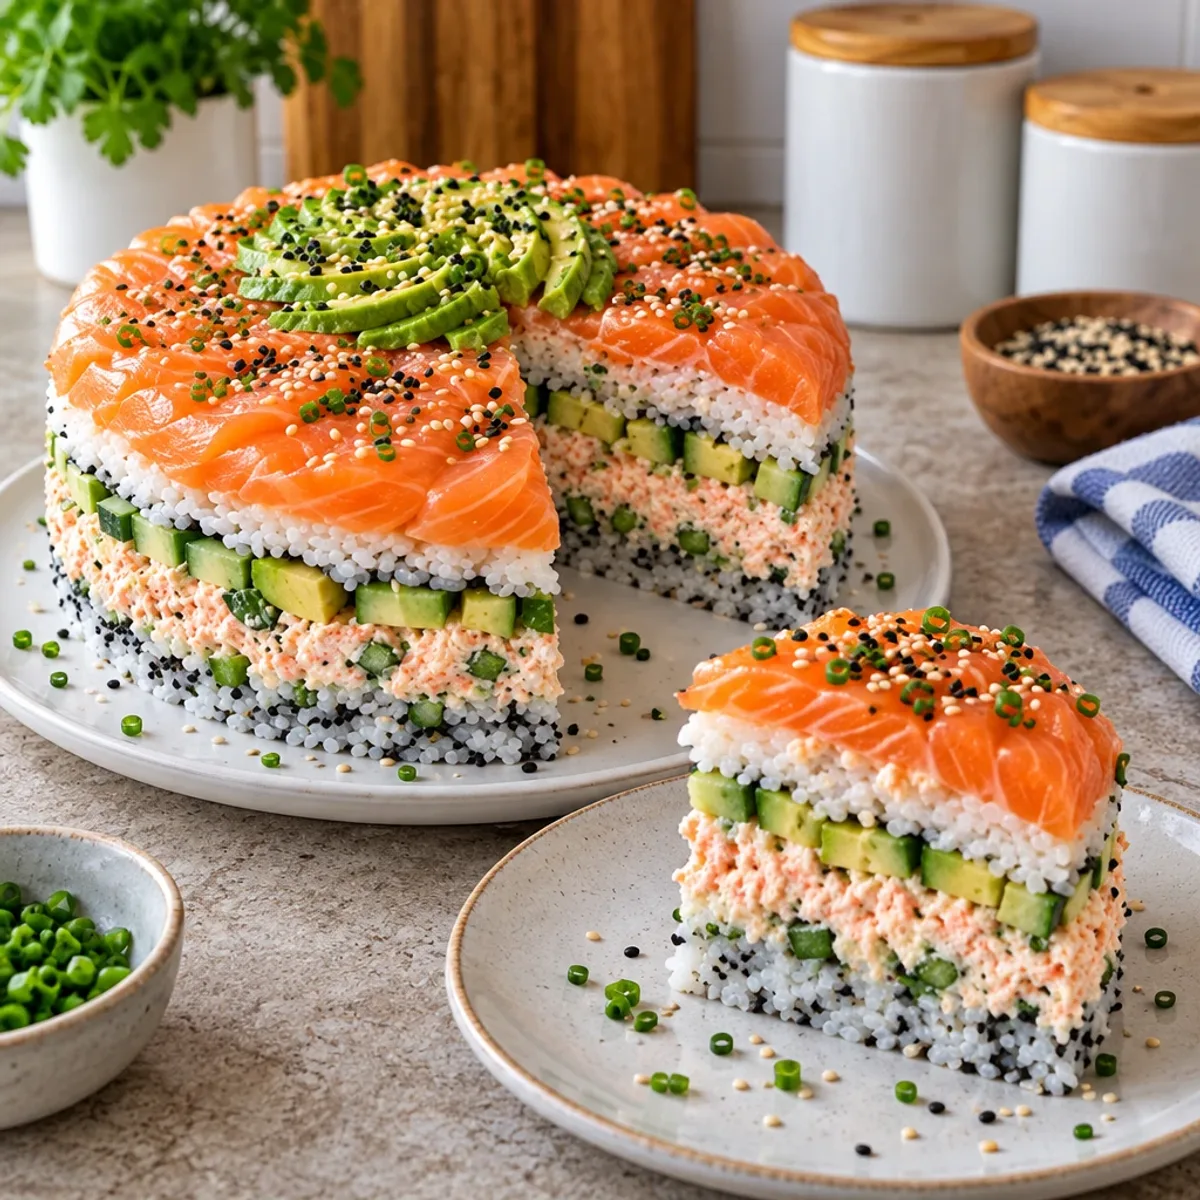
After chilling, remove the sushi cake from the refrigerator and carefully release the springform pan. Remove the parchment paper from the sides. Arrange thinly sliced sushi-grade salmon over the entire top in an attractive overlapping pattern, followed by the sliced avocado in a decorative circle.
Step 10: Add Final Touches
Sprinkle 2 tablespoons of toasted sesame seeds and 2 tablespoons of chopped green onions over the cake for added flavor and texture. For a luxurious touch, place optional salmon roe in the center of the cake, enhancing its visual appeal.
Step 11: Slice and Serve
Using a sharp damp knife, cut the sushi cake into 8 wedges. Serve the cake chilled, accompanied by soy sauce and optional wasabi for dipping. Enjoy every delicious bite of your stunning Sushi Cake!
Meal Prep Made Easy with Sushi Cake
Preparing this Sushi Cake in advance is a brilliant time-saver for any busy home cook! You can prepare the seasoned sushi rice and the seafood mixture—using imitation crab, cooked salmon, Japanese mayonnaise, and sriracha—up to 24 hours in advance; simply store them separately in airtight containers in the refrigerator to maintain freshness. Additionally, you can dice the cucumber and cube the avocado (sprinkled with lemon juice to prevent browning) ahead of time, ideally a few hours before assembly. When it’s time to serve, just layer the ingredients as described, refrigerate for 30 minutes to firm up, and garnish with salmon and avocado. This ensures your Sushi Cake is just as fresh and delicious as if it were made on the spot!
What to Serve with Sushi Cake
Savor the refreshing taste of Sushi Cake alongside these delightful pairings that will elevate your dining experience.
Creamy Miso Soup: A warm bowl of miso soup complements the cool layers of the sushi cake, enhancing the meal with umami richness.
Crisp Seaweed Salad: This vibrant salad adds a crunchy texture and refreshing flavor, balancing the sushi cake’s richness.
Steamed Edamame: Lightly salted edamame not only provides a pop of color but also a satisfying bite between layers of flavors.
Pickled Ginger: A traditional sushi accompaniment, pickled ginger offers a tangy contrast that cleanses the palate between bites.
Sushi-Style California Rolls: These rolls mirror the flavors of the sushi cake, allowing guests to enjoy a double dose of deliciousness.
Sesame Ginger Dressing Salad: Serve a mixed green salad dressed with sesame ginger for a light and zesty pairing that complements the sushi's flavors.
Sparkling Sake or White Wine: Refreshing drinks, like sparkling sake or a chilled white wine, enhance the dining experience with their crispness and acidity.
Matcha Green Tea: The earthy notes of matcha make it a soothing beverage that contrasts beautifully with the cake's textures.
Mochi Ice Cream: For dessert, consider a light and chewy mochi ice cream that echoes Japanese flavors, leaving a delightful sweetness to end your meal.
Sushi Cake Variations & Substitutions
Feel free to play with flavors and textures to make this sushi cake your own!
Vegetable-Heavy: Substitute imitation crab with shredded carrots and bell peppers for a vibrant veggie version. The crunch adds a refreshing twist!
Spicy Kick: If you love heat, add extra sriracha in the filling or top with spicy mayo for an unforgettable flavor punch. Your spicy twist will definitely tantalize taste buds!
Vegan Option: Opt for tofu or tempeh instead of seafood, combined with avocado and veggies for a fresh, plant-based delight. This version can still provide that satisfying sushi flavor!
Cucumber Substitute: Try using finely diced radishes for a zesty crunch. They bring a peppery edge that elevates your cake, making it extra special.
Flavorful Rice: Enhance your sushi rice by mixing in a little coconut milk and lime zest for a tropical touch, breathing new life into this classic dish.
Herb Infusion: Add fresh herbs like cilantro or basil between layers for a burst of freshness. These aromatic flavors can transform your sushi cake into a fragrant masterpiece!
Fruit Boost: Layer in thin slices of mango or pineapple for a sweet, tropical accent that beautifully contrasts the savory ingredients. Sweet and savory balance creates a delightful dining experience.
Savory Toppings: Experiment with toppings like shredded nori salad or sesame seeds mixed with furikake for added texture and depth of flavor. Such toppings can transform your presentation and taste!
Let your creativity shine as you create variations of this Sushi Cake! Whether you crave something spicy or a little fruity, there’s a twist that’s just right for you.
How to Store and Freeze Sushi Cake
Room Temperature: Best consumed immediately; avoid leaving out for more than 2 hours to maintain freshness and quality.
Fridge: Store any leftovers in an airtight container for up to 24 hours. This keeps the flavors intact while preventing the avocado from browning.
Freezer: Freezing is not recommended, as the texture of the salmon and other ingredients may become mushy upon thawing.
Reheating: Enjoy chilled for optimal flavor and freshness; avoid reheating as it may compromise the texture of your beautiful Sushi Cake.
Helpful Tricks for Sushi Cake
Perfect Rice Rinsing: Rinse until clear: Properly rinsing the sushi rice removes excess starch, ensuring a perfectly sticky texture for your Sushi Cake.
Cooling Time Matters: Don’t skip the resting: Allow the rice to cool to room temperature for the flavors to meld properly and for easier assembly.
Layering Technique: Press gently: When spreading the layers, pressing gently ensures a compact cake, preventing it from falling apart when sliced.
Avocado Freshness: Lemon juice protection: Brushing lemon juice on avocado not only adds flavor but also prevents browning, keeping your Sushi Cake looking vibrant.
Chill for Firmness: Refrigeration is key: Allowing the assembled cake to chill helps firm layers, making it easier to cut and beautifully present.
Sharp Knife Usage: Always dampen your knife: Using a sharp, damp knife minimizes tearing, ensuring clean cuts for a visually appealing Sushi Cake.
Sushi Cake Recipe FAQs
How do I choose the right sushi rice?
Absolutely! Look for short-grain sushi rice, as its sticky texture is essential for keeping your Sushi Cake together. When you pick your rice, it should feel slightly sticky, with no hard grains. Always check the packaging for a sushi rice label—this ensures you're getting exactly what you need for that perfect cake.
Advertisement
How should I store any leftover Sushi Cake?
Very simply! Store your leftovers in an airtight container in the refrigerator. They should be consumed within 24 hours for the best flavor and texture. I often use plastic wrap to tightly cover the surface before sealing the container to prevent the avocado from browning.
Can Sushi Cake be frozen?
Not a good idea! Freezing Sushi Cake is generally not recommended due to the delicate texture of the salmon and avocado. If you do freeze it, wrap it very tightly in plastic wrap and foil to minimize air exposure, but be prepared for a change in texture when you thaw—mushy ingredients just won’t cut it!
What’s the best way to prevent the avocado from browning?
Here's a simple trick! Always sprinkle a bit of fresh lemon juice on diced avocado to keep it fresh and vibrant. The citric acid acts as a barrier against oxidation. If you're using sliced avocado, brush those slices with lemon juice just before layering them atop your Sushi Cake.
Can I customize my Sushi Cake for dietary needs?
Absolutely! You can easily adapt this recipe. For a vegetarian option, swap the seafood for finely diced veggies or tofu. If you're avoiding gluten, ensure that your soy sauce is gluten-free. And for those with shellfish allergies, you can use chicken or just focus on the vegetables for a delightful alternative!
What should I do if my rice doesn't come out sticky?
No worries! If that happens, you might not have rinsed the rice enough initially. Next time, rinse under cold water until it runs clear to remove excess starch. Also, ensure that you let the rice steam properly after cooking for 10 minutes—it’s key for achieving that sticky texture perfect for your Sushi Cake!
Sushi Cake: A Flavorful Twist on Classic Sushi
Ingredients
Equipment
Method
- Begin by placing 2 cups of uncooked sushi rice into a fine mesh strainer. Rinse it under cold running water for about 2-3 minutes, or until the water runs almost clear.
- Transfer the rinsed rice to a medium saucepan and add 2 and 1/4 cups of water. Bring to a gentle boil over medium heat, cover tightly and reduce heat. Cook for 15 minutes, then remove from heat and let it rest covered for 10 minutes.
- In a small bowl, mix together 1/4 cup rice vinegar, 2 tablespoons granulated sugar, and 1 teaspoon salt until the sugar dissolves. After the rice has rested, pour the mixture over the rice and fold gently.
- In a mixing bowl, combine 8 ounces of imitation crab meat, 6 ounces of flaked cooked salmon, 4 tablespoons of mayonnaise, and 2 teaspoons of sriracha sauce. Mix gently until creamy and well combined.
- Finely dice 1 medium cucumber. Cube one avocado and sprinkle with 1 tablespoon lemon juice. Slice the other avocado and brush slices with lemon juice.
- Prepare an 8-inch round springform pan lined with parchment. Spread half of the sushi rice evenly across the bottom and press gently. Sprinkle half of the chopped nori over the rice.
- Spread the crab and salmon mixture over the nori layer, scatter the diced cucumber, and arrange cubed avocado on top. Layer with the remaining nori and sushi rice, pressing gently.
- Cover the pan with plastic wrap and refrigerate for 30 minutes.
- Carefully release the springform and remove parchment. Arrange sushi-grade salmon over the top followed by sliced avocado.
- Sprinkle on sesame seeds and green onions. For an optional touch, add salmon roe in the center.
- Using a sharp damp knife, cut the cake into 8 wedges. Serve chilled with soy sauce and optional wasabi.