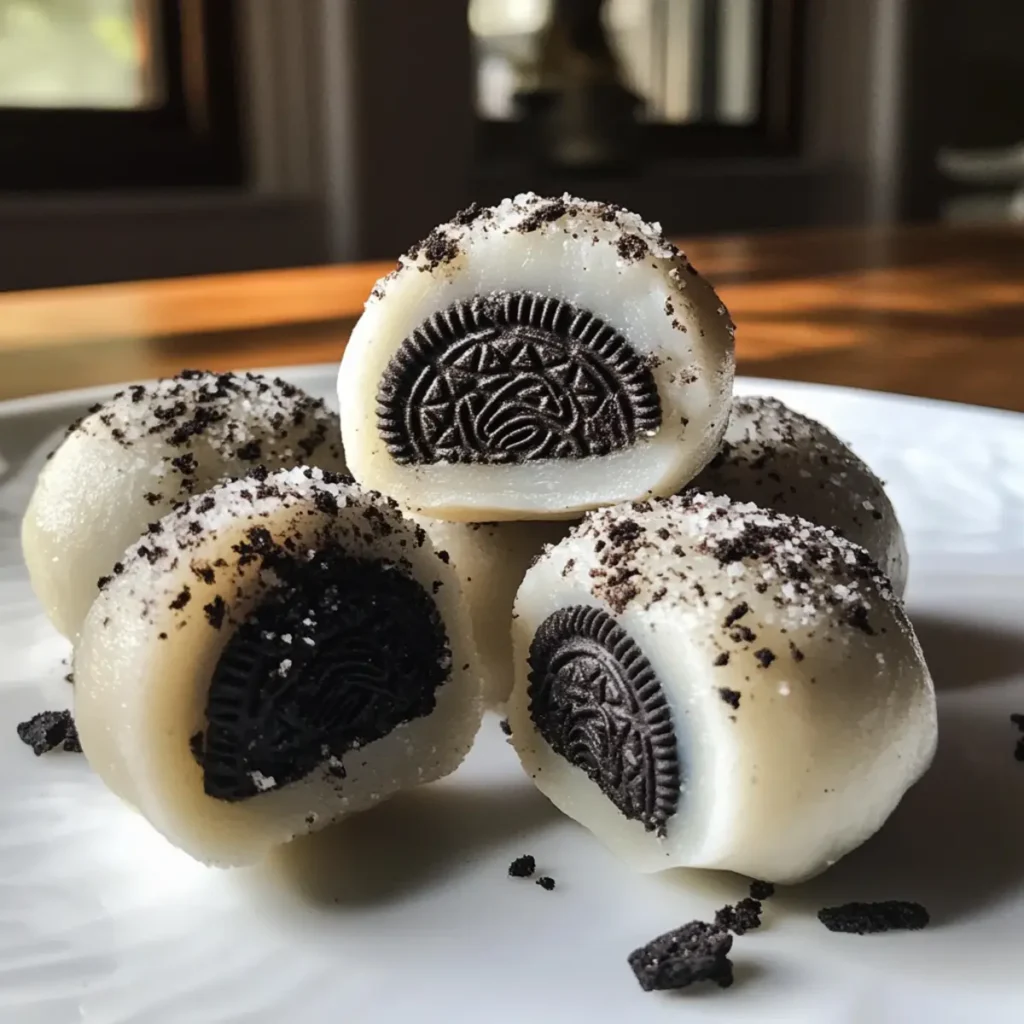
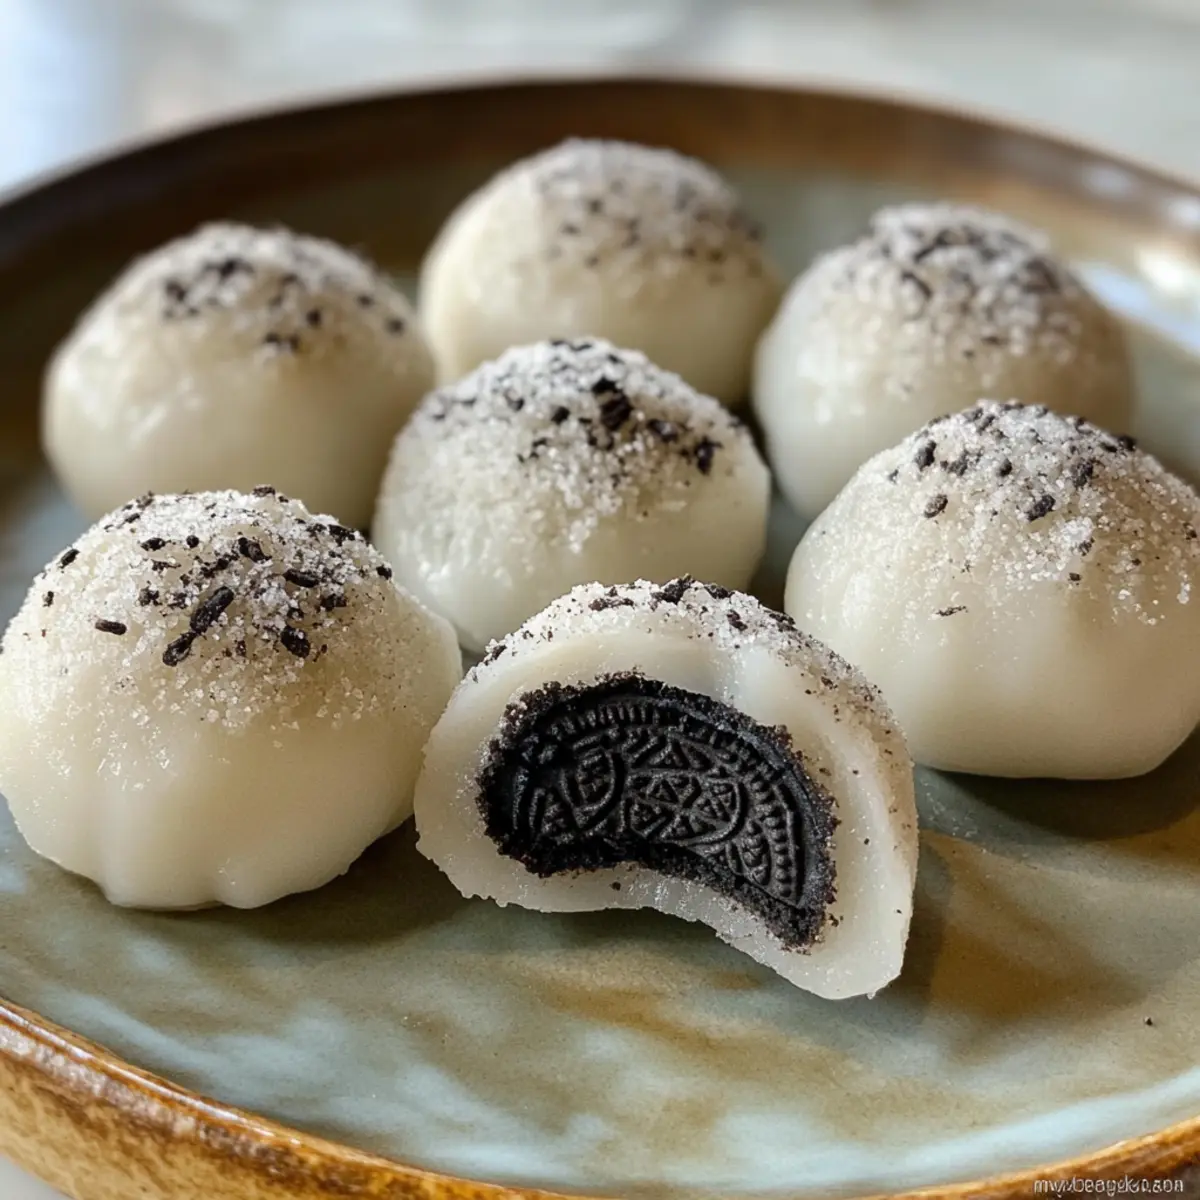
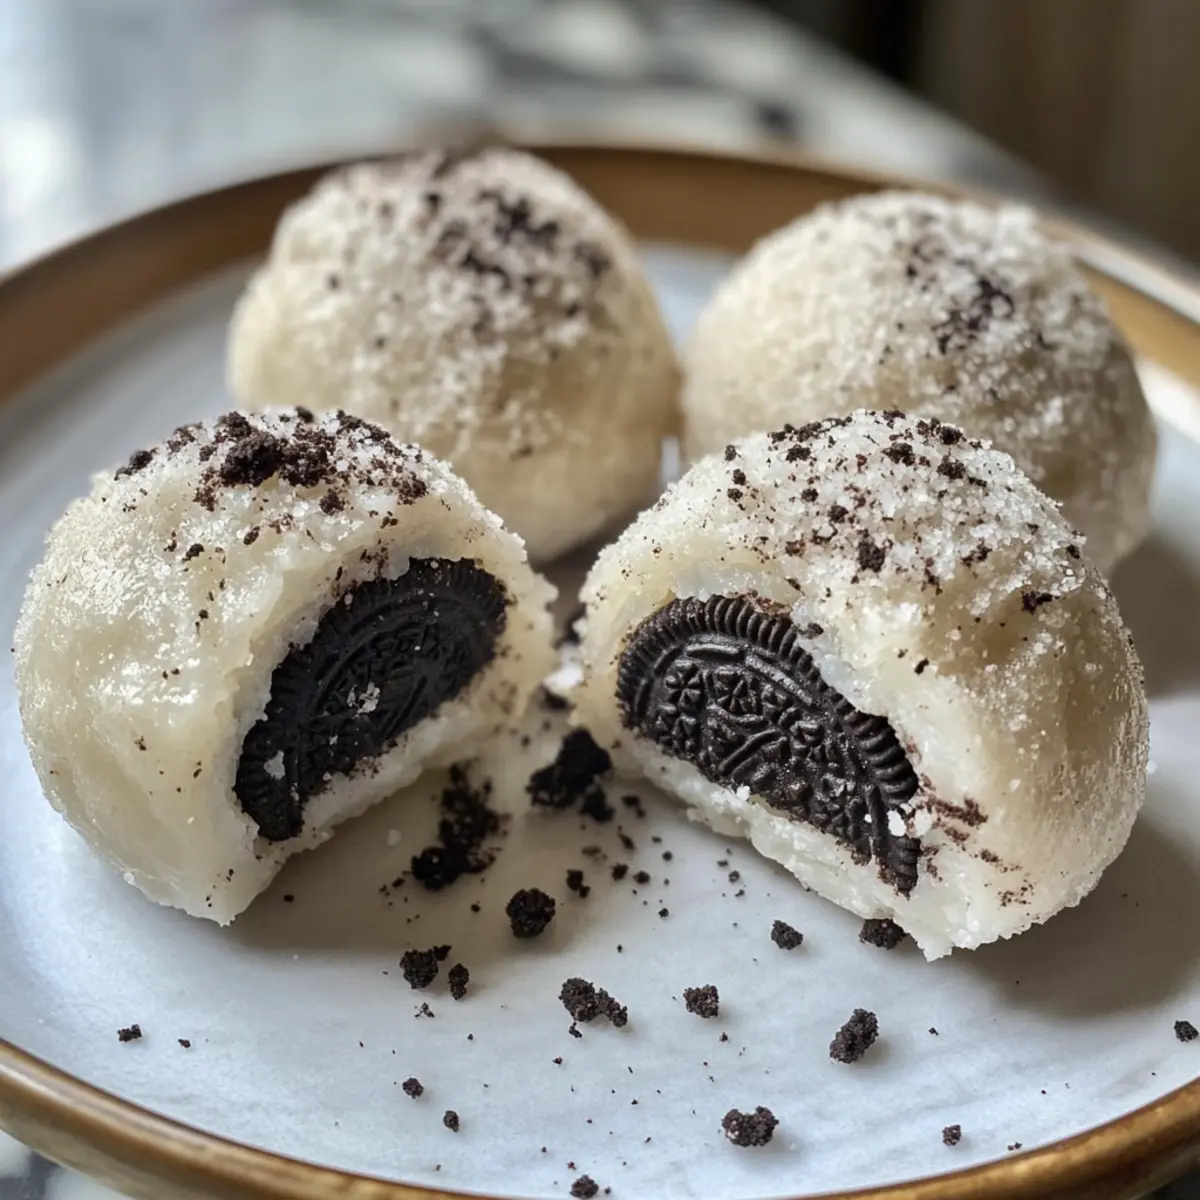
As I stood there, watching the vibrant colors of my pantry, a sudden craving struck me. What if I could combine the chewy delight of traditional Japanese mochi with the beloved flavor of Oreos? Enter my Chewy Oreo Mochi, a unique dessert that marries these two worlds beautifully. This recipe is not only easy to whip up, making it perfect for those busy afternoons, but it also brings a fun twist that will impress family and friends alike. With a crunchy Oreo coating and a soft, chewy interior, it’s hard to resist snacking on these little delights. Why not take your taste buds on a creative adventure and give this irresistible treat a try?
Why is Oreo Mochi a Must-Try?
Unique Fusion: The combination of traditional Japanese mochi and iconic Oreo cookies creates a delightful treat that offers culinary charm and nostalgia.
Chewy Delight: With its soft and chewy texture, each bite feels like an exciting new adventure in dessert!
Quick and Easy: This recipe is perfect for beginners and seasoned chefs alike, requiring minimal ingredients and effort—ideal for busy afternoons.
Customizable Fun: Feel free to experiment with different cookie coatings or delicious fillings, like chocolate ganache or sweetened red bean paste, for endless variations.
Crowd-Pleasing Snack: Whether it’s for movie nights or dinner parties, these cute mochi treats are sure to be a hit! Enjoy your own homemade creations, such as Creative Snowman Oreo or Fun Grinch Oreo balls, for more delicious ideas.
Oreo Mochi Ingredients
• Get ready for chewy delight!
For the Mochi Dough
- Glutinous Rice Flour – This is essential for achieving the chewy texture of the mochi; no substitutes here for authenticity.
- Cornstarch – Helps create a smooth texture; you can swap this with potato starch if needed.
- Cocoa Powder – Adds a rich chocolate flavor; feel free to use Dutch-processed cocoa for a unique twist.
- White Sugar – Sweetens the mochi nicely; try brown sugar for a deeper, caramel-like taste.
- Corn Oil – Keeps your mochi moist and pliable; vegetable oil works as a suitable substitute.
- Milk – Integrates moisture seamlessly into the dough; any plant-based milk can be used for a dairy-free version.
For the Coating
- Oreo Cookies (crushed) – Provides that iconic flavor and a crunchy texture; substitute with your favorite chocolate cookie if desired.
Now that you have all the necessary ingredients, you’re one step closer to creating your own delightful Oreo Mochi! This easy recipe promises to be not only a sweet treat but also a fun culinary adventure in your kitchen.
Step‑by‑Step Instructions for Oreo Mochi
Step 1: Mix the Dough
In a large mixing bowl, combine 1 cup of glutinous rice flour, 2 tablespoons of cornstarch, 2 tablespoons of cocoa powder, and 1/4 cup of white sugar. Add 1/2 cup of corn oil and 1/2 cup of milk, then use a whisk to blend the ingredients together until smooth and lump-free, about 2 minutes. The mixture should have a silky texture, setting the perfect foundation for your Oreo Mochi.
Step 2: Sift the Mixture
Once your dough is mixed, it’s time to ensure it’s silky smooth. Use a fine mesh strainer over a pot, and pour the dough mixture through to remove any remaining lumps. This will help your Oreo Mochi achieve an even texture. As you sift, prepare the pot for cooking by setting it on the stove over low heat, ready for the next step.
Step 3: Heat and Stir
Carefully transfer the sifted mixture into the pot, then cook over low heat, stirring continuously with a spatula. After about 8–10 minutes, the mixture will start to thicken and pull away from the pot edges, transforming into a sticky, dough-like consistency. Be diligent in your stirring to prevent sticking; a smooth texture is key for the perfect Oreo Mochi!
Step 4: Pull the Dough
Once thickened, transfer the hot mochi dough to a clean, cool surface dusted with cornstarch. Let it sit for about 5 minutes, then use your hands to stretch and pull the dough until it becomes smooth and elastic. This step typically takes around 7–10 minutes, ensuring the mochi will be beautifully chewy and delightful with every bite of your Oreo Mochi.
Step 5: Form Balls
Divide the elastic mochi dough into small, even pieces, about 1 inch in diameter. Roll each piece into a ball, using your palms to create a smooth surface. Aim for uniform sizes so that they cook evenly and present beautifully. These little balls will become the base of your scrumptious Oreo Mochi!
Step 6: Coat the Mochi
Prepare a plate with crushed Oreo cookies for coating. Roll each mochi ball gently in the crushed Oreos, ensuring they are fully coated for that extra crunch and flavor infusion. This step not only adds texture but also enhances the signature Oreo taste in your mochi. Once coated, set them aside on a plate for serving.
What to Serve with Chewy Oreo Mochi?
Treat your taste buds to delightful pairings that elevate your Oreo Mochi experience.
-
Fresh Strawberries: The natural sweetness and acidity of strawberries cut through the richness of the Oreo Mochi, creating a refreshing contrast. They also add a lovely pop of color to your dessert spread.
-
Green Tea Ice Cream: This creamy, subtly bitter ice cream pairs beautifully with the chocolatey flavor of the mochi. A scoop on the side makes for a delightful combination that warms the heart.
-
Coconut Milk: Pouring some chilled coconut milk over your Oreo Mochi adds a tropical twist and creamy texture. It enhances the mochi’s chewiness while offering a calming, beachy vibe.
-
Sweetened Red Bean Paste: Common in many Asian desserts, this sweet paste offers a unique taste contrast. Placing a dollop on your plate complements the richness of the mochi beautifully.
-
Japanese Matcha Latte: The earthy bitterness of matcha balances the sweetness of your dessert. Its signature green color brings an elegant touch, making for a perfect sip alongside the chewy delights.
-
Chocolate Dipping Sauce: Create a decadent experience by providing a side of warm chocolate sauce. Guests can dip their mochi for an extra indulgent treat, playing with flavors and textures.
Enjoy exploring these delightful companions to your Chewy Oreo Mochi, making dessert time a truly exceptional moment!
How to Store and Freeze Oreo Mochi
Room Temperature: Store your Oreo Mochi in an airtight container at room temperature for up to 2-3 days to maintain its chewy texture.
Fridge: For longer shelf life, refrigerate the mochi in a sealed container. This can extend freshness for about a week while keeping it soft.
Freezer: To freeze, wrap individual mochi balls tightly in plastic wrap and place them in a freezer bag. They will stay delicious for up to a month; simply thaw at room temperature before enjoying.
Reheating: If desired, reheat in the microwave for about 10-15 seconds to regain that delightful soft and chewy texture. Enjoy your homemade Oreo Mochi!
Make Ahead Options
These delightful Oreo Mochi are perfect for busy home cooks looking to save time! You can prepare the mochi dough up to 24 hours in advance. Simply follow the instructions up to the point of forming the balls, then cover it tightly with plastic wrap and refrigerate. For the best results, coat the mochi balls in crushed Oreos just before serving to maintain that delightful crunch. Alternatively, you can roll the mochi balls in Oreos and store them in an airtight container for up to 3 days at room temperature. This way, you can enjoy freshly made Oreo Mochi with minimal effort on your busy weeknights!
Expert Tips for Oreo Mochi
• Non-Stick Necessity: Use a non-stick pan for heating to prevent the dough from sticking, ensuring a smoother cooking process.
• Stretch with Care: Take your time while stretching the dough; achieving the right elasticity is key to a perfect chewy Oreo Mochi.
• Crush Finely: Ensure Oreos are crushed into fine crumbs for optimal coating and a delightful crunch in every bite.
• Patience Pays Off: Pull the dough for about 10 minutes for max chewiness—this step transforms the texture and makes it heavenly!
• Cooling Time: Allow the dough to cool slightly before handling, which makes it easier to pull and shape without burns.
Oreo Mochi Variations & Substitutions
Feel free to get creative with your Oreo Mochi and make it your own; the possibilities are endless!
-
Dairy-Free: Substitute regular milk with almond, soy, or oat milk to enjoy a vegan-friendly mochi.
-
Flavor Twist: Swap Oreos for your favorite chocolate sandwich cookie to mix up the flavor profile while keeping that delightful crunch.
-
Filled Mochi: Add a delicious filling by incorporating sweetened red bean paste in the center of each mochi ball for a delightful surprise.
-
Nutty Crunch: Include finely chopped nuts like almonds or walnuts in the dough to enhance texture and add an earthy depth.
-
Minty Freshness: Crush peppermint or mint Oreos for a refreshing take that adds a cool twist to the classic flavor.
-
Dessert Dippers: Serve your mochi with a side of warm chocolate ganache or caramel for dipping, creating an indulgent treat.
-
Choco-Lover’s Delight: Mix in chocolate chips to the dough before steaming for an extra chocolatey boost that will satisfy any sweet tooth.
-
Fiery Kick: Add a pinch of cayenne pepper to the cocoa mix for a surprising layer of heat that dances on your taste buds.
These variations are a wonderful way to elevate your Oreo Mochi and ensure it’s a treat everyone will love! Exploring recipes like Creative Snowman Oreo or Fun Grinch Oreo can also inspire delightful creative ideas for your sweet creations.
Advertisement
Oreo Mochi Recipe FAQs
What type of glutinous rice flour should I use for Oreo Mochi?
Absolutely use sweet rice flour, known as “mochi flour,” which is crucial for achieving that authentic chewy texture. Avoid using regular rice flour, as it won’t provide the same elasticity.
How long can I store Oreo Mochi?
For the best experience, keep your Oreo Mochi in an airtight container at room temperature for about 2-3 days. If you want to extend its shelf life, refrigerate them for up to one week, though they may lose some chewiness after a few days.
Can I freeze Oreo Mochi?
Yes, you can! To freeze, wrap each mochi ball tightly in plastic wrap and place them in a freezer-safe bag. They can last up to 3 months in the freezer. To enjoy, just let them thaw at room temperature for about 30 minutes or pop them in the microwave for 10-15 seconds to regain their soft texture.
What should I do if my mochi dough is too sticky?
If your dough is too sticky, try adding a bit more cornstarch or cornstarch dust to your work surface while stretching the dough. If it still feels unmanageable, let it cool slightly before working with it. Always ensure that you’re stirring continuously while cooking, as this helps prevent the mixture from becoming too sticky in the first place.
Are there any allergenic ingredients in Oreo Mochi?
While this recipe contains gluten from the glutinous rice flour, it’s suitable for those without gluten intolerance. However, keep in mind that Oreos do contain dairy and may not be suitable for those with lactose intolerance. If you’re looking for a dairy-free option, feel free to substitute with your favorite dairy-free cookies.

Oreo Mochi: Soft, Chewy Delights You Can’t Resist
Ingredients
Equipment
Method
- In a large mixing bowl, combine glutinous rice flour, cornstarch, cocoa powder, and white sugar. Add corn oil and milk, whisk until smooth.
- Use a fine mesh strainer over a pot, pour the dough mixture through to remove lumps. Prepare pot on low heat.
- Transfer the mixture into the pot, cook over low heat, stirring continuously for about 8-10 minutes until the mixture thickens.
- Transfer thickened dough to a cool surface dusted with cornstarch, let it sit for 5 minutes, then stretch and pull until smooth.
- Divide dough into small pieces (1 inch). Roll each piece into a ball.
- Prepare a plate with crushed Oreo cookies, roll each mochi ball in the Oreos until fully coated.