
As I stood by the ocean, the tangy scent of saltwater mingled with the alluring aroma of grilled oysters wafting from a nearby stall. It was a moment that reminded me of those late summer afternoons spent savoring the freshest catches, and I knew I had to recreate that magic at home. Enter my Miso Baked Oysters: A Quick and Easy West Coast Appetizer that brings a delightful Japanese twist to the classic oyster experience. This recipe is perfect for those busy weeknights or impromptu gatherings, offering a creamy, umami-rich miso mayonnaise that elevates fresh oysters to new heights. Plus, it comes together in a snap, making it a total crowd-pleaser without the fuss. So, are you ready to dive into a world of flavor and impress your friends at your next dinner party?

Why Are Miso Baked Oysters So Special?
Quick and Easy: This recipe takes minimal time in the kitchen, allowing you to whip up a delicious appetizer in under 30 minutes.
Umami Explosion: The unique combination of miso and Japanese mayonnaise delivers a rich, savory flavor that enhances the natural sweetness of the oysters.
Crowd-Pleasing Appeal: Perfect for gatherings or cozy dinners, these oysters are sure to impress family and friends, akin to the flavor-packed joy of Baked Brie Honey.
Nutritional Bonus: Packed with protein and essential vitamins, they provide a healthy yet indulgent option for seafood lovers.
Versatile Variations: Customize your dish by trying different cheeses or adding breadcrumbs for a delightful crunch, making each batch uniquely yours!
Miso Baked Oysters Ingredients
• Dive into a world of umami with these ingredients!
For the Oysters
- Oysters – Fresh, shucked; the star of the dish, providing protein and a briny richness.
For the Miso Mayo
- Japanese Mayonnaise – ¾ c.; adds creaminess and a rich flavor; or substitute regular mayonnaise with lemon juice for a lighter twist.
- Miso Paste – 2 tbsp.; enhances umami and depth; light miso gives a milder taste, while dark miso offers a robust flavor.
- Mirin – 1 tbsp.; this sweet rice wine infuses sweetness and a touch of complexity.
- Hot Sauce – 5 dashes (e.g., Tabasco); sparks up the dish with heat; adjust based on your spice tolerance.
- Fresh Lemon Juice – 2 tbsp.; brightens the flavors; always opt for fresh juice for the best taste.
For the Spinach
- Fresh Spinach – 1 ½ c., shredded or chiffonade; adds a nutritious layer and vibrant color beneath the oysters.
For the Topping
- Cheddar or Mozzarella Cheese – ½ c. (about 2 oz); creates a creamy, melted topping; leave out for a dairy-free version.
Optional Garnishes
- Extra Lemon Wedges – for a zesty finish.
- Parsley – for a pop of color and freshness.
- Paprika – adds a subtle flavor and enhances the presentation.
Get ready to impress with these Miso Baked Oysters, a quick and easy appetizer that will light up your table!
Step‑by‑Step Instructions for Miso Baked Oysters-A Quick And Easy West Coast Appetizer
Step 1: Preheat Your Oven
Begin by preheating your oven’s broiler or your BBQ grill to a high setting, around 425°F (220°C). This high heat will give your Miso Baked Oysters that perfectly bubbling and golden-brown finish. As the oven heats, gather your ingredients and equipment, including a baking sheet and oyster shells or ramekins for assembly.
Step 2: Prepare the Baking Vessel
Arrange your shucked oyster shells or sturdy ramekins on a baking sheet. For added stability, use a layer of rock salt under the shells to keep them upright while baking. This will ensure the oysters remain nestled securely, allowing the flavorful juices to mix and enhance the dish while baking.
Step 3: Make the Miso Mayo
In a mixing bowl, combine ¾ cup of Japanese mayonnaise with 2 tablespoons of miso paste. Stir in 1 tablespoon of mirin, 5 dashes of hot sauce, and 2 tablespoons of fresh lemon juice. Mix thoroughly until you’ll have a creamy and cohesive miso mayonnaise sauce. This rich blend is the star of your Miso Baked Oysters, delivering a delightful umami flavor.
Step 4: Layer the Ingredients
Spread 1½ cups of shredded spinach evenly into your prepared oyster shells or ramekins. Place the shucked oysters directly on top of the spinach, ensuring they’re nicely nestled. If you’re using large oysters, consider cutting them in half for easier eating. This layered approach complements the rich miso mayo beautifully while providing a nutritious base.
Step 5: Top & Bake
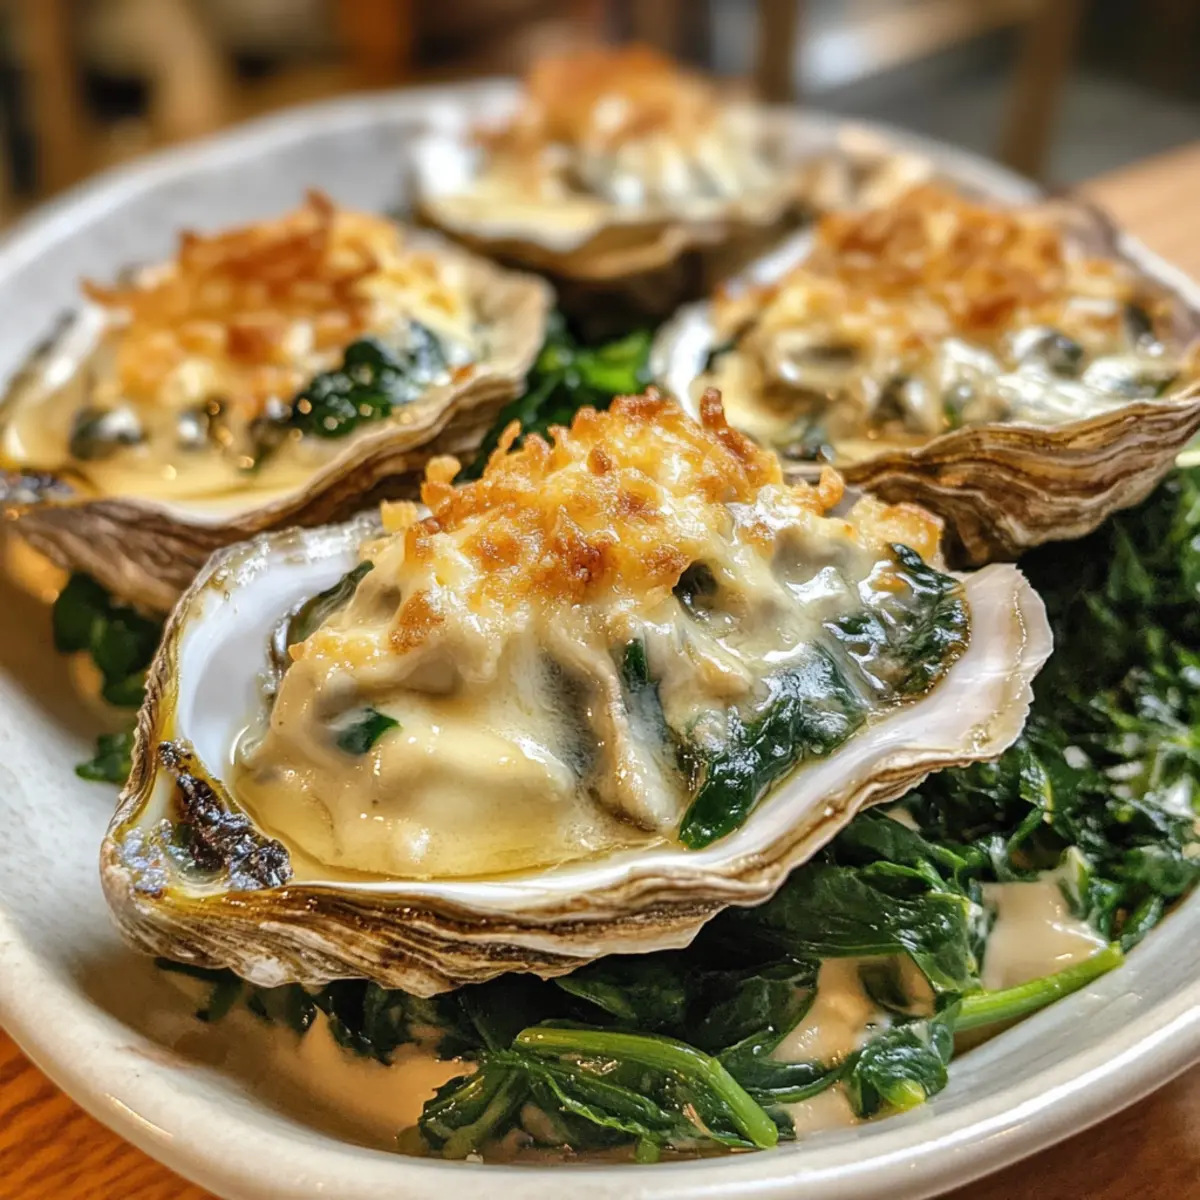
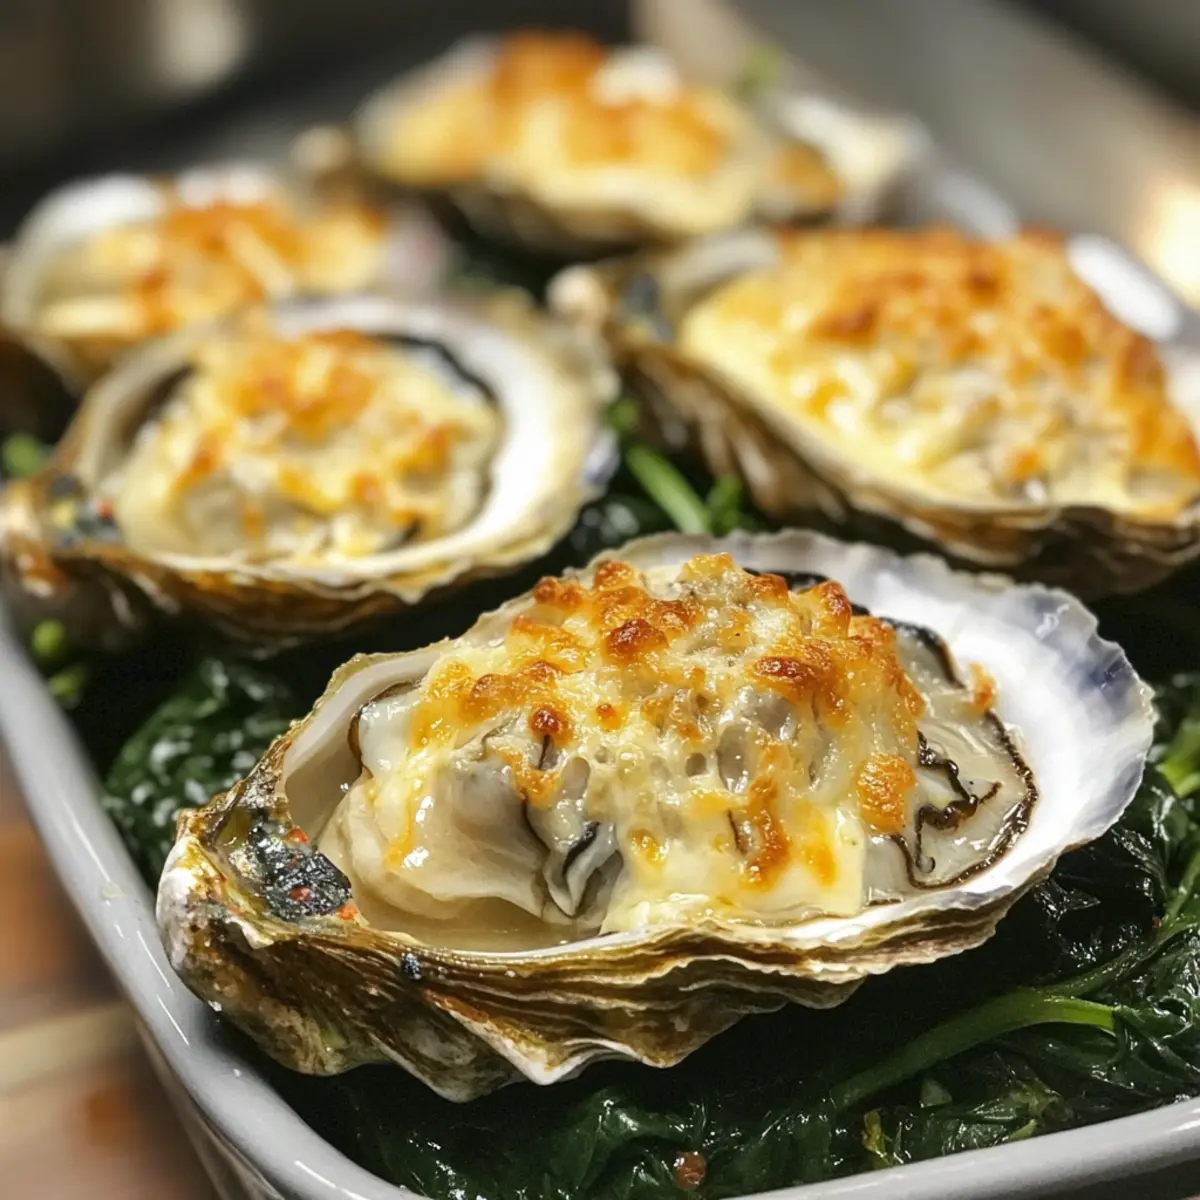
Spoon the homemade miso mayonnaise generously over each oyster, ensuring they’re well-coated. For an extra touch, sprinkle ½ cup of shredded cheese (like cheddar or mozzarella) over the top. Slide the baking sheet into the preheated oven and broil for 5 to 8 minutes, watching closely until the cheese is bubbly and golden brown.
Step 6: Cool & Serve
Once done, carefully remove the Miso Baked Oysters from the oven and allow them to cool for about 5 minutes. This cooling period helps settle the flavors and prevents burns. If desired, garnish with extra lemon wedges, fresh parsley, or a dash of paprika before serving. Enjoy this delectable appetizer warm and fresh!
Expert Tips for Miso Baked Oysters
Watch That Broil: Keep a close eye on your oysters while broiling, as they can burn quickly—just a minute too long can ruin that beautiful topping!
Choose Your Miso Wisely: Using light miso yields a milder flavor, while dark miso intensifies the umami. Select based on your taste preference for these Miso Baked Oysters!
Prep Oysters Properly: If your oysters are large, cut them in half for easier consumption. This will also allow the flavors to meld beautifully in each bite.
Spinach Matters: Fresh spinach not only adds nutrition but also moisture; avoid frozen spinach as it can become watery and dilute the flavors.
Cool Before Serving: Allow your baked oysters to cool for about 5 minutes after broiling. This ensures you enjoy the rich flavors without the risk of burning your mouth!
Storage Tips for Miso Baked Oysters
Room Temperature: Miso Baked Oysters are best enjoyed immediately after baking. If left out, consume within 2 hours for optimal freshness and safety.
Fridge: Store any leftover baked oysters in an airtight container in the refrigerator for up to 3 days. Place a piece of parchment paper between layers to maintain texture.
Freezer: For longer storage, freeze unbaked oyster preparations in airtight containers. They can be stored for up to 3 months. Thaw in the fridge before baking.
Reheating: To reheat, place leftovers in the oven at 350°F (175°C) for about 10 minutes, until heated through. Avoid microwave reheating to preserve the texture of the Miso Baked Oysters.
Make Ahead Options
These Miso Baked Oysters are ideal for meal prep, saving you time on busy weeknights! To prep ahead, you can mix the miso mayonnaise sauce (up to 24 hours) in advance and refrigerate it in an airtight container. Additionally, you can layer the shredded spinach and place the oysters in the shells or ramekins and store them in the fridge for up to 3 days. When you’re ready to enjoy, simply add the chilled miso mayo and cheese topping just before baking, then broil for 5-8 minutes until bubbly. This ensures your Miso Baked Oysters remain just as delicious with minimal effort, perfect for impressing guests or a cozy dinner at home!
What to Serve with Miso Baked Oysters: A Quick and Easy West Coast Appetizer
Enhance your dining experience with delicious pairings that complement the rich, savory flavors of these delectable baked oysters.
Crusty Baguette: The perfect vessel for soaking up the rich juices from the oysters, adding a satisfying crunch to each bite.
Crispy Green Salad: A mix of fresh greens, lightly dressed, adds a refreshing contrast to the creamy richness of the oysters, balancing the meal beautifully.
Garlic Butter Asparagus: Tender asparagus with a hint of garlic elevates your plate, providing a delightful crunch and a vibrant splash of green.
Savory Rice Pilaf: The subtle flavors of fluffy rice pilaf can soak up the oysters’ juices, creating a comforting and filling addition to the meal.
Szechuan Noodles: For a fun twist, serve with spicy Szechuan noodles, providing a delightful contrast between the creamy oysters and bold noodle dish.
Chardonnay: A chilled glass of this wine harmonizes beautifully, with its buttery notes enhancing the umami flavors of the miso without overwhelming the palate.
Lemon Sorbet: This refreshing dessert is ideal for cleansing the palate after the rich oysters, leaving a light and zesty finish that lingers.
Miso Soup: A warm bowl of miso soup as a starter not only complements the oysters but also embraces the Japanese theme, inviting warmth and comfort to your meal.
Miso Baked Oysters Variations & Substitutions
Feel free to take these Miso Baked Oysters to new flavor heights and personalize them to your heart’s delight!
Dairy-Free: Substitute cheese with vegan cheese or simply skip it for a lighter version.
Gluten-Free: Ensure your miso paste and sauces are labeled gluten-free to delight everyone at your table.
Cheese Twist: Experiment with other cheeses, such as smoked Gouda or creamy goat cheese, to create an enticing flavor profile.
Spicy Kick: Add extra hot sauce or sprinkle red pepper flakes on top before baking for a fiery twist that packs a punch.
Add Crunch: Top with panko breadcrumbs mixed with a drizzle of olive oil before broiling to create a lovely crunchy texture that’s simply irresistible.
Herbaceous Blend: Incorporate freshly chopped herbs such as basil or cilantro into the miso mayo for a refreshing herbal flavor.
Umami Boost: Mix in a dash of soy sauce or Worcestershire sauce to the miso mayo for an extra umami kick, perfect for die-hard flavor enthusiasts.
These versatile variations will let you play with the classic recipe, just like how I love to enhance the flavors in my comforting Apple Cinnamon Cobbler. Enjoy your culinary adventure!

Miso Baked Oysters Recipe FAQs
How do I choose the best oysters for baking?
Absolutely! When selecting oysters, look for ones that are fresh and tightly closed. A slightly opened shell might indicate that the oyster is dead, so you should discard it. The oysters should have a clean, briny smell, reminiscent of the ocean, and they should feel heavy for their size. Generally, aim for medium to large-sized oysters to ensure a nice meatiness.
Advertisement
How should I store leftover Miso Baked Oysters?
Very good question! Leftover Miso Baked Oysters can be stored in an airtight container in the refrigerator for up to 3 days. It’s best to eat them fresh, but if you have some left, consider placing parchment paper between layers to help maintain their texture while storing. Just make sure you reheat them gently to enjoy the delicious flavors again!
Can I freeze Miso Baked Oysters?
Certainly! If you want to freeze them, it’s best to freeze the unbaked oyster preparations. Place the layered contents in an airtight container and they can last up to 3 months in the freezer. When you’re ready to enjoy them, thaw the container in the fridge overnight and bake as directed. This way, you’ll keep all the wonderful flavors intact!
What should I do if my Miso Baked Oysters turn out rubbery?
If your oysters are rubbery, it might be that they were overcooked. Oysters are delicate and can become tough with excessive heat. To ensure they turn out perfect, keep a close eye while broiling—aim for just 5 to 8 minutes until they’re bubbling and lightly browned. If you’re working with larger oysters, consider cutting them in half for even cooking.
Are Miso Baked Oysters safe for those with shellfish allergies?
No! It’s important to note that Miso Baked Oysters are not safe for anyone with shellfish allergies, as they contain oysters, which are a common allergen. If you’re entertaining guests, always check dietary restrictions beforehand and consider offering a different appetizer option that’s suitable for all. Your friends will appreciate your thoughtfulness!
Can I make Miso Baked Oysters dairy-free?
Absolutely! For a dairy-free version of Miso Baked Oysters, simply skip the cheese topping altogether or replace it with a plant-based cheese that melts well. You can also enhance the flavors with a sprinkling of nutritional yeast for a cheesy flavor without dairy. Enjoy personalizing your dish!
Miso Baked Oysters: A Quick and Easy West Coast Delight
Ingredients
Equipment
Method
- Preheat your oven's broiler or BBQ grill to high (around 425°F / 220°C).
- Arrange your shucked oyster shells or ramekins on a baking sheet, using rock salt for added stability.
- In a mixing bowl, combine Japanese mayonnaise, miso paste, mirin, hot sauce, and fresh lemon juice. Mix until creamy.
- Spread shredded spinach in the oyster shells, then place the oysters on top.
- Spoon miso mayonnaise over each oyster and sprinkle with cheese if desired. Broil for 5 to 8 minutes until bubbly.
- Allow to cool for about 5 minutes before serving. Garnish with lemon wedges, parsley, or paprika if desired.