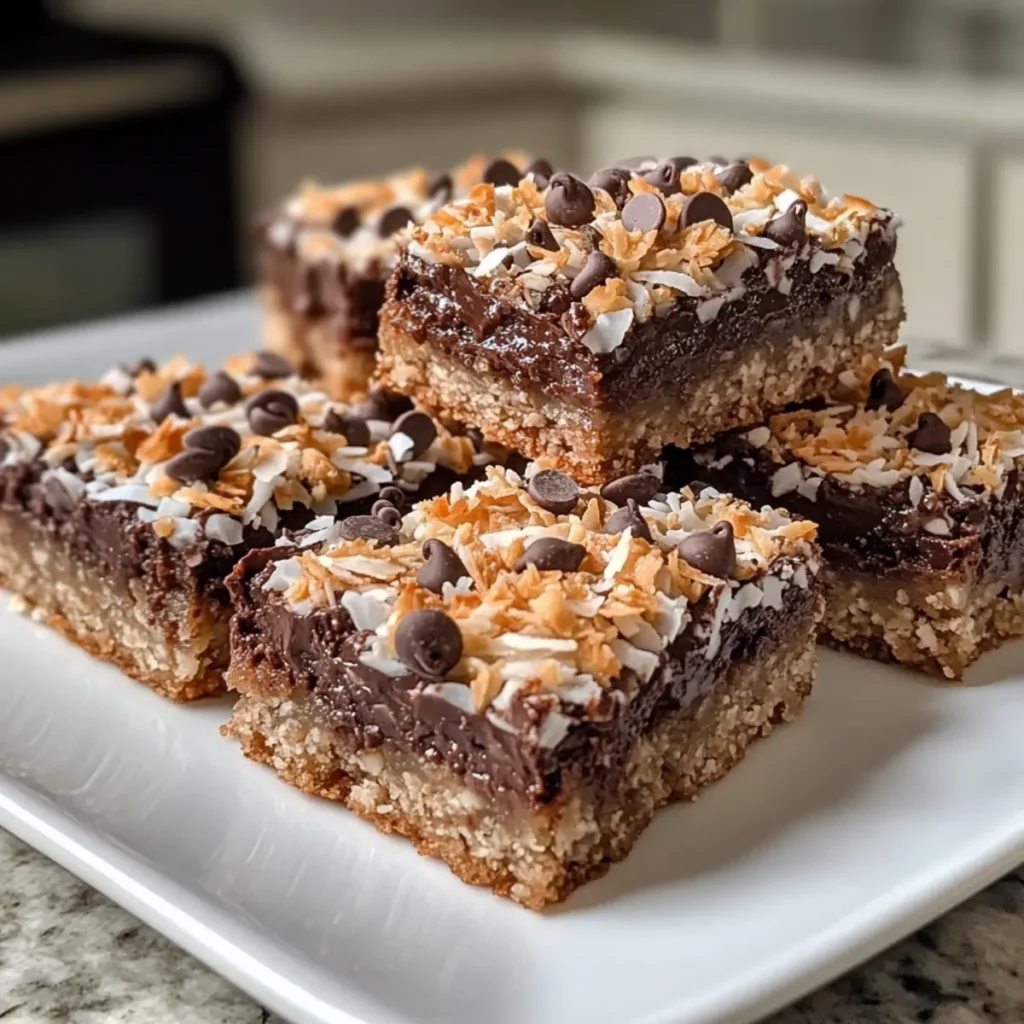
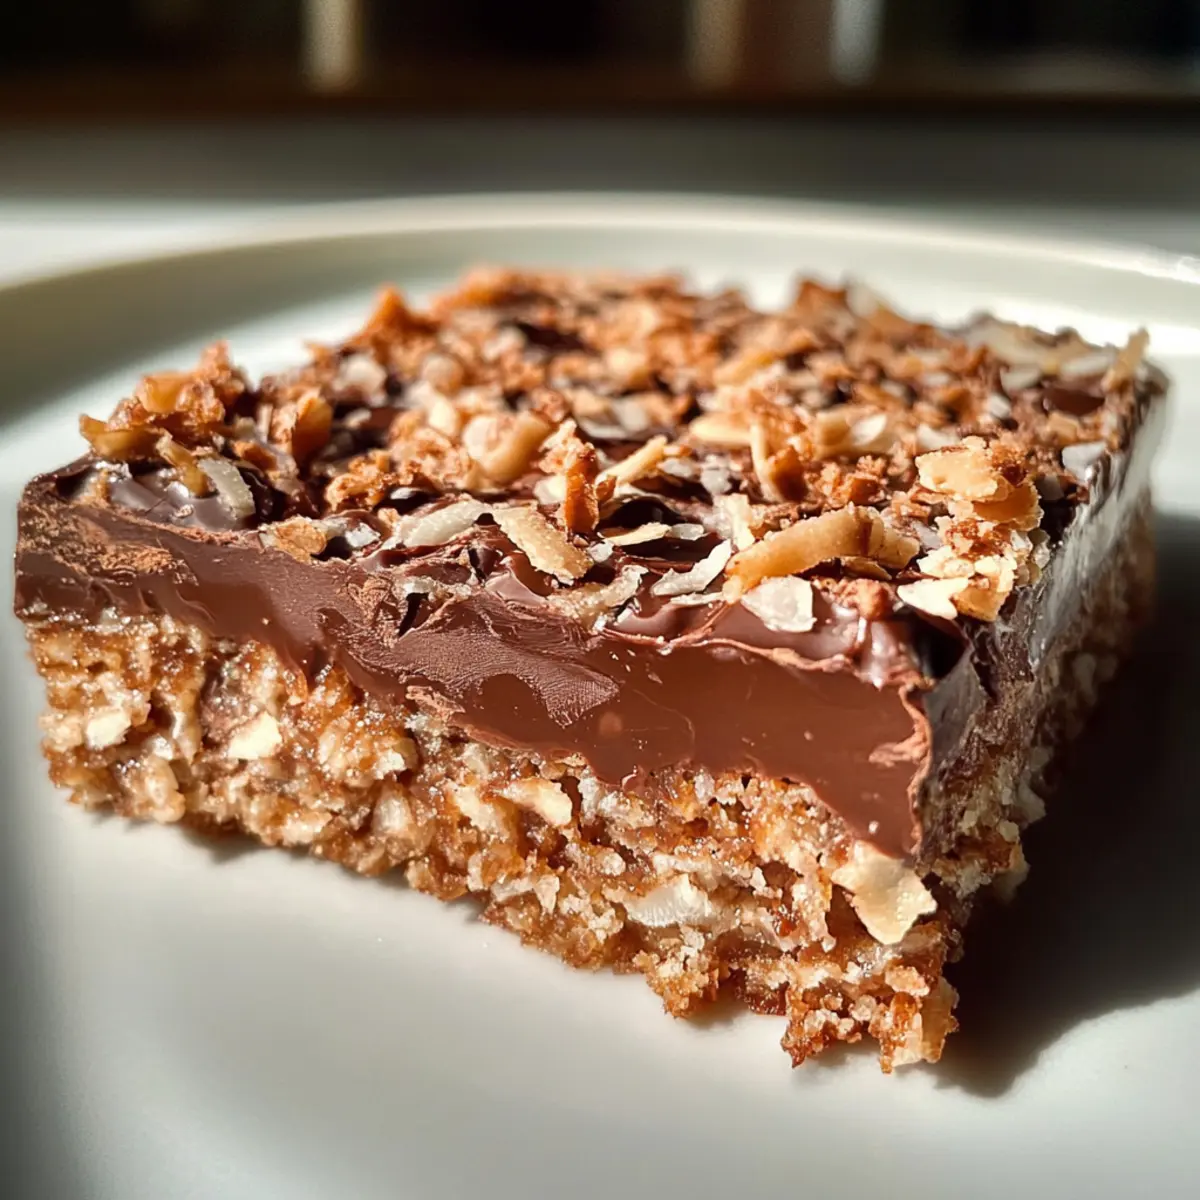
As I stood in my kitchen, the aroma of coconut and chocolate wafted in the air, instantly transporting me to a sun-kissed beach with every indulgent bite. These Vegan Magic Bars are a game-changer for anyone craving a quick and easy dessert that doesn’t sacrifice taste. With just 10 simple ingredients, you can whip up these delightful treats in less than 30 minutes. Not only are they gluten-free, but they also blend the rich flavors of molasses, walnuts, and chocolate chips into a chewy, irresistible base, perfect for sharing—or savoring all by yourself. Whether it’s a cozy night in or a gathering with friends, these bars will have everyone reaching for seconds. Curious how to make your own little piece of magic? Let’s dive into the recipe!
Why Are Vegan Magic Bars So Irresistible?
Quick and Easy: With only 10 ingredients, these bars come together in under 30 minutes, making them perfect for a last-minute treat.
Decadent Flavors: The delightful combination of chocolate, coconut, and molasses creates a gourmet experience right at home.
Tailored for Everyone: Whether you’re vegan, gluten-free, or just seeking a healthier dessert, these bars cater to various dietary needs.
Crowd-Pleaser: At parties or gatherings, these magic bars disappear fast, earning rave reviews from friends and family.
Versatile Options: Feel free to swap in your favorite nuts or dried fruits for a personalized twist, just like in Cookie Cheesecake Bars.
Indulge in a snack that satisfies sweet cravings without the guilt!
Magic Bars Ingredients
• Whip up your own vegan magic bars with these simple ingredients!
For the Base
• Rolled Oats – The chewy foundation of the bars; choose gluten-free oats for a gluten-free version.
• Walnuts – Contributes moisture and healthy fats; can be easily replaced with pepitas or sunflower seeds for a nut-free option.
• Coconut Milk – Acts as the creamy fat source, keeping the texture soft and chewy.
• Molasses – Adds depth of flavor; it’s crucial for that rich, buttery taste.
• Coconut Sugar – A natural sweetener that works well; can swap with brown sugar or other granulated sugars in equal measure.
• Cinnamon – Provides a warm spice note, enhancing sweetness without adding extra sugar.
For the Toppings
• Coconut Flakes – Adds a crunchy texture and tropical vibe; feel free to use sweetened or unsweetened based on your taste.
• Chocolate Chips – Introduces a rich chocolatey flavor; consider dark chocolate for added intensity or dairy-free options.
With just these ingredients, your magic bars will be a deliciously guilt-free indulgence that everyone will love!
Step‑by‑Step Instructions for Vegan Magic Bars
Step 1: Preheat the Oven
Begin by preheating your oven to 350°F (175°C). This step is crucial as it ensures that the Vegan Magic Bars bake evenly. While the oven warms up, prepare your baking pan by lining it with parchment paper, leaving some overhang for easy removal later.
Step 2: Mix the Base Ingredients
In a large mixing bowl, combine rolled oats, chopped walnuts, coconut milk, molasses, coconut sugar, and cinnamon. Stir the mixture well until all ingredients are fully incorporated, creating a cohesive, sticky base. You’ll want it to have a thick, dough-like consistency that holds together but isn’t too runny.
Step 3: Form the Base Layer
Transfer the oat mixture into your prepared baking pan. Use a spatula or your hands to press it firmly and evenly into the bottom of the pan, ensuring a smooth and compact layer. This will serve as the foundation for your Vegan Magic Bars, so make sure it’s well-distributed and packed tightly.
Step 4: Add the Toppings
Sprinkle a generous layer of coconut flakes and chocolate chips evenly over the pressed base. Make sure to cover the entire surface for that delicious, indulgent flavor in every bite. Lightly press the toppings into the mixture to help them adhere during baking, ensuring they don’t just sit on top.
Step 5: Bake to Perfection
Place the pan in the preheated oven and bake for 25 minutes. Keep an eye on the edges; they should turn a lovely golden brown when the bars are ready. This will create a delightful contrast with the chewy base and crispy toppings, giving your Vegan Magic Bars the perfect texture.
Step 6: Cool and Slice
Once baked, remove the pan from the oven and allow the Vegan Magic Bars to cool completely in the pan. This cooling period is essential, as it helps the bars set and makes them easier to slice without crumbling. Let them rest for at least 30 minutes before cutting into squares or bars.
What to Serve with Vegan Magic Bars
Indulge in these sweet treats with delightful accompaniments that elevate your experience to pure bliss.
- Vegan Ice Cream: A scoop of creamy vegan ice cream pairs perfectly, adding a cool contrast to the chewy bars.
- Fresh Berries: Juicy strawberries or raspberries bring a refreshing tartness, balancing the sweetness of the magic bars.
- Nutty Granola: Crumble some nutty granola over the bars for a crunchy texture that enhances the overall flavor and satisfaction.
- Chia Seed Pudding: This creamy, nutritious pudding brings a whimsical touch, making it a delightful side that is both decadent and healthy.
- Herbal Tea: A warm cup of chamomile or peppermint tea complements the rich chocolate, creating a soothing duet for your taste buds.
- Coconut Whipped Cream: Top with velvety coconut whipped cream for an even more indulgent treat, echoing the bars’ coconut flavor.
- Chocolate Drizzle: A drizzle of dark chocolate sauce adds an extra layer of richness, making each bite even more irresistible.
- Citrus Sorbet: A refreshing citrus sorbet cleanses the palate between bites, lifting you with its bright, zesty notes.
How to Store and Freeze Vegan Magic Bars
Room Temperature: Store your Vegan Magic Bars in an airtight container at room temperature for up to 5 days for optimal freshness.
Fridge: Place the bars in the refrigerator to extend their shelf life to up to 2 weeks. Ensure they’re in an airtight container to prevent moisture absorption.
Freezer: For longer storage, wrap individual bars in plastic wrap and then in foil, or place them in a freezer-safe bag. They can be frozen for up to 3 months, maintaining their delicious taste.
Reheating: When ready to enjoy, thaw in the fridge overnight or for a quick option, microwave for 10-15 seconds until slightly warm, enhancing their chewy texture!
Magic Bars Variations & Substitutions
Customize these magic bars to perfectly suit your taste buds and dietary needs!
- Nut-Free: Replace walnuts with pepitas or sunflower seeds for a delicious nut-free option that still packs a flavor punch.
- Fruity Twist: Swap chocolate chips for dried fruits like cranberries or raisins; their natural sweetness gives a lovely contrast to the chewy base.
- Plant-Based Milk: Use almond milk or any preferred plant-based milk in place of coconut milk for unique flavor profiles—imagine hints of vanilla with almond milk!
- Sweetener Swap: If you’d like a different sweetness, coconut sugar can be substituted with brown sugar or agave, maintaining that deliciously rich taste.
- Extra Crunch: For some added texture, sprinkle in some chopped pecans or crispy rice cereal before baking, creating a delightful crunch throughout.
- Spicy Kick: Add a pinch of cayenne or crushed red pepper flakes for a surprising heat that complements the sweet flavors beautifully.
- Coconut Lovers: Feel free to add extra coconut flakes—more means more of that irresistible tropical vibe, reminiscent of sandy beach vacations.
- Decadent Drizzle: Once cooled, drizzle with melted dark chocolate for an extra indulgent touch that takes these magic bars to the next level! You might also love to pair them with some Apple Cheesecake Bars for an irresistible dessert spread.
Each variation adds its unique twist, so don’t hesitate to mix and match until you find your perfect magic combo!
Expert Tips for Vegan Magic Bars
- Cooling Time: Allow the bars to cool completely before slicing; this reduces crumbling and ensures a neat cut for perfect presentation.
- Ingredient Quality: Use high-quality ingredients for the best flavor; organic coconut milk and dark chocolate can elevate your magic bars significantly.
- Avoid Overbaking: Keep a close eye on the bars as they bake; overbaking can lead to a dry texture, while just enough time gives them that chewy goodness.
- Compact Base: Press the base mixture firmly into the pan; a well-packed foundation helps the bars hold together better after baking, preventing them from falling apart.
- Toppings Balance: Stick to the recommended amounts of coconut flakes and chocolate chips; too many can compromise the structure of your magic bars.
Make Ahead Options
These Vegan Magic Bars are perfect for meal prep enthusiasts who want to save time during busy weeknights! You can prepare the base mixture up to 24 hours in advance by following the first three steps—mixing the ingredients and pressing the base into your lined baking pan. Cover it tightly with plastic wrap and refrigerate to keep it fresh. When you’re ready to enjoy these delicious bars, simply sprinkle the toppings on top and bake as directed. For the best quality, allow the bars to cool completely before slicing to prevent crumbling. By prepping ahead, you’ll have a delightful treat ready with minimal effort!
Vegan Magic Bars Recipe FAQs
What ingredients should I use for the best flavor?
Absolutely! For the best flavor in your Vegan Magic Bars, opt for high-quality ingredients. Use organic coconut milk and high-quality dark chocolate chips. These small changes can make a noticeable difference, enhancing the overall taste and richness of your bars. Remember, the fresher the ingredients, the better the end result!
How do I know when the bars are fully baked?
Very good question! To check if your Vegan Magic Bars are fully baked, look for the edges to turn a lovely golden brown. This usually takes about 25 minutes at 350°F (175°C). If you gently press the center, it should feel slightly firm but still soft—if it feels too mushy, give it an extra couple of minutes, but keep a close eye to avoid overbaking.
Advertisement
Can I store Vegan Magic Bars in the fridge? How long will they last?
Yes, you can! Storing your Vegan Magic Bars in the fridge is a great way to extend their shelf life. Just make sure to place them in an airtight container, and they will stay fresh for up to 2 weeks. Personally, I find they taste best chilled, giving them a lovely chewy texture!
How should I freeze Vegan Magic Bars?
Absolutely! Freezing is super easy. To freeze your Vegan Magic Bars, wrap each bar individually in plastic wrap and then in foil to protect against freezer burn. You can also place them in a freezer-safe bag. They will maintain their delicious taste for up to 3 months. When you’re ready to enjoy, just thaw them in the fridge overnight, or for a quick option, pop them in the microwave for 10-15 seconds until slightly warm.
What could cause my bars to crumble?
A common issue! If your Vegan Magic Bars are crumbling, it might be due to insufficient cooling time. Make sure to let them cool completely in the pan before slicing. Additionally, ensure that you’ve packed the base mixture tightly enough before baking, as a loose base can lead to crumbling. Lastly, avoid adding too many toppings, as this can also compromise the structure.
Are there any allergy considerations with these bars?
Definitely! If you’re making these Vegan Magic Bars for someone with allergies, remember that walnuts can be substituted with pepitas or sunflower seeds for a nut-free version. Additionally, always check the ingredient labels for gluten-free oats and dairy-free chocolate chips to ensure they meet dietary restrictions. Enjoy customizing them for your friends and family!
Magical Vegan Bars That Satisfy Sweet Cravings Guilt-Free
Ingredients
Equipment
Method
- Preheat your oven to 350°F (175°C) and prepare your baking pan by lining it with parchment paper.
- In a large mixing bowl, combine rolled oats, chopped walnuts, coconut milk, molasses, coconut sugar, and cinnamon. Stir until fully incorporated.
- Transfer the oat mixture into the baking pan, pressing it firmly and evenly into the bottom.
- Sprinkle coconut flakes and chocolate chips over the pressed base, ensuring coverage.
- Bake in the preheated oven for 25 minutes until the edges are golden brown.
- Allow the bars to cool completely in the pan for at least 30 minutes before slicing.