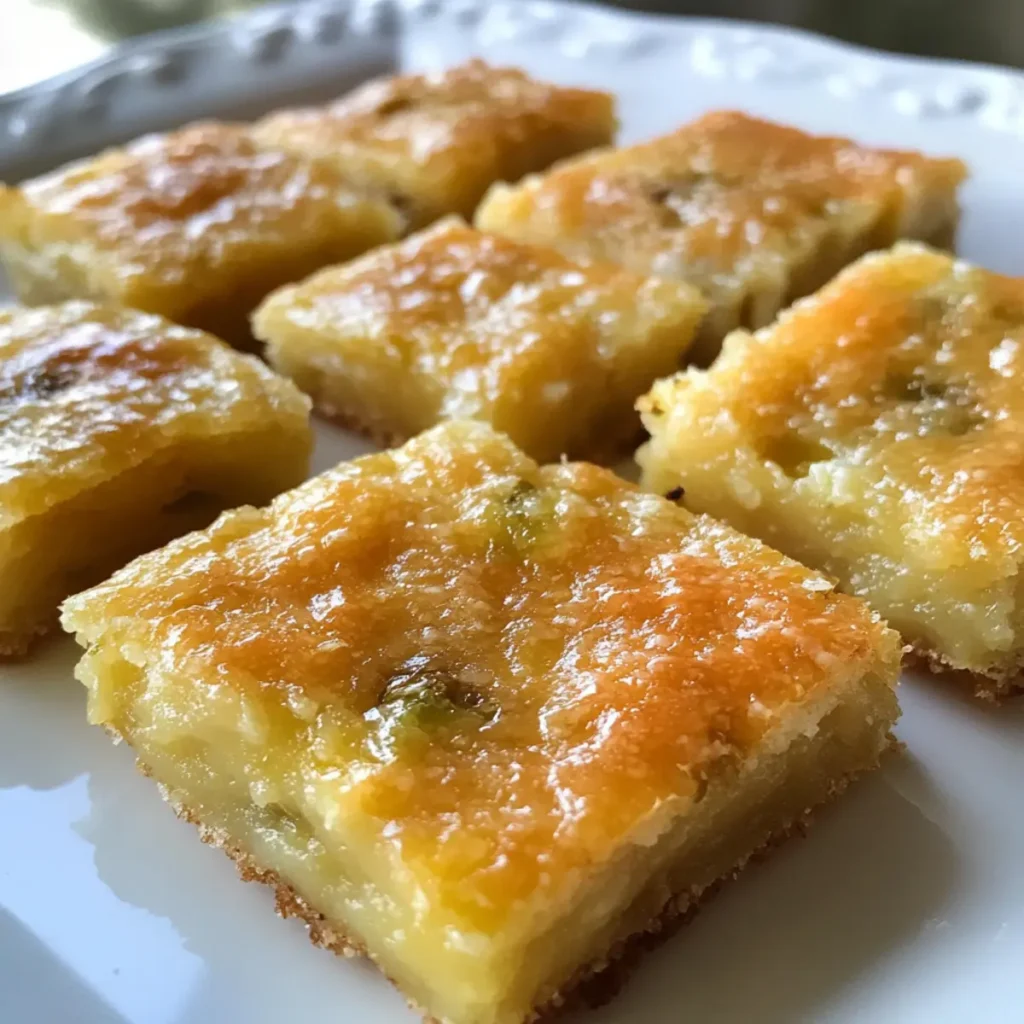
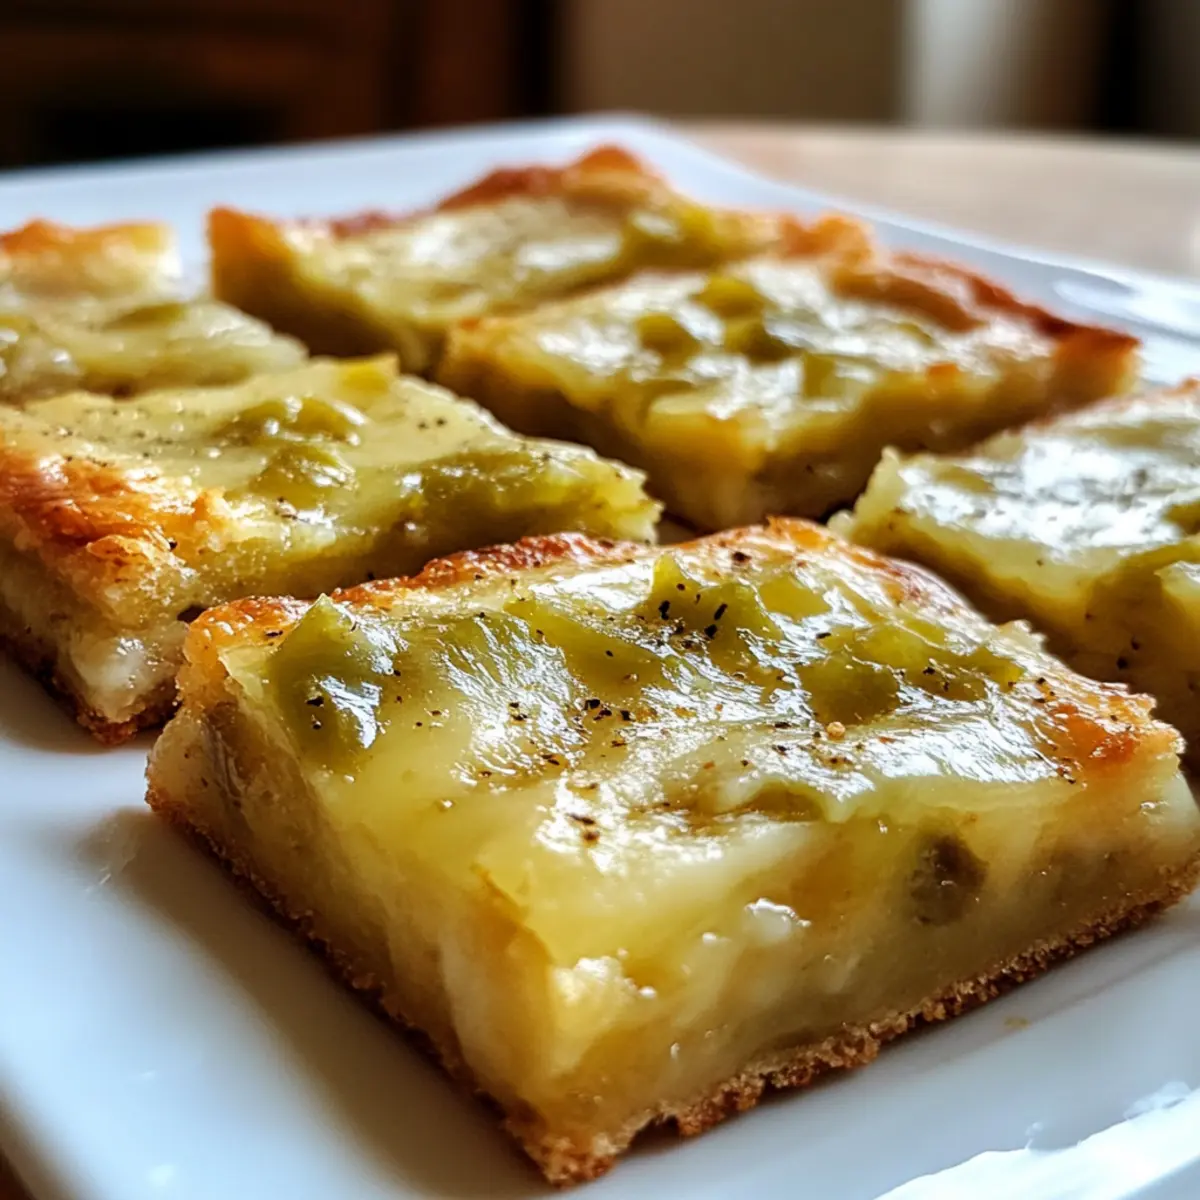
The other day, as I sifted through my pantry, I stumbled upon a can of diced green chiles and an abundance of cheese—an invitation for a culinary adventure. That’s when I knew it was time to whip up my beloved Green Chile Cheese Squares, a comfort food that never fails to impress. These squares are not just easy to make; they’re also versatile, making them perfect for brunch or as a crowd-pleasing snack. With a gooey texture and just the right kick from the chiles, every bite is a warm hug on a plate. Plus, they can easily accommodate a gluten-free diet, so everyone can join in the fun! Are you ready to uncover the secret to these irresistible cheese squares that will steal the show at your next gathering?
Why Are Green Chile Cheese Squares a Must-Try?
Irresistible Comfort: These squares bring together everything you love about comfort food—melted cheese and zesty chiles in every gooey bite.
Easy Preparation: With simple ingredients and straightforward instructions, you can whip these up without breaking a sweat, leaving you more time to enjoy.
Versatile Variations: Feel free to play with the recipe; add jalapeños for a spicy kick or incorporate fresh herbs for a burst of flavor.
Perfect for Any Occasion: Whether it’s a cozy brunch, game day, or a festive gathering, these cheese squares are sure to be a hit with family and friends!
Gluten-Free Friendly: With just a few tweaks, you can easily make these squares gluten-free, ensuring everyone can indulge without worry.
Get ready to impress with these delightful snacks that will leave everyone asking for the recipe!
Green Chile Cheese Squares Ingredients
• Discover the essential components for mouthwatering Green Chile Cheese Squares!
For the Batter
- Large Eggs – Provide structure and richness; flax eggs work for a vegan option.
- Shredded Monterey Jack Cheese – Adds creaminess and melts beautifully; use Pepper Jack for extra spice.
- Shredded Sharp Cheddar Cheese – Gives a robust flavor; mild cheddar can be used for a subtler taste.
- All-Purpose Flour – Creates a firm base for the squares; swap for whole wheat or a gluten-free blend as needed.
- Baking Powder – Ensures the squares rise perfectly; check freshness for best results.
- Salt – Amplifies flavor; reduce if using salted butter.
- Unsalted Butter (melted) – Adds rich flavor; oils can replace for a dairy-free alternative.
- Milk (2% or whole) – Contributes moisture; any non-dairy milk works for lactose-free options.
- Diced Green Chiles (drained) – Infuses mild heat and flavor; fresh roasted chiles enhance the taste, or use diced poblanos for a twist.
These ingredients are your ticket to creating delicious Green Chile Cheese Squares that everyone will love! Enjoy your cooking adventure!
Step‑by‑Step Instructions for Green Chile Cheese Squares
Step 1: Preheat the Oven
Start by preheating your oven to 350°F (175°C). While that’s warming up, take a moment to grease a 9×13-inch casserole dish thoroughly. This will ensure your Green Chile Cheese Squares don’t stick and help achieve that lovely golden-brown finish you desire.
Step 2: Whisk the Eggs
In a large mixing bowl, crack open your large eggs and whisk them together until they are light and frothy, about 2-3 minutes. This aeration will provide structure and lift to your squares, creating a delightful texture. Once ready, set the bowl aside to move on to the next step.
Step 3: Add the Cheeses
Now, stir in your shredded Monterey Jack and sharp cheddar cheese into the egg mixture. Ensure the cheeses are evenly distributed throughout the eggs, as this will give every bite of your Green Chile Cheese Squares that ooey-gooey goodness. Set this cheesy mixture aside for now.
Step 4: Combine Dry Ingredients
In a separate bowl, combine the all-purpose flour, baking powder, and salt. Whisk these ingredients together until they are well mixed, which will help ensure that your Green Chile Cheese Squares rise beautifully during baking. Once combined, gently fold this mixture into the egg-cheese mixture, retaining as much air as possible.
Step 5: Mix in Butter and Milk
Next, pour in the melted unsalted butter and milk into your combined batter. Blend these ingredients until everything is smooth and well incorporated. This is what makes your mixture luscious, so take your time and enjoy the gooey texture that’s forming.
Step 6: Fold in the Green Chiles
Now it’s time to add those luscious diced green chiles into the batter. Gently fold them in with a spatula, ensuring they’re evenly distributed throughout the mixture. These green chiles will add a burst of flavor and a touch of heat to your Green Chile Cheese Squares.
Step 7: Spread the Batter
Pour the batter into your prepared casserole dish and use a spatula to spread it out evenly. Make sure the top is smooth and level; this helps it cook evenly. Watch for drips and spills on the dish’s edges, which can lead to unwanted sticking.
Step 8: Bake to Perfection
Place the dish in your preheated oven and bake for 35 to 45 minutes. Keep an eye on it and look for a golden brown top and a toothpick inserted in the center to come out clean. This visual cue will indicate that your Green Chile Cheese Squares are ready to be taken out!
Step 9: Cool and Slice
Once baked, remove the squares from the oven and allow them to cool slightly in the dish for about 10 minutes. This cooling time helps them set up, making it easier to cut them into squares. Use a sharp knife to slice them while they are still warm, enhancing the experience when serving.
Make Ahead Options
These Green Chile Cheese Squares are perfect for meal prep, allowing you to enjoy homemade comfort food even on your busiest days! You can prepare the batter up to 24 hours in advance; simply mix all the ingredients and refrigerate it in an airtight container. To keep the flavors fresh, cover the batter tightly to prevent it from drying out. When you’re ready to bake, pour the chilled mixture into the prepared dish and bake as directed. Additionally, you can also bake the squares ahead of time, allowing them to cool completely before cutting them into squares and storing them in the fridge for up to 3 days. Just reheat in the oven or microwave before serving, and you’ll have delicious, warm Green Chile Cheese Squares ready to go!
What to Serve with Green Chile Cheese Squares
Pair your delightful squares with fresh and complementary sides that enhance their cheesy goodness.
-
Fresh Garden Salad: A crisp salad with mixed greens and a tangy vinaigrette balances the richness of the cheese squares, adding a refreshing crunch.
-
Guacamole and Tortilla Chips: Creamy guacamole paired with crunchy tortilla chips perfects the snacking experience, bringing delightful flavors and textures together.
-
Spanish Rice: This savory side adds a hearty foundation with its robust flavors, making each bite satisfying and filling alongside the squares.
-
Salsa: A zesty salsa can elevate your cheese squares with its bright flavors and a touch of spice, making each bite bursting with taste.
-
Creamy Coleslaw: The coolness of coleslaw contrasts beautifully with the warm cheese squares, adding a crunchy texture that complements every mouthful.
-
Pineapple Iced Tea: A refreshing drink such as pineapple iced tea pairs wonderfully, offering sweetness that cuts through the savory flavors while quenching your thirst.
Elevate your meal by mixing and matching these options to create a satisfying and memorable dining experience!
Expert Tips for Green Chile Cheese Squares
-
Whisk Wisely: Whisk the eggs until they’re pale and frothy. This aeration gives your Green Chile Cheese Squares a light, fluffy texture.
-
Avoid Overbaking: To prevent drying out, check for doneness around the 35-minute mark. Cover with foil if edges brown too quickly.
-
Layer Safely: If you have leftovers, stack the squares with parchment paper between layers in an airtight container to keep them fresh.
-
Experiment with Add-ins: Feel free to customize your squares! Add minced jalapeños for heat or cooked bacon for a savory twist while still maintaining the recipe’s essence.
-
Serving Temperature: These squares taste best warm, so serve them right out of the oven for the ultimate indulgent experience.
Storage Tips for Green Chile Cheese Squares
-
Room Temperature: Allow the squares to cool completely, then store them in an airtight container. They can be kept at room temperature for up to 2 hours before needing refrigeration.
-
Fridge: Store your Green Chile Cheese Squares in an airtight container in the fridge for up to 3 days. Reheat in the microwave for 30 seconds, or until warm, before serving.
-
Freezer: For longer storage, freeze the squares in a single layer on a baking sheet, then transfer to an airtight container or freezer bag. They will keep well for up to 1 month.
-
Reheating: When ready to enjoy, reheat frozen squares in the oven at 350°F (175°C) for 15-20 minutes, or until heated through, to retain their delicious gooey texture.
Green Chile Cheese Squares Variations
Explore the delightful possibilities for customizing your Green Chile Cheese Squares with these fun twists! Let your creativity shine as you mix and match ingredients to suit your taste buds.
-
Extra Spicy: Add minced jalapeños or a sprinkle of cayenne pepper for an extra kick that’ll warm your palate. Don’t be afraid to test the waters and ramp up the heat!
-
Savory Addition: Mix in crispy cooked bacon or diced ham for a meat lover’s twist. The salty, savory flavor pairs perfectly with the creamy cheese and zesty chiles.
-
Herb Infusion: Incorporate fragrant herbs like fresh cilantro or chives to brighten the dish. A handful of greenery not only enhances flavor but adds a beautiful pop of color.
-
Vegetable Boost: Swap out the chiles for chopped spinach or roasted red peppers for a veggie-packed version. This twist keeps the dish light and nutritious while still delivering on taste.
-
Creamy Texture: Substitute half of the cheese mixture with cream cheese for an ultra-rich and creamy texture. This decadent change creates even more gooey goodness!
-
Gluten-Free Alternative: Use a gluten-free flour blend to keep these squares suitable for all diets, ensuring no one misses out on this comforting snack.
-
Zesty Cheese Combo: Mix in some crumbled feta or pepper jack cheese alongside your Monterey Jack and cheddar for an exciting flavor profile. This creates an inviting world of chunks and zests!
-
Tequila Infusion: For a unique twist, add a splash of tequila to the batter before baking. The alcohol will evaporate, leaving a lovely subtle complexity behind.
Feel free to explore these variations as you whip up your Green Chile Cheese Squares, and for more delicious ideas, you might enjoy my Savory Satisfying Blt or a slice of Moist Carrot Frosting. Enjoy your culinary adventure!
Green Chile Cheese Squares Recipe FAQs
What type of green chiles should I use?
Absolutely! You can use canned diced green chiles for convenience, but for a fresher taste, you can roast and chop your own. If you’re feeling adventurous, try substituting with diced poblano peppers for a flavorful twist. Just ensure that they’re well-drained if using canned to avoid excess moisture in your squares.
Advertisement
How do I store the Green Chile Cheese Squares?
For best results, allow your Green Chile Cheese Squares to cool completely, then store them in an airtight container. They can be kept in the refrigerator for up to 3 days. Alternatively, you can stack them with parchment paper between layers to prevent sticking. For longer storage, freeze them in a single layer and then transfer to a freezer-safe bag or container for up to 1 month.
Can I freeze Green Chile Cheese Squares?
Yes, indeed! To freeze, first allow your squares to cool down a bit. Then, cut them into individual squares and place them on a baking sheet in a single layer until frozen solid. Afterward, transfer them to an airtight container or a heavy-duty freezer bag. When you’re ready to enjoy, bake them straight from the freezer at 350°F (175°C) for 15-20 minutes for that fresh-out-of-the-oven texture.
What should I do if my squares are too dense?
If your Green Chile Cheese Squares turn out too dense, it might be because the eggs weren’t whisked enough or the batter was overmixed. When combining your wet and dry ingredients, be gentle and avoid overmixing; this helps to retain air in the batter for a lighter texture. Also, ensuring that your baking powder is fresh can contribute greatly to achieving that perfect rise!
Can I make Green Chile Cheese Squares gluten-free?
Yes, very! You can easily make these squares gluten-free by substituting all-purpose flour with a gluten-free blend. I often find that the 1:1 gluten-free flour options work beautifully without altering the texture too much. Just make sure to check the labels of your ingredients (like baking powder) to ensure they’re gluten-free as well.
Can my pet eat green chiles?
No, it’s important to note that while green chiles are generally safe for humans, they can be a little spicy for pets, especially dogs. It’s best to avoid giving them any flavored dishes that contain ingredients like chiles, cheese, or excessive fats, as their digestive systems may not handle these well. Always consult with your vet if you’re uncertain about sharing any food with your furry friends.

Melt-In-Your-Mouth Green Chile Cheese Squares for Comfort Snacking
Ingredients
Equipment
Method
- Preheat the oven to 350°F (175°C) and grease a 9x13-inch casserole dish.
- In a large bowl, whisk eggs until light and frothy, about 2-3 minutes.
- Stir in shredded Monterey Jack and sharp cheddar cheese into the egg mixture.
- Combine all-purpose flour, baking powder, and salt in a separate bowl; whisk until well mixed.
- Gently fold the dry ingredients into the egg-cheese mixture, retaining as much air as possible.
- Pour in melted butter and milk; blend until smooth.
- Fold in diced green chiles with a spatula.
- Pour the batter into the prepared casserole dish and spread evenly.
- Bake in the preheated oven for 35 to 45 minutes until golden brown and a toothpick inserted comes out clean.
- Allow to cool for about 10 minutes before slicing into squares.