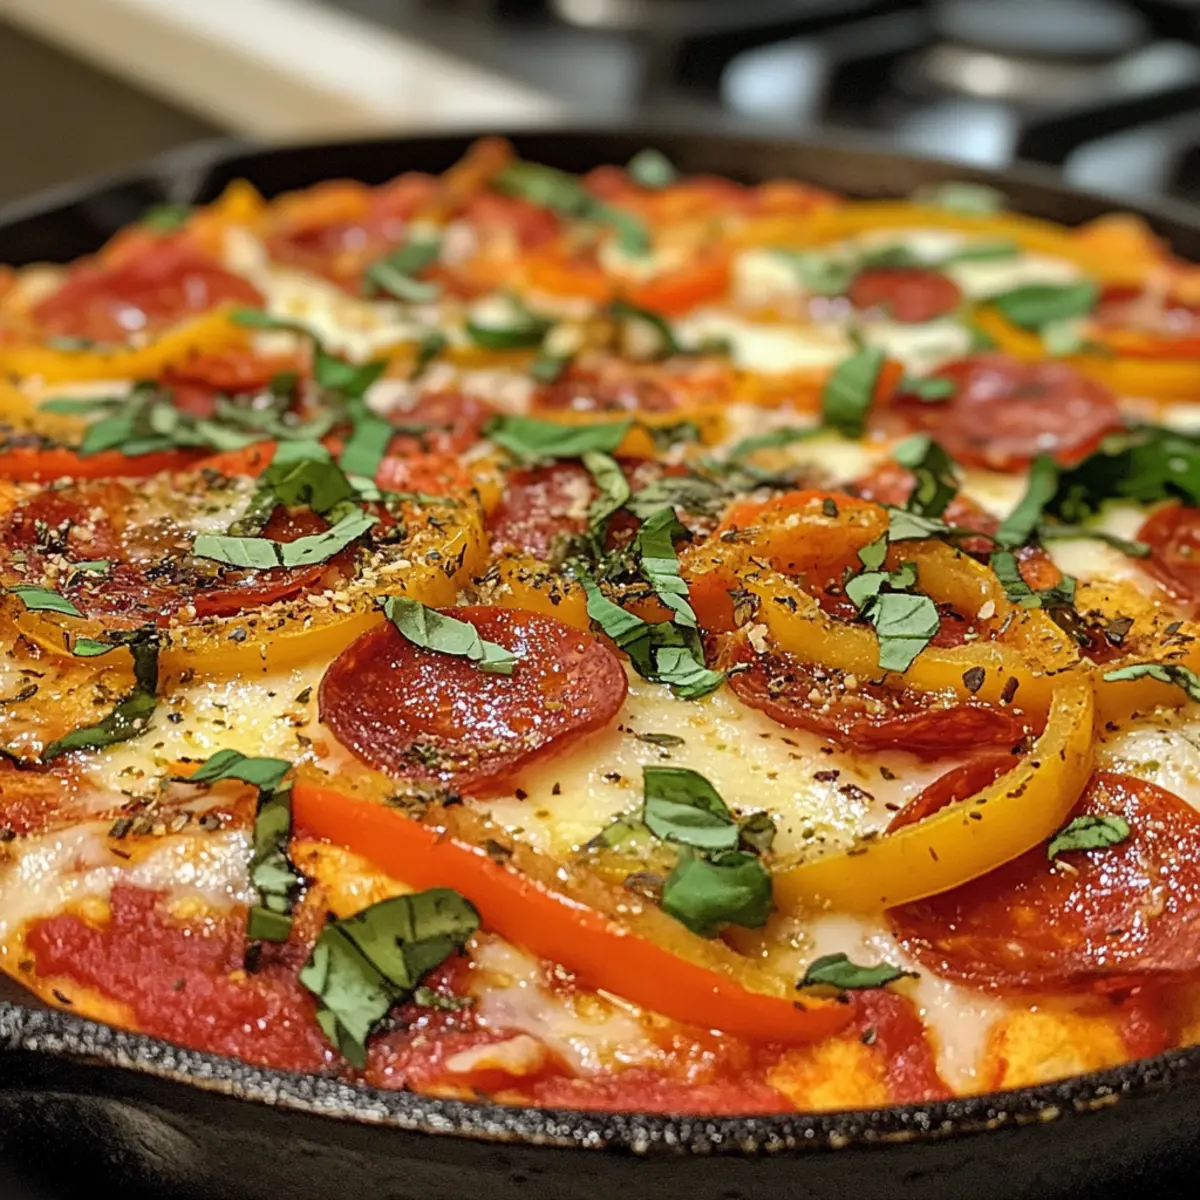
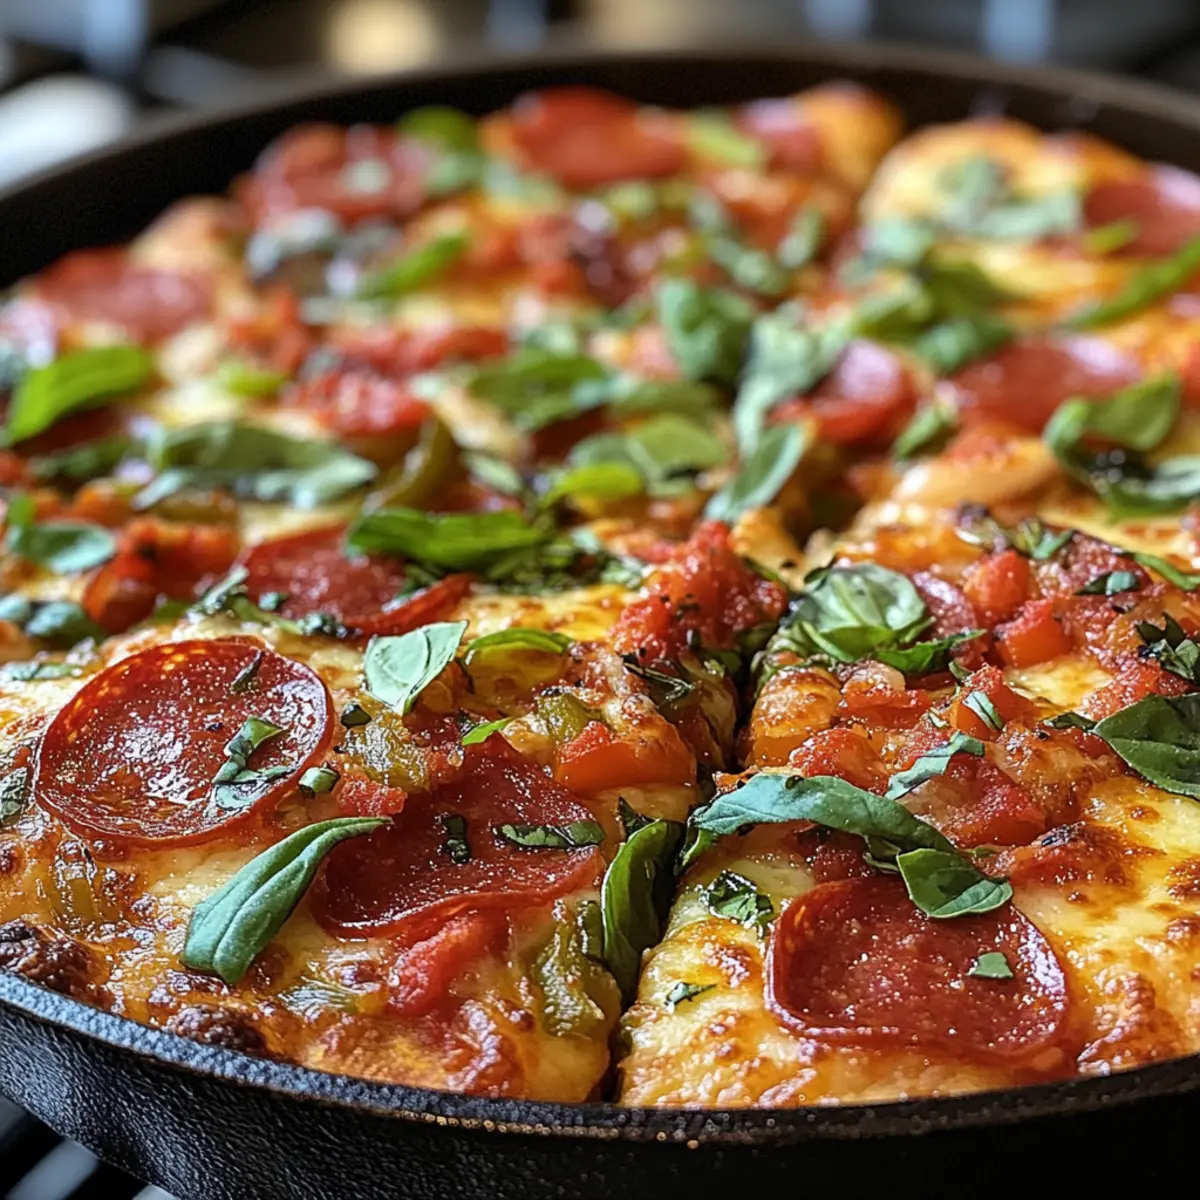
The sizzling sound of dough hitting a hot cast iron skillet is music to my ears—a sound that promises golden crust perfection. When it comes to homemade pizza, nothing compares to crafting your own Crispy Cast Iron Skillet Pizza right in your kitchen. This quick and forgiving recipe not only elevates your pizza game but also keeps those pesky takeout cravings at bay. With a delightful crunch on the outside and a chewy interior, every bite is a satisfying treat. Plus, you can personalize it with your favorite toppings, making it truly your own. Whether it’s a weeknight family dinner or an impromptu gathering with friends, this pizza is bound to impress. So, are you ready to ditch the delivery and create a masterpiece? Let’s dive into the delicious world of homemade pizza!
Why Choose Cast Iron Pizza Over Takeout?
Flaky, crispy crust: The cast iron skillet creates a perfectly crispy base that outshines any delivery pizza.
Flavorful customization: You can choose your favorite toppings and sauces, from spicy jalapeños to creamy garlic sauce, ensuring every bite is a personal delight.
Quick and easy: With minimal prep and straightforward instructions, you’ll have a delicious meal ready in no time.
Perfect for gatherings: Impress your friends with a pizza that’s perfect for sharing at game nights or casual dinners.
Health-conscious option: Skip the preservatives and excess calories of takeout—this homemade creation is as fresh as it gets! If you’re looking for more easy meal ideas, check out my One Pan Skillet or Crushed Garlic Potatoes for fantastic companions to your pizza!
Crispy Cast Iron Skillet Pizza Ingredients
For the Dough
- All-purpose flour – A solid base for your crust; try bread flour for an extra chewy bite.
- Yeast – This magical agent helps the dough rise; quick-rise yeast will speed things up.
- Warm water – Activates the yeast; just make sure it’s not too hot to keep those yeast cells alive.
- Olive oil – Adds rich flavor and moisture to the dough; can be swapped out for vegetable oil if preferred.
- Salt – Essential for enhancing flavor; adjust to your taste, and kosher salt works best.
For the Topping
- Pizza sauce – Provides a delightful moisture and flavor; marinara sauce can work too, or thin tomato paste with water.
- Cheese (mozzarella recommended) – Delivers that gooey texture and flavor; mix it up with provolone or cheddar for variety.
- Toppings (vegetables, meats, etc.) – Personalize your pizza to your liking; fresh ingredients will bring the most flavor.
Elevate your pizza experience with my Crispy Cast Iron Skillet Pizza. Ready to savor the homemade difference?
Step‑by‑Step Instructions for Crispy Cast Iron Skillet Pizza
Step 1: Preheat the Skillet
Begin by preheating your cast iron skillet in a cold oven set to 500°F (260°C). Allow it to heat for at least 30 minutes, ensuring the skillet reaches an ideal temperature for baking. This crucial step creates a perfectly crispy crust, so make sure to check that the skillet is hot before adding any dough.
Step 2: Prepare the Dough
In a large mixing bowl, combine all-purpose flour, quick-rise yeast, warm water, olive oil, and salt. Stir the ingredients together until they form a rough dough. The warm water activates the yeast, so ensure it’s warm but not hot. Once combined, the dough should be slightly sticky but manageable.
Step 3: Knead the Dough
Transfer the dough to a floured surface and knead it for about 5-7 minutes. Use your palms to push and fold the dough until it becomes smooth and elastic. This step helps develop the gluten, giving your Crispy Cast Iron Skillet Pizza the perfect chewy texture. Once done, form it into a ball and place it in a lightly oiled bowl.
Step 4: Let the Dough Rise
Cover the bowl with a clean kitchen towel and place it in a warm spot to rise. Allow the dough to double in size, which should take roughly 1 hour. You’ll know it’s ready when it’s puffy and has increased significantly in volume. This fermentation is essential for flavor and texture.
Step 5: Shape the Dough
After rising, gently punch down the dough to release any air bubbles. On a floured surface, roll out the dough into a circle that fits your preheated skillet. Press it evenly into the bottom and up the sides of the skillet to create a nice base for your pizza. This shaping process contributes to the Crispy Cast Iron Skillet Pizza’s delicious crust.
Step 6: Add Sauce and Toppings
Spread a generous layer of pizza sauce over the rolled-out dough, leaving a small border for the crust. Sprinkle a generous amount of cheese on top, ensuring it covers the sauce well. Add your favorite toppings, being careful not to overload to maintain that crispy texture.
Step 7: Bake the Pizza
Carefully transfer the skillet with the assembled pizza to the preheated oven. Bake for 10-15 minutes, keeping an eye on it until the crust turns golden brown and the cheese is bubbling and melted. The high temperature ensures a crispy base while cooking the toppings thoroughly.
Step 8: Cool and Slice
Once baked, remove the skillet from the oven and let the pizza cool for a few minutes. This brief cooling period allows the cheese to set slightly, making it easier to slice. Use a pizza cutter to cut your Crispy Cast Iron Skillet Pizza into wedges, and serve hot with your favorite dipping sauce!

How to Store and Freeze Crispy Cast Iron Skillet Pizza
Fridge: Store leftover slices in an airtight container in the refrigerator for up to 3 days. This keeps your pizza fresh and delicious for quick reheating.
Freezer: For longer storage, freeze baked slices of your Crispy Cast Iron Skillet Pizza in a freezer-safe container or tightly wrapped in plastic wrap for up to 2 months.
Reheating: When ready to enjoy, reheat in an oven at 350°F (175°C) for about 10-15 minutes to restore that signature crispy crust—much better than microwaving!
Cooling: Allow your pizza to cool completely before storing to prevent condensation and sogginess, ensuring the best quality when you’re ready to dig in!
Make Ahead Options
Crispy Cast Iron Skillet Pizza is perfect for meal prep enthusiasts! You can prepare the dough up to 24 hours in advance by mixing it and letting it rise, then refrigerating it to slow down the fermentation process. The toppings can also be chopped and stored in airtight containers in the fridge for up to 3 days, keeping them fresh for when you’re ready to bake. When it’s time to serve, simply bring the dough to room temperature, shape it, and add your sauce, cheese, and toppings before baking. This way, you’ll enjoy all the comforting flavors of a homemade pizza with minimal effort on busy weeknights!
Expert Tips for Crispy Cast Iron Skillet Pizza
-
Preheat Perfectly: Ensure your skillet is adequately preheated at 500°F to achieve that signature crispy crust; don’t rush this step!
-
Dough Consistency: Aim for a slightly sticky dough. If it’s too dry or crumbly, your Crispy Cast Iron Skillet Pizza may turn out tough.
-
Topping Balance: Be mindful of your toppings; overloading them can lead to a soggy pizza. Stick to a few key ingredients for the best results!
-
Reheat Right: When reheating leftovers, use the oven instead of the microwave. This helps maintain that delightful crunch on the crust.
-
Season Generously: Don’t forget to season your dough with salt for enhanced flavor. Adjusting to your taste can make a world of difference!
Variations & Substitutions for Crispy Cast Iron Skillet Pizza
Embrace the joy of customizing your pizza masterpiece with these delightful twists and swaps that will elevate your dining experience!
-
Dairy-Free: Substitute mozzarella with almond or cashew cheese for a creamy, dairy-free alternative. Enjoy the same deliciousness without the lactose!
-
Whole Wheat Flour: Use whole wheat flour instead of all-purpose for added fiber. It gives the crust a nutty flavor while still keeping it delightfully chewy.
-
Spicy Twist: Add crushed red pepper flakes or jalapeños to your toppings to amp up the heat. A little spice can take your pizza to a whole new level!
-
Herb-Infused Dough: Mix dried oregano or basil into your pizza dough for a fragrant and flavorful base. It’ll make every bite aromatic and delicious.
-
Sauce Swaps: Try pesto or buffalo sauce in place of traditional pizza sauce for a flavorful twist. Each option offers a brand-new taste experience worth trying.
-
Veggie-Packed: Load up your pizza with seasonal vegetables like zucchini or artichokes for a fresh, vibrant topping. These additions can add unique flavors and textures.
-
Meat Lovers: Mix in some cooked sausage, grilled chicken, or pepperoni for a hearty, protein-packed option. Your pizza night can become a feast for everyone!
-
Grain-Free: Create a keto-friendly crust using cauliflower or almond flour for an alternative that fits your dietary needs. Enjoy your favorite pizza without the carbs!
With these variations, you can elevate your Crispy Cast Iron Skillet Pizza into something even more memorable. And if you’re on the lookout for more delicious recipes, don’t miss out on my delectable Jalapeno Popper Eggrolls or savory One Pan Skillet for the perfect combo!
What to Serve with Crispy Cast Iron Skillet Pizza?
When crafting a delightful meal, consider these tantalizing accompaniments to elevate your homemade pizza experience.
-
Garlic Bread: The buttery, garlicky flavors beautifully complement the pizza’s savory notes while offering a satisfying crunch with every bite.
-
Fresh Arugula Salad: Crisp arugula tossed with a light vinaigrette adds a peppery, refreshing balance to the rich toppings, creating a perfect contrast.
-
Homemade Marinara Sauce: Serve a side of marinara for dipping to enhance the pizza experience, with robust flavors that bring out the best in your creation.
-
Roasted Vegetables: Caramelized vegetables add depth and enhance the meal’s nutritional profile, while their natural sweetness pairs excellently with your pizza’s saltiness.
-
Wine Pairing: A chilled glass of Sauvignon Blanc or a light red such as Pinot Noir can enhance the flavors, making every sip a perfect match.
-
Mini Dessert Pizza: End on a sweet note with a dessert pizza made with Nutella, strawberries, and whipped cream—a delightful way to satisfy your sweet tooth after the savory main course.
-
Crispy Fried Zucchini: These crunchy bites provide a light and flavorful side that meshes wonderfully with the pizza’s hearty nature.
-
Chocolate Lava Cake: For a rich finish, serve a molten chocolate dessert that contrasts beautifully with the crispy pizza, offering a luxurious indulgence.
Crispy Cast Iron Skillet Pizza Recipe FAQs
What type of flour should I use for the dough?
Absolutely! You can use all-purpose flour for a classic crust, but if you’re aiming for a chewier bite, I recommend giving bread flour a try. It enhances the texture and rises beautifully!
Advertisement
How do I know if my yeast is active?
To ensure your yeast is active, mix it with warm water and a pinch of sugar. Wait for about 5-10 minutes; if it becomes frothy and bubbly, you’re good to go! If it doesn’t foam, your yeast may be expired.
How do I store leftover pizza?
Store any leftover slices of your Crispy Cast Iron Skillet Pizza in an airtight container in the fridge for up to 3 days. This keeps it fresh and easy for a quick snack later!
Can I freeze my pizza? If so, how?
Yes, you can freeze baked slices for up to 2 months! To do this, allow the pizza to cool completely and wrap each slice tightly in plastic wrap. Then, place them in a freezer-safe container. When you’re ready to enjoy, reheat in the oven at 350°F (175°C) for 10-15 minutes for the best texture.
What should I do if my crust is soggy?
Very! A soggy crust can happen if you overload your pizza with toppings that release moisture (like wet vegetables). For a crispy bottom, keep toppings to a minimum and make sure your skillet is well preheated. Also, using a pizza stone can enhance crispiness further!
Are there any dietary considerations for this recipe?
Yes, definitely! If you have dietary restrictions, you can easily substitute ingredients. For gluten-free options, use a gluten-free flour blend for the dough. Dairy-free cheese can be used for those avoiding dairy, and feel free to customize your toppings to suit your preferences!

Crispy Cast Iron Skillet Pizza That Beats Takeout Every Time
Ingredients
Equipment
Method
- Preheat your cast iron skillet in a cold oven set to 500°F (260°C) for at least 30 minutes.
- In a large mixing bowl, combine all-purpose flour, quick-rise yeast, warm water, olive oil, and salt. Stir until forming a rough dough.
- Transfer the dough to a floured surface and knead for 5-7 minutes until smooth and elastic.
- Cover the dough with a clean kitchen towel and let it rise in a warm spot until doubled in size, about 1 hour.
- Gently punch down the dough, then roll it into a circle to fit your skillet, pressing it into the bottom and sides.
- Spread pizza sauce over the dough, sprinkle with cheese, and add preferred toppings.
- Transfer the skillet to the oven and bake for 10-15 minutes until golden brown and cheese is bubbling.
- Remove from oven, let cool for a few minutes, then slice and serve.