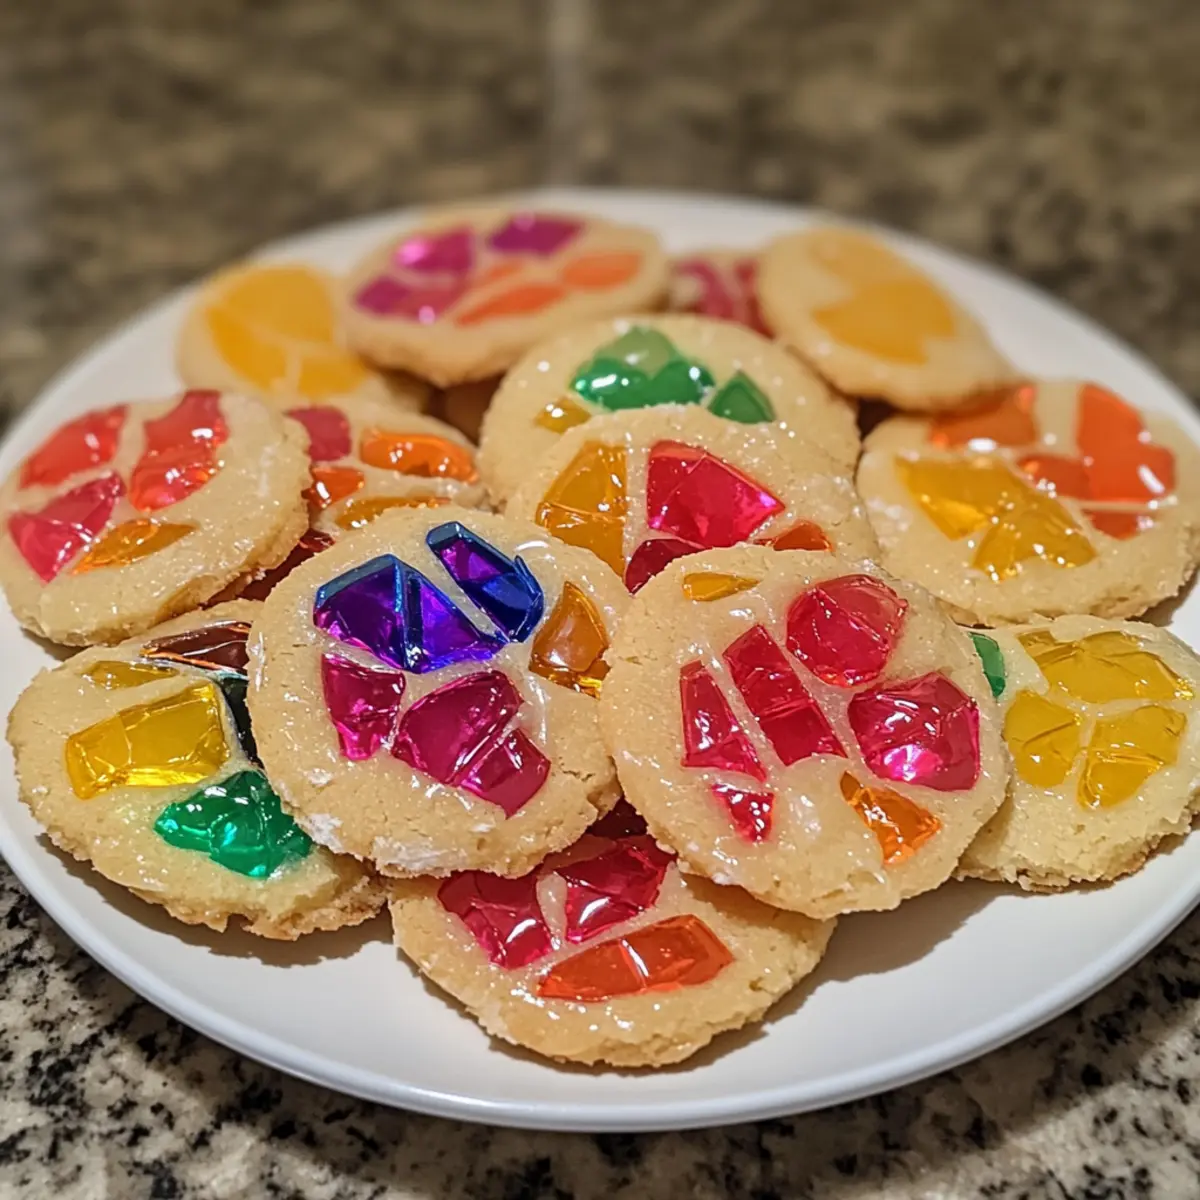
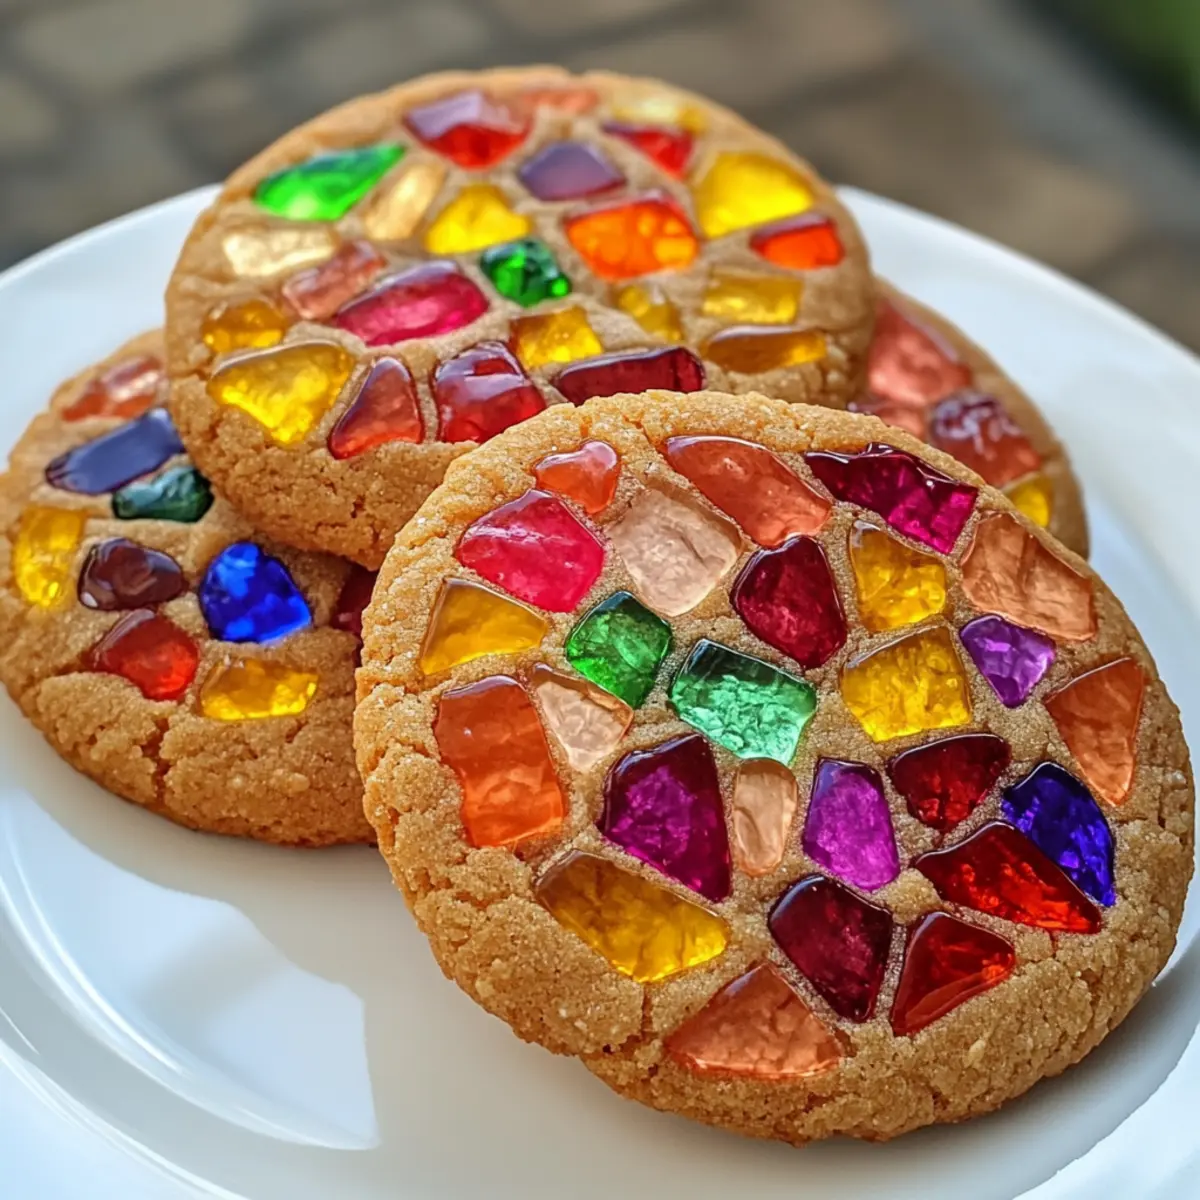
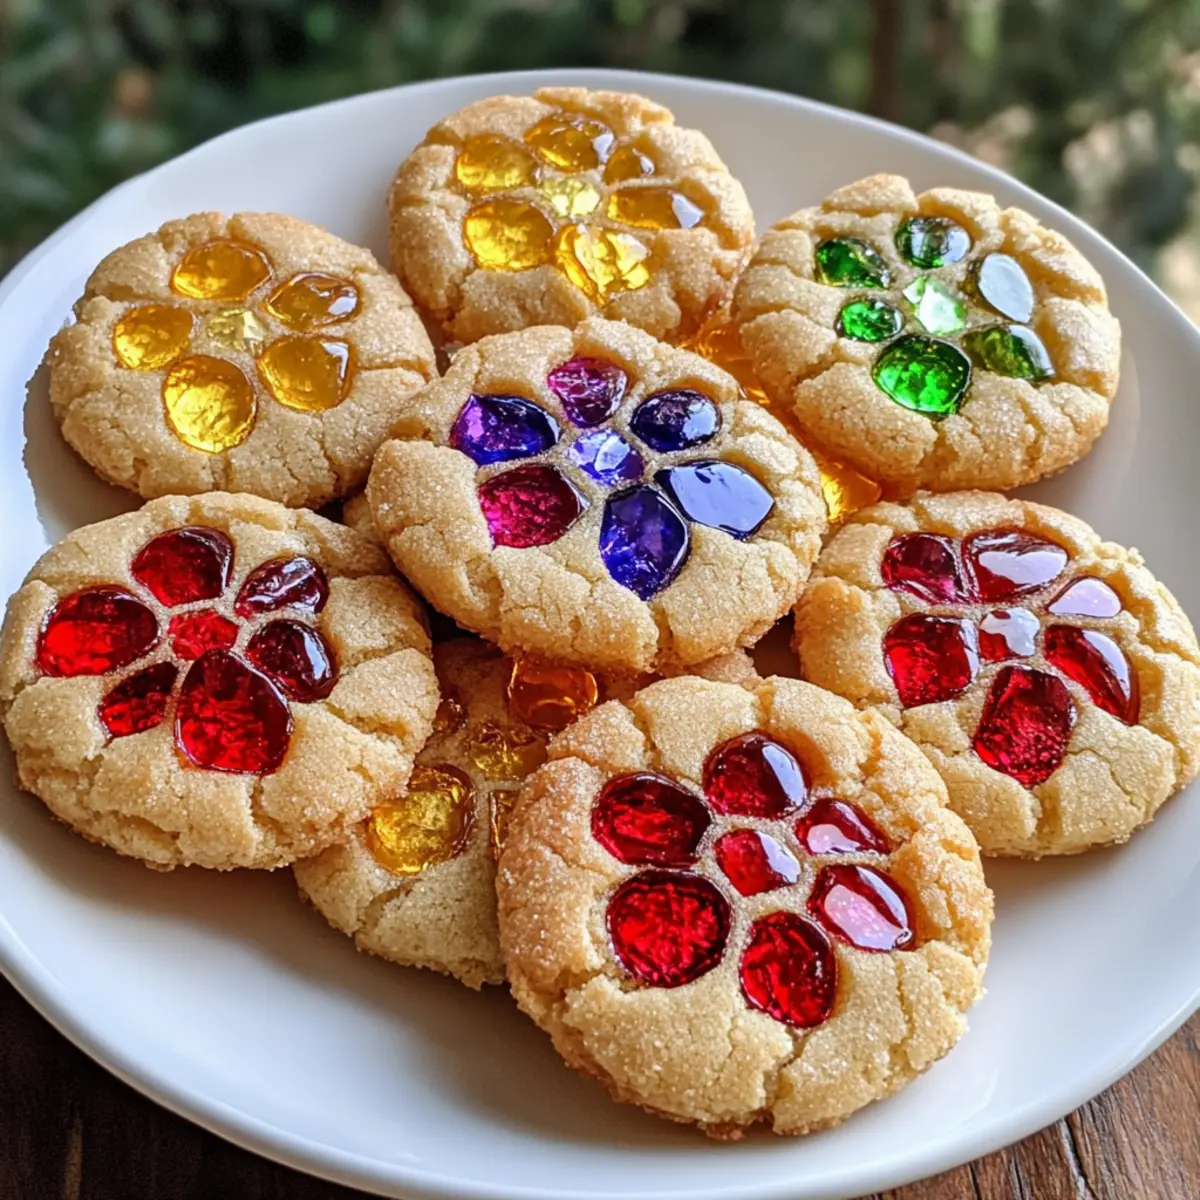
As I strolled through the holiday market, the sight of twinkling lights and vibrant decorations instantly whisked me back to my childhood. Among the delightful treats, stained glass cookies always caught my eye, captivating with their jewel-toned centers that shimmered like ornaments. These enchanting cookies not only look stunning but also offer a blissful bite of buttery goodness that is too tempting to resist. Perfect for both cookie exchanges and festive decorating, my Sparkling Stained Glass Cookies are a quick and fun way to add a touch of joy to your celebrations. With simple ingredients, you can transform your kitchen into a holiday wonderland and share the magic of homemade goodies with loved ones. Curious about how to create this dazzling treat? Let’s get started!
Why are Stained Glass Cookies a must-try?
Visual Appeal: These cookies are like edible art, showcasing vibrant colors that catch the eye and bring a festive ambiance to any gathering.
Simple Process: With just a few straightforward steps, you can create these delightful treats without needing advanced baking skills.
Versatile Designs: Use different cookie cutters to match any occasion—whether it’s Christmas, birthdays, or any festive event, these cookies fit the theme perfectly.
Sharing Joy: Gift them to friends or display them on your holiday table; everyone will adore these delicious and beautiful cookies.
Make Ahead: Prepare a batch in advance and freeze them for hassle-free holiday baking or last-minute gifts. Embrace the spirit of the season with these incredible cookies that will surely impress!
If you love cookie decorating, you might enjoy our Lemon Lavender Cookies.
Stained Glass Cookies Ingredients
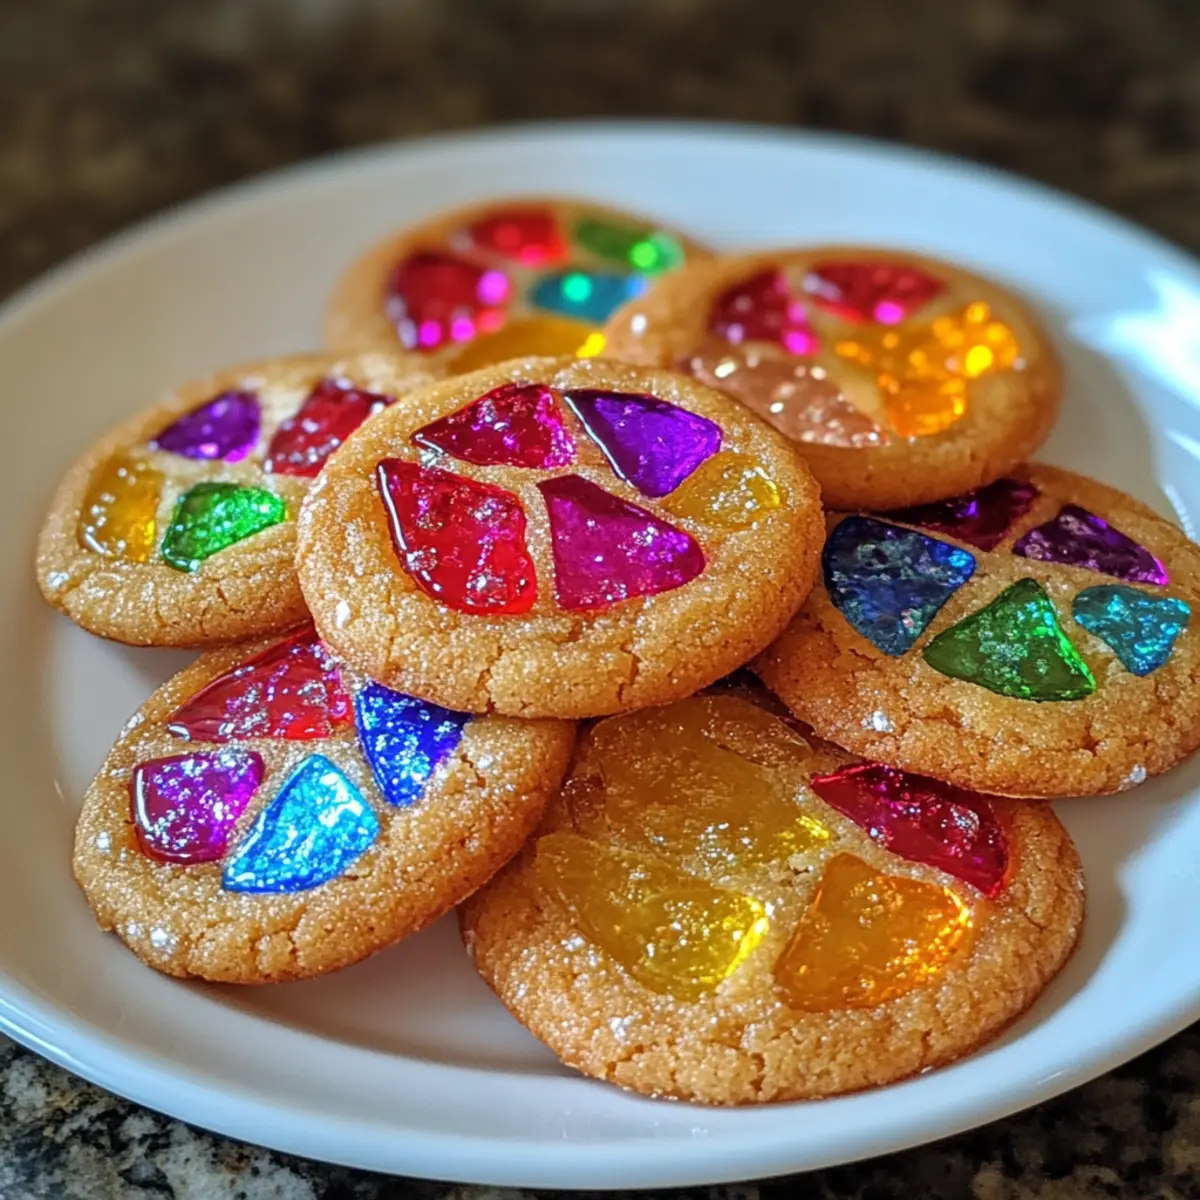
• Create the ultimate festive treat with these tasty stained glass cookies!
For the Dough
- Flour – Provides structure; feel free to substitute with gluten-free all-purpose flour for a gluten-free version.
- Butter – Adds richness and a creamy texture; for a dairy-free option, use plant-based butter.
- Sugar – Sweetens the cookies; brown sugar can enhance the flavor with a deeper richness.
- Eggs – Binds ingredients and helps with leavening; use aquafaba as a vegan substitute if needed.
- Baking Soda – Helps cookies rise; no substitutions are necessary here.
For the Stained Glass Effect
- Hard Candies – Creates the dazzling stained glass centers when melted; opt for a colorful mix, with crushed Jolly Ranchers being a classic choice.
Step‑by‑Step Instructions for Stained Glass Cookies
Step 1: Preheat the Oven
Begin by preheating your oven to 375°F (190°C). This ensures that your stained glass cookies bake evenly and achieve that delightful golden edge. While the oven warms up, you can prepare your cookie dough, making the most of your time and setting the stage for cookie magic.
Step 2: Cream the Butter and Sugar
In a large mixing bowl, cream together 1 cup of soft, room-temperature butter and 1 cup of granulated sugar until the mixture is light and fluffy, which should take about 3-5 minutes. Use an electric mixer for ease, and watch as the color changes to a pale shade, ensuring a beautifully rich flavor for your stained glass cookies.
Step 3: Add the Eggs
Next, crack in two large eggs, one at a time, mixing well after each addition until fully combined. This step helps bind the ingredients, creating a soft, cohesive dough. Keep mixing until you notice a smooth texture, setting a lovely foundation for your holiday treats.
Step 4: Whisk Dry Ingredients
In a separate bowl, whisk together 3 cups of all-purpose flour and 1 teaspoon of baking soda. This ensures that your dry ingredients are well combined, removing any lumps and preparing them to blend seamlessly into your creamy mixture. A well-combined mix leads to a consistent dough, crucial for perfect stained glass cookies.
Step 5: Combine Mixtures
Gradually add the dry ingredient mixture into your creamed mixture, stirring continuously until just combined. Avoid overmixing to maintain a tender texture. You’ll notice the dough starts to take shape and become easy to handle, ensuring a delightful buttery base for your cookies.
Step 6: Chill the Dough
Cover your dough with plastic wrap and chill it in the refrigerator for about 30 minutes. This step is essential as it firms up the dough, helping prevent spreading while baking. You’ll want it to be firm yet workable, creating those beautifully defined cookie shapes when cut.
Step 7: Roll Out the Dough
Once chilled, lightly flour your work surface and roll out the dough to about ¼ inch thickness. Use a rolling pin to ensure an even thickness for consistent baking. The dough should feel smooth and pliable, making it perfect for cutting decorative shapes for your stained glass cookies.
Step 8: Cut Out Shapes
Using your favorite cookie cutters, cut out festive shapes from your rolled dough. Carefully remove the excess dough around the shapes, ensuring they hold their form. For the stained glass effect, take a smaller cookie cutter to cut out centers. Set the shaped cookies on parchment-lined baking sheets, ready for their sugary embellishments.
Step 9: Fill with Hard Candies
Next, take crushed hard candies—like Jolly Ranchers—and fill the cut-out centers of each cookie. Aim for a generous amount, but avoid overfilling to prevent bubbling. This step is where the magic happens as these candies will melt and create the stunning stained glass effect in your cookies.
Step 10: Bake the Cookies
Bake your shaped cookies in the preheated oven for 8-10 minutes, until the edges turn golden and the candy centers are melted and bubbly. Keep a watchful eye on them to prevent over-baking. The enticing aroma will fill your kitchen, signaling that your stained glass cookies are nearly ready!
Step 11: Cool and Transfer
Once baked, allow the cookies to cool on the baking sheets for about 5 minutes before transferring them to a wire rack. This helps them firm up and ensures they maintain their beautiful shapes. Allow them to fully cool, and relish the sight of your dazzling stained glass creations before serving.
Make Ahead Options
These Stained Glass Cookies are perfect for busy bakers looking to streamline their holiday preparations! You can prepare the dough up to 24 hours in advance by wrapping it tightly in plastic wrap and refrigerating it to maintain freshness. Additionally, the cookies can be cut out and shaped, then placed on a parchment-lined baking sheet and stored in the fridge for up to 3 days before baking. To keep the vibrant colors of the melted candies, avoid filling the cookies with hard candies until just before baking. When you’re ready to serve, simply fill the centers with your crushed hard candies and bake as directed for scrumptious results that are just as delightful as if made fresh!
How to Store and Freeze Stained Glass Cookies
Room Temperature: Store cookies in an airtight container at room temperature for up to 1 week to maintain their freshness and flavor.
Freezer: For longer storage, freeze stained glass cookies in a single layer, tightly wrapped, for up to 3 months. Thaw at room temperature before serving.
Reheating: If you prefer warm cookies, gently reheat in the oven at 300°F (150°C) for about 5 minutes, ensuring they regain their delightful texture.
Make Ahead: You can prepare the dough in advance and freeze it, wrapped tightly, for up to 2 months. Thaw in the refrigerator before rolling out and baking.
Expert Tips for Stained Glass Cookies
-
Chill the Dough: Make sure to chill the dough for at least 30 minutes to prevent spreading, ensuring your stained glass cookies maintain their beautiful shapes.
-
Sharp Tools: Use a sharp knife or cookie cutter for cutting out centers; this will provide clean edges and a neat presentation for your cookies.
-
Monitor Baking: Keep a close eye on baking time to avoid over-baking. The cookies should be golden at the edges with melted candy centers for the perfect stained glass effect.
-
Colorful Candies: Experiment with different colored hard candies to match various holidays or themes, giving your cookies a festive flair that guests will love.
-
Storage Tips: Store finished cookies in an airtight container at room temperature. They’ll stay fresh for up to a week, making them perfect for quick holiday snacks or gifting.
What to Serve with Sparkling Stained Glass Cookies
As you bake these dazzling treats, consider pairing them with delightful sides that elevate your holiday spread.
-
Festive Hot Chocolate: The rich chocolatey warmth complements the buttery sweetness of the cookies, making for a cozy pairing everyone will relish.
-
Creamy Vanilla Ice Cream: This smooth dessert adds a refreshing contrast to the crunchy texture of the cookies, creating a satisfying harmony of flavors.
-
Bright Fruit Salad: A mix of seasonal fruits like pomegranates and citrus adds a burst of freshness and color to your table, balancing sweetness and acidity beautifully.
-
Spiced Chai Tea: The aromatic spices in chai enhance the cookies’ flavors while offering a comforting beverage that cheers up any chilly day.
-
Gingerbread Cookies: Expand your holiday cookie platter with spiced gingerbread, providing a wonderful depth of flavor and nostalgia that pairs perfectly with stained glass cookies.
-
Eggnog: This traditional holiday drink’s creamy, spiced notes are a natural companion, wonderfully complementing the buttery, colorful cookies while adding festive cheer.
-
Almond Biscotti: These crunchy treats can be dipped in your favorite warm beverage, providing a delightful texture contrast to the crumbly stained glass cookies.
Serve these pairings together for a complete holiday experience that will leave your guests enchanted and satisfied.
Stained Glass Cookies: Endless Variations
Get ready to add your personal touch to these delightful treats; your creativity knows no bounds with stained glass cookies!
- Gluten-Free: Substitute all-purpose flour with your favorite gluten-free blend for a celiac-friendly version that everyone can enjoy.
- Dairy-Free: Use plant-based butter instead of regular butter to satisfy dairy-free guests while still keeping all the buttery goodness.
- Bolder Flavors: Incorporate a teaspoon of vanilla or almond extract into the dough for an extra flavor boost that elevates these cookies to a whole new level.
- Sweet Swaps: Try brown sugar instead of white sugar for a richer, more caramel-like flavor profile that pairs beautifully with the candy centers.
- Decorative Shapes: Use seasonal cookie cutters—think hearts for Valentine’s Day or bunnies for Easter—ensuring these cookies become a year-round hit in your household.
- Chocolate Surprise: Replace hard candies with chocolate chips for a delicious twist, where every bite melts deliciously in your mouth. Perfect for those who crave a gooey texture!
- Custom Colors: Mix and match different colored hard candies to create cookie masterpieces that reflect your festive spirit or party theme, making each cookie a unique work of art.
- Spicy Kick: For a surprise element, sprinkle in a hint of cinnamon or nutmeg into the dough, adding warmth and zest that pairs surprisingly well with the sweet candy centers.
Whether you’re crafting these cookies for the holidays or simply wanting to brighten someone’s day, these variations provide endless possibilities for creativity! If you’re in the mood for something equally enchanting, don’t miss out on our Chocolate Thumbprint Cookies.
Advertisement
Stained Glass Cookies Recipe FAQs
What kind of hard candies should I use for the stained glass effect?
Absolutely! For the stained glass effect, crushed Jolly Ranchers are a popular choice due to their vibrant colors and ease of melting. However, you can use any clear or brightly colored hard candies. Just make sure they don’t contain a wax coating, as this can affect how they melt and set in the cookies.
How should I store my Stained Glass Cookies?
To keep your delicious cookies fresh, store them in an airtight container at room temperature for up to 1 week. If you know you won’t eat them all within that time, you can freeze them for longer-lasting enjoyment.
Can I freeze Stained Glass Cookies? How do I do that?
Yes, you can freeze your stained glass cookies! To properly freeze them, place the cookies in a single layer on a baking sheet and freeze until solid. Then, transfer them to an airtight container or freezer bag. They will stay fresh for up to 3 months. When you’re ready to enjoy them, simply thaw at room temperature for about 30 minutes before serving.
What should I do if the candy bubbles over when baking?
Very! If you notice that the candy is bubbling over, it often means that you’ve overfilled the cookie centers. To prevent this, fill the cut-outs generously but avoid going over the edges. If it does happen, simply remove the cookies from the oven and allow them to cool for a few minutes, then use a knife to carefully trim away any excess candy before they set.
Can I make Stained Glass Cookies dairy-free or vegan?
Absolutely! You can make these cookies dairy-free by substituting regular butter with plant-based butter. For a vegan option, replace the eggs with aquafaba, which is a fantastic egg substitute made from chickpea brine. Just whip it up until it’s light and fluffy before mixing it into your cookie dough.
How long should I chill the cookie dough before rolling it out?
The dough should be chilled for at least 30 minutes. This step is crucial as it firms up the mixture, making it easier to roll out and cut into shapes while also preventing the cookies from spreading too much during baking. If time allows, chilling it longer can yield even better results!
Stained Glass Cookies: Festive Treats That Dazzle and Delight
Ingredients
Equipment
Method
- Preheat your oven to 375°F (190°C).
- Cream together 1 cup of soft butter and 1 cup of granulated sugar until light and fluffy, about 3-5 minutes.
- Add 2 large eggs, mixing well after each addition until fully combined.
- Whisk together 3 cups of flour and 1 teaspoon of baking soda in a separate bowl.
- Gradually add the dry mixture to the creamed mixture, stirring continuously until just combined.
- Cover dough with plastic wrap and chill in the refrigerator for 30 minutes.
- Roll out the dough to about ¼ inch thickness on a floured surface.
- Cut out festive shapes with cookie cutters and remove excess dough.
- Fill the centers of each cookie with crushed hard candies.
- Bake for 8-10 minutes until edges turn golden and candy centers are melted.
- Cool on baking sheets for 5 minutes before transferring to a wire rack.