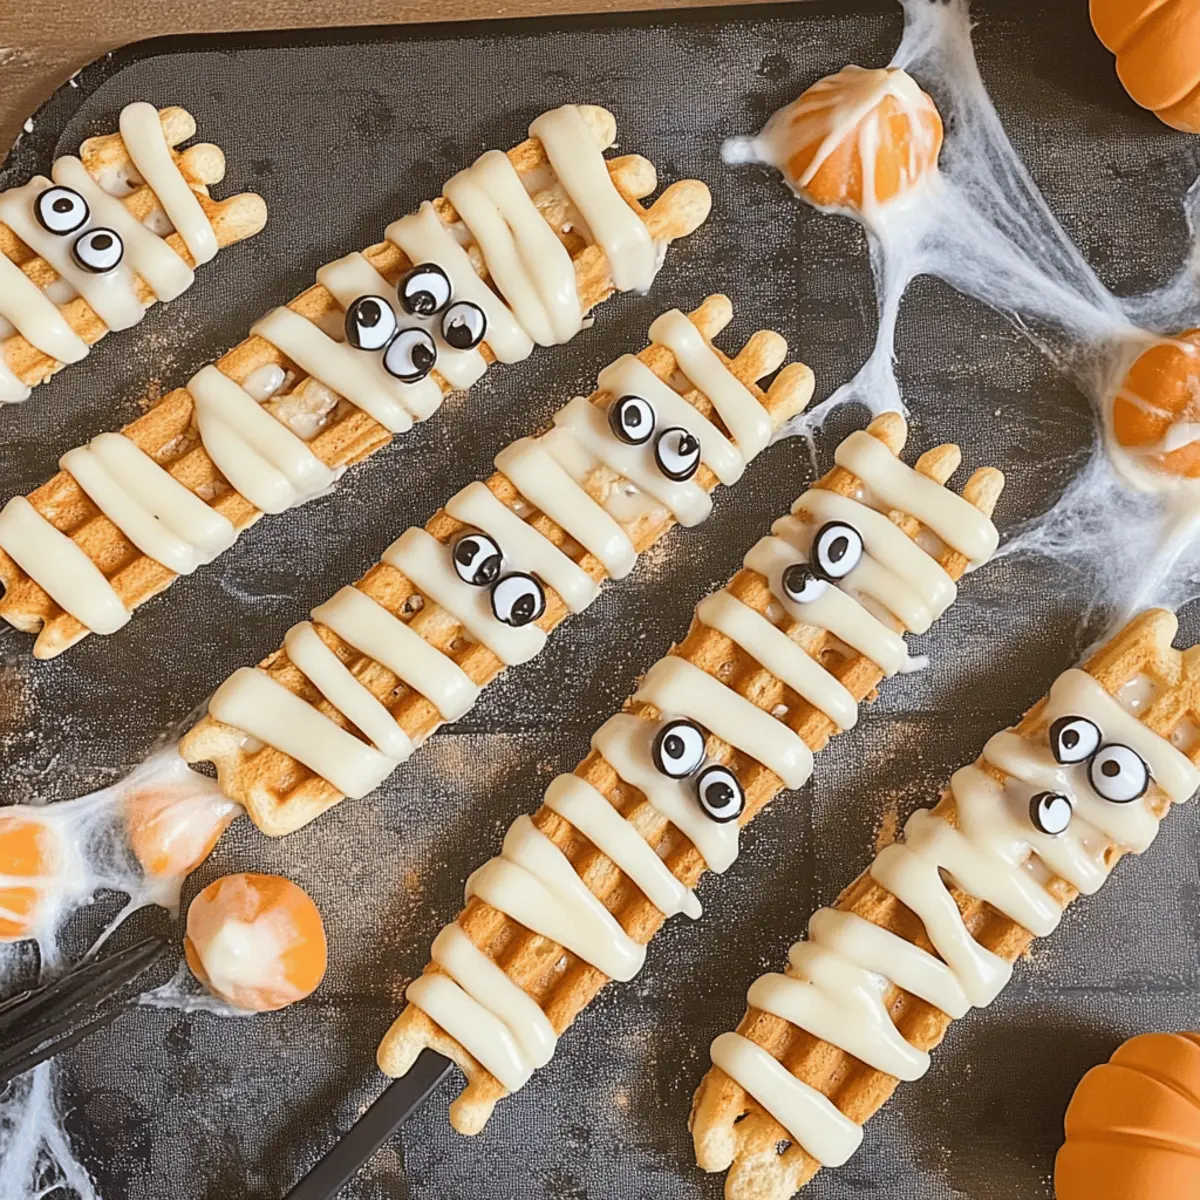
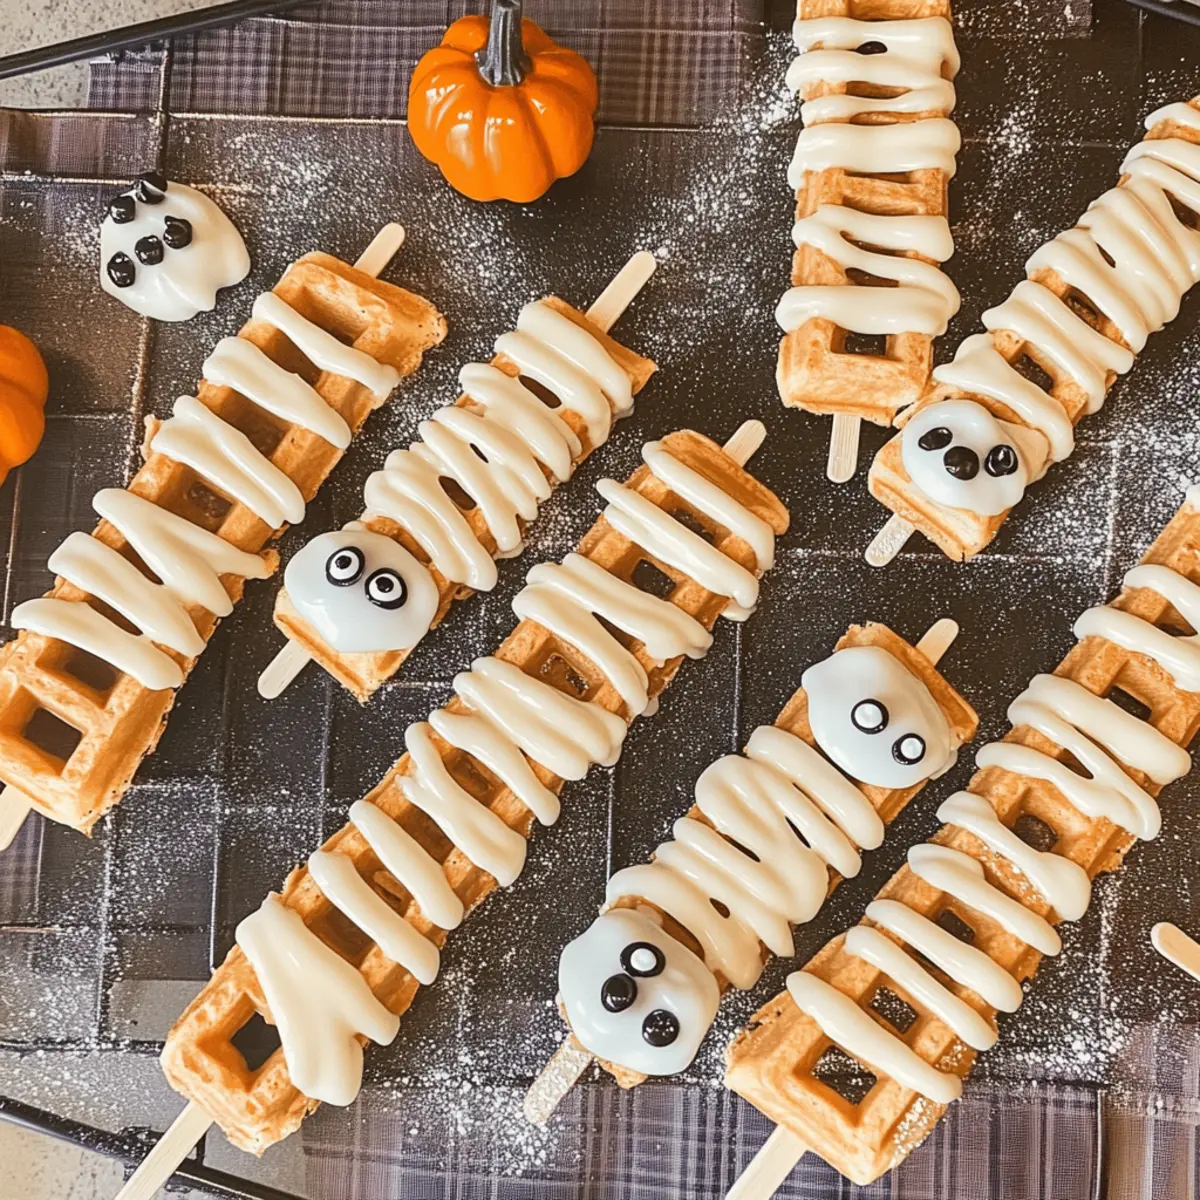
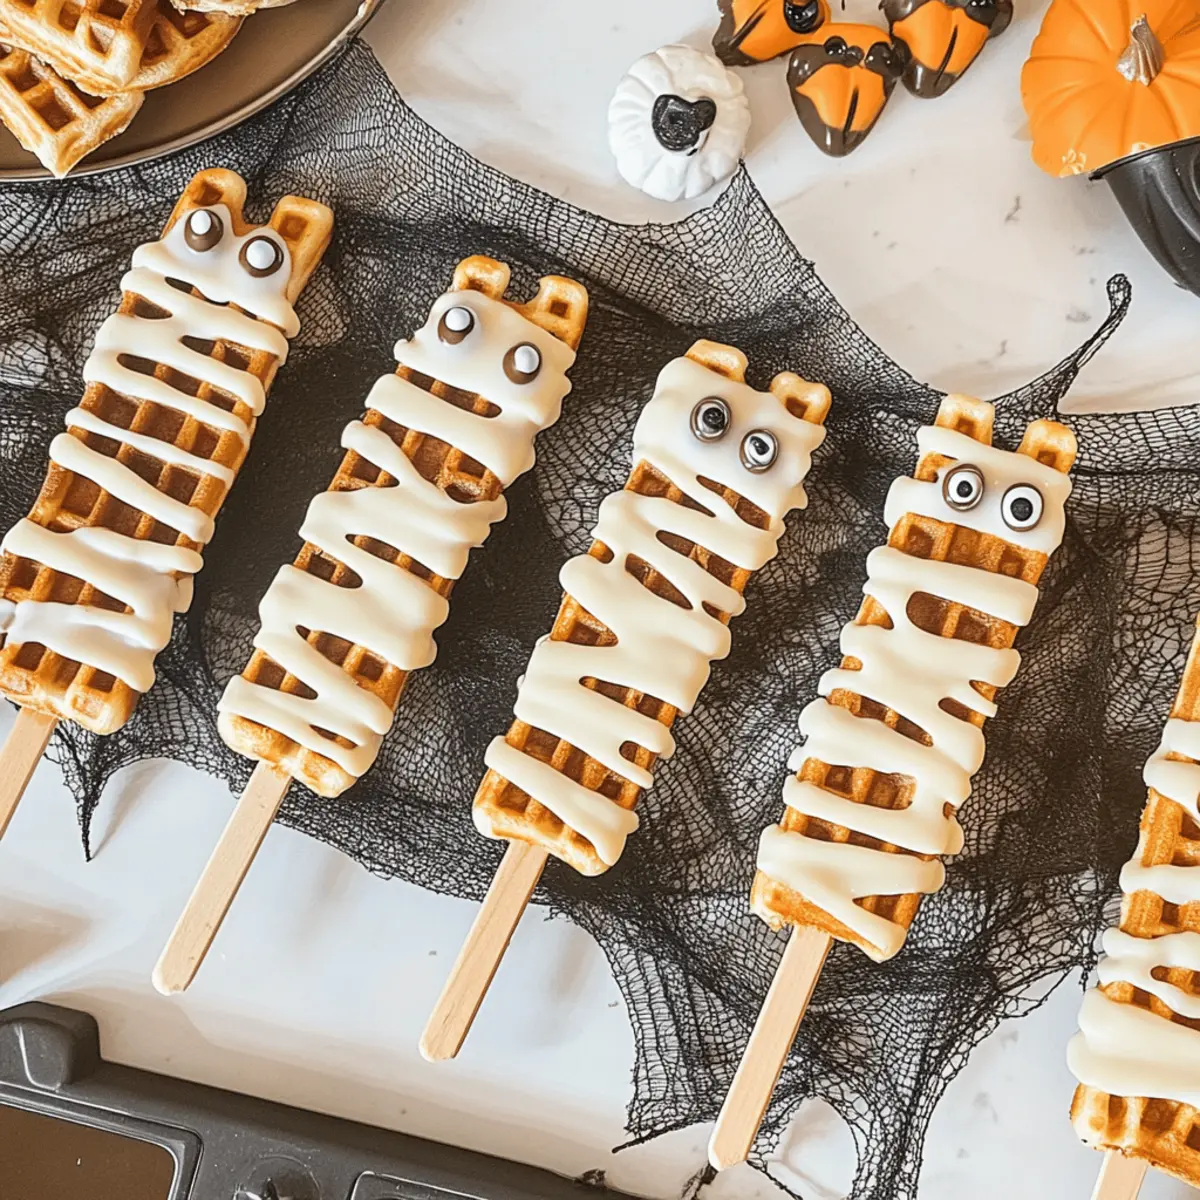
As the air grows crisp and the leaves begin to tumble, it’s time to conjure up some festive fun in the kitchen! My Simple and Spooky Waffle Mummy Sticks are just the treat you need to celebrate Halloween, transforming your breakfast into a delightful and eerie experience. These adorable waffle mummies are not only quick to prepare, but they also make for a great activity with kids, ensuring everyone gets to join the spooky fun. With a crispy exterior and a sweet drizzle of white chocolate, these treats are perfect for busy mornings or ghoulish get-togethers. So, grab your mini waffle stick iron and let’s dive into a fantastically festive breakfast adventure—because who says mornings can’t be a little spooky? What will your creative twist be?
Why Make Spooky Waffle Mummy Sticks?
Festive Fun: These waffle mummy sticks bring spirited excitement to your breakfast table, ensuring a delightful experience for kids and adults alike.
Quick Preparation: With just a few straightforward steps, you’ll have a charming Halloween breakfast ready in no time.
Versatile Options: Feel free to swap in pumpkin or chocolate waffle mixes for a unique flavor twist that’ll keep everyone guessing!
Crowd-Pleasing Appeal: Perfect for seasonal gatherings, these spooky treats are sure to impress your guests, especially when presented with a side of extra candy eyes for added fun.
Sweetly Delightful: The crispy exterior and smooth white chocolate drizzle create a mouthwatering contrast that’s sure to satisfy everyone’s sweet tooth.
Time-Saving: These waffle sticks are an ideal solution for busy mornings; prepare ahead and simply reheat before serving! For another quick treat idea that packs a punch, check out my Cheeto Mozzarella Sticks for a fun flair any time of day!
Spooky Waffle Mummy Sticks Ingredients
• Prepare to create your Halloween delight!
For the Waffles
- Belgian Waffle Mix – This provides a crispy base that complements the spooky theme; feel free to use a homemade recipe for a personal touch.
- Mini Waffle Stick Iron – Essential for crafting these adorable sticks; if you don’t have one, regular waffle makers work too but may require cutting.
For the Decoration
- White Melting Chocolate – This sweet drizzle transforms your waffles into mummies; substitute with melted white chocolate chips if you prefer.
- Edible Candy Eyes – These spooky embellishments make your waffles come alive; they’re optional if you want to create a different look.
- Glitter Popsicle Sticks (optional) – Perfect for presentation, these add a festive flair to your Halloween treats.
With these ingredients, you’re all set to whip up some delicious Spooky Waffle Mummy Sticks that will steal the show at your Halloween breakfast!
Step‑by‑Step Instructions for Spooky Waffle Mummy Sticks
Step 1: Preheat the Waffle Iron
Begin by preheating your mini waffle stick iron according to the manufacturer’s instructions, usually around 350°F (175°C). This important first step ensures your Spooky Waffle Mummy Sticks will come out perfectly crispy. Prepare for about 5 minutes until the indicator light shows that it’s ready for batter!
Step 2: Prepare the Batter
In a mixing bowl, prepare the Belgian waffle mix according to the package instructions or your own homemade recipe. Whisk the ingredients until just combined, ensuring there are no dry lumps. This batter will create fluffy, yet crispy waffles that transform into delightful mummies—so give it a good blend!
Step 3: Cook the Waffles
Pour the prepared batter into your preheated mini waffle stick iron, filling each section generously but not overflowing. Close the lid and cook for approximately 3–5 minutes until they turn golden brown and crispy. You’ll know they’re ready when the steam subsides, giving you those adorable waffle sticks!
Step 4: Cool the Waffles
Once cooked, carefully remove the waffles from the iron using a fork or silicone spatula. Place them on a wire rack or a plate to cool slightly for about 2-3 minutes. This cooling time helps set the texture, making it easier to drizzle with chocolate without making a mess.
Step 5: Melt the White Chocolate
In a microwave-safe bowl or double boiler, melt the white melting chocolate until smooth. Heat it in 30-second intervals in the microwave, stirring in between, until you achieve a silky texture. The melted chocolate will be the main attraction for your Spooky Waffle Mummy Sticks, so ensure it’s perfectly melted.
Step 6: Drizzle the Chocolate
Using a spoon or a piping bag, drizzle the melted white chocolate over each waffle stick to create the mummy bandages. Be creative with your drizzling! Aim for an even coverage without covering the entire surface to leave space for those adorable eyes, making the waffles look extra spooky.
Step 7: Add the Eyes
While the white chocolate is still warm and gooey, place two edible candy eyes on each waffle stick to bring your mummies to life! The warmth of the chocolate will help secure the eyes, ensuring they stay put while adding a delightful and playful touch.
Step 8: Optional Presentation
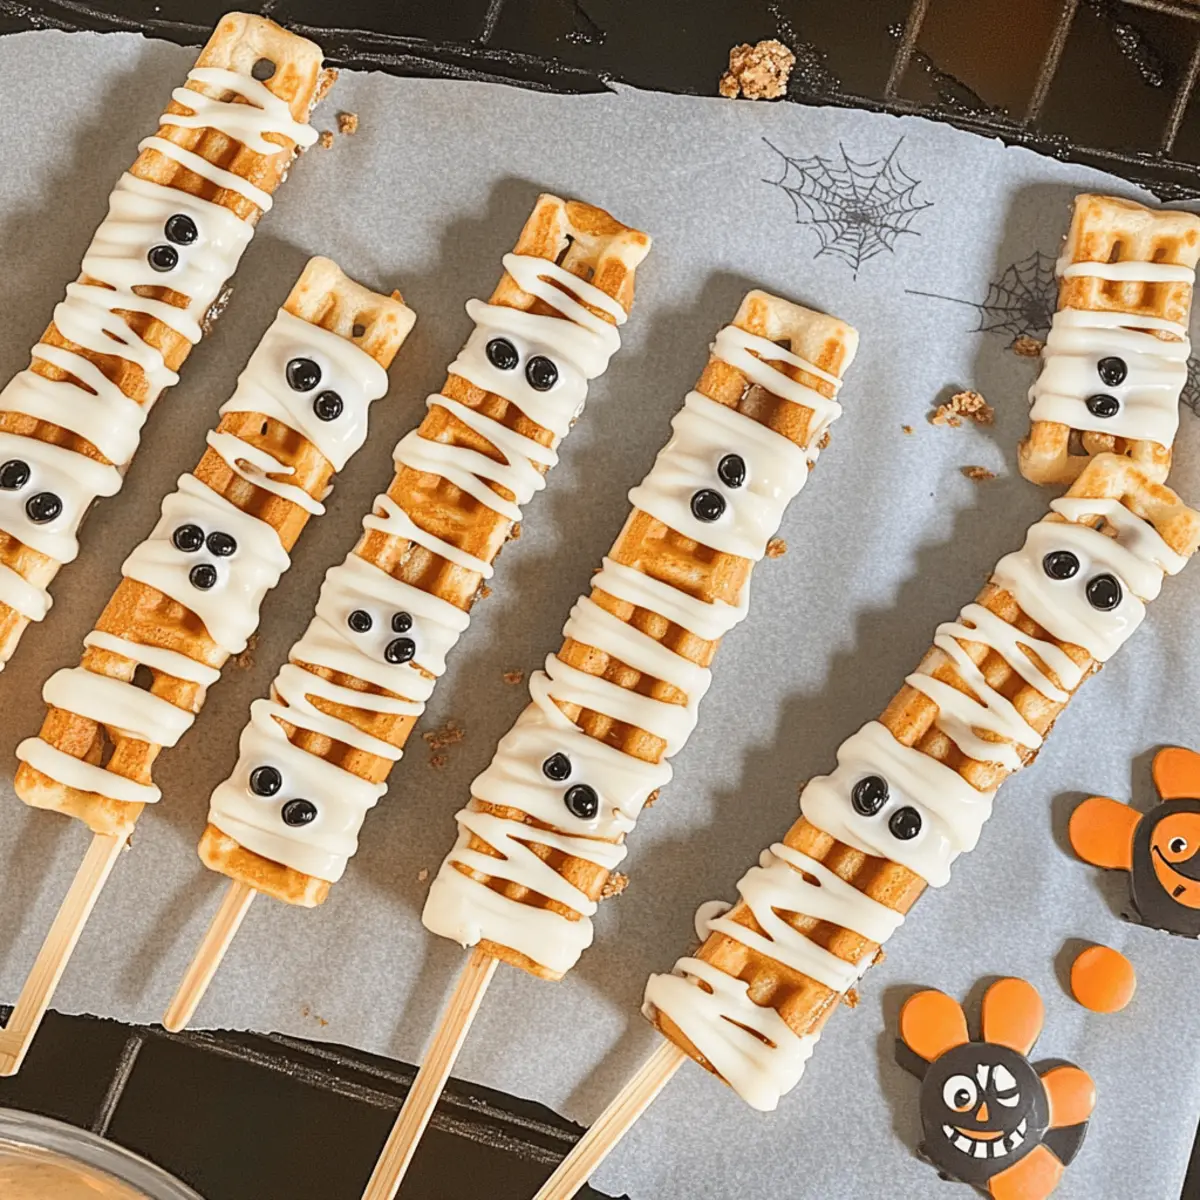
For an added festive flair, insert glitter popsicle sticks into the bottom of each waffle mummy stick. These not only allow for easy handling but also create an eye-catching presentation that’s perfect for your Halloween-themed breakfast spread.
Step 9: Serve and Enjoy
Your Spooky Waffle Mummy Sticks are now ready to be devoured! Arrange them on a festive platter, surrounded by extra candy eyes or seasonal decorations, to elevate your Halloween breakfast experience. Celebrate with friends and family as you all dig into these fun and tasty treats!
Spooky Waffle Mummy Sticks Variations
Let your imagination run wild and customize these whimsical treats to make them uniquely yours!
-
Pumpkin Waffles: Substitute the Belgian waffle mix with pumpkin-flavored mix for a festive fall twist. With warm spices, this will enhance the Halloween theme!
-
Chocolate Waffles: Switch to a chocolate waffle mix for an irresistible combo of flavors that kids will love. The chocolate pairs perfectly with the sweet white drizzle!
-
Nut-Free Option: Replace white melting chocolate with dairy-free chocolate chips for a nut-free treat that everyone can enjoy. It’s amazing how a simple swap can cater to dietary needs.
-
Spicy Cocoa Drizzle: Mix a pinch of cayenne or cinnamon into your melted white chocolate for a fun and surprising kick. It’s a delightful way to add an unexpected twist for the adventurous eaters!
-
Fruit Topping: Instead of using candy eyes, try fresh fruit slices like sliced bananas or strawberries for a healthier, fruity decoration. This twist makes the mummies a bit more colorful and nutritious!
-
Gluten-Free Waffles: Use a gluten-free waffle mix to make these mummies accessible for everyone at your table. Everyone deserves to enjoy this spooky breakfast!
-
Syrup Surprise: Drizzle with maple syrup instead of chocolate for a classic twist—this will bring a new dimension of flavor to your waffle mummies.
-
Mini Monster Sticks: Cut your waffles into fun monster shapes using cookie cutters instead of sticks. This adds a playful element, transforming breakfast into a fun culinary adventure!
These variations will delight even the fussiest eaters! And if you’re looking for another quick and playful snack idea to complement your spooky breakfast, consider my delicious Cheeto Mozzarella Sticks. Enjoy creating your festive magic!
What to Serve with Simple and Spooky Waffle Mummy Sticks
Delight your guests with a well-rounded breakfast spread that enchants the senses and celebrates the Halloween theme!
-
Crispy Bacon: The salty crunch of crispy bacon adds a savory contrast that beautifully complements the sweetness of the waffle mummies.
-
Fresh Fruit Salad: Bright, juicy fruit brings a refreshing burst of flavor; think vibrant berries and sweet melon to balance the richness of the chocolate.
-
Pumpkin Spice Latte: This seasonal favorite combines the cozy flavors of fall, perfectly pairing with the sweet, festive vibe of your waffle sticks.
-
Whipped Cream: Light and fluffy, a dollop of whipped cream not only elevates this treat’s decadence but also adds a playful touch when you drizzle it on top.
-
Spiced Apple Cider: Warm spiced apple cider creates a comforting ambiance, enhancing the Halloween spirit while washing down your tasty mummy sticks marvelously.
-
Chocolate Drizzle: For those extra sweet tooth moments, offer additional melted chocolate for dipping, making each bite of your mummy sticks even more indulgent.
-
Mini Pumpkin Muffins: These tiny treats offer a perfect handheld option for family and friends to grab as they celebrate, providing a delicious pumpkin-flavored complement.
With these delightful pairings, your brunch will be not just festive but also inviting and fully satisfying!
Make Ahead Options
These Spooky Waffle Mummy Sticks are perfect for busy cooks looking to streamline their holiday breakfast preparation! You can make the waffle sticks up to 24 hours in advance and store them in the refrigerator. Simply prepare the waffles according to the instructions, allowing them to cool completely before placing them in an airtight container. To maintain their delightful crispy texture, cover them well to prevent moisture. When you’re ready to serve, just reheat the waffles in the microwave for about 20-30 seconds (or until heated through) and finish with the melted white chocolate drizzle and candy eyes. This way, you’ll enjoy a festive breakfast with minimal effort, keeping the spooky spirit alive!
Storage Tips for Spooky Waffle Mummy Sticks
Room Temperature: Leftover waffle mummy sticks can be kept at room temperature for up to 2 hours before they need to be refrigerated; however, they are best enjoyed fresh.
Fridge: Store cooled Spooky Waffle Mummy Sticks in an airtight container in the fridge for up to 2-3 days. Wrap with plastic wrap to maintain their crispiness.
Freezer: For longer storage, freeze the waffles individually wrapped in plastic wrap for up to 1 month. Thaw them in the fridge overnight and reheat in a toaster or microwave for a quick breakfast.
Reheating: To enjoy warmed mummy sticks, microwave them for 15-30 seconds or pop them in a toaster oven until heated through. Adding the drizzle of white chocolate after reheating will keep that eye-popping charm intact!
Helpful Tricks for Spooky Waffle Mummy Sticks
Crispy Perfection: Use a mini waffle stick iron for the best texture. A regular waffle maker can work but may require cutting, which can be tricky.
Timing Matters: Drizzle the melted white chocolate while the waffles are still warm for better adhesion of the candy eyes. This ensures your spooky mummy sticks look just right!
Batch Make Ahead: Prepare the waffle batter the night before and refrigerate. This makes mornings easier; just preheat the iron and cook those waffle mummies fresh!
Stay Fresh: Store any leftovers wrapped in plastic wrap in the fridge for up to 2-3 days. This keeps your Spooky Waffle Mummy Sticks deliciously fresh for a quick snack.
Get Creative: Don’t hesitate to experiment with different toppings like colored chocolate melts or fun sprinkles to give your mummy sticks a unique twist!
Advertisement
Spooky Waffle Mummy Sticks Recipe FAQs
How do I choose ripe ingredients for my Spooky Waffle Mummy Sticks?
Absolutely! For this recipe, the key ingredients are pretty straightforward. You’ll want to use fresh Belgian waffle mix—look for brands that have the least amount of additives for the fluffiest texture. If you’re using chocolate for drizzling, make sure it’s fresh and hasn’t expired, as this ensures a smoother melt!
What’s the best way to store leftover Spooky Waffle Mummy Sticks?
I recommend placing leftover waffle mummy sticks in an airtight container and storing them in the refrigerator for 2-3 days. Wrapping them in plastic wrap can maintain their crispiness and prevent them from becoming stale. This way, they’re ready for a quick snack or breakfast!
Can I freeze Spooky Waffle Mummy Sticks?
Yes, absolutely! To freeze, individually wrap the waffle sticks in plastic wrap, then place them in a freezer-safe bag. They can be stored for up to 1 month. When you’re ready to enjoy, thaw them in the fridge overnight and reheat in the microwave for 15-30 seconds or in a toaster oven to restore their delightful crunch!
What if my melted chocolate isn’t drizzling nicely?
If you find your melted white chocolate is too thick to drizzle effectively, simply place it in the microwave for a few more seconds, stirring in between intervals until it reaches a smooth consistency. Add a tiny bit of coconut oil or vegetable oil to thin it out if needed. This will help create that perfect mummy effect without any clumps!
Are there any dietary considerations for allergies?
When making your Spooky Waffle Mummy Sticks, be mindful of any allergies to ingredients. The white chocolate may contain milk and soy, so you might want to opt for dairy-free chocolate chips if you have lactose intolerant guests or those with soy allergies. Always check the labels to keep everyone safe and included in the fun!
Can I prepare the batter in advance?
Yes, you can! Preparing the waffle batter the night before is a great way to save time in the morning. Simply refrigerate it overnight, and when you’re ready to make your Spooky Waffle Mummy Sticks, give it a quick stir to ensure everything is well mixed before pouring it into your preheated waffle iron.
Crispy Spooky Waffle Mummy Sticks for Halloween Fun
Ingredients
Equipment
Method
- Preheat the Waffle Iron: Preheat your mini waffle stick iron according to the manufacturer's instructions, about 350°F (175°C).
- Prepare the Batter: In a mixing bowl, prepare the Belgian waffle mix according to the package instructions or your homemade recipe.
- Cook the Waffles: Pour the batter into the preheated mini waffle stick iron and cook for approximately 3–5 minutes until golden brown and crispy.
- Cool the Waffles: Carefully remove the waffles and place them on a wire rack to cool for about 2-3 minutes.
- Melt the White Chocolate: Melt the white chocolate in a microwave-safe bowl until smooth, heating in 30-second intervals.
- Drizzle the Chocolate: Drizzle the melted chocolate over each waffle stick to create mummy bandages.
- Add the Eyes: While the chocolate is warm, place two candy eyes on each waffle stick.
- Optional Presentation: Insert glitter popsicle sticks into the bottom of each waffle stick for easy handling.
- Serve and Enjoy: Arrange the mummy sticks on a platter surrounded by extra candy eyes and enjoy!