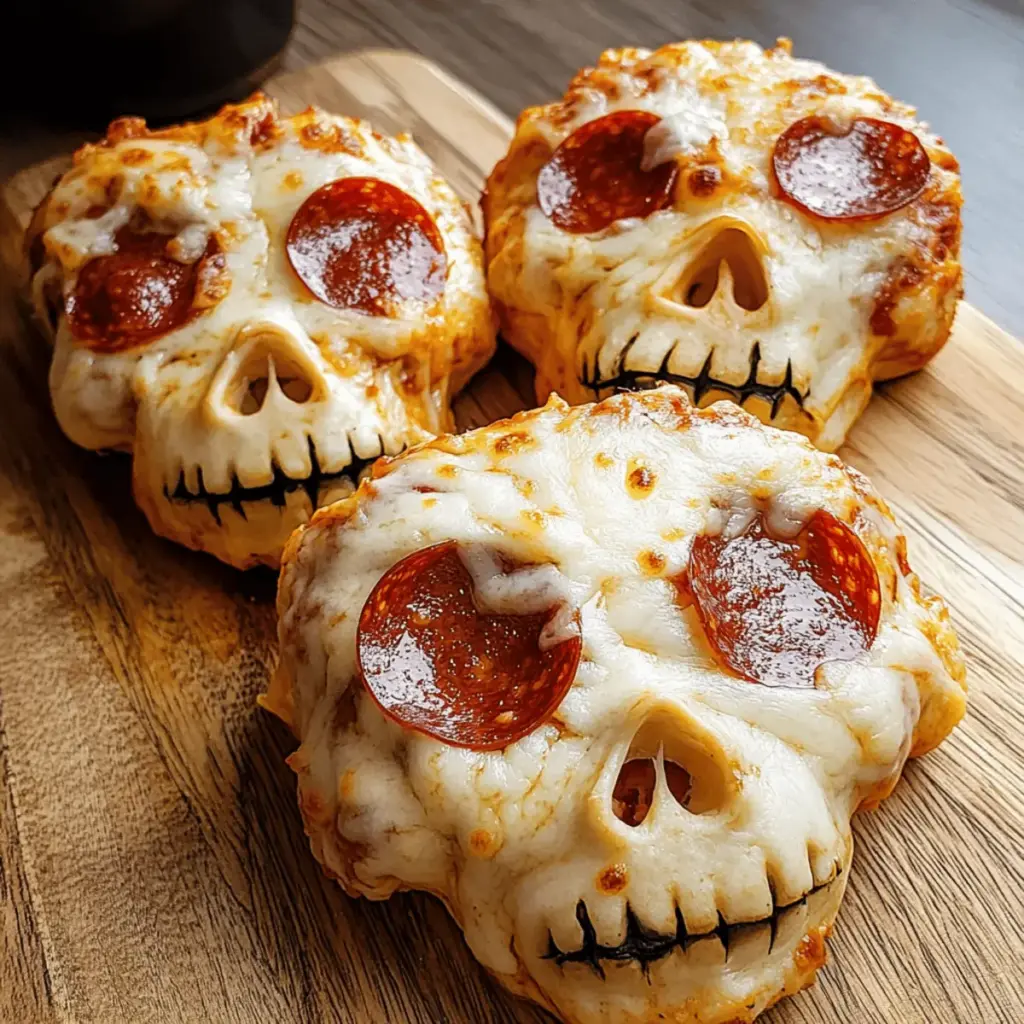
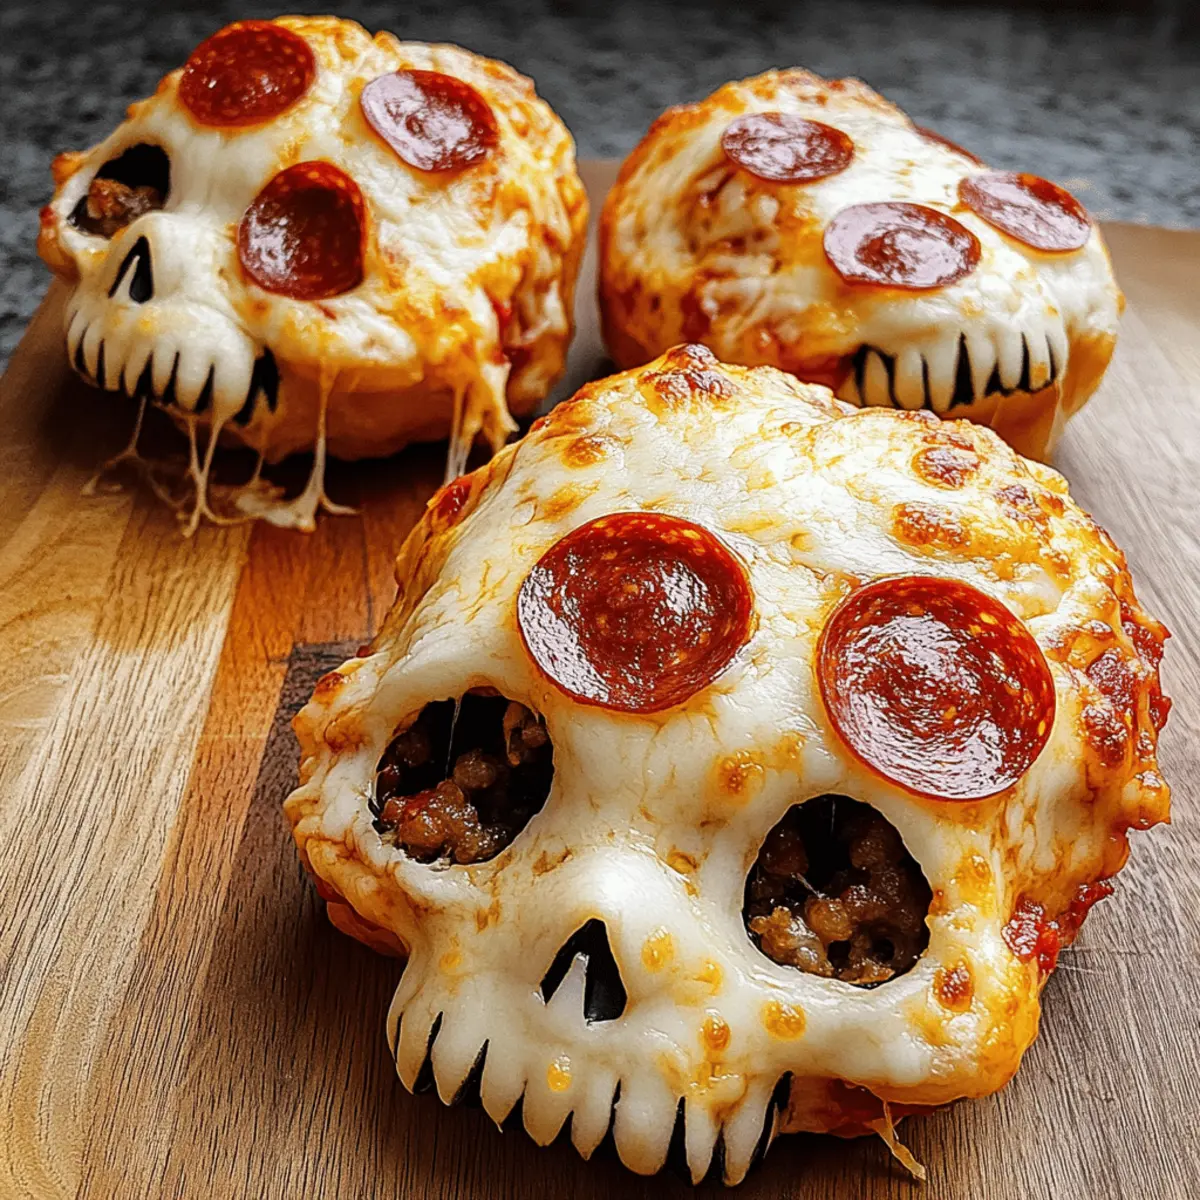
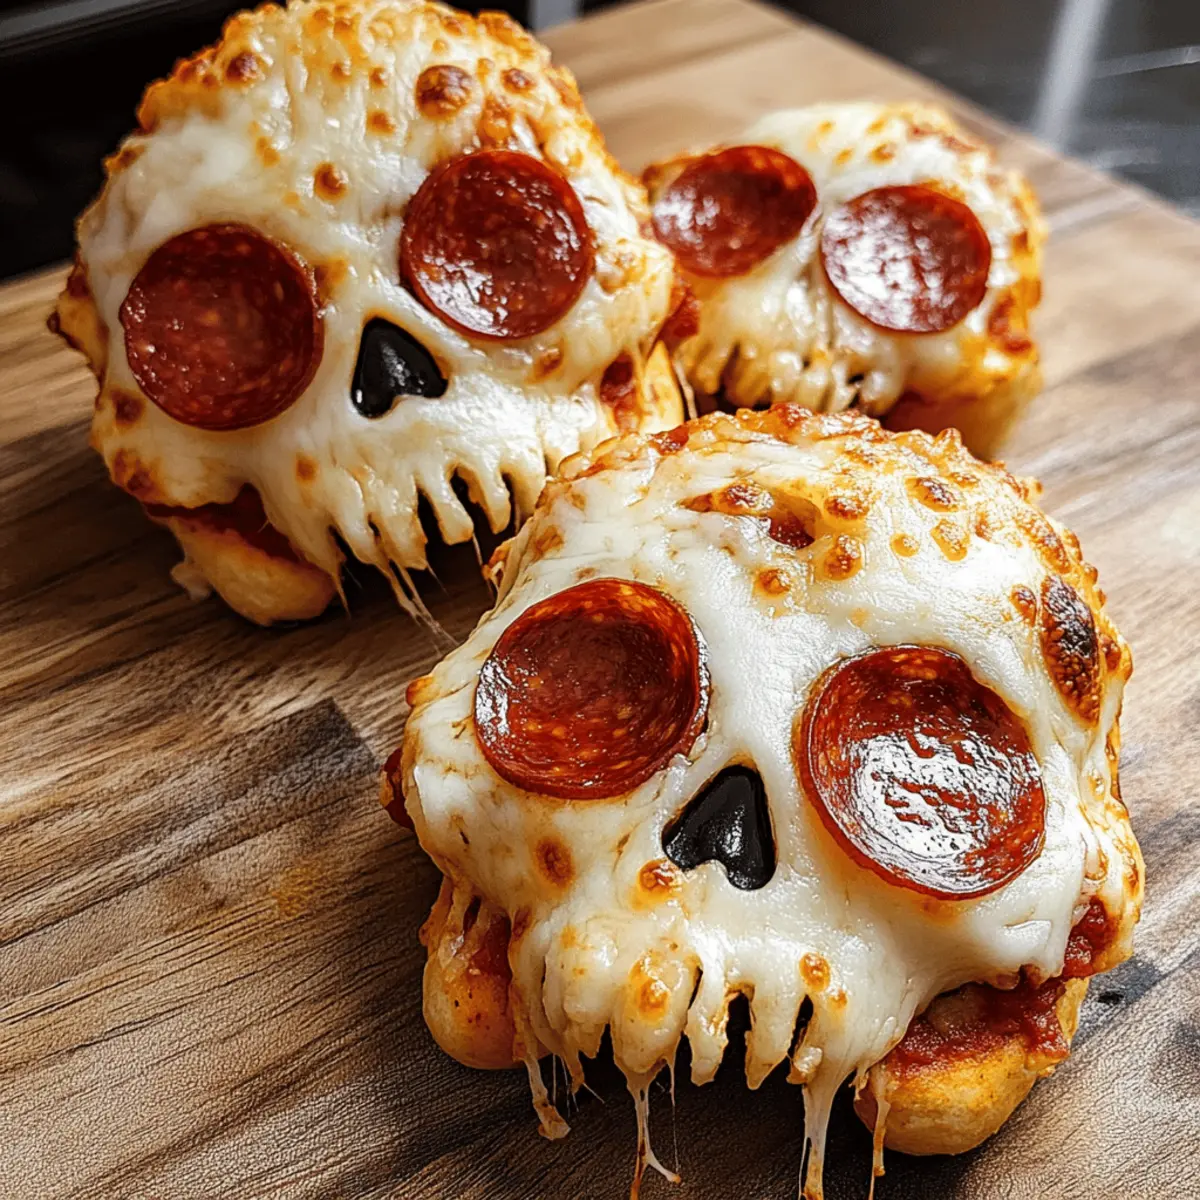
As I prepared for the spookiest night of the year, the idea of crafting some playful, edible treats danced in my mind. Enter these Spooky Pizza Skulls, a mesmerizing twist on pizza that’s sure to delight both the young and the young at heart. These customizable, skull-shaped pockets are brimming with gooey mozzarella, savory pepperoni, and zesty sausage, making them a perfect match for any Halloween gathering. Not only do they bring a fun flair to your party table, but they’re also make-ahead friendly—ideal for those busy festivities. With the ability to switch up the fillings to suit vegetarian needs or your favorite flavors, there’s limitless potential for creativity. What spook-tacular combinations will you whip up?
Why Are Pizza Skulls So Fun?
Endless Customization: These Pizza Skulls allow you to mix and match fillings like BBQ chicken or spinach for a personal touch.
Kid-Friendly Appeal: Perfectly spooky, they’re sure to be a hit with kids and adults alike at any Halloween gathering.
Make-Ahead Option: Assemble them ahead of time and pop them in the oven when ready, saving you precious time during the festivities.
Tasty and Satisfying: Each bite offers a delightful combination of crispy crust and gooey cheese, making them irresistible.
Versatile Nights: Whether savory or sweet, like chocolate-filled versions, these skulls fit any occasion—check out my Christmas Tree Pizza for more fun ideas!
Pizza Skulls Ingredients
Get ready to craft the perfect spooky treat with these simple yet essential ingredients!
For the Dough
- Pizza Dough – Use store-bought or homemade for a crispy base; just ensure it’s not too thin to avoid breakage.
For the Filling
- Shredded Mozzarella – The creamy core; feel free to add extra for an even cheesier delight!
- Pepperoni – Adds flavor and protein; swap in turkey pepperoni or omit for a vegetarian-friendly option.
- Italian Sausage – Introduces richness; consider using cooked, crumbled sausage or sautéed veggies like spinach for a meatless twist.
- Pizza Sauce – Provides moisture and flavor; opt for a thick variety to keep your Pizza Skulls from getting soggy.
With these ingredients at your fingertips, you’ll be one step closer to baking up some delicious Pizza Skulls that everyone will adore!
Step‑by‑Step Instructions for Pizza Skulls
Step 1: Preheat and Prepare
Begin by preheating your oven to 375°F (190°C). While the oven warms, take your skull-shaped cake pan and spray it with a non-stick cooking spray to ensure easy removal later. This will help your Pizza Skulls maintain their spooky shape, so don’t skip this step!
Step 2: Roll Out the Dough
Next, roll out your pizza dough on a floured surface into a rectangle measuring approximately 15×10 inches. Once you have your dough evenly rolled, use a sharp knife or pizza cutter to divide it into six equal strips. Each strip will form the base of your Pizza Skulls, so make sure they are uniform in size.
Step 3: Shape the Dough in the Mold
Now, take each strip and press it into the skull mold, ensuring the dough covers the edges well. Make sure to press down firmly so the dough holds its shape and molds perfectly to the skull design. This step is crucial for achieving the iconic look of your Pizza Skulls, so give it a gentle but firm touch!
Step 4: Add the Filling
With the dough in place, it’s time to layer in the goodness! Start by spooning a bit of pizza sauce into each skull mold, followed by a generous sprinkle of shredded mozzarella. Then, add your chosen fillings like chopped pepperoni and crumbled sausage, topping it all off with a little extra mozzarella for that deliciously gooey center.
Step 5: Seal the Pizza Skulls
Now, take the edges of each overhanging dough strip and fold them over the filling. Pinch the edges together firmly to seal the skulls and prevent any fillings from leaking out during baking. This is where you can show your creativity; pinch and twist for a fun design!
Step 6: Bake to Golden Perfection
Place your filled and sealed Pizza Skulls in the preheated oven and bake for about 18 to 20 minutes. Keep an eye on them as they bake! You’re looking for a beautiful golden brown crust; once they reach the perfect hue, remove them from the oven and let them cool slightly on a wire rack.
Step 7: Serve and Enjoy
Finally, serve your Pizza Skulls warm, paired with marinara sauce for dipping if you wish. These spooky treats are sure to be the talk of your Halloween gathering! The crispy crust and oozy, cheesy filling create a delightful bite that everyone will love, making your Pizza Skulls a hit at any festive occasion.

What to Serve with Spooky Pizza Skulls
To elevate your Halloween feast, consider these delightful accompaniments that will enchant your guests and complement the fun, cheesy goodness of your Pizza Skulls.
-
Marinara Sauce: A classic dip that adds a tangy bite and pairs perfectly with the cheesy filling.
-
Garlic Breadsticks: Crunchy on the outside and warm on the inside, these breadsticks provide a lovely texture contrast to your Pizza Skulls.
-
Crispy Salad: A fresh, green salad gently dressed with a light vinaigrette balances out the richness of the skulls, providing a refreshing touch.
-
Roasted Vegetables: Colorful and flavorful, roasted veggies add a nutritious and tasty side that rounds out the meal beautifully. They can bring a delightful sweetness and earthiness to the table.
-
Stuffed Pumpkin Soup: Serve in mini pumpkins for a festive flair! This creamy soup complements the flavors of the Pizza Skulls while adding a seasonal element.
-
Spooky Punch: A fruity, non-alcoholic punch can keep everyone refreshed. For an adult version, drop in some sparkling wine or your favorite liqueur!
-
Apple Slices with Caramel Dip: Sweet and simple, this treat rounds out the meal with a touch of sweetness. The crunchy apples contrast nicely with the warm, cheesy goodness of the skulls.
Make Ahead Options
These Spooky Pizza Skulls are an excellent choice for meal prep and can save you precious time during those busy Halloween festivities! You can assemble the Pizza Skulls up to 24 hours in advance. To do this, fill and seal them as per the usual instructions, then place them in the refrigerator, ensuring they are covered to maintain freshness. When it’s time to bake, simply preheat your oven and add an extra 2-3 minutes to the baking time to ensure they cook through perfectly. This way, you can enjoy the flavors of homemade Pizza Skulls with minimal last-minute effort, just as delicious and ready to impress your guests!
Expert Tips for Pizza Skulls
• Don’t Overfill: Avoid overstuffing each skull with filling. Stick to 1–1.5 tablespoons to ensure they bake evenly and hold their shape.
• Thick Sauce is Key: Choose a thick pizza sauce to maintain the integrity of the crust. A runny sauce can lead to sogginess, which is a common mistake.
• Chill for Convenience: Prepare and assemble your Pizza Skulls a day ahead. Refrigerate them unbaked overnight, but remember to add 2-3 more minutes to the baking time when you’re ready to cook.
• Experiment with Flavors: Feel free to mix things up! Swap in unique fillings like barbecue chicken, sautéed veggies, or even sweet options like chocolate for variety.
• Check for Browning: Keep an eye on the baking process. If they start to brown too quickly, cover them loosely with aluminum foil to prevent burning.
How to Store and Freeze Pizza Skulls
Fridge: Store leftover Pizza Skulls in an airtight container for up to 2 days to maintain their delicious flavor and texture.
Freezer: For longer storage, freeze unbaked Pizza Skulls by placing them on a baking sheet to freeze individually. Once solid, transfer to a freezer-safe bag for up to 2 months.
Reheating: Reheat baked Pizza Skulls in a preheated oven at 350°F (175°C) for about 10-15 minutes until warmed through and crisp.
Make-Ahead Tip: You can assemble Pizza Skulls ahead of time and refrigerate them unbaked overnight; just add a few extra minutes to the bake time!
Pizza Skulls Variations & Substitutions
Feel free to embrace your creative side and customize these delightful Pizza Skulls to suit your tastes and dietary needs!
-
Vegetarian: Substitute the pepperoni and sausage with your favorite vegetables, such as bell peppers, mushrooms, and spinach, for a hearty meatless option.
This twist not only caters to vegetarian friends but also adds a burst of color and nutrition. -
Gluten-Free: Use gluten-free pizza dough to make these spooky treats accessible for those with dietary restrictions.
Many stores offer tasty alternatives that hold their shape beautifully during baking. -
Sweet Version: Swap the savory fillings for a dessert twist by using sweet crescent roll dough filled with chocolate chips or fruit preserves.
Serve these with a drizzle of caramel or a dusting of powdered sugar for a delightful treat! -
Spicy Kick: Add some heat by incorporating jalapeños or crushed red pepper flakes into the filling for those who crave a bit of spice.
Pair them with a cooling dip to balance the flavors. -
Flavor Boost: Mix in herbs like oregano or basil into the cheese for an Italian flair.
Fresh ingredients elevate the flavor profile, making them even more enticing! -
BBQ Twist: For a smoky flavor, use BBQ sauce instead of pizza sauce, and fill them with BBQ chicken and cheese.
This unique variation brings a sweet and tangy twist that will impress your guests. -
Cheesy Delight: Opt for a blend of cheeses, like cheddar or pepper jack, to enhance the richness of the filling.
Combining different cheeses creates layers of taste and a gooey, satisfying center. -
Mini Skulls: Make bite-sized versions for an easy appetizer by cutting the strips smaller; ideal for parties or gatherings!
These little bites are perfect for dipping and sharing—check out my Christmas Tree Pizza for more fun ideas!
With these variations, you’ll have the freedom to create endless flavor combinations while keeping the Halloween spirit alive!
Pizza Skulls Recipe FAQs
How do I choose the right pizza dough?
Absolutely! Whether you prefer homemade or store-bought, ensure your pizza dough isn’t too thin to prevent breakage. A good rule is to look for a dough that feels pliable yet firm, typically around 1/4 inch thick once rolled out.
Advertisement
How long can I store leftover Pizza Skulls?
Very! You can store leftover Pizza Skulls in an airtight container in the refrigerator for up to 2 days. To maintain their crispy texture, I recommend reheating them in the oven instead of the microwave to prevent sogginess.
Can I freeze Pizza Skulls?
Absolutely! To freeze unbaked Pizza Skulls, lay them out on a baking sheet in a single layer and place them in the freezer until solid. Then transfer the frozen skulls to a freezer-safe bag, where they can be stored for up to 2 months. When ready to bake, you can cook them straight from the freezer—just add a few extra minutes to the baking time.
What should I do if my Pizza Skulls are soggy?
The key to avoiding sogginess lies in using a thick pizza sauce and not overfilling the skulls. If you find your Pizza Skulls soggy, next time opt for thicker sauces and make sure to stick to 1–1.5 tablespoons of filling. You can also try baking them a little longer while keeping an eye on them!
Are Pizza Skulls suitable for vegetarians?
Very! You can easily make Pizza Skulls vegetarian-friendly by substituting the pepperoni and sausage with veggies like spinach, bell peppers, or mushrooms. Just get creative with your fillings, and your vegetarian guests will love them!
Can my pets eat Pizza Skulls?
No, it’s best to avoid letting your pets indulge in Pizza Skulls. The toppings, especially dairy, spices, and any rich sauces, may upset their stomachs. Stick to pet-friendly treats for them instead!

Delicious Pizza Skulls: Customize Your Spooky Treats!
Ingredients
Equipment
Method
- Preheat your oven to 375°F (190°C) and spray the skull-shaped cake pan with non-stick cooking spray.
- Roll out pizza dough on a floured surface into a rectangle measuring 15x10 inches and divide into six equal strips.
- Press each strip into the skull mold, ensuring it covers the edges well.
- Layer pizza sauce, shredded mozzarella, pepperoni, and sausage into each skull mold, adding extra mozzarella on top.
- Fold over the overhanging dough strips and pinch the edges to seal the skulls.
- Bake in the preheated oven for 18 to 20 minutes until golden brown, then let cool slightly on a wire rack.
- Serve warm, paired with marinara sauce for dipping.