As I stood in my kitchen, the aroma of toasted coconut wafting through the air, I couldn’t help but feel transported to a sun-soaked paradise. This Toasted Coconut Pina Colada Ice Cream is a refreshing homage to tropical vibes, blending sweet, fresh pineapple with creamy coconut—perfect for those sweltering summer days. Not only is it an incredibly easy homemade ice cream recipe, but it also welcomes everyone with the option to add rum or keep it family-friendly and safe. The delightful combination of flavors and textures will have you dreaming of sandy beaches and warm breezes, all from the comfort of your own home. Are you ready to dive into this cool treat?
Why is Pina Colada Ice Cream So Irresistible?
Tropical Escape: This homemade Pina Colada Ice Cream is your ticket to a sunny vacation without leaving the kitchen.
Creamy Delight: Crafted with rich Thai coconut milk, every scoop melts in your mouth, offering a luxurious texture that’s simply divine.
Burst of Freshness: With the addition of fresh pineapple, you get a lovely balance of sweetness that captures the lively essence of summer.
Customizable Indulgence: Want to elevate your treat? A splash of dark rum transforms your dessert into a grown-up delight. For a family-friendly version, just skip the booze!
Quick to Make: You won’t need hours to create this refreshing dessert. Whip it up and freeze it in no time, making it an ideal last-minute treat for gatherings.
Elevate your dessert experience further by pairing it with hints of other flavors; check out our recipe for Biscoff Cheesecake Sweet for more indulgent ideas!
Pina Colada Ice Cream Ingredients
For the Ice Cream Base
• Thai Coconut Milk – Use unsweetened for a rich and creamy texture.
• Fresh Pineapple – ½ a fresh pineapple yields about 1 ¾ cups of sweet puree.
• Sugar – Adjust to your taste for the perfect level of sweetness.
• Salt – Enhances flavors and balances the sweetness of the ice cream.
Optional Flavor Enhancer
• Dark Rum – A splash adds an authentic Pina Colada flavor; substitute with light rum if desired.
For the Toasted Coconut
• Toasted Coconut – Provides delightful texture and flavor; save ¼ cup for topping. Sweetened coconut flakes work best!
Step‑by‑Step Instructions for Toasted Coconut Pina Colada Ice Cream
Step 1: Pineapple Prep
Begin by peeling and chopping half of a fresh pineapple. Place the pineapple chunks into a blender and blend until the mixture is slightly chunky. You’ll want to measure out 1 ¾ cups of pineapple puree for your ice cream base. Set the puree aside while you prepare the other ingredients.
Step 2: Mix Ingredients
In a large mixing bowl, whisk together 1 can of Thai coconut milk, the pineapple puree, sugar, and a pinch of salt. If you’re feeling adventurous, add a splash of dark rum for that classic Pina Colada touch. Mix everything thoroughly until well combined and you can see a smooth, creamy texture forming.
Step 3: Toast Coconut
Preheat your oven to 350°F (175°C). Spread the remaining sweetened coconut flakes evenly on a baking sheet. Place the tray in the oven and toast the coconut for about 6-7 minutes, or until it’s lightly browned and fragrant. Keep a close eye to prevent burning, as it can go from golden to charred quickly!
Step 4: Churn
Once your mixture is ready and the coconut is toasted, pour the combined ingredients into your ice cream machine. Churn according to the manufacturer’s instructions—usually for about 20-25 minutes—until the mixture thickens and becomes creamy, resembling soft-serve ice cream.
Step 5: Incorporate Coconut
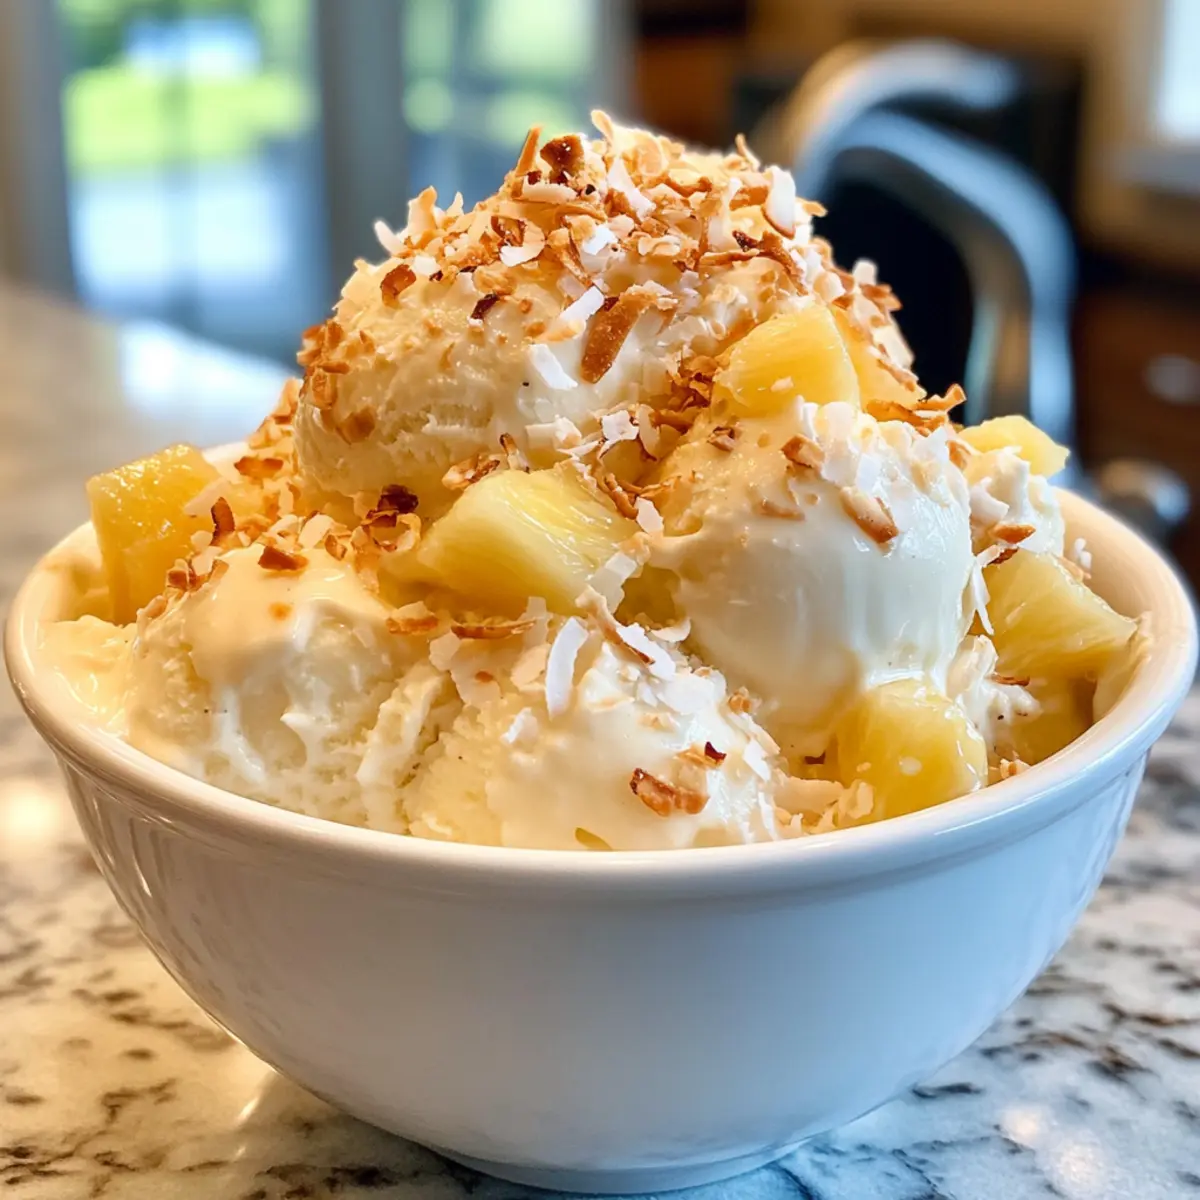
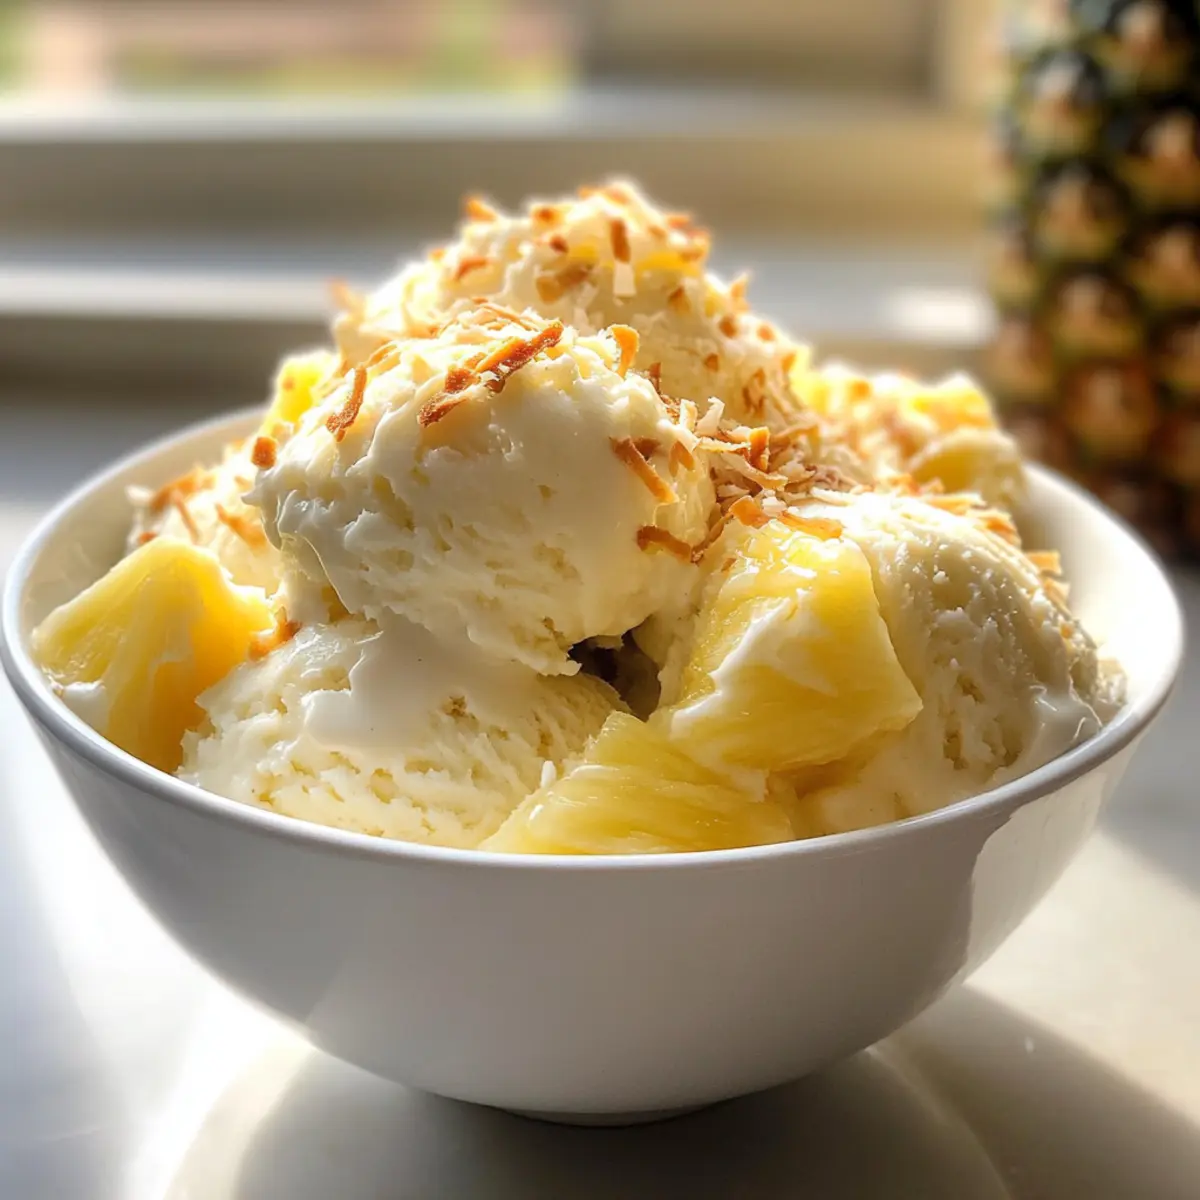
When the ice cream reaches the desired consistency, fold in ¾ cup of the toasted coconut. Gently mix it in, ensuring a delightful crunch in every bite, while keeping some toasted coconut aside for topping later. This step adds a delightful texture to your Pina Colada Ice Cream.
Step 6: Freeze
Transfer your ice cream mixture into an airtight container, smoothing the top with a spatula. Seal the container tightly and place it in the freezer for at least 4 hours, or until it’s firm enough to scoop. This allows the flavors to meld together beautifully while it solidifies.
Step 7: Serve
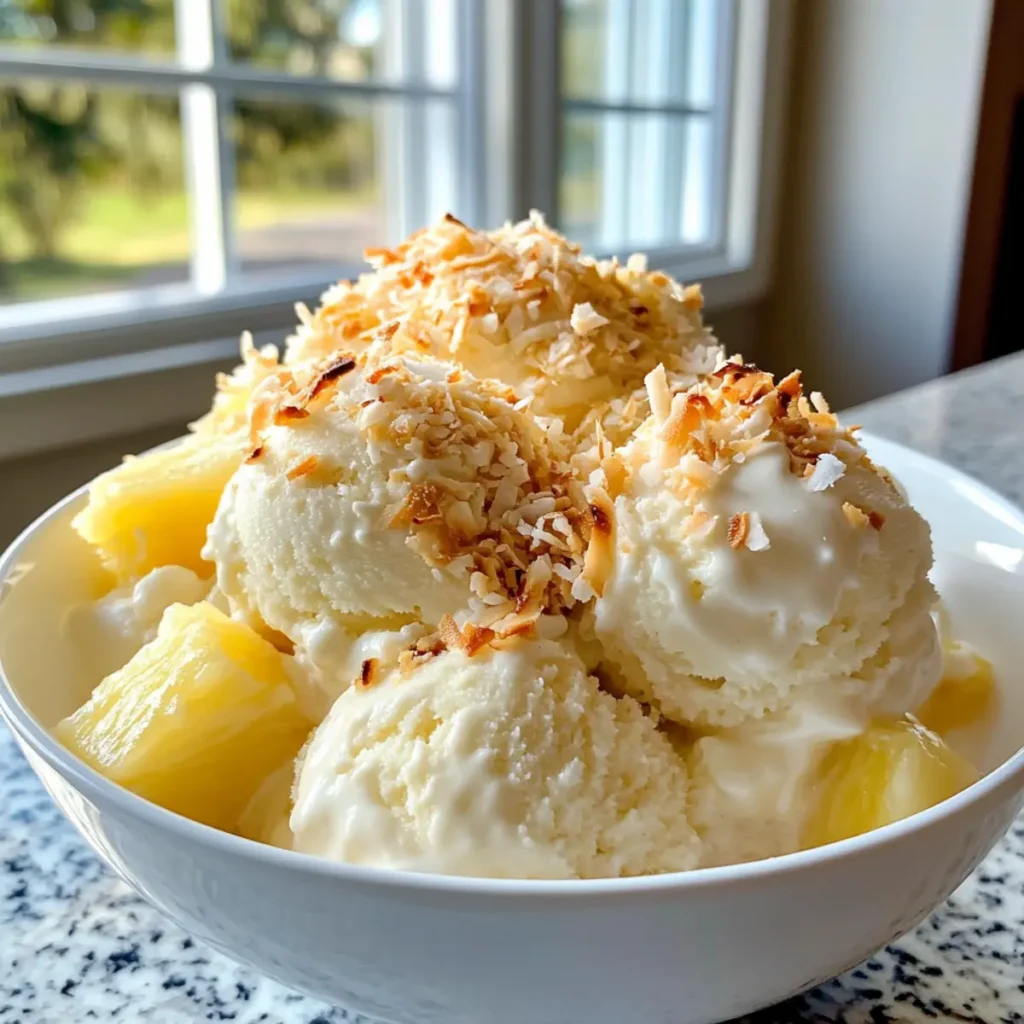
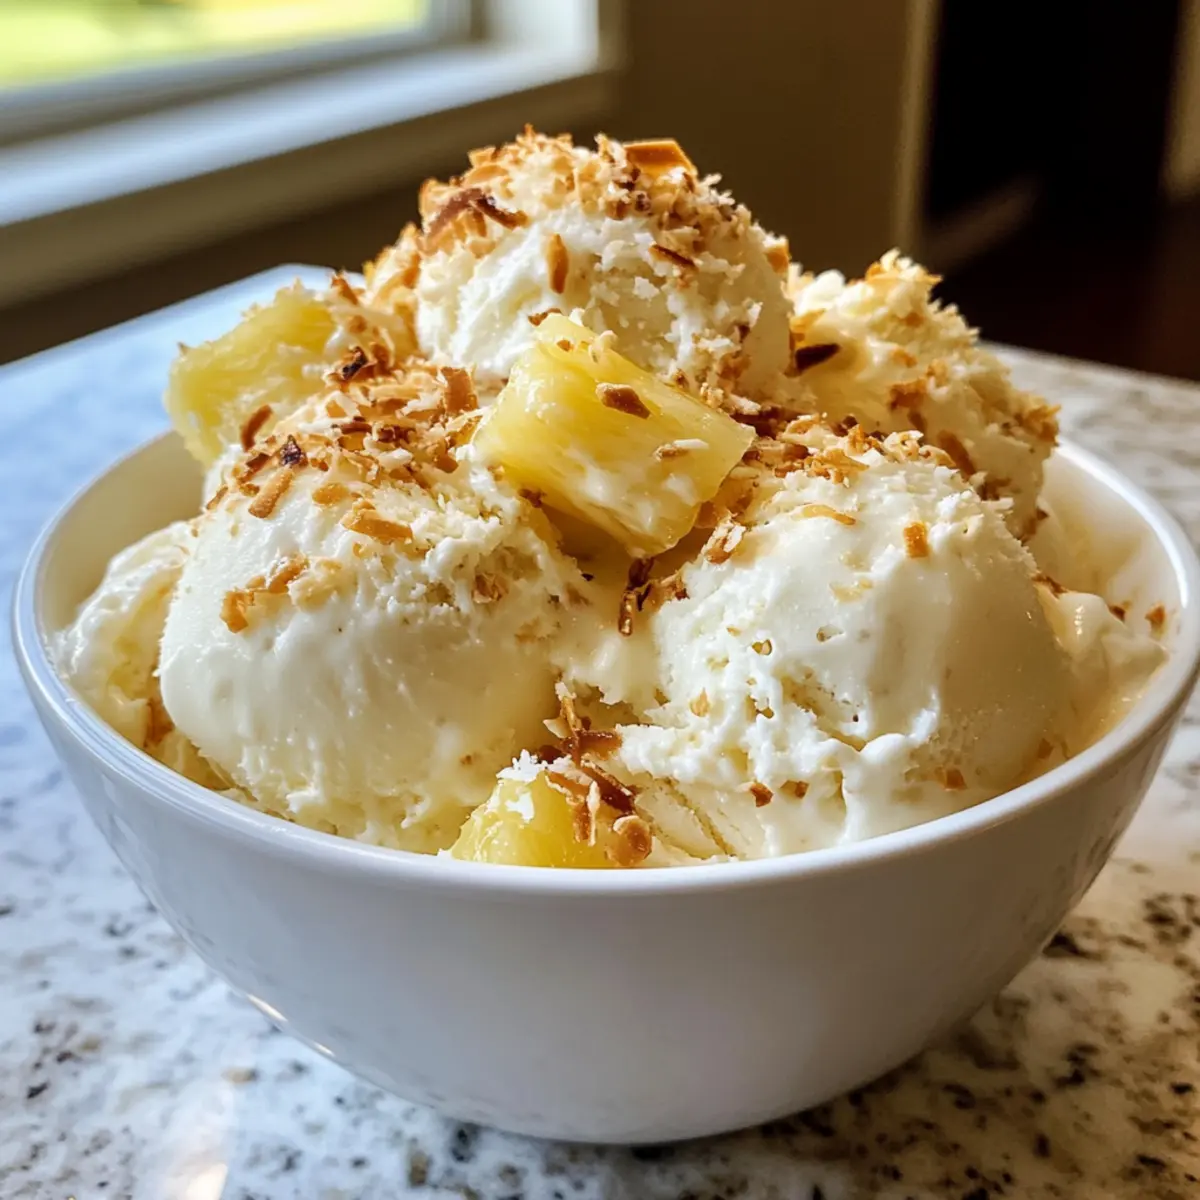
When you’re ready to serve, take the ice cream out of the freezer and let it sit at room temperature for a few minutes for easier scooping. Scoop out portions into bowls, and top generously with the reserved toasted coconut and optional pineapple chunks for an extra tropical flair!
Pina Colada Ice Cream Variations
Feel free to get creative and make this Pina Colada Ice Cream your own with these tempting variations!
-
Dairy-Free: Substitute Thai coconut milk with almond or cashew milk for a lighter, dairy-free option that still feels rich.
-
Fruit Fusion: Swap pineapples for mango or peach to create a whole new tropical experience, bursting with sweet flavors!
-
Non-Alcoholic: Skip the rum entirely for a family-friendly dessert that everyone can enjoy, without losing any of the fun.
-
Extra Crunch: Add in crushed macadamia nuts or pecans along with the toasted coconut for delightful texture and nutty flavor.
-
Chocolate Drizzle: For a decadent twist, drizzle melted dark chocolate over the top before serving for an indulgent finishing touch.
-
Spicy Kick: Mix in a dash of cayenne pepper or finely chopped jalapeño for a surprising, sweet-heat sensation that awakens your taste buds.
-
Coconut Milk Variance: Try using coconut cream for a richer and creamier ice cream, elevating the tropical experience with extra coconut flavor.
-
Tropical Sundaes: Serve your ice cream topped with fresh fruit, a sprinkle of toasted coconut, and a drizzle of caramel or chocolate sauce for a fun sundae bar at home!
You can also explore flavors that complement this ice cream, such as making a luscious Carrot Sheet Cake to accompany your tropical treat, or dive into the delicious world of Gingerbread Spice Cheesecake for dessert ideas that transport you further into sweetness!
Make Ahead Options
The Toasted Coconut Pina Colada Ice Cream is perfect for meal prep, allowing you to indulge in tropical flavors without the last-minute rush! You can prepare the pineapple puree up to 24 hours in advance; simply blend and refrigerate it in an airtight container. Additionally, the toasted coconut can be made ahead and stored at room temperature for up to 3 days. When you’re ready to churn, mix the ingredients and process them according to your ice cream maker’s instructions. Fold in the toasted coconut just before freezing for that delightful crunch, ensuring your ice cream retains its creamy texture and sumptuous flavor. This way, you can effortlessly serve up a refreshing treat that’s just as delicious as when freshly made!
How to Store and Freeze Pina Colada Ice Cream
Fridge: Enjoy your Pina Colada Ice Cream fresh for up to 3 days if kept in an airtight container, although best consumed frozen to retain its creamy texture.
Freezer: Store in an airtight container for up to 2 weeks, ensuring it’s tightly sealed to prevent ice crystals from forming.
Reheating: If the ice cream hardens too much, let it sit at room temperature for about 5-10 minutes before scooping for a smoother serving experience.
Reminders: Always label your container with the date of freezing. Homemade ice cream, like this Pina Colada Ice Cream, is best enjoyed fresh!
Expert Tips for Pina Colada Ice Cream
-
Perfect Mixture: Ensure your mixture is well-combined before churning. This step prevents icy chunks and helps achieve that creamy texture in your Pina Colada Ice Cream.
-
Toast Coconut Carefully: Monitor the coconut closely while toasting. It can burn quickly; you want it golden and fragrant, not charred.
-
No Ice Cream Maker? Don’t fret! You can make delicious ice cream by pouring the mixture into a shallow dish and stirring every 30 minutes until frozen for about 3-4 hours.
-
Ingredient Substitutions: For a dairy-free option, substitute the Thai coconut milk with any creamy non-dairy alternative, and experiment with various fruits for new flavors.
-
Adjust Sweetness: Taste your mixture before freezing and adjust the sugar based on your preference. Fresh pineapples can vary in sweetness!
-
Serving Temperature: Let your Pina Colada Ice Cream sit out for a few minutes before serving. This makes scooping a breeze and enhances the flavor experience!
What to Serve with Toasted Coconut Pina Colada Ice Cream
The perfect tropical escape can be fully realized when you complement this delightful dessert with the right pairings.
-
Crunchy Cookies: The sweet and buttery flavors of freshly baked cookies provide a delightful contrast to the creamy ice cream texture. Consider classic shortbread or coconut macaroons for an extra tropical touch.
-
Grilled Pineapple Skewers: Caramelized and warm, these juicy bites enhance the pineapple flavors in your ice cream, offering a sweet and smoky contrast that elevates each scoop.
-
Mint Sprigs: Adding a handful of fresh mint not only brightens up the dessert but also adds a refreshing aroma. This herbaceous note pairs beautifully with the rich coconut and pineapple.
-
Chocolate Drizzle: A rich chocolate sauce creates a luxurious experience that harmonizes with the tropical taste. Just drizzle over the ice cream for an indulgent twist that will please chocolate lovers.
-
Coconut Whipped Cream: Light and airy, this creamy topping is a marvelous way to emphasize the coconut flavors in the ice cream, adding a touch of elegance to each serving.
-
Margarita Mocktail: A refreshing beverage made with lime, mint, and a splash of soda will complement those fruity flavors without overpowering them. Perfect for summer gatherings!
-
Fruit Salad: A colorful assortment of tropical fruits, perhaps mangoes and kiwi, enhances the summery feel of the dessert while bringing additional freshness to the table.
-
Coconut Ladoo: For a cultural twist, serve these traditional Indian sweets made of coconut and condensed milk for a delightful flavor contrast. Their chewy texture pairs wonderfully with the ice cream!
Let your taste buds travel as you select from these delightful pairings to create a memorable dessert experience!
Advertisement
Toasted Coconut Pina Colada Ice Cream Recipe FAQs
How do I choose ripe pineapple for my Pina Colada Ice Cream?
Absolutely! When selecting a fresh pineapple, look for one that is slightly fragrant at the base and has a golden color. The leaves should be green and fresh, not wilted. A ripe pineapple will yield slightly to pressure when you apply a gentle squeeze.
How should I store my Pina Colada Ice Cream, and how long will it last?
This homemade ice cream can be stored in an airtight container in the freezer for up to 2 weeks. Be sure to seal it tightly to prevent ice crystals from forming. Before serving, allow it to sit at room temperature for about 5-10 minutes for easier scooping!
Can I freeze Pina Colada Ice Cream?
Definitely! To freeze, transfer your ice cream into a well-sealed, airtight container. This ice cream can be safely frozen for up to 2 weeks. If you find it too firm when ready to serve, let it sit at room temperature for about 5-10 minutes to soften slightly before scooping.
What should I do if my ice cream turns out icy?
To achieve a creamy texture, it’s essential to make sure all your ingredients are well mixed before churning. If you experience icy chunks, it might be due to aeration not being adequate or too much air being incorporated. For silky-smooth results, you can also try churning it longer or using an ice cream maker with a built-in compressor to control the temperature.
Are there any dietary considerations I should be aware of when making Pina Colada Ice Cream?
Very! If you’re serving this treat to children or those avoiding alcohol, simply skip the rum for a family-friendly version. Moreover, for dairy-free needs, substitute the Thai coconut milk with any creamy non-dairy alternative, such as almond or oat milk. Always check individual ingredient labels for allergen information!

Homemade Pina Colada Ice Cream for a Tropical Escape
Ingredients
Equipment
Method
- Begin by peeling and chopping half of a fresh pineapple. Blend until slightly chunky to measure out 1 ¾ cups of puree. Set aside.
- In a large mixing bowl, whisk together 1 can of Thai coconut milk, the pineapple puree, sugar, and a pinch of salt. Add dark rum if desired. Mix until smooth.
- Preheat your oven to 350°F (175°C). Spread sweetened coconut flakes on a baking sheet and toast for 6-7 minutes until lightly browned.
- Pour the mixture into an ice cream machine and churn according to instructions for 20-25 minutes until thick.
- Fold in ¾ cup of toasted coconut, reserving some for topping. Mix gently to keep some texture.
- Transfer to an airtight container and freeze for at least 4 hours until firm.
- Let the ice cream sit at room temperature for a few minutes before serving. Top with reserved toasted coconut and optional pineapple chunks.