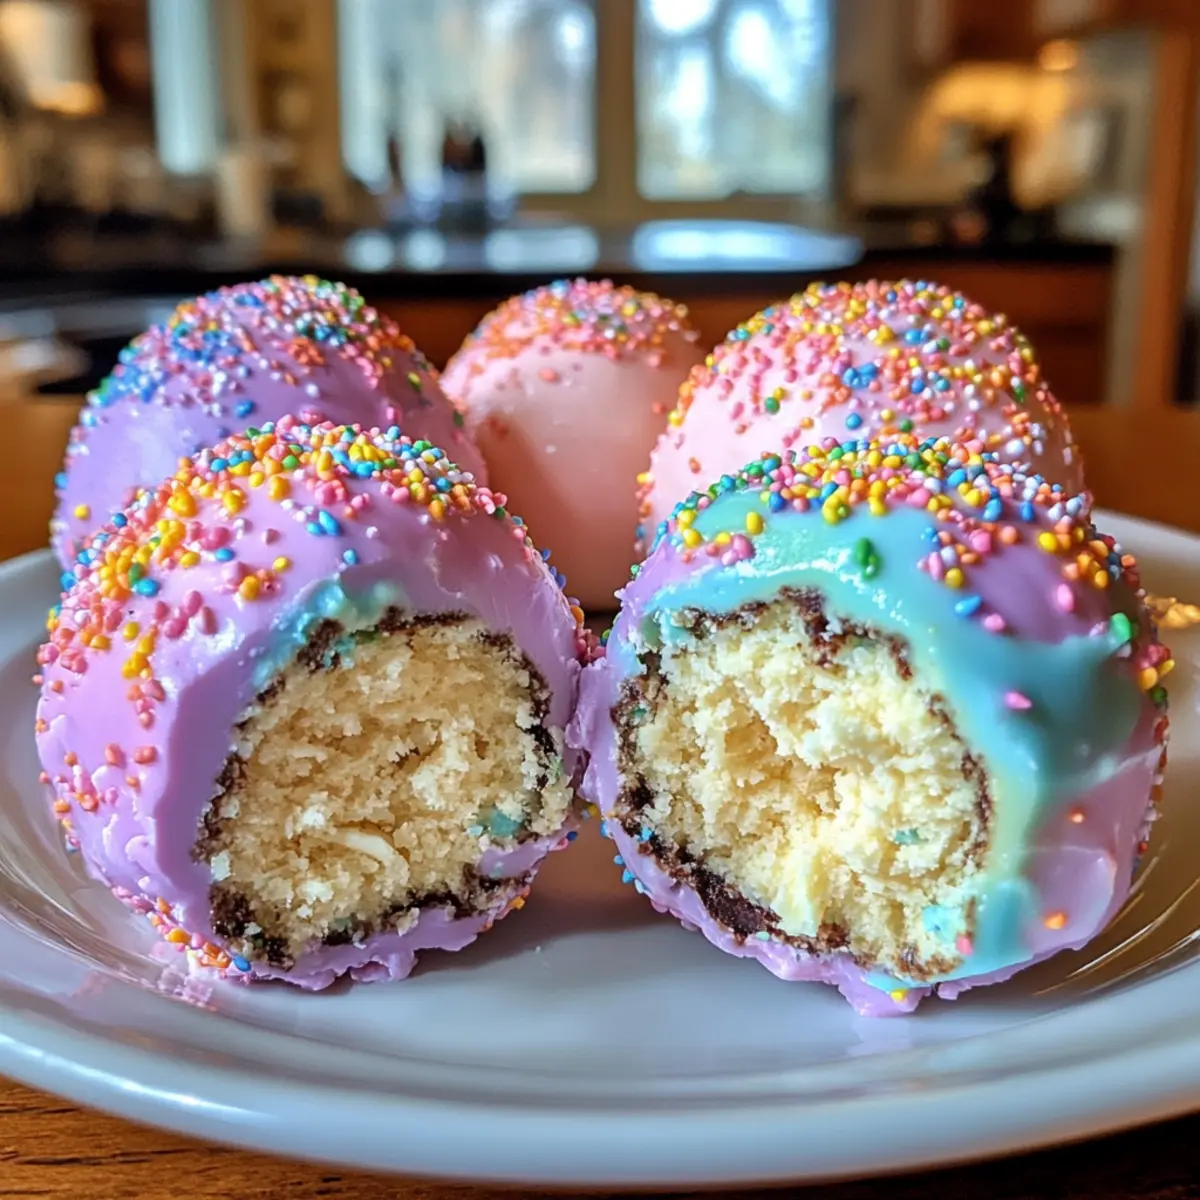
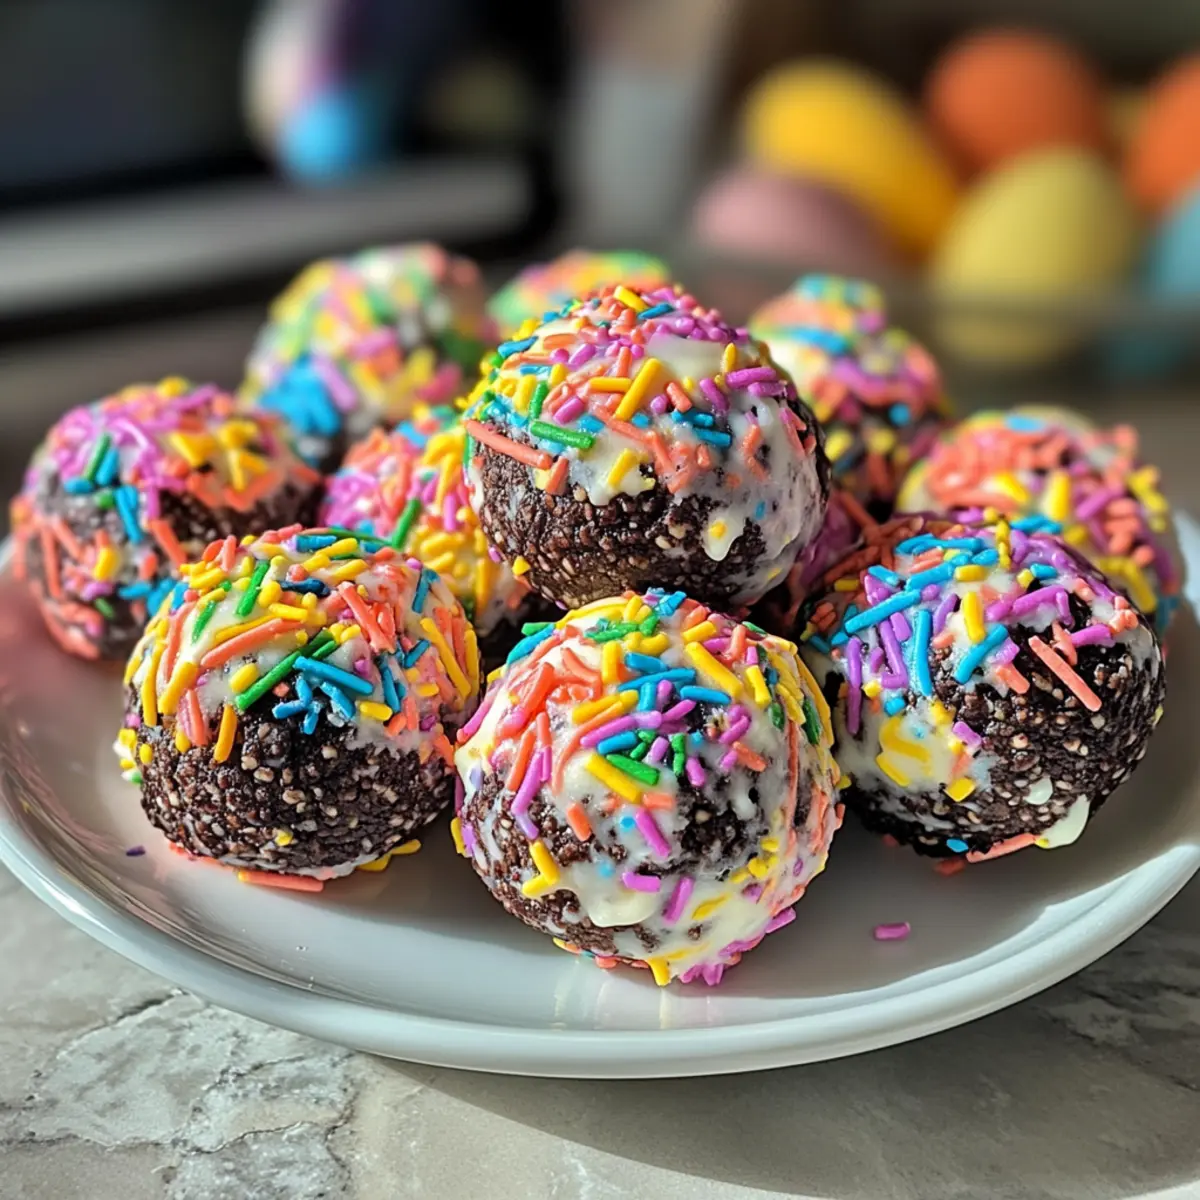
The kitchen filled with laughter and the sweet scent of chocolate as I crafted my latest treat—Easter Egg Oreo Balls. These no-bake delights combine the iconic taste of Oreos with a creamy center, all wrapped in a festive candy coating. It’s hard to believe something so simple can look so impressive! With only a handful of ingredients and endless customization opportunities, this recipe is a perfect way to bring the family together for a fun baking session. Whether you’re preparing for a festive gathering or just looking to make a sweet surprise for loved ones, these Easter Egg Oreo Balls are sure to be a hit with everyone, from kids to adults. Ready to explore how to make these charming treats? Let’s hop to it!
Why Are Easter Egg Oreo Balls the Best?
Endless Customization: With simple ingredients, you can transform these treats to match any theme or flavor preference. Try swapping Oreos for other cookies or adding your favorite extracts.
No-Bake Convenience: These delightful treats come together without turning on the oven, making them perfect for busy schedules or warm days.
Family Fun: Involve the family! Shaping and decorating these egg-shaped bites is a perfect activity for kids and adults alike.
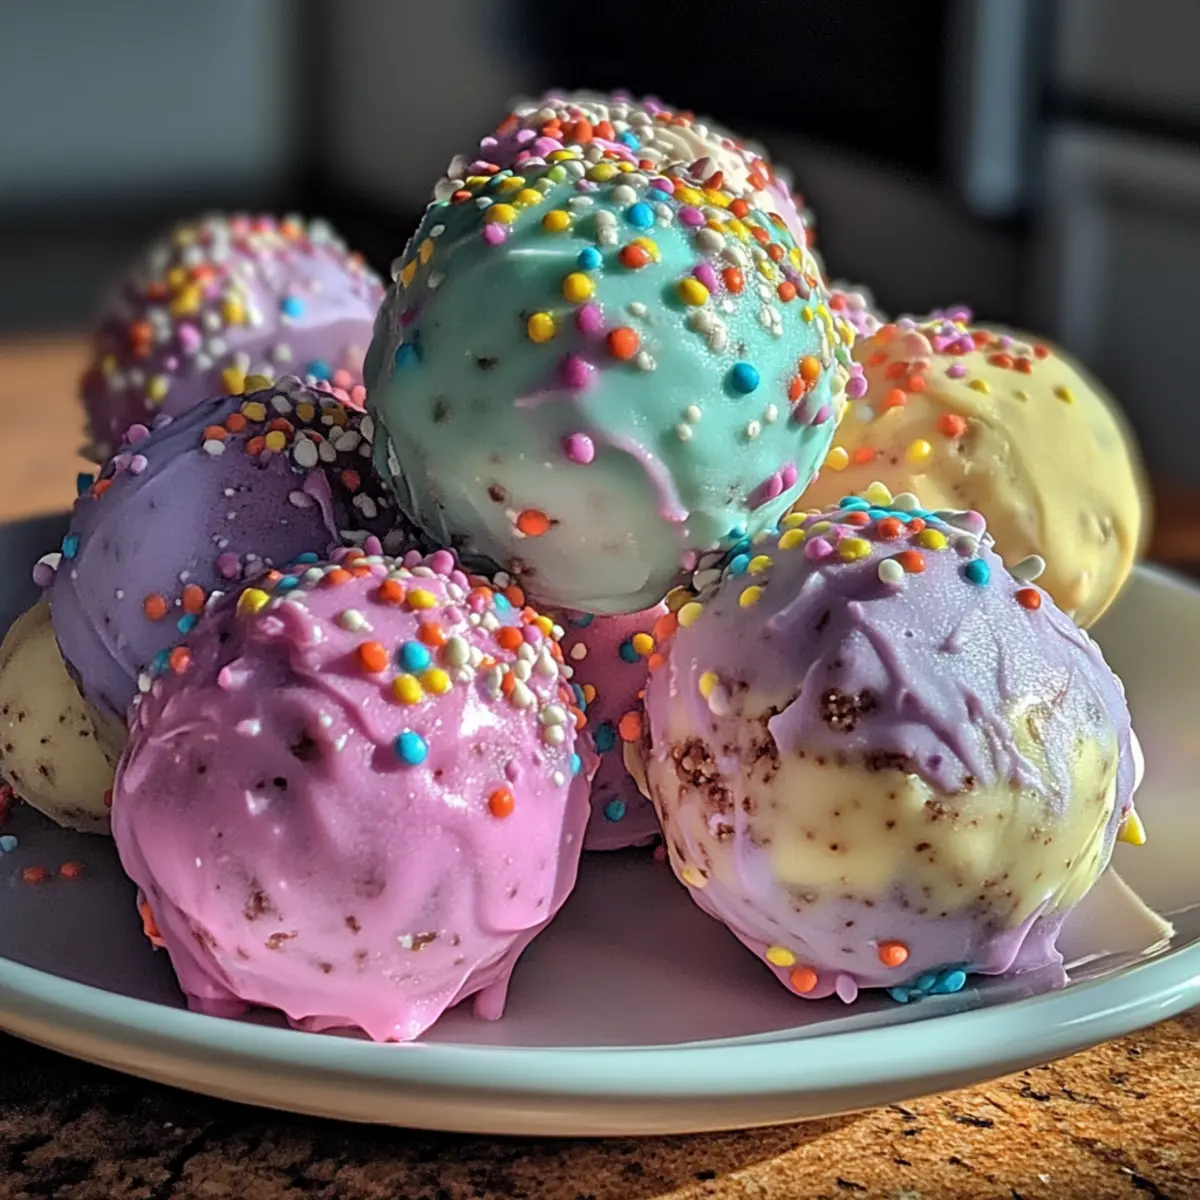
Eye-Catching Treats: Their colorful appearance makes them a standout addition to any festive table, ensuring your dessert is not only delicious but visually stunning.
Perfect for Any Occasion: From Easter celebrations to birthday parties, these Easter Egg Oreo Balls are a guaranteed crowd-pleaser that everyone will enjoy!
Easter Egg Oreo Balls Ingredients
For the Truffle Base
• Oreo cookies – Form the foundation of this recipe, lending their iconic chocolate flavor; feel free to experiment with different Oreo varieties!
• Cream cheese – Provides a rich, creamy center that binds the Oreo mixture together; consider using reduced-fat or dairy-free options for a lighter treat.
• Vanilla extract (optional) – Adds depth to the flavor profile, though you could omit it or swap it for almond extract for a twist.
For the Coating
• White candy melts – Create a smooth and colorful coating for your Easter Egg Oreo Balls; if needed, substitute with white chocolate chips, adding coconut oil for a smoother melting experience.
• Pastel food coloring – Essential for achieving that vibrant, festive look; opt for gel food coloring for the best results without thinning your coating.
For the Decoration (optional)
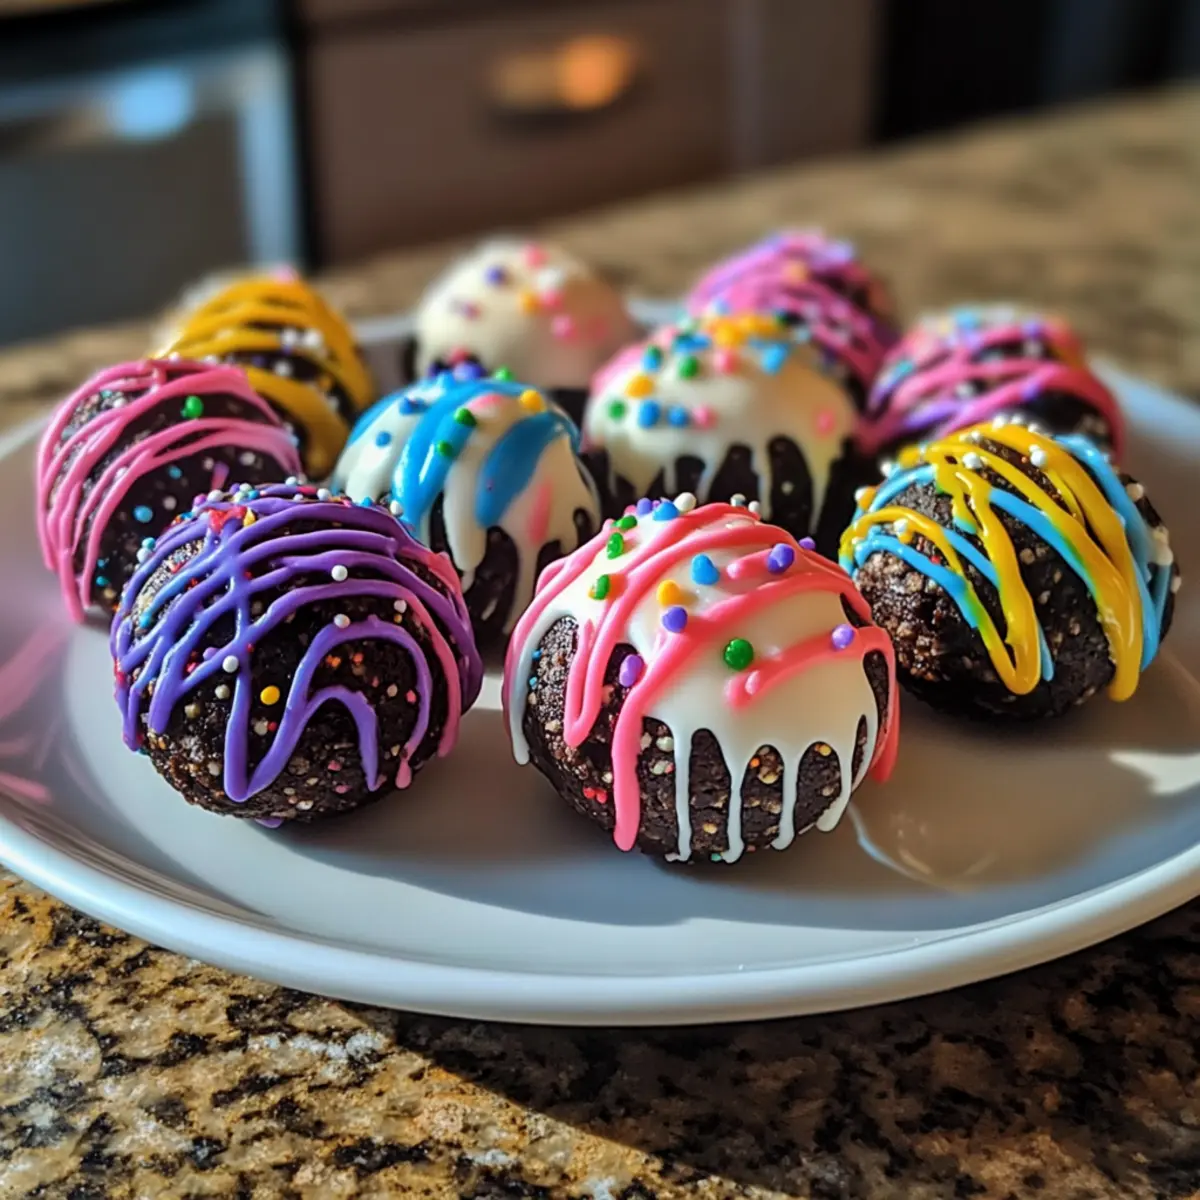
• Sprinkles/sanding sugar/drizzle – Perfect for adding a playful finish, these toppings give your Easter Egg Oreo Balls an eye-catching allure!
These Easter Egg Oreo Balls are not only a delightful dessert, but they’re also customizable, making them a fun treat for any occasion!
Step‑by‑Step Instructions for Easter Egg Oreo Balls
Step 1: Crush Oreos
Begin by finely crushing Oreos in a food processor or a zip-top bag. Aim for a powder-like consistency, ensuring the cream filling is included for added richness. This should take about 2-3 minutes in a food processor, and about 5 minutes by hand. Once crushed, transfer the Oreos to a large mixing bowl to prepare for the next step.
Step 2: Mix Filling
In the bowl with the crushed Oreos, add softened cream cheese and optional vanilla extract. Using a spatula or your hands, mix vigorously until a thick and cohesive dough forms, about 3-4 minutes. The mixture should hold together well without crumbling. This delightful blend creates the creamy center for your Easter Egg Oreo Balls.
Step 3: Shape Eggs
Scoop about 1 tablespoon of the Oreo mixture and roll it into an egg shape between your palms. Aim for uniformity in size for even coating later. Place each shaped egg on a parchment-lined baking sheet, keeping them spaced apart to prevent sticking. Repeat this process until all the mixture is formed into egg shapes, which should yield about 15-20 eggs.
Step 4: Chill
Cover the baking sheet with plastic wrap and refrigerate the shaped eggs for at least 30 minutes, or freeze for 15 minutes, until they are firm. This chilling process helps the eggs maintain their shape during coating. Once firm, they will be easier to dip and handle without melting.
Step 5: Melt Coating
In a microwave-safe bowl, melt the white candy melts according to the package instructions, typically in 30-second increments, stirring in between until smooth. If using white chocolate chips, add a small amount of coconut oil to achieve a smooth consistency. The candy melts should be completely liquefied and glossy, ready for coating.
Step 6: Color Coating
Divide the melted candy into smaller bowls if desired, and mix in pastel food coloring until you achieve the desired vibrant hues. Gel food coloring works best, allowing for rich colors without thinning the candy melt. This step adds that festive touch to the Easter Egg Oreo Balls, making them visually appealing for any occasion.
Step 7: Dip Eggs
Take each chilled egg and dip it into the melted coating, using a fork to submerge it completely. Allow any excess coating to drip off, then gently place it back on the parchment-lined sheet. Repeat this process until all eggs are coated, ensuring that they are evenly covered for a smooth finish.
Step 8: Decorate
Before the coating sets, sprinkle decorative toppings like sprinkles or sanding sugar on each egg for a playful finish. If you wish to drizzle another candy color over them, use a fork or a piping bag for precision. The decorations should be added quickly while the coating is still wet, allowing them to adhere properly.
Step 9: Set
Let the coated eggs sit at room temperature for about 15 minutes or refrigerate for 10 minutes until the coating hardens completely. This allows the colorful candy shell to firm up, enhancing the overall texture and appearance of your Easter Egg Oreo Balls, making them delightful to look at and even better to eat.
Step 10: Serve
Once set, your Easter Egg Oreo Balls are ready to be served! Arrange them on a beautiful Easter platter for an eye-catching display or store them in an airtight container in the refrigerator for up to 5 days. These treats are perfect for sharing at holiday gatherings or simply enjoying as a sweet treat at home.
Make Ahead Options
These Easter Egg Oreo Balls are perfect for busy cooks looking to save time without sacrificing flavor! You can prepare the Oreo mixture and shape the eggs up to 24 hours in advance; just store them in an airtight container in the refrigerator to maintain their texture. For an even quicker option, chill the formed eggs for about 30 minutes, then freeze them for up to 2 months—they’ll hold their shape beautifully. When you’re ready to finish, simply melt the candy coating, dip the frozen eggs (no need to thaw), and decorate immediately. Your festive treats will be just as delicious and impressive, allowing you to enjoy the sweet moments with your loved ones!
Storage Tips for Easter Egg Oreo Balls
- Fridge: Store your Easter Egg Oreo Balls in an airtight container in the refrigerator for up to 5 days. This keeps them fresh and flavorful, ready for snacking!
- Freezer: For longer storage, freeze the Oreo balls in a single layer on a baking sheet until firm, then transfer to a freezer-safe container. They can be kept for up to 2 months.
- Thawing: To enjoy frozen Easter Egg Oreo Balls, simply transfer them to the fridge 1-2 hours before serving. This gentle method keeps their texture intact.
- Reheating: These treats are best enjoyed chilled or at room temperature, so no reheating is required! Just allow them to come to your desired temperature before indulging.
What to Serve with Easter Egg Oreo Balls
Build a memorable Easter feast around these delightful no-bake treats that will captivate both young and old alike.
- Creamy Cheesecake: The rich texture of cheesecake beautifully balances the sweet crunch of Oreo balls, creating a heavenly dessert duo.
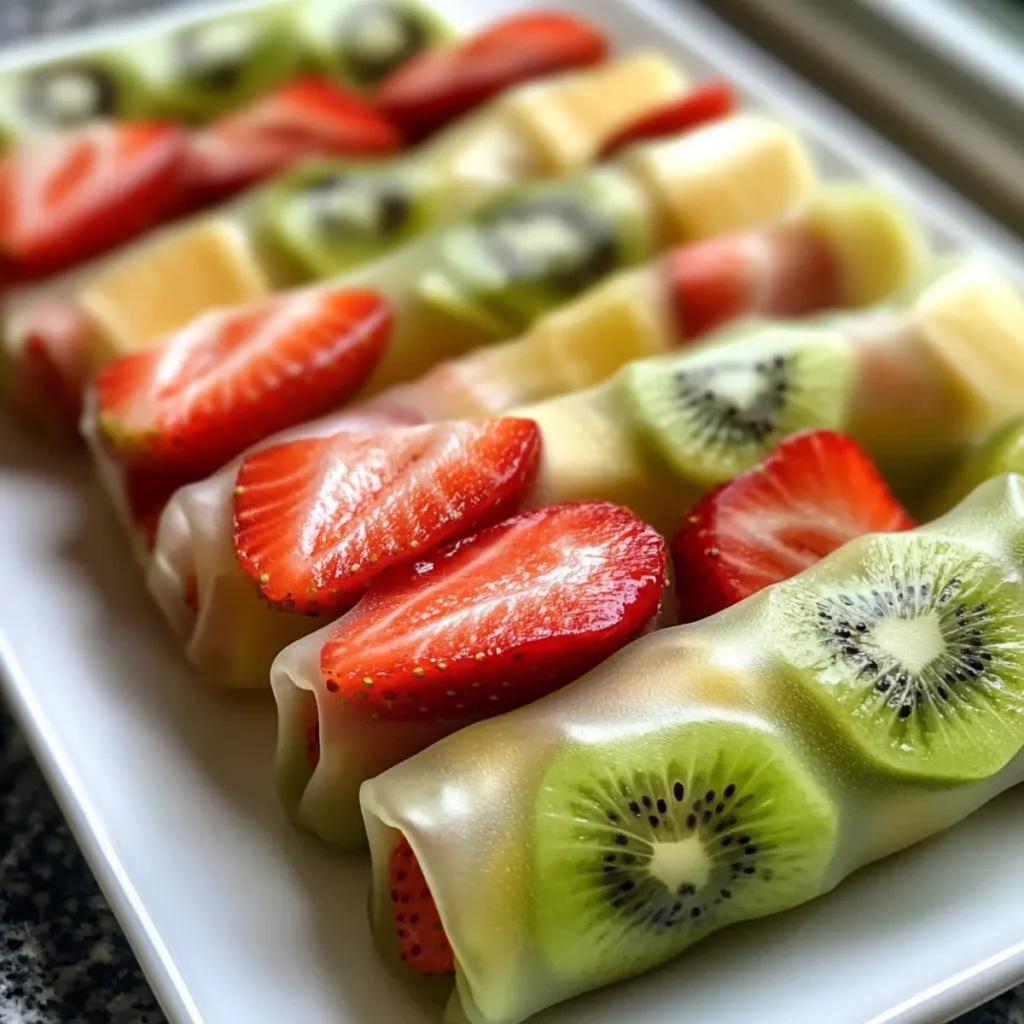
- Fresh Fruit Salad: A refreshing mix of seasonal fruits adds color and brightness, complementing the sweetness of the Easter Egg Oreo Balls perfectly.
- Chocolate Fondue: For a fun interactive dessert, serve melted chocolate with fresh fruits and marshmallows for dipping alongside the Oreo balls.
- Carrot Cake: The spiced layers of carrot cake harmonize with the chocolatey flavor, making a classic pairing for an Easter gathering.
- Mint Chocolate Milkshake: This cool, creamy drink enhances the chocolate experience, providing a refreshing contrast to the sweet candy shell.
- Spring Green Salad: A light salad with mixed greens, strawberries, and a citrus vinaigrette offers a crisp, vibrant counterpoint to the rich dessert.
- Coffee or Espresso: The bold flavors of coffee can cut through the sweetness of the Oreo balls, creating a delightful end to the meal.
- Vanilla Ice Cream: A scoop of classic vanilla or a dollop of whipped cream can add a delightful creaminess to your dessert table.
Mix and match these options to create a festive spread that everyone will adore!
Expert Tips for Easter Egg Oreo Balls
- Chill for Firmness: Ensure your shaped Oreo mixture is sufficiently chilled before dipping to maintain their egg shape; this prevents melting during coating.
- Melt Smoothly: If using chocolate chips, always add a bit of coconut oil to achieve a smoother melting consistency, making dipping easier.
- Use Gel Colors: Choose gel food coloring for vibrant hues without thinning the coating, guaranteeing a stunning finish on your Easter Egg Oreo Balls.
- Decorate Quickly: Add sprinkles or drizzle before the coating sets to ensure they adhere well, enhancing both appearance and flavor.
- Experiment with Flavors: Don’t hesitate to mix in flavored extracts or swap Oreos for different cookie varieties to create unique and delicious variations!
Easter Egg Oreo Balls Variations
Feel free to get creative and personalize your Easter Egg Oreo Balls with these fun and flavorful twists!
-
Golden Oreos: Swap regular Oreos for Golden Oreos for a lighter flavor. This brings a buttery taste that’s simply delightful!
-
Dairy-Free Delight: Use dairy-free cream cheese and coconut oil to create a vegan version. These will still be irresistibly delicious!
-
Minty Fresh: Add a drop of peppermint extract to the filling for a fresh, minty twist that pairs perfectly with chocolate. Each bite will feel like spring!
-
Tropical Paradise: Replace white candy melts with melted chocolate mixed with coconut flakes for a chewy, tropical variation. The coconut adds a playful, cheerful texture!
-
Nutty Surprise: Mix in crushed nuts or nut butter with the Oreo filling. This addition gives a satisfying crunch and a rich flavor twist.
-
Extra Crunch: Roll your chilled eggs in crushed graham crackers or fine chopped nuts after dipping for added texture and a delightful contrast to the creamy filling.
-
Spiced Fall: Incorporate a pinch of cinnamon or pumpkin spice into the cream cheese mixture for a cozy, autumn-inspired version. It’s like a hug in dessert form!
-
Simply Swirled: Before the candy coating sets, drizzle with contrasting colors of melts or chocolate for an eye-catching design. This makes them not only tasty but stunning!
Feel free to explore these variations, or hop on over to make some festive treats like Grinch Oreo Balls or Golden Cheesecake Egg Rolls for even more creative options!
Easter Egg Oreo Balls Recipe FAQs
How do I choose the best ripeness or selection of ingredients?
Absolutely! For the best flavor in your Easter Egg Oreo Balls, use fresh, high-quality Oreo cookies. If you’re opting for cream cheese, ensure it’s softened but not spoiled—check for a smooth texture and a light, creamy smell. Avoid any cream cheese that appears discolored or has a sour odor.
Advertisement
How should I store Easter Egg Oreo Balls?
To keep your Easter Egg Oreo Balls fresh, store them in an airtight container in the refrigerator for up to 5 days. If you plan to keep them longer, place the balls in a single layer on a baking sheet to freeze until firm, then transfer them to a freezer-safe container. They can be frozen for up to 2 months, ensuring a sweet treat is always on hand!
Can I freeze Easter Egg Oreo Balls? What’s the best method?
Absolutely! Freezing Easter Egg Oreo Balls is a great way to prolong their life. Follow these steps: after shaping them, place the eggs in a single layer on a parchment-lined baking sheet and freeze for 1 to 2 hours until hard. Then, transfer the frozen eggs to a freezer-safe container with parchment between layers to prevent sticking. They’ll stay fresh in the freezer for about 2 months!
What if my coating is too thick or not melting properly?
Very! If your coating has thickened or is struggling to melt smoothly, don’t worry! Try adding a teaspoon of coconut oil to your melted candy melts or chocolate chips, mixing it in until the mixture becomes glossy and easy to dip. If it still seems too thick, you can microwave it in 10-second intervals, stirring in between, until you achieve your desired consistency. This will ensure a beautifully smooth coating every time.
Are there any dietary considerations I should keep in mind for my Easter Egg Oreo Balls?
Yes, it’s important! For those with dietary restrictions, consider using gluten-free Oreos to make these delightful treats celiac-friendly. Additionally, if someone has lactose intolerance, opt for dairy-free cream cheese and vegan candy melts to cater to their needs. Moreover, always double-check the labels for any potential allergens. It’s wonderful to make sure everyone can enjoy these festive treats!
What should I do if my Oreo filling mixture is too crumbly?
If you find the Oreo filling mixture is too crumbly and not coming together, you might be dealing with a bit of dry dough. No worries! Gently add a teaspoon of softened cream cheese and mix again until it reaches a more cohesive, dough-like consistency. If it remains crumbly, adding a small dash of vanilla or just a touch more cream cheese can help bind it effectively. Embrace the process—adjusting as needed is part of the fun!
Delightful Easter Egg Oreo Balls That Are a No-Bake Treat
Ingredients
Equipment
Method
- Begin by finely crushing Oreos in a food processor or a zip-top bag for about 2-3 minutes.
- In the bowl with the crushed Oreos, add softened cream cheese and optional vanilla extract, mixing until a thick dough forms.
- Scoop about 1 tablespoon of mixture and roll into an egg shape, placing each on a parchment-lined baking sheet.
- Cover with plastic wrap and refrigerate for at least 30 minutes until firm.
- Melt white candy melts in a microwave-safe bowl until smooth, stirring at 30-second intervals.
- Mix in pastel food coloring to achieve vibrant hues.
- Dip each chilled egg into the melted coating, allowing excess to drip off, then place back on the baking sheet.
- Sprinkle decorative toppings before the coating sets.
- Let coated eggs set at room temperature for about 15 minutes until the coating hardens.
- Serve on a platter or store in an airtight container in the refrigerator for up to 5 days.