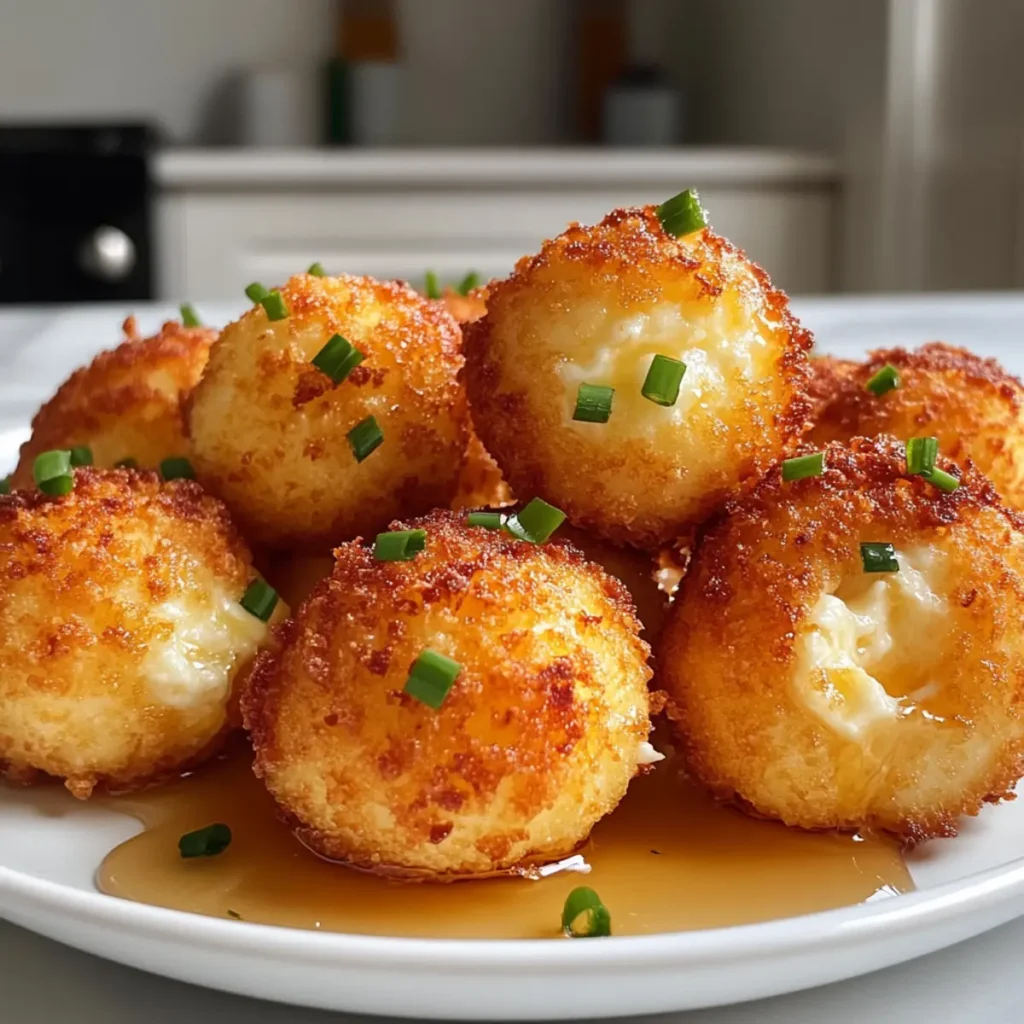
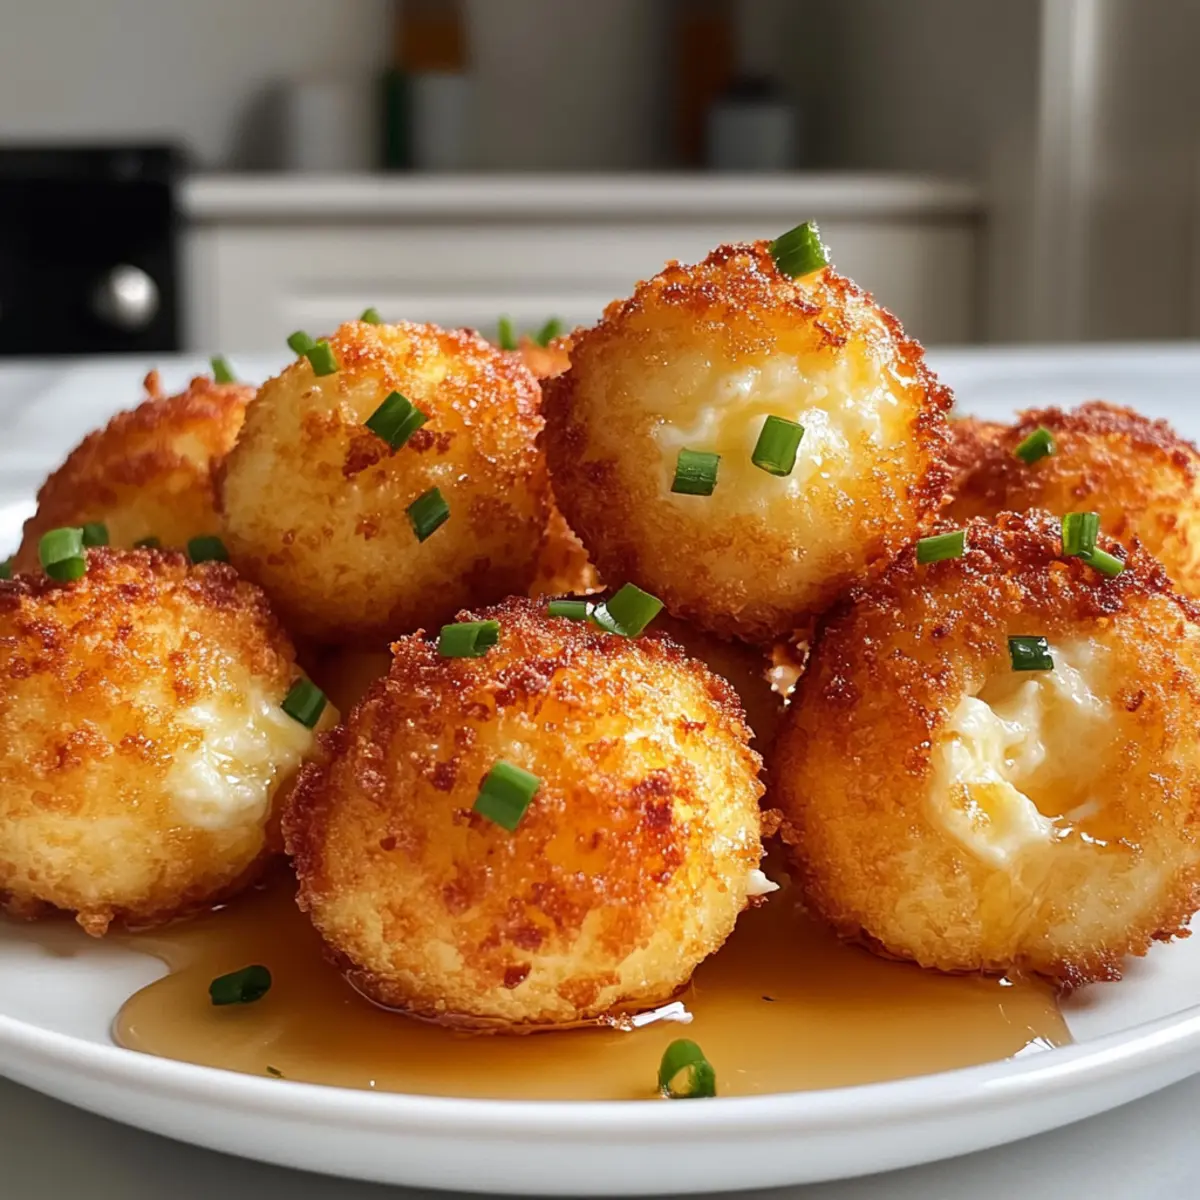
The sizzle of cheese hitting hot oil is enough to awaken any food lover’s senses! These Crispy Goat Cheese Poppers with Honey are my go-to for impressing guests or satisfying late-night cravings. Not only do they deliver a delightful crispy exterior that gives way to creamy goat cheese, but they also combine the sweet and savory notes of honey and chives for an irresistible treat. Quick to prepare and perfect as a party appetizer or a cozy snack with crackers, they promise to be a crowd-pleaser on any table. Curious about how to elevate your snacking game? Let’s dive into this cheesy wonder!

Why are these poppers a must-try?
Melty Goodness: Every bite reveals a creamy center of goat cheese that serenades your taste buds.
Quick and Easy: Ready in just a few steps, making them perfect for spontaneous gatherings or snacks.
Sweet-Savory Fusion: The combination of honey and chives adds a gourmet twist that pairs beautifully with the cheese.
Crowd-Pleaser: Whether you’re hosting a party or just craving comfort food, these poppers are sure to impress everyone.
Endless Versatility: Serve them as appetizers, gourmet salad toppings, or simply with crackers for a delightful evening at home. If you love simple yet sophisticated recipes, check out my Cheesecake Cookies Salted for another irresistible treat!
Crispy Goat Cheese Poppers Ingredients
For the Coating
- All-purpose flour – Provides the base coating for the cheese balls; can substitute with gluten-free flour for a gluten-free option.
- Black pepper – Adds a touch of warmth and flavor to the dish.
- Large egg – Acts as a binding agent to help the coatings adhere.
- Kosher salt – Enhances the overall flavor of the poppers.
- Panko breadcrumbs – Creates that irresistible crunchy exterior; substitutions are not recommended, as panko gives the best texture.
For the Filling
- Soft goat cheese – The star ingredient, delivering a creamy center; can be replaced with cream cheese for a milder taste if desired.
For Frying
- Oil (grapeseed, canola, or vegetable) – Used for frying, providing the necessary heat for achieving crispiness.
For the Drizzle
- Honey – Adds a sweet contrast to the savory cheese; can be swapped with agave syrup for a vegan-friendly option.
- Minced fresh chives – Provides a fresh herbaceous note which enhances flavor and presentation.
These Crispy Goat Cheese Poppers with Honey promise a delightful experience that is not only satisfyingly creamy but also perfect for impressing family and friends alike!
Step‑by‑Step Instructions for Crispy Goat Cheese Poppers with Honey
Step 1: Prepare Coatings
In a medium bowl, whisk together 1 cup of all-purpose flour and ½ teaspoon of black pepper until combined. In a separate bowl, crack an egg and add a pinch of kosher salt along with a tablespoon of water; whisk until frothy. Pour about 1.5 cups of panko breadcrumbs into a third bowl, ensuring all your coatings are set and ready to create those Crispy Goat Cheese Poppers!
Step 2: Form Cheese Balls
Take 8 ounces of soft goat cheese and roll it into 24 tablespoon-sized balls, making sure they’re even and smooth. Platters or a baking sheet lined with parchment paper help keep them organized while you work. Each ball should be just about the size of a golf ball for perfect frying. These little bites of creamy goodness will become the heart of your crispy delight.
Step 3: Coat Balls
Begin the coating process by rolling each goat cheese ball in the flour mixture, making sure they are evenly coated. Next, dip the floured ball into the egg mixture, letting any excess drip off, and finally roll it in the panko breadcrumbs, pressing gently to ensure a good coating. Repeat until all the cheese balls are well-coated, creating that crunchy exterior perfect for your Crispy Goat Cheese Poppers with Honey.
Step 4: Freeze
Place the coated cheese balls in the freezer for about 20 minutes. This step is crucial as it helps the poppers firm up, ensuring they hold their shape during frying. While they chill, you can prepare your frying station, making sure you have a slotted spoon ready for the perfect removal later!
Step 5: Fry
In a deep saucepan, heat about an inch of oil (grapeseed, canola, or vegetable) to 350°F over medium-high heat. Carefully add the cheese balls in batches, frying them for 1 to 2 minutes until they turn golden brown and crispy. Maintain your oil temperature to avoid greasy poppers; they should sizzle as they cook!
Step 6: Serve
Once golden and crisp, use a slotted spoon to remove each Crispy Goat Cheese Popper, letting the excess oil drain off. Arrange them on a serving platter, then drizzle with warm honey for a sweet touch and sprinkle freshly minced chives for a pop of color and flavor. Serve immediately while they’re hot and enjoy the delightful combination of creamy cheese and sweet-savory goodness!

Expert Tips
- Oil Temperature: Ensure your oil is at 350°F for optimal frying; too low will result in greasy Crispy Goat Cheese Poppers.
- Batch Frying: Avoid overcrowding the frying pan; fry in small batches for even cooking and crispiness.
- Firmness is Key: Freeze the cheese balls until they are firm to help them maintain shape while frying.
- Coating Technique: Be sure to fully coat and press the panko breadcrumbs onto the cheese balls for that perfect crunchy exterior.
- Serving Suggestions: Pair with crusty bread or fresh salads for a lovely balance to the creamy poppers.
How to Store and Freeze Crispy Goat Cheese Poppers
Fridge: Store leftover crispy goat cheese poppers in an airtight container for up to 3 days. To maintain their crunch, reheat them in an oven or air fryer.
Freezer: For longer storage, freeze the un-fried cheese balls on a baking sheet until firm, then transfer to a freezer bag. They can be stored for up to 3 months. Fry directly from frozen for a quick snack!
Reheating: To reheat, place cooked poppers in the oven at 375°F for about 10 minutes until warmed through. This helps restore their crispy texture.
Make Ahead Options
These Crispy Goat Cheese Poppers with Honey are perfect for meal prep enthusiasts! You can prepare the cheese balls and freeze them up to 24 hours in advance, ensuring they hold their shape during frying. Simply roll the goat cheese into balls, coat them in flour, egg, and panko, and freeze them on a baking sheet for about 20 minutes before transferring to an airtight container. When you’re ready to serve, heat the oil and fry the frozen poppers directly from the freezer for that crispy exterior and creamy interior, just as delicious as if they were made fresh! This approach not only saves you time on busy weeknights but also offers that same delightful taste everyone loves.
Crispy Goat Cheese Poppers with Honey Variations
Customize these delightful poppers to make them truly your own! Each twist brings new flavors and textures to the table.
- Gluten-Free: Swap all-purpose flour with gluten-free flour to cater to gluten sensitivities without sacrificing flavor.
- Creamy Alternative: For a milder taste, substitute goat cheese with cream cheese or even a spiced cheese for an exciting variation.
- Herb-Infused: Mix Italian herbs or paprika into the panko breadcrumbs to add an aromatic twist that elevates the flavor profile.
- Spicy Kick: Add crushed red pepper flakes to the flour mixture for a gentle heat that enhances the sweet-savory contrast.
- Sweet Swap: Use maple syrup instead of honey for a unique sweetness that pairs beautifully with the cheese.
- Nutty Crunch: Incorporate chopped nuts like almonds or pecans into the panko coating for an extra crunchy texture that delights with each bite.
- Savory Boost: Incorporate finely chopped green onions or garlic into the filling for a punch of flavor that makes these poppers irresistible.
- Dipping Delight: Serve with various dipping sauces like a spicy aioli or balsamic glaze to complement and enhance flavors, making your gatherings unforgettable.
For more cheesy goodness, consider pairing these with my Jalapeno Popper Eggrolls or indulge in the sweetness of my Carrot Sheet Cake. Enjoy your culinary adventure!
What to Serve with Crispy Goat Cheese Poppers with Honey
Elevate your dining experience with delicious accompaniments that perfectly balance the creamy, crunchy delights of these poppers.
- Fresh Arugula Salad: The peppery greens provide a refreshing contrast to the creamy poppers, adding a layer of freshness and texture.
- Garlic Herb Crackers: Choose crispy crackers to complement the richness of the goat cheese, enhancing the overall snacking experience with delightful crunch.
- Sweet Fig Jam: Spread fig jam on a cracker and top it with a popper; the sweet fruitiness mirrors the honey’s sweetness beautifully.
- Roasted Red Pepper Hummus: Serve a dollop of hummus alongside for a vibrant dip option. Its smooth texture complements the poppers while adding a savory note.
- Zesty Cucumber Salad: This cool salad offers a crisp bite and brightness, balancing the richness of the fried cheese with its refreshing crunch.
- Chardonnay or Sparkling Wine: A glass of chilled Chardonnay brings out the creaminess of the goat cheese, creating a luxurious pairing that heightens the tasting experience.
- Dark Chocolate Truffles: Indulge in a sweet finish to your meal with rich truffles, their deep flavors contrasting the savory cheese without overpowering the palate.
- Herbed Olive Oil for Drizzling: A simple yet tasty option—drizzle some herbed olive oil over the poppers for an extra layer of flavor and sophistication.
- Spicy Honey Drizzle: For an adventurous twist, mix honey with a hint of chili to drizzle over the poppers, elevating their sweet-salty profile to new heights.

Crispy Goat Cheese Poppers with Honey Recipe FAQs
What type of goat cheese is best for the poppers?
I recommend using soft goat cheese for the creamiest texture. If you’re looking for a milder flavor, you can substitute cream cheese, but it will alter the taste slightly. Make sure it’s fresh and not past the expiration date for the best results!
How should I store leftovers?
Store leftover crispy goat cheese poppers in an airtight container in the fridge for up to 3 days. To maintain their crunchy texture, I suggest reheating them in an oven or air fryer. This way, they get nice and crispy again!
Advertisement
Can I freeze the poppers?
Absolutely! For freezing, place the un-fried, coated cheese balls on a lined baking sheet and freeze until firm, about 20 minutes. Then move them to a freezer bag and store for up to 3 months. Fry them directly from frozen—no need to thaw, and they’ll be just as delicious!
What should I do if the cheese balls are falling apart while frying?
If your cheese balls are falling apart, it may be because they weren’t frozen long enough. Ensure they are firm before frying, and also check that your oil is hot enough at 350°F. Frying in small batches can help ensure they don’t get too crowded, leading to even cooking.
Are there any dietary considerations for these poppers?
Yes! These crispy goat cheese poppers contain dairy, making them unsuitable for those with lactose intolerance or a dairy allergy. If you’re looking for a vegan alternative, substitute the goat cheese with a vegan cream cheese and use agave syrup instead of honey.
What’s the best way to serve these poppers?
Serve your crispy goat cheese poppers warm, drizzled with honey and sprinkled with chives for a lovely presentation. They are fantastic as appetizers, paired with crackers, or even as a topping for fresh salads. The sweet-savory combination is a crowd-pleaser that will elevate any gathering!
Crispy Goat Cheese Poppers with Honey: Irresistibly Creamy Delight
Ingredients
Equipment
Method
- In a medium bowl, whisk together 1 cup of all-purpose flour and ½ teaspoon of black pepper until combined. In a separate bowl, crack an egg and add a pinch of kosher salt along with a tablespoon of water; whisk until frothy. Pour about 1.5 cups of panko breadcrumbs into a third bowl.
- Take 8 ounces of soft goat cheese and roll it into 24 tablespoon-sized balls, making sure they’re even and smooth.
- Begin the coating process by rolling each goat cheese ball in the flour mixture, then dip it into the egg mixture, and finally roll it in the panko breadcrumbs.
- Place the coated cheese balls in the freezer for about 20 minutes to firm up.
- In a deep saucepan, heat about an inch of oil to 350°F over medium-high heat. Carefully add the cheese balls in batches, frying for 1 to 2 minutes until golden brown and crispy.
- Remove the fried poppers with a slotted spoon, drain excess oil, drizzle with honey and sprinkle with chives before serving.