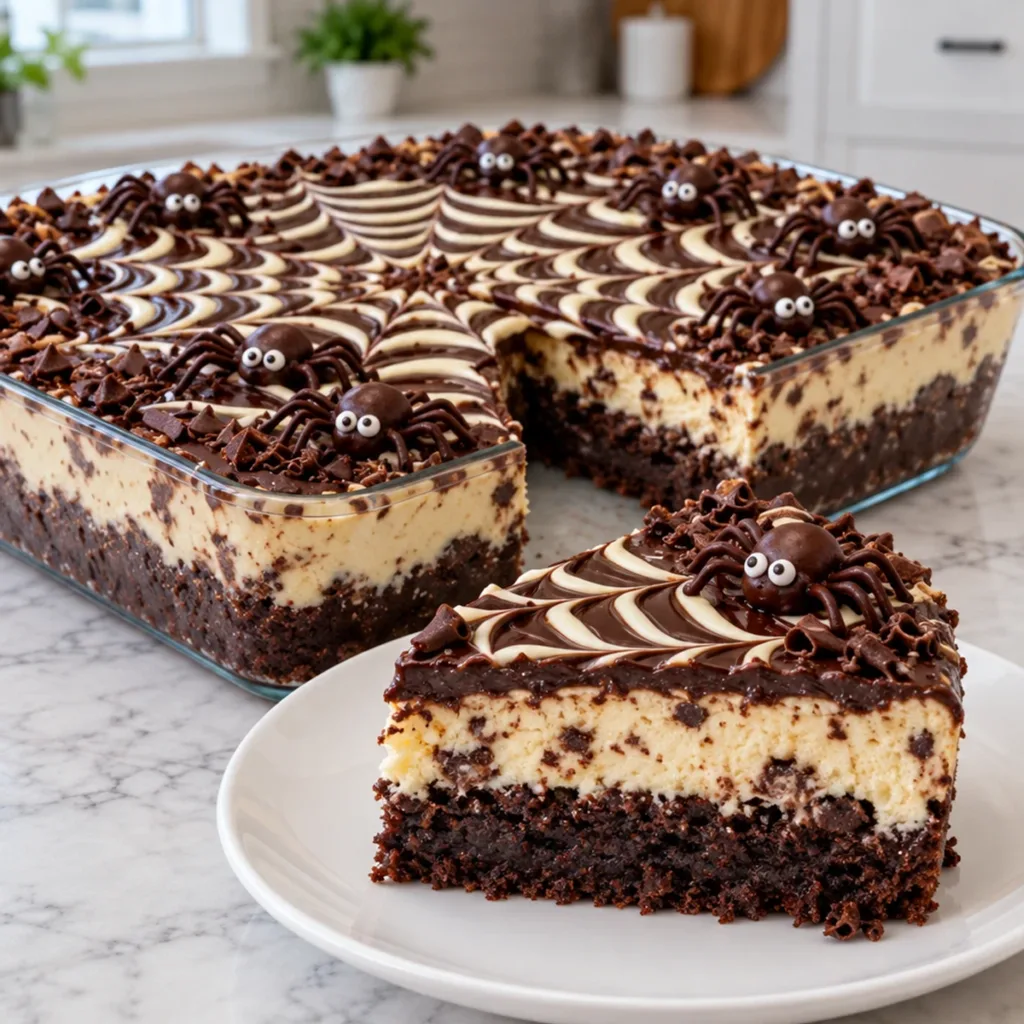
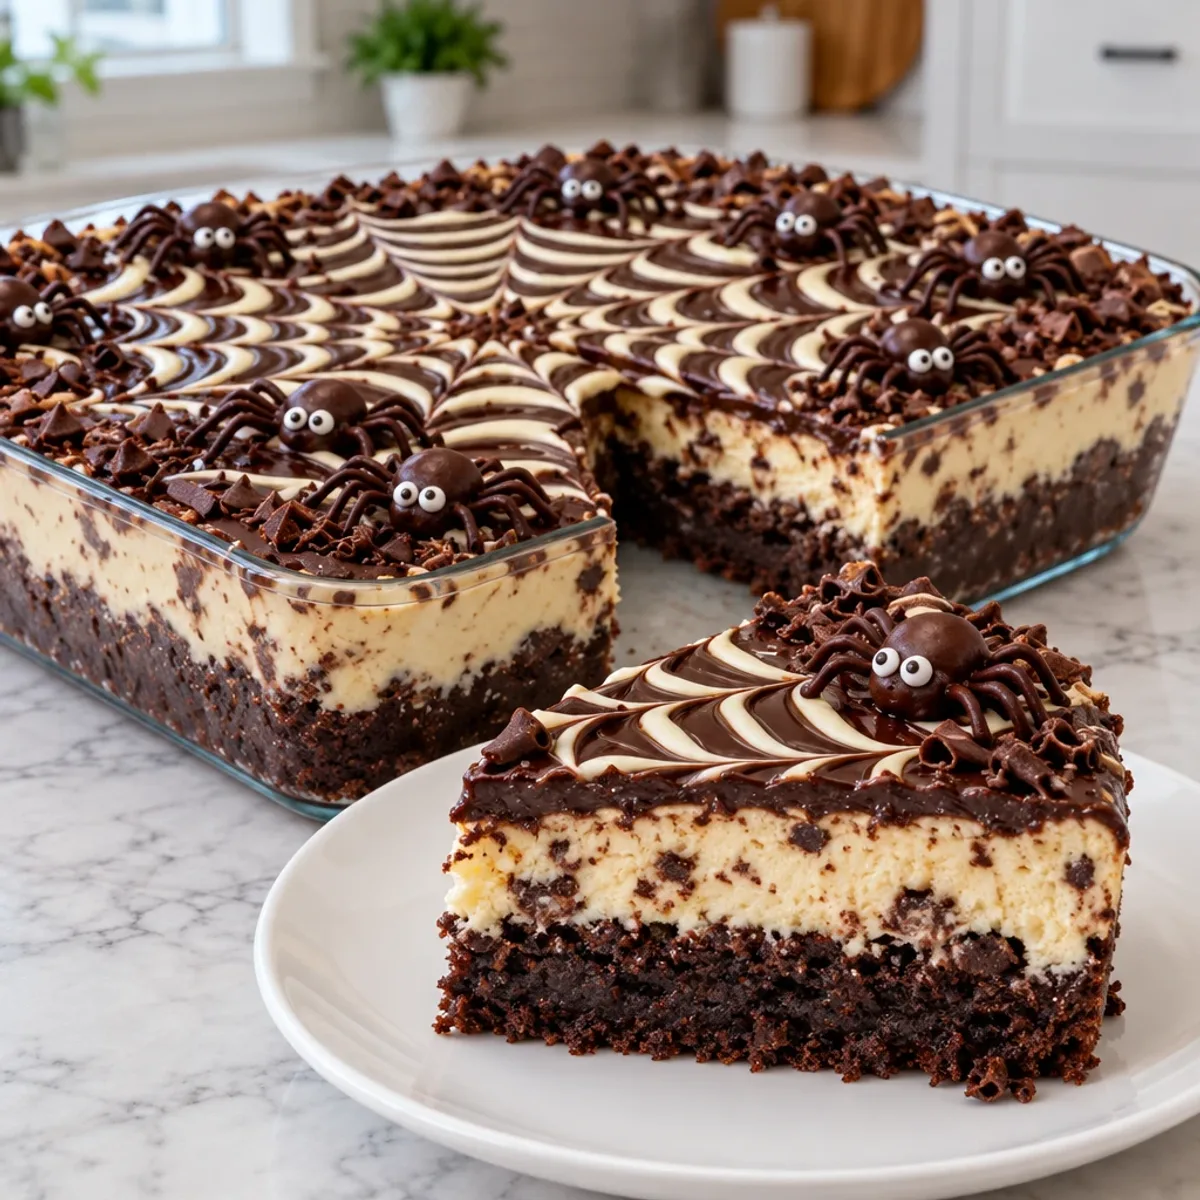
As I stared at the remnants of last year’s Halloween candy, an idea swirled in my mind. What if I could transform those sugary delights into something truly spectacular? Enter the Chocolate Spiderweb Brownie Cheesecake, a decadent creation that’s more than just dessert; it’s a showstopper! This recipe combines a rich, fudgy brownie base with a creamy cheesecake layer, making it a crowd-pleaser that’s perfect for gatherings or cozy nights in. Not only is it visually stunning with its whimsical spiderweb design, but it’s also surprisingly easy to make. With minimal prep time and ingredients you likely have on hand, you can impress your guests without breaking a sweat. Ready to take your baking skills to the next level? Let’s dive into crafting this sweet masterpiece together!
Why Is This Cheesecake So Irresistible?
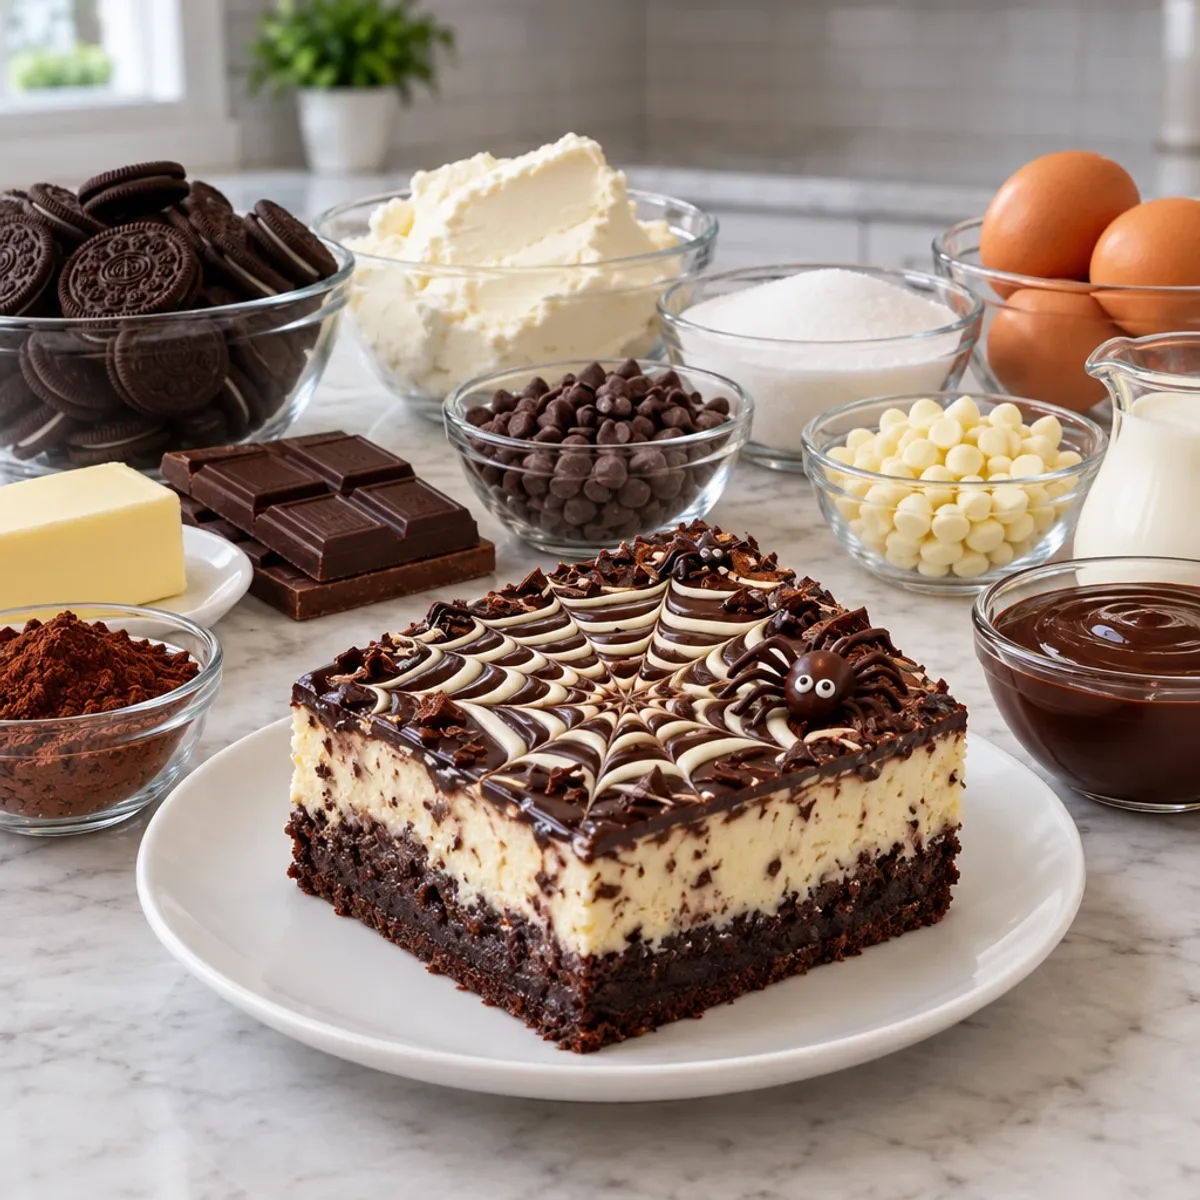
Decadent Layers: This Chocolate Spiderweb Brownie Cheesecake features a rich brownie base paired with a creamy cheesecake filling that's hard to resist.
Visually Stunning: With a fun spiderweb design, it’s sure to be the star of any dessert table, making it not just a treat—but a conversation starter.
Easy to Prepare: Don’t worry if you're a baking novice! The straightforward steps mean you can whip this up without stress.
Perfect for Any Occasion: Whether it’s a casual dinner or a festive gathering, this dessert is versatile enough to impress at any event.
Make Ahead Delight: Can be prepared in advance, letting you enjoy time with guests rather than being stuck in the kitchen!
This delightful dessert can be a go-to for anyone looking to elevate their baking repertoire. Explore more about similar treats like Braided Raspberry Danish and Classic New York Cheesecake for more delicious inspirations!
Chocolate Spiderweb Brownie Cheesecake Ingredients
For the Brownie Layer
• Unsalted butter – 1 cup, melted for a rich base flavor.
• Granulated sugar – 2 cups, to provide sweetness and moisture.
• Eggs – 4 large, at room temperature for better mixing.
• Vanilla extract – 1 teaspoon, enhances overall flavor.
• All-purpose flour – 1 cup, to give structure to the brownies.
• Unsweetened cocoa powder – ¾ cup, adds the deep chocolatey taste.
• Salt – ½ teaspoon, balances sweetness and enhances flavor.
For the Cheesecake Layer
• Cream cheese – 16 ounces, softened for a smooth and creamy texture.
• Powdered sugar – 1 cup, sweetens the cheesecake without grittiness.
• Vanilla extract – 1 teaspoon, brings warmth to the cheesecake.
• Heavy whipping cream – 2 cups, cold, for a light and fluffy filling.
For the Chocolate Swirls
• Semisweet chocolate chips – ½ cup, melted for luscious chocolate swirls.
For the Ganache
• Semisweet chocolate chips – 1 cup, the star ingredient for a glossy finish.
• Heavy whipping cream – ½ cup, to create the perfect ganache consistency.
For the Spiderweb Design
• White chocolate chips – ½ cup, melted for visually stunning patterns.
• Heavy whipping cream – 2 tablespoons, for melting the white chocolate.
For Decorating
• Chocolate truffles – 6 round, for spooky spider ornaments.
• Chocolate-covered pretzel sticks – 24 thin, broken to create spider legs.
• Candy eyes – 12 small, to bring your spiders to life!
• Chocolate chips – ¼ cup, scattered for added texture and flavor.
• Chocolate cookie crumbs – 2 tablespoons, for a delightful crunchy finish.
With these carefully selected Chocolate Spiderweb Brownie Cheesecake ingredients, you'll be well on your way to creating a dessert that's not just a sweet treat, but an unforgettable experience!
Step-by-Step Instructions for Chocolate Spiderweb Brownie Cheesecake
Step 1: Preheat and Prepare
Preheat your oven to 350°F (175°C). Lightly grease a 9 by 13 inch rectangular glass baking dish with cooking spray. This ensures your Chocolate Spiderweb Brownie Cheesecake comes out easily after baking. Set the prepared dish aside as you mix the brownie batter.
Step 2: Mix the Brownie Batter
In a large mixing bowl, combine 1 cup of melted unsalted butter and 2 cups of granulated sugar. Whisk them together until well combined. Then, add in 4 large room-temperature eggs, one at a time, whisking after each addition until the mixture is smooth. Finally, stir in 1 teaspoon of vanilla extract until evenly incorporated.
Step 3: Combine Dry Ingredients
In a separate bowl, whisk together 1 cup of all-purpose flour, ¾ cup of unsweetened cocoa powder, and ½ teaspoon of salt. This dry mixture provides structure and rich chocolate flavor to your brownies. Gradually add these dry ingredients into the wet mixture, folding gently with a spatula until just combined; be careful not to overmix to keep them fudgy.
Step 4: Bake the Brownies
Pour the brownie batter into your prepared baking dish, spreading it evenly into all corners. Place the dish on the center rack of your preheated oven and bake for 25 to 30 minutes. The edges should appear set, and a toothpick inserted in the center should come out with moist crumbs. Once baked, remove it from the oven and allow it to cool completely on a wire rack for about 1 hour.
Step 5: Prepare the Cheesecake Layer
In a large mixing bowl, place 16 ounces of softened cream cheese and add 1 cup of powdered sugar along with 1 teaspoon of vanilla extract. Beat with an electric mixer for 2 to 3 minutes until the mixture is completely smooth and creamy. This step is essential for a rich and fluffy cheesecake layer that complements the brownie base.
Step 6: Whip the Cream
In a separate chilled bowl, pour 2 cups of cold heavy whipping cream. Whip the cream until stiff peaks form, which will help create a light and airy cheesecake filling. Once whipped, gently fold the whipped cream into the cream cheese mixture until fully incorporated, giving the cheesecake a luscious texture.
Step 7: Add Chocolate Swirls
Melt ½ cup of semisweet chocolate chips in a microwave-safe bowl in 20-second intervals, stirring in between until smooth. Once melted, allow it to cool slightly. Remove about 1 cup of the prepared cheesecake filling and fold in the melted chocolate until evenly combined, adding rich chocolate flavor to your cheesecake layer.
Step 8: Layer the Cheesecake
Spread the plain cheesecake filling evenly over the completely cooled brownie layer. Carefully drop spoonfuls of the chocolate cheesecake filling over this layer and use a butter knife to swirl them together, creating a marbled effect while keeping some swirls visible. Smooth the surface gently, then refrigerate for 1 hour to firm up the layer.
Step 9: Make the Ganache
In a heatproof mixing bowl, place 1 cup of semisweet chocolate chips. In a small saucepan, heat ½ cup of heavy whipping cream over medium-low heat until it steams but does not boil. Pour the warm cream over the chocolate chips and let it sit for 2 minutes. Stir gently until the mixture is smooth and glossy, then let it cool for 5 to 10 minutes until slightly thickened.
Step 10: Add the Ganache
Remove the chilled cheesecake from the refrigerator and pour the chocolate ganache evenly over the cheesecake layer. Use an offset spatula to spread it gently, creating a smooth surface. This ganache layer will add an irresistible chocolate finish to your Chocolate Spiderweb Brownie Cheesecake.
Step 11: Create the Spiderweb Design
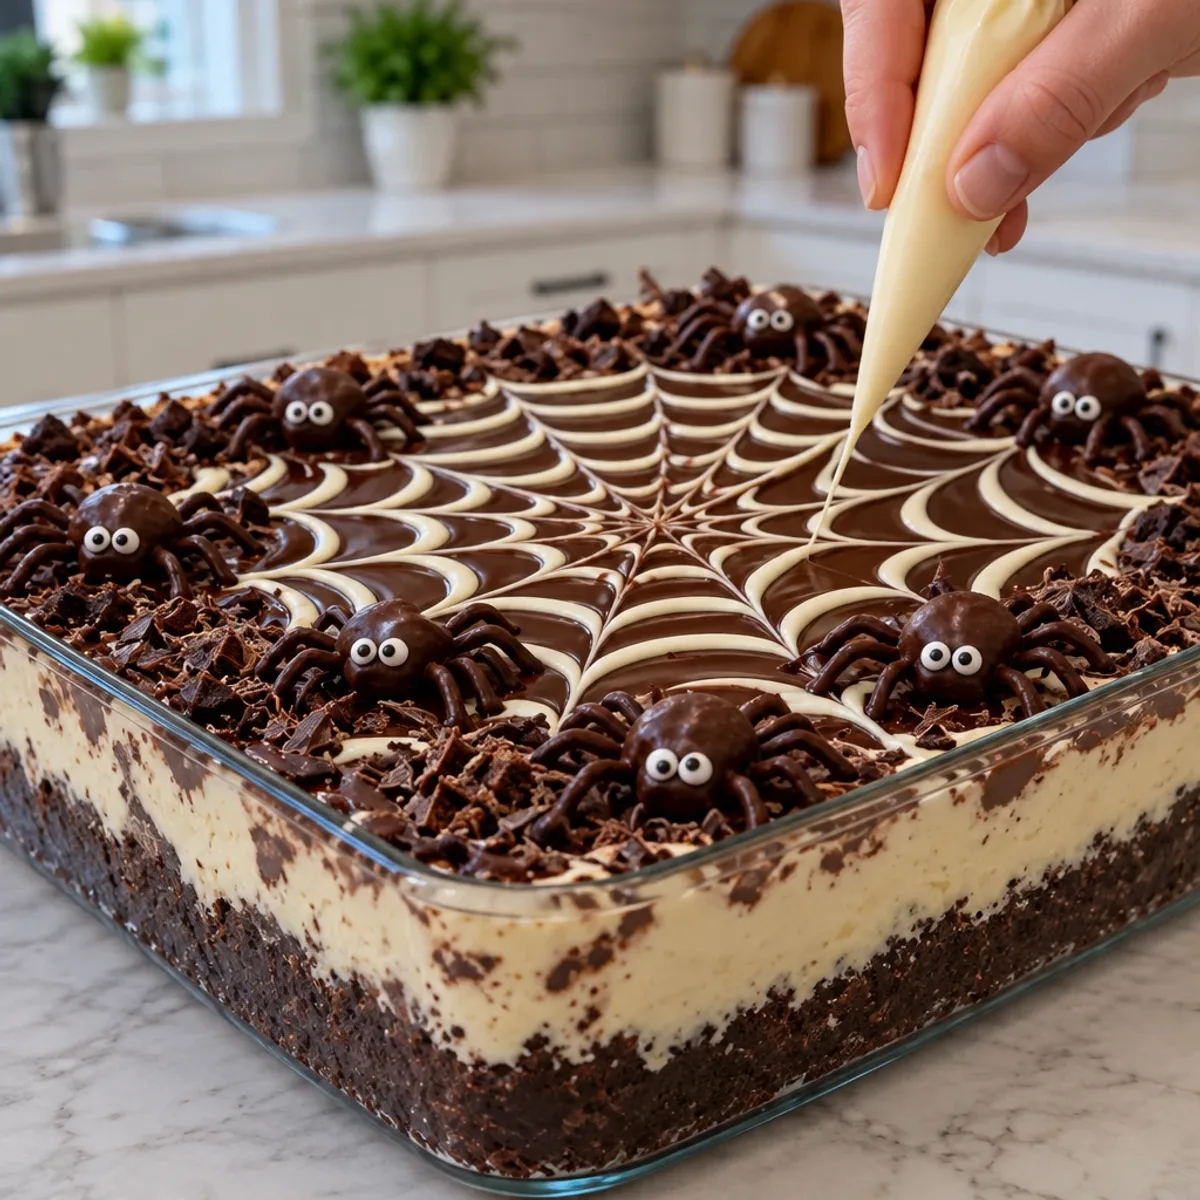
For the spiderweb, melt ½ cup of white chocolate chips with 2 tablespoons of heavy cream in short 15-second intervals in the microwave until smooth. Transfer this melted white chocolate into a piping bag and pipe small circles starting from the center of the ganache, then larger circles around them. Use a clean toothpick to drag straight lines through the circles for a beautiful spiderweb effect.
Step 12: Decorate and Chill
Create the spiders by inserting 4 broken chocolate-covered pretzel legs into each of the 6 round chocolate truffles and add 2 small candy eyes with melted chocolate. Arrange these creepy crawlers around the edges of the cheesecake without covering the spiderweb. Sprinkle with ¼ cup of chocolate chips and 2 tablespoons of chocolate cookie crumbs for texture. Cover the baking dish carefully and refrigerate for at least 3 hours until set.
Step 13: Serve and Enjoy
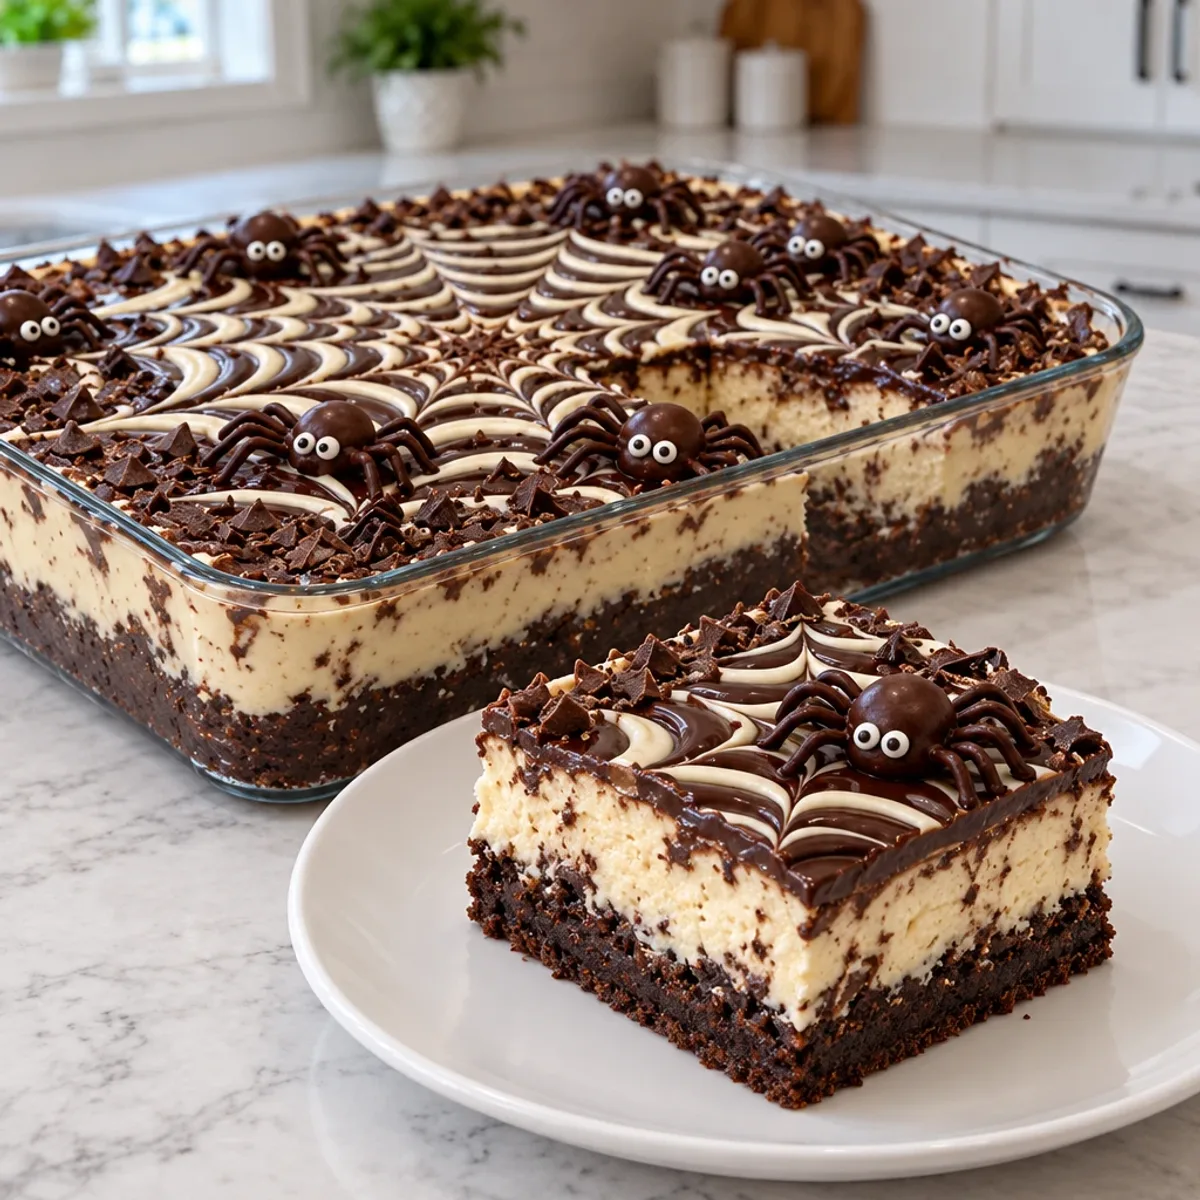
When ready to serve, use a sharp knife dipped in warm water to cut the Chocolate Spiderweb Brownie Cheesecake into 16 evenly sized squares, wiping the knife between cuts for neatness. Carefully lift each piece with a flat dessert spatula and enjoy this show-stopping dessert chilled! Store any leftovers in a covered container in the refrigerator for up to 4 days.
Tips for the Best Chocolate Spiderweb Brownie Cheesecake
Timing is Key: Allow each layer to cool properly. Rushing this can lead to a messy result or soggy layers.
Don’t Overmix: When combining dry and wet ingredients for the brownie layer, fold gently. Overmixing can lead to tough brownies instead of fudgy perfection.
Perfect Ganache: Let your ganache cool slightly after mixing to maintain a silky texture. If it’s too hot, it may melt other layers.
Chill, Chill, Chill: Always refrigerate the cheesecake for at least 3 hours to ensure the filling is firm before serving. This helps maintain layers.
Decorate Wisely: When piping the spiderweb design, clean your toothpick between strokes for a neater appearance. This small touch elevates the presentation of your Chocolate Spiderweb Brownie Cheesecake!
Chocolate Spiderweb Brownie Cheesecake Variations
Feel free to explore your creativity with these delightful twists on the traditional recipe!
Gluten-Free: Substitute all-purpose flour with a gluten-free blend for a cakelike texture everyone can enjoy. This ensures that no one misses out on the fun or flavor!
Dairy-Free: Use coconut cream in place of cream cheese and dairy-free chocolate. Your cheesecake will still be creamy and rich, perfect for those with dietary restrictions.
Nutty Delight: Add walnuts or pecans to the brownie layer for an extra crunch. The nutty flavor complements the chocolate beautifully!
Cheesecake Swirl Boost: Incorporate pumpkin puree into the cheesecake mixture for a seasonal twist. This will not only add warmth but also a lovely hue.
Spice It Up: Mix in a teaspoon of cinnamon or a pinch of cayenne pepper into the brownie batter for a subtle yet exciting flavor boost.
Fruit Infusion: Swirl raspberry or cherry jam into the cheesecake mixture for a fruity burst that cuts through the richness beautifully.
Vegan Option: Use flax eggs and coconut milk for the cheesecake layer, combining deliciously with the brownie base. It’s a plant-based indulgence that everyone can savor!
Flavor Extracts: Experiment with almond or mint extract instead of vanilla for the cheesecake layer. This simple swap elevates the flavor profile to something truly unique.
Each variation offers a chance to adjust the flavors to suit your personal taste. Embrace the art of baking! If you're looking for more decadent ideas, consider making a Peanut Butter Swirl Brownie or a classic Vanilla Cheesecake for more unforgettable sweet treats.
What to Serve with Chocolate Spiderweb Brownie Cheesecake
Indulging in a slice of this delight means you'll want the perfect accompaniments to round off your dessert experience.
Vanilla Ice Cream: A scoop of creamy vanilla ice cream balances the rich chocolate, enhancing the overall experience.
Fresh Berries: Raspberries or strawberries add a refreshing tartness that cuts through the sweetness, bringing a burst of freshness.
Whipped Cream: Light and airy, a dollop of homemade whipped cream complements the dense cake beautifully, adding a delightful texture.
Chocolate Sauce Drizzle: For those chocolate lovers, an extra drizzle of warm chocolate sauce intensifies the decadent experience.
Coffee or Espresso: A warm cup of coffee or espresso complements the rich flavors, enhancing the chocolatey notes with cozy warmth.
Mint Tea: For a refreshing palate cleanser, mint tea adds a light herbal touch that refreshes the senses beautifully.
Caramel Sauce: A drizzle of sweet caramel brings a contrasting flavor and a delightful richness to the plate.
Chocolate Mousse: A small dish of chocolate mousse can elevate the dessert experience, adding another layer of chocolatey goodness to every bite.
How to Store and Freeze Chocolate Spiderweb Brownie Cheesecake
Fridge: Store the cheesecake in a covered container for up to 4 days. This will keep the layers fresh and ready for delightful servings!
Freezer: For longer storage, wrap slices tightly in plastic wrap and then place them in an airtight container. They can be frozen for up to 3 months without losing flavor.
Thawing: When ready to enjoy, transfer the cheesecake from the freezer to the fridge for about 6 hours to thaw gradually. Avoid microwaving, as it can alter the texture.
Reheating: If you prefer it warm, take a slice out and let it sit at room temperature for 15-20 minutes, then enjoy the deliciousness of your Chocolate Spiderweb Brownie Cheesecake!
Preparing Your Chocolate Spiderweb Brownie Cheesecake in Advance
You can make your Chocolate Spiderweb Brownie Cheesecake a breeze by prepping components ahead of time, saving precious minutes on busy weeknights! Start by preparing the brownie layer, which can be baked and stored in the fridge for up to 3 days. Next, whip up the cheesecake filling and assemble the layers, then refrigerate for at least 3 hours until firm. For the best quality, add the ganache and spiderweb decoration just before serving to keep those layers fresh and vibrant. The finished cheesecake can be stored in an airtight container for up to 4 days, allowing you to enjoy delightful slices all week long while impressing your family with its irresistible charm!
Advertisement
Chocolate Spiderweb Brownie Cheesecake Recipe FAQs
What kind of cocoa powder should I use for the brownie layer?
I recommend using unsweetened cocoa powder for the best flavor! It allows the rich chocolate taste to shine without adding unnecessary sweetness.
How should I store any leftover cheesecake?
Store the Chocolate Spiderweb Brownie Cheesecake in a covered container in the refrigerator. It will stay fresh for up to 4 days, allowing you to enjoy it over multiple days!
Can I freeze the cheesecake for later?
Absolutely! To freeze, wrap slices tightly in plastic wrap and place them in an airtight container. They can be frozen for up to 3 months. Just remember to thaw them in the fridge for about 6 hours before serving.
Why is my brownie layer dry?
Dry brownies often result from overbaking or overmixing the batter. To keep them fudgy, stick to the recommended baking time and gently fold the ingredients together until just combined.
Can I make this cheesecake gluten-free?
Yes! You can substitute all-purpose flour with a gluten-free flour blend of your choice. Just ensure all other ingredients (like chocolate chips) are certified gluten-free to safely accommodate dietary needs.
How do I ensure perfect chocolate ganache?
Make sure to heat the cream until steaming but not boiling. Pour it over the chocolate chips and let it sit undisturbed for 2 minutes before stirring. This helps achieve a smooth, glossy ganache without burning the chocolate.
These FAQs will help you navigate any questions or concerns while crafting your delightful Chocolate Spiderweb Brownie Cheesecake!
Chocolate Spiderweb Brownie Cheesecake Delight
Ingredients
Equipment
Method
- Preheat your oven to 350°F (175°C) and grease a 9x13 inch baking dish.
- In a bowl, combine melted butter and sugar; whisk together.
- Add eggs one at a time and mix in the vanilla extract.
- In another bowl, whisk together flour, cocoa powder, and salt. Fold this into the wet mixture.
- Pour the batter into the prepared dish and bake for 25-30 minutes until set.
- Mix cream cheese, powdered sugar, and vanilla in a bowl until smooth.
- Whip heavy cream until stiff peaks form, then fold into the cream cheese mixture.
- Spread plain cheesecake over cooled brownies and swirl in chocolate cheesecake mixture.
- Refrigerate for 1 hour to firm up layers.
- Prepare ganache by mixing melted chocolate chips with warm heavy cream.
- Pour ganache over cheesecake layer and smooth.
- Create spiderweb with melted white chocolate and a piping bag.
- Decorate with chocolate truffles, pretzel legs, and candy eyes.
- Chill for at least 3 hours, then cut into squares and serve chilled.