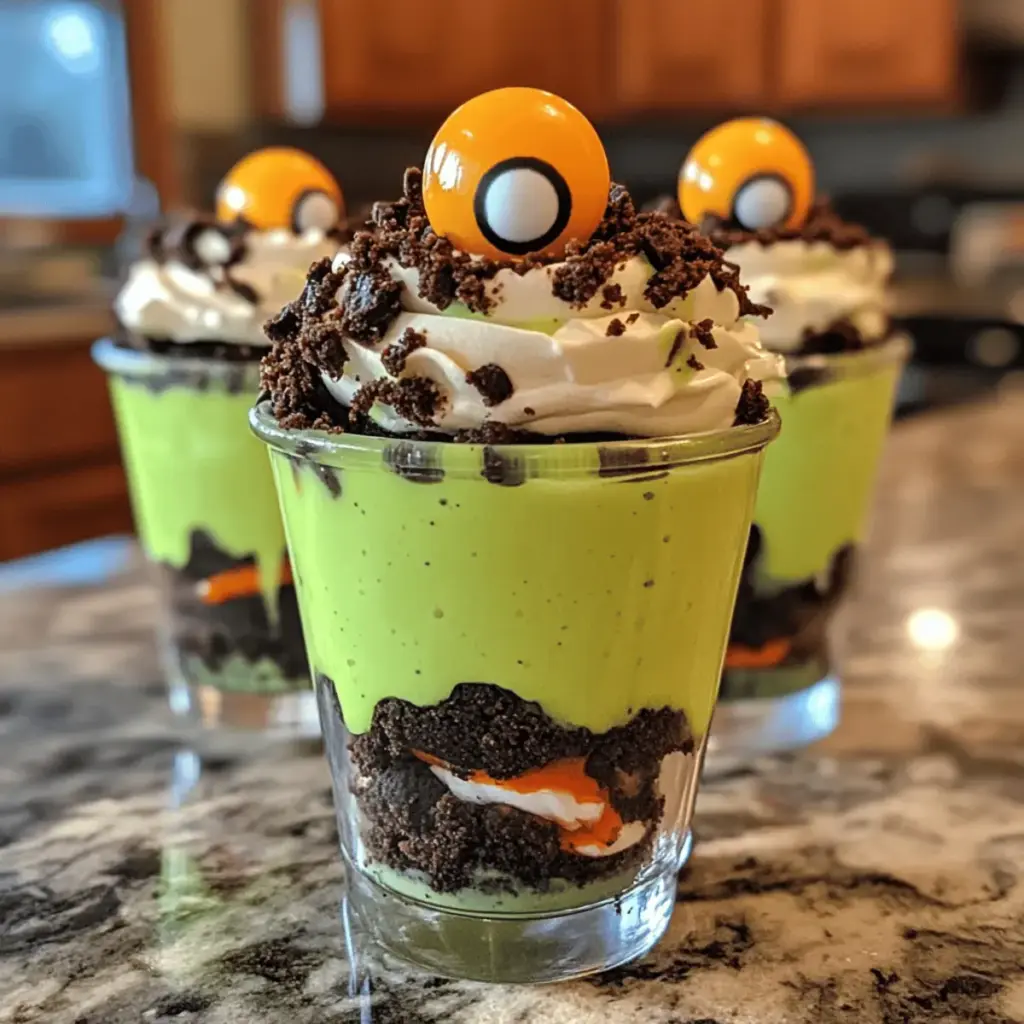
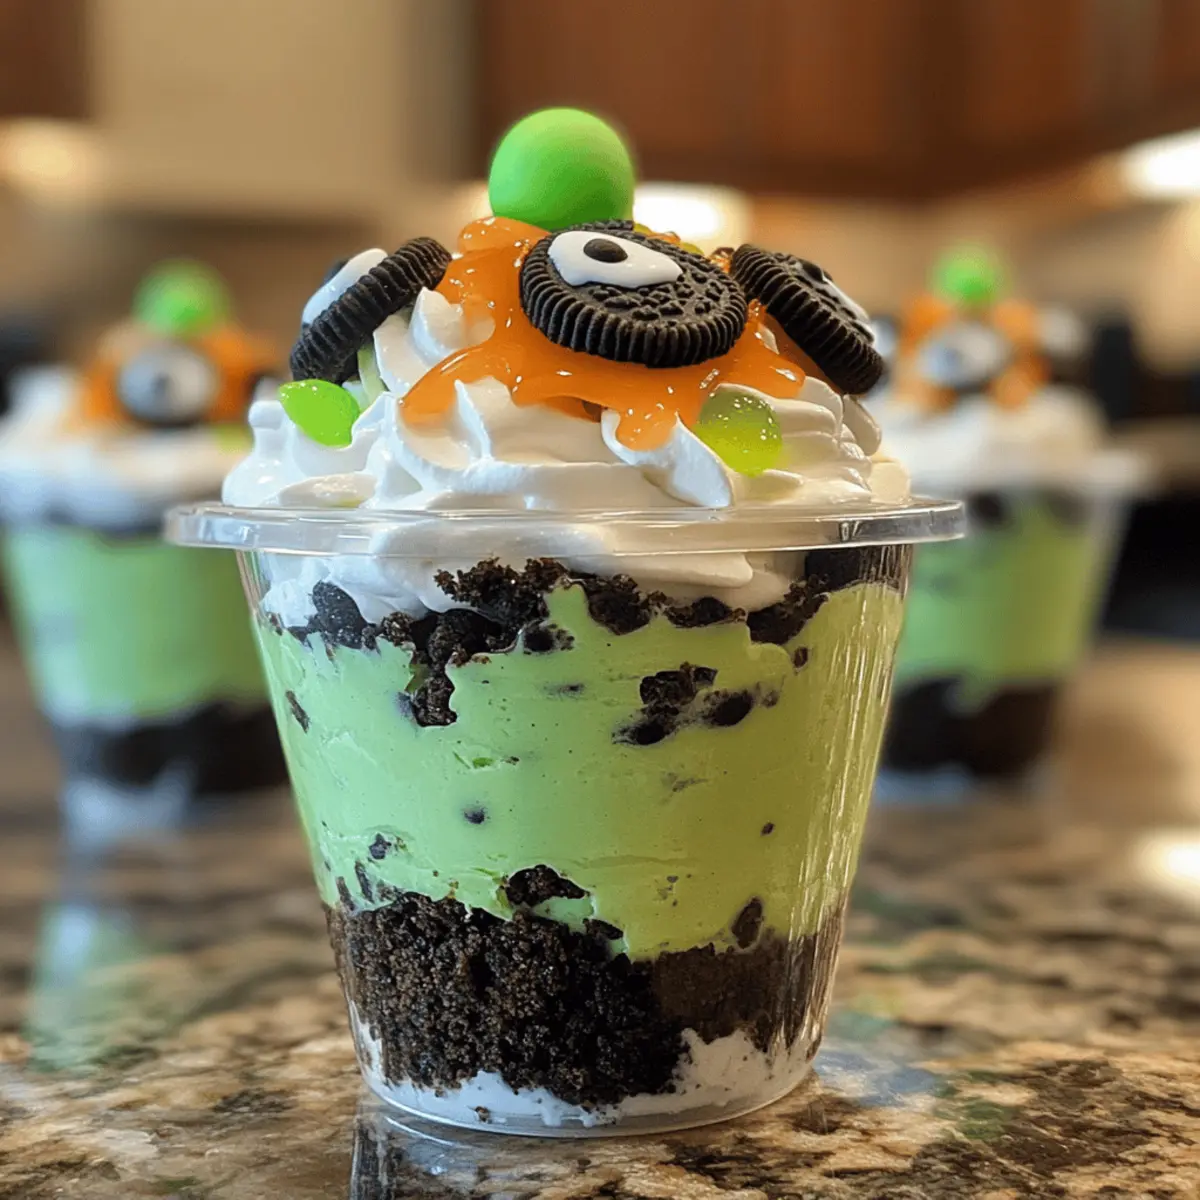
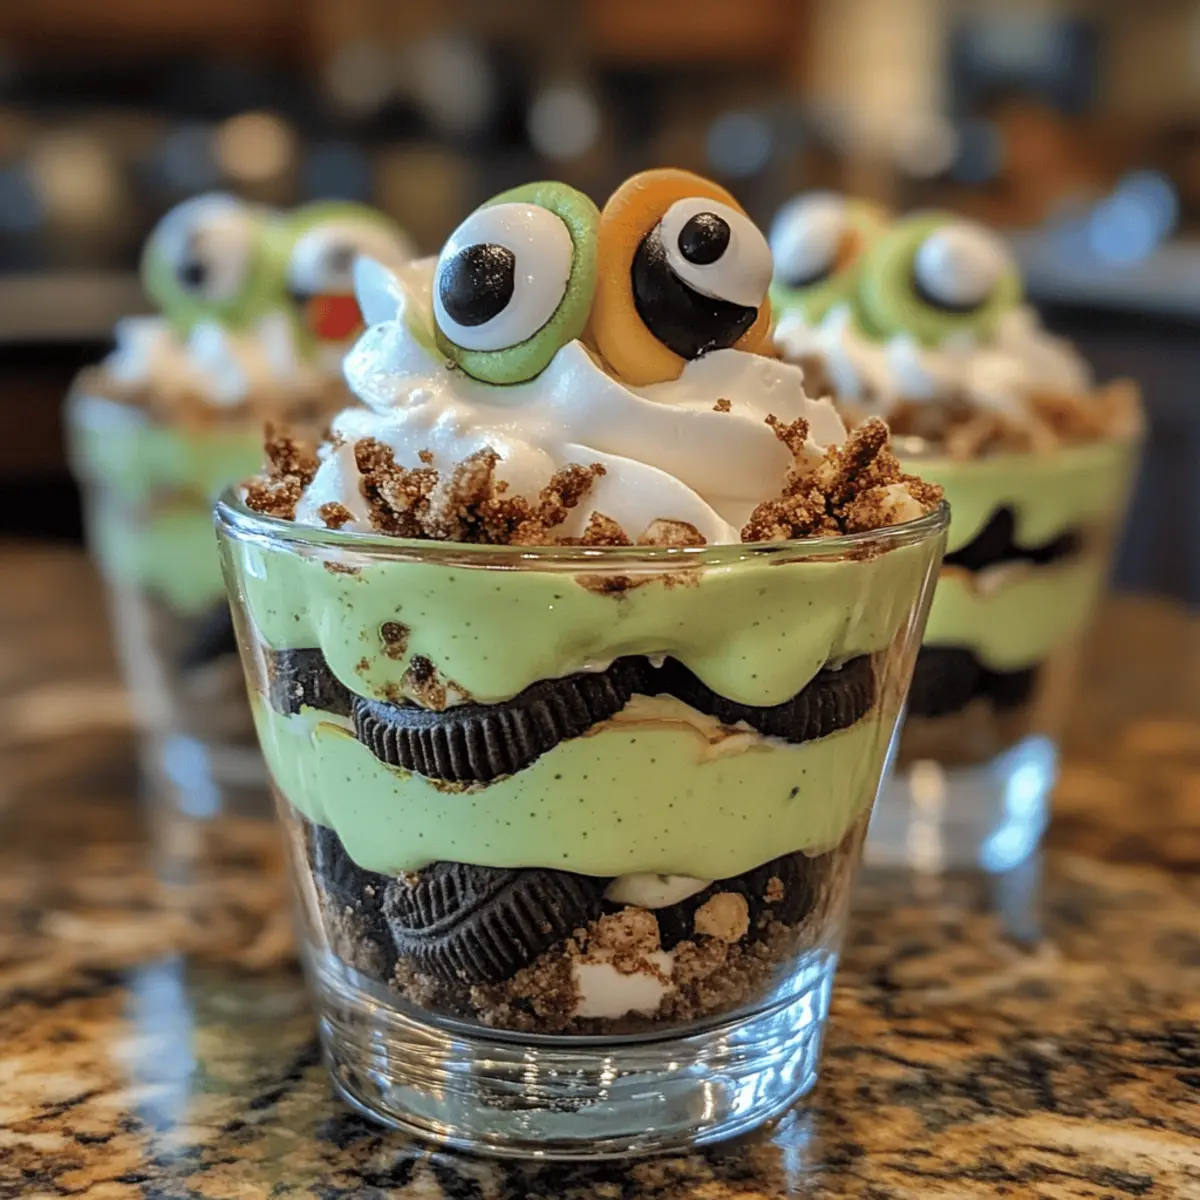
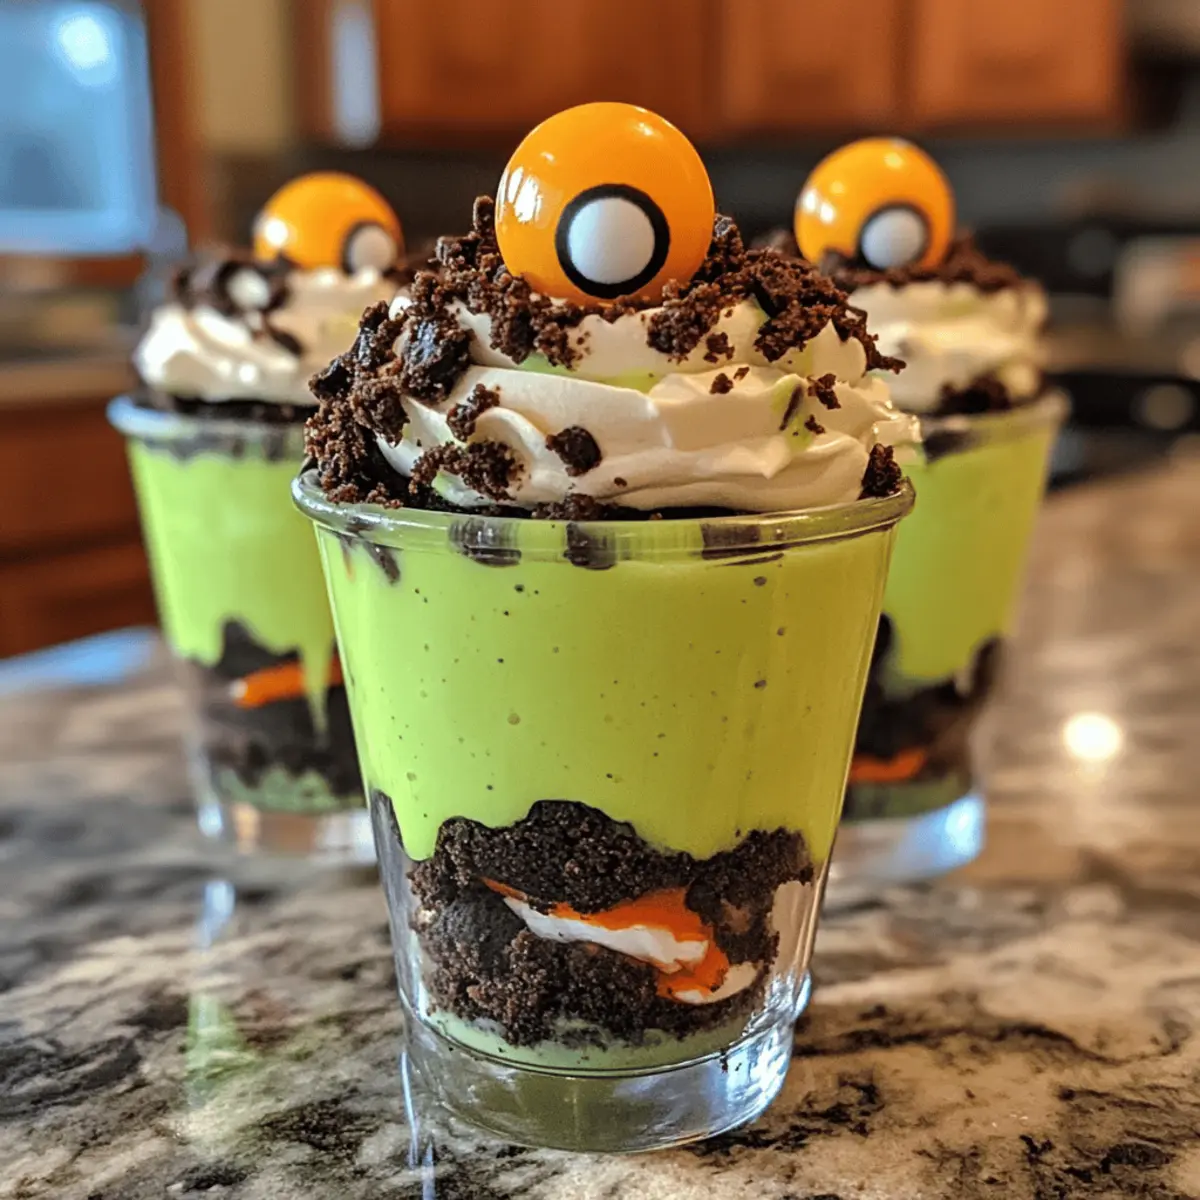
As the crisp autumn air settles in, the excitement of Halloween creeps closer, and it’s the perfect time to whip up some spooky yet delicious treats. Enter the Zombie Dirt Pudding Cups — a no-bake dessert that’s as fun to create as it is to devour! With just 10 minutes of prep time, these cups are effortlessly easy to make, making them an ideal addition to any Halloween bash. Imagine layers of crunchy Mint Oreos paired with creamy white chocolate pudding, all topped with delightfully creepy candy eyeballs. Not only do they charm both kids and adults alike, but they also add a playful twist to your dessert table that’s sure to impress. Curious about how to assemble these frightfully fun treats? Let’s dive into the recipe!
How can you create spooky desserts?
Easy Preparation: With just 10 minutes of prep, these Zombie Dirt Pudding Cups come together quickly, making them perfect for even the busiest Halloween celebrations.
Kid-Friendly Fun: The whimsical presentation with candy eyeballs will thrill kids and spark their creativity, making dessert a playful experience.
Flavor Packed: The combination of Mint Oreos and creamy white chocolate pudding offers a surprising twist that tantalizes taste buds, ensuring every bite is memorable.
Versatile Creation: Feel free to swap Oreos for different flavors or add your unique decorations, like Halloween sprinkles, to make it truly your own. Check out these delightful Spice Cheesecake Cups for another festive dessert option!
Perfect for Parties: Whether for a school event, neighborhood gathering, or family celebration, these cups are a surefire hit that brings everyone together in sweet delight.
Zombie Dirt Pudding Cups Ingredients
These fun treats come together with some spooky essentials!
For the Pudding Layer
• Instant White Chocolate Pudding Mix – This forms the creamy filling; you can substitute it with vanilla pudding mix for a milder taste.
• Whole Milk – Essential for proper thickening; be sure to avoid skim milk or alternatives which might not set correctly.
• Green Food Coloring – Adds a festive touch; adjust the drops to achieve your preferred spooky color.
For the Cookie Base
• Mint Oreos – These provide the crunchy base and delightful flavor; feel free to swap for regular Oreos for a classic taste.
• Cool Whip – This ingredient creates a fluffy texture; you can replace it with homemade whipped cream for a fresher alternative.
For the Spooky Decoration
• Large and Small Candy Eyeballs – These spooky treats bring the Zombie theme to life! Consider using gummy candies or chocolate pieces for fun variations.
• Bone or Skeleton Sprinkles – Optional for that extra Halloween flair on top.
Get ready to wow your family and friends with these fun Zombie Dirt Pudding Cups that will surely be a hit at any Halloween gathering!
Step‑by‑Step Instructions for Zombie Dirt Pudding Cups
Step 1: Prepare the Oreo Base
Start by twisting off one side of 12 Mint Oreos, carefully keeping the filling intact. Set these cookie halves aside on a plate. In a food processor, crush the remaining Mint Oreos into fine crumbs, creating a sandy texture for the base. This should take about 1-2 minutes.
Step 2: Mix the Pudding
In a large mixing bowl, combine 2 cups of whole milk with the instant white chocolate pudding mix. Whisk the mixture vigorously for 1-2 minutes until it thickens slightly and becomes smooth. Add a few drops of green food coloring—stir until you achieve your desired spooky shade.
Step 3: Fold in the Cool Whip
Gently fold in 1 cup of Cool Whip into the thickened pudding mixture. Use a spatula to carefully bring the two elements together, ensuring the fluffy texture remains intact. Aim for a cohesive and creamy blend, which should take about 1-2 minutes of gentle folding.
Step 4: Layer the Ingredients
Begin layering in your serving cups by adding 1-2 tablespoons of the crushed Oreo crumbs as the base layer. Next, spoon in a generous layer of the green pudding mixture on top. Repeat this process, alternating between the Oreo crumbs and pudding layers, until you reach the top of the cup.
Step 5: Chill the Pudding Cups
Once all layers are assembled, place the pudding cups in the refrigerator and chill for at least 1 hour. This cooling time allows the pudding to set properly, ensuring a delightful texture when served.
Step 6: Add the Eyeballs
Before serving, take the reserved Oreo halves and gently press one large and one small candy eyeball into the exposed filling of each twisted Oreo. With the eyeballs in place, insert these cookies upright into the pudding, allowing them to peek out for a spooky effect.
Step 7: Decorate for Halloween
Sprinkle some bone or skeleton sprinkles on top of the layered cups for added Halloween flair. This step not only enhances the visual appeal but also adds an extra crunch to the Zombie Dirt Pudding Cups, perfect for festive gatherings.
Make Ahead Options
These Zombie Dirt Pudding Cups are perfect for busy home cooks looking to save time! You can prepare the pudding mixture and layer the cups up to 24 hours in advance. To do this, simply mix the pudding and fold in the Cool Whip, then layer with crushed Oreos in their cups and cover with plastic wrap. The cups will stay fresh in the fridge, ensuring they remain just as delicious! When it’s time to serve, just add the candy eyeballs and sprinkles for that spooky touch. This way, you save precious time while still presenting a festive Halloween treat that’s ready to impress your guests!
Storage Tips for Zombie Dirt Pudding Cups
Fridge: Store leftovers in an airtight container or cover with plastic wrap for freshness. They can last in the refrigerator for up to 2-3 days.
Freezer: These pudding cups are not suitable for freezing, as the texture can change once thawed, leading to a watery consistency.
Reheating: Enjoy them chilled directly from the fridge. No reheating is necessary, as these treats are best served cold for optimal texture and flavor.
Prep Ahead: If you’re planning a party, feel free to prepare the pudding cups a day in advance. Just ensure they have enough time to chill!
Expert Tips for Zombie Dirt Pudding Cups
• Chill Time Matters: Allow the pudding cups to chill for at least an hour to achieve the best texture. This makes sure they set perfectly and have a smooth finish.
• Layer Wisely: Alternate layers of crushed Oreos and pudding to prevent the layers from mixing together. This keeps each bite delightfully distinct and visually appealing.
• Use High-Quality Ingredients: For a richer flavor in your Zombie Dirt Pudding Cups, use full-fat milk and quality Oreos. This ensures the dessert tastes indulgent and satisfying.
• Adjust the Color: Play with the amount of green food coloring to get the spooky shade you desire. A little goes a long way, so start with just a few drops!
• Keep it Crunchy: Consider adding an extra layer of Oreo crumbs right before serving to maintain that satisfying crunch against the creamy pudding.
Zombie Dirt Pudding Cups Variations
Feel free to personalize your Zombie Dirt Pudding Cups for a twist that tickles your taste buds!
- Dairy-Free: Use almond or coconut milk along with dairy-free pudding mix for a vegan-friendly version without losing creaminess.
- Flavorful Fun: Try different Oreo flavors, like peanut butter or red velvet, to create exciting variations that’ll surprise everyone. Each bite will bring a new taste experience!
- Additional Crunch: Fold in some crushed candy corn or Halloween-themed cereal to the layers for an extra crunch and festive flair. It adds texture and a bit of sweetness!
- Chocolate Lovers: Switch the white chocolate pudding for chocolate pudding mix, creating a rich, chocolatey outer space reminiscent of a graveyard delight.
- Whipped Topping Swap: Make your own stabilized whipped cream instead of Cool Whip for a fresher flavor that perfectly complements the spooky aesthetic.
- Natural Colors: Replace green food coloring with pureed spinach or avocado for a natural hue while staying delicious.
- Heat It Up: Add a pinch of cayenne pepper to the pudding for a surprising kick! This twist brings warmth and depth, perfect for adventurous taste buds.
- Ravishing Red: Substitute candy eyeballs with red gummy worms or raspberry candies for a fun and eerie alternative that adds visual appeal too.
Check out the fun variations, and don’t forget to explore other delightful desserts like these festive Spice Cheesecake Cups to keep your Halloween treats fresh and exciting!
What to Serve with Zombie Dirt Pudding Cups
Create a delightful Halloween spread that’ll leave your guests spellbound!
Advertisement
- Creepy Crawly Cupcakes: These festive cupcakes topped with gummy worms will add a playful element, perfectly complementing the spooky dessert.
- Witch’s Brew Punch: A vibrant green punch made with lime sherbet and soda can balance the sweetness, making it an enchanting refreshment for your party.
- Roasted Pumpkin Seeds: Their crunchy texture contrasts delightfully with the creamy pudding cups, providing a savory option amidst sweet treats. Try spicing them with a bit of cayenne for an extra kick!
- Colorful Vegetable Platter: Crisp veggies alongside a ranch dip create a refreshing contrast, balancing out sweet treats and providing a much-needed crunch.
- Haunted Cheese Board: Include a variety of cheeses, crackers, and spooky-themed decorations like cheese ghosts for a fun and sophisticated option. This will delight adults while enticing little ones with familiar flavors.
- Chocolate Mousse Cups: These rich dessert cups enhance your menu with silky chocolate goodness, making for a decadent dessert experience alongside the Zombie Dirt Pudding Cups.
- Mummy Hot Dogs: Slice hot dogs in half, wrap them in crescent dough, and bake—these ghoulishly fun bites will have everyone clamoring for more at your Halloween feast!
- Apple Slices with Caramel Dip: Add a touch of freshness with sweet, crisp apple slices paired with a rich caramel dip, blending the flavors beautifully with the minty pudding.
- Gummy Candy Mix: A bowl of colorful gummy candies will keep the Halloween spirit alive and provide a playful snack that’ll thrill kids of all ages.

Zombie Dirt Pudding Cups Recipe FAQs
What type of Oreos should I use for Zombie Dirt Pudding Cups?
I recommend using Mint Oreos for their delicious minty flavor, which pairs perfectly with the white chocolate pudding. However, if you prefer a more traditional taste, regular Oreos work just as well!
How long can I store leftover Zombie Dirt Pudding Cups in the fridge?
Leftover pudding cups can be stored in the refrigerator for up to 2-3 days. Just be sure to cover them with plastic wrap or keep them in an airtight container to maintain freshness.
Can I freeze Zombie Dirt Pudding Cups?
I strongly advise against freezing these pudding cups, as the texture can become watery once thawed. It’s best to enjoy them fresh out of the fridge, keeping all the delightful layers intact!
What should I do if my pudding mixture isn’t thickening?
If your pudding isn’t thickening, it might be due to using low-fat or non-dairy milk, which won’t absorb the pudding mix properly. Make sure you use whole milk for the best results, as it helps the pudding achieve that creamy consistency. If you find it still isn’t thickening, let it sit for a few more minutes and whisk again.
Are there any allergens I should consider in this recipe?
Absolutely! Keep in mind that this recipe contains gluten and dairy due to the Oreos and milk. If you’re making these for a gathering, be sure to check with your guests for any allergies. You can also explore alternatives like gluten-free Oreos and non-dairy milk to accommodate different dietary needs.
Delicious Zombie Dirt Pudding Cups for Fun Halloween Treats
Ingredients
Equipment
Method
- Start by twisting off one side of 12 Mint Oreos, keeping the filling intact, and set the halves aside. Crush the remaining Mint Oreos into fine crumbs in a food processor.
- In a large mixing bowl, combine 2 cups of whole milk with the instant white chocolate pudding mix. Whisk for 1-2 minutes until thickened and smooth; add green food coloring.
- Gently fold in 1 cup of Cool Whip into the thickened pudding mixture, ensuring the texture remains fluffy.
- Layer in serving cups starting with 1-2 tablespoons of crushed Oreo crumbs, followed by a layer of the green pudding mixture. Repeat until full.
- Chill the pudding cups in the refrigerator for at least 1 hour to set properly.
- Press one large and one small candy eyeball into each Oreo half and insert them upright into the pudding just before serving.
- Sprinkle bone or skeleton sprinkles on top for added Halloween flair.