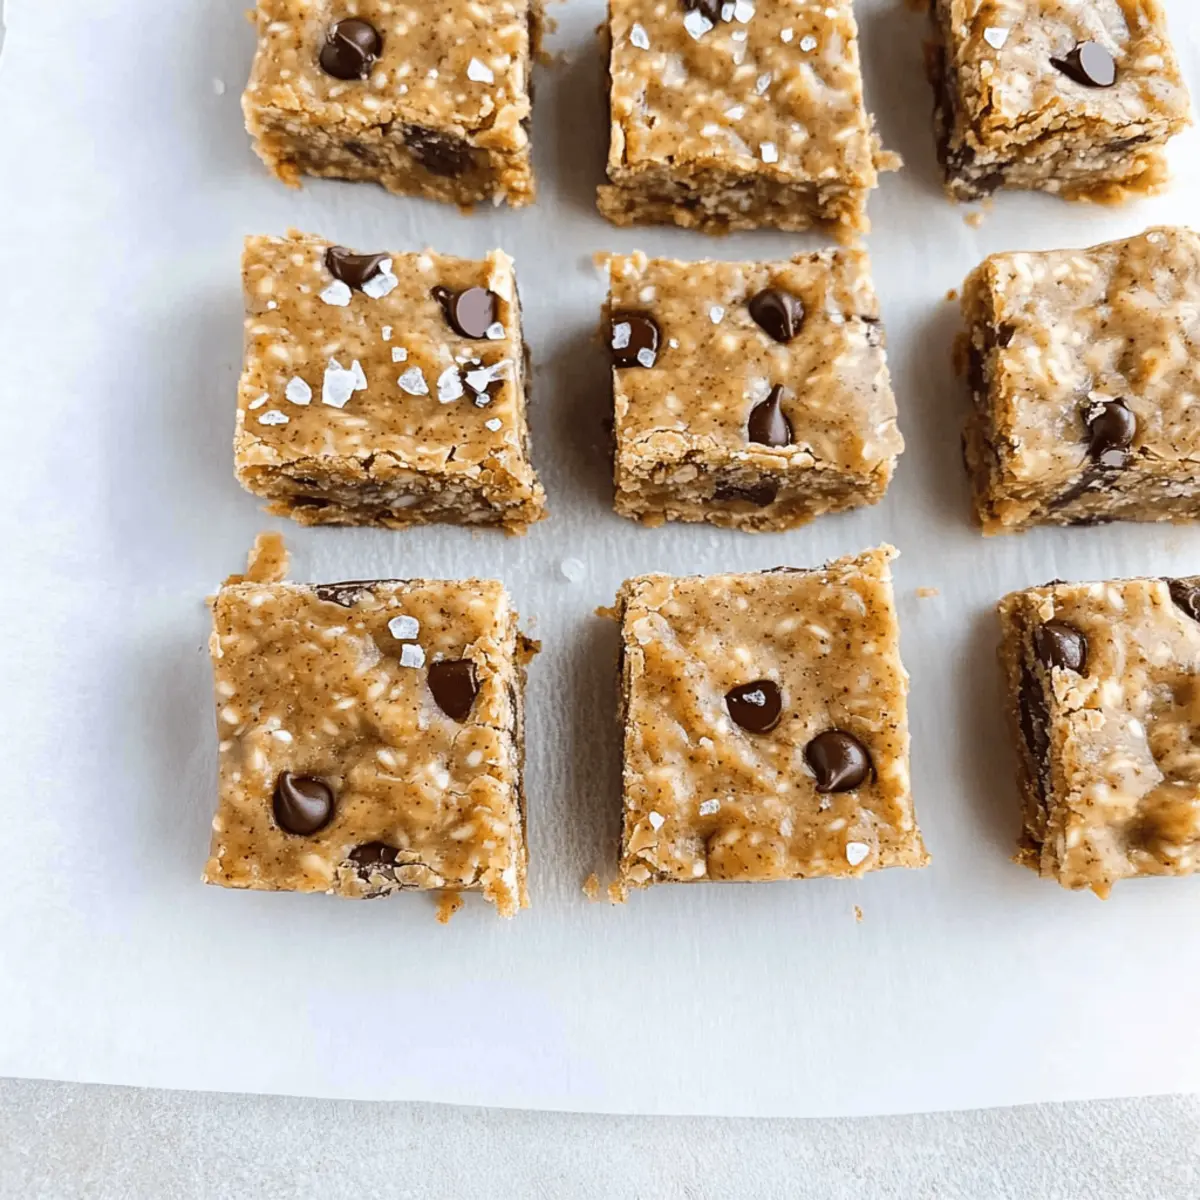
Picture it: a busy afternoon, and the sweet craving strikes. Instead of reaching for a store-bought snack full of additives, I turn to my trusty recipe for Homemade Peanut Butter Protein Bars. These chewy, gluten-free delights are not just delicious; they’re packed with wholesome ingredients that provide a nutritious energy boost. With creamy peanut butter, oats, and a hint of chocolate, they come together in a mere 20 minutes, making them perfect for meal prep or a quick grab-and-go breakfast. Plus, they’re endlessly customizable—swap in your favorite nut butter or add some dried fruit for variety. Ready to dive into a simple yet satisfying way to elevate your snack game? Let’s get started on this delectable journey!
Why Choose Peanut Butter Protein Bars?
Nutrient-Dense: These bars are packed with protein and healthy fats, making them a perfect post-workout snack or a quick breakfast option.
Quick and Easy: In just 20 minutes, you can whip up a batch, ensuring you’re never caught without a nutritious bite.
Customizable Flavors: Switch peanut butter for almond or sunflower seed butter, or introduce dried fruit for added texture—your snack, your choice!
Satiating Textures: Enjoy a delightful chew thanks to the combination of oats and creamy peanut butter mixed with the occasional chocolate chip for that sweet touch.
Health-Conscious: With a gluten-free and no-bake profile, these bars cater to various dietary needs, appealing to fitness enthusiasts and busy families alike.
If you’re on the hunt for delicious and nutritious snacks, don’t miss out on my Chewy Peanut Butter or Garlic Butter Chicken for more meal prep ideas!
Peanut Butter Protein Bars Ingredients
For the Base
• Creamy Peanut Butter – Provides richness and binds the ingredients; opt for natural unsweetened for the best flavor.
• Honey – Acts as a natural sweetener, helping to hold the bars together; maple syrup is a great substitution.
• Coconut Oil – Adds healthy fats and moisture; don’t skip this for a light texture.
• Vanilla Extract – Enhances the flavor profile; use pure vanilla for the most delightful taste.
• Salt – Balances the sweetness and is essential for flavor enhancement.
For the Dry Mix
• Old Fashioned Oats – Forms the chewy base; rolled oats work best for structure and texture.
• Flax Meal – Introduces omega-3s and helps bind the ingredients together; ground chia seeds can be substituted.
• Cinnamon – Adds warmth and depth of flavor, although it can be omitted if preferred.
• Protein Powder – Boosts protein content; feel free to substitute with another similar product.
For Added Flavor
• Coconut (shredded) – Adds delicious texture and flavor; choose sweetened or unsweetened based on your taste.
• Mini Chocolate Chips – Provide sweetness and delightful bursts of chocolate; swap for dark chocolate or omit for less sugar.
• Flaked Salt – Use on top to elevate the flavor; it’s optional but highly recommended.
Whether you’re looking to satisfy a sweet tooth or fuel your body, these Peanut Butter Protein Bars are a perfect choice!
Step‑by‑Step Instructions for Peanut Butter Protein Bars
Step 1: Prepare the Pan
Begin by preparing an 8×8 or 9×9 inch pan. Lightly spray it with cooking oil or line it with parchment paper, making sure to leave some overhang for easy removal later. This step is crucial for preventing the peanut butter protein bars from sticking, ensuring they come out perfectly shaped after chilling.
Step 2: Melt the Mixture
In a microwave-safe bowl, combine 1 cup of creamy peanut butter, 1/3 cup of honey, and 1/4 cup of coconut oil. Microwave these ingredients for 30-45 seconds until they’re soft and warm. Stir the mixture until smooth and well combined, allowing the warm peanut butter to enhance the flavors—this sets the foundation for your delicious Peanut Butter Protein Bars.
Step 3: Add Flavorful Ingredients
Once the mixture is smooth, stir in 1 teaspoon of vanilla extract, 1/4 teaspoon of salt, and 1/2 teaspoon of cinnamon. Next, add 1/4 cup of flax meal and 1 scoop of protein powder. Mix everything until fully combined, ensuring an even distribution of flavors. This step makes the bars dense and nutrient-packed, perfect for an energy boost.
Step 4: Incorporate Oats and Coconut
Add 1 cup of old-fashioned oats and 1/2 cup of shredded coconut to the mixture. Stir thoroughly until everything is well coated and the oats are evenly dispersed. The texture should be slightly sticky—this is a good sign that your Peanut Butter Protein Bars will hold together nicely after chilling.
Step 5: Fold in Chocolate Chips
If you love a hint of sweetness, fold in 1/2 cup of mini chocolate chips. Ensure the mixture has cooled down enough to prevent melting the chocolate. This step adds delightful bursts of chocolate throughout the bars, creating a balance between healthy and indulgent flavors that everyone will love.
Step 6: Press and Smooth
Transfer the mixture into the prepared pan. Using a spatula or your hands, press the mixture firmly and evenly into the corners, smoothing out the top for a clean finish. This compacting helps the Peanut Butter Protein Bars to hold their shape as they set—an essential step for achieving that perfect chewy texture.
Step 7: Chill to Set
Place the pan in the refrigerator or freezer for about 10-15 minutes. This chilling period is vital for the mixture to firm up, creating the ideal consistency for your homemade snacks. Keep an eye on them; once they’re slightly set and firm to the touch, they’re ready for the next step.
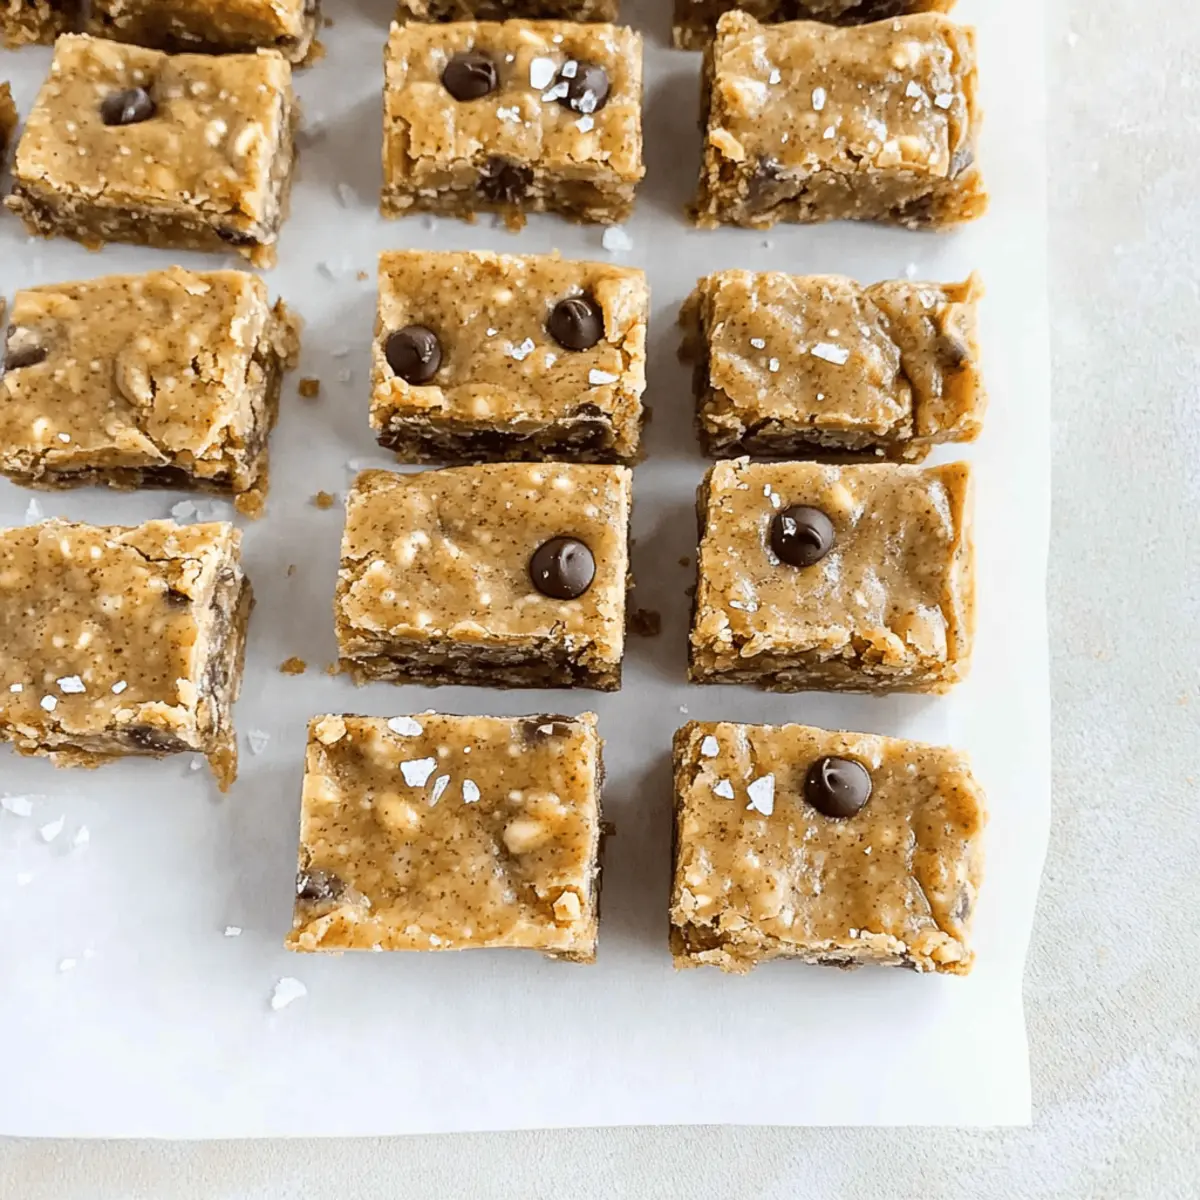
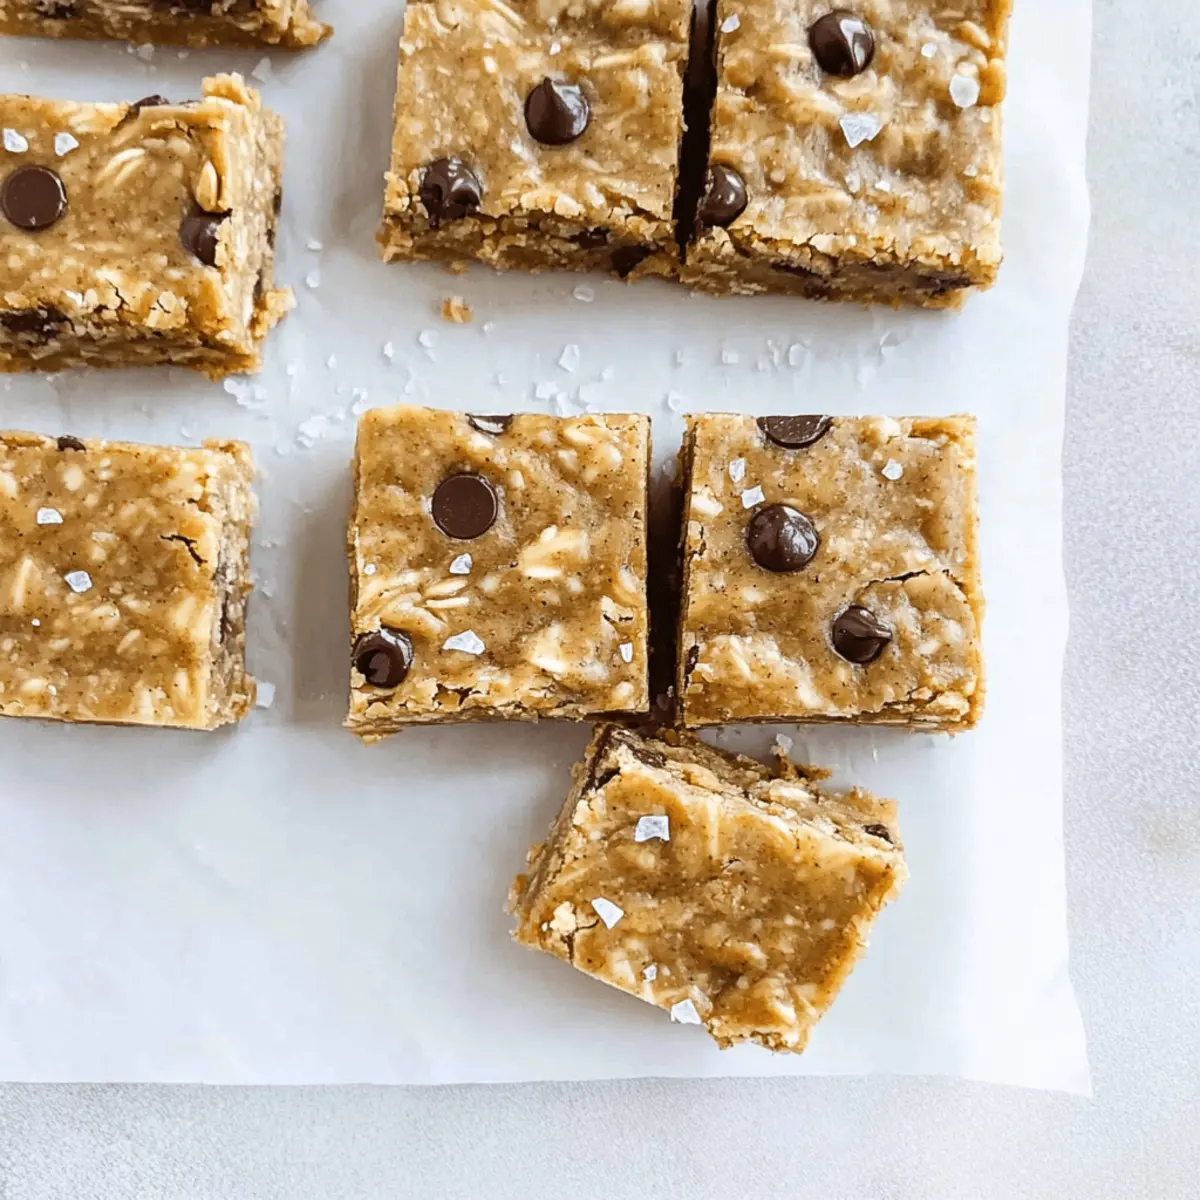
Step 8: Cut and Store
After chilling, remove the bars from the pan using the parchment overhang. Cut them into squares or rectangles, according to your preference. Store your delicious Peanut Butter Protein Bars in an airtight container in the refrigerator for up to one month, or freeze them for longer storage. They are now ready to be enjoyed anytime!
Peanut Butter Protein Bars Variations
Feel free to mix and match these delightful ideas and create your own signature bars! Each twist brings a new burst of flavor and joy.
-
Nut Butter Swap: Replace peanut butter with almond or sunflower seed butter for a nut-free or different flavor experience.
-
Fruitful Additions: Toss in dried cranberries or apricots for a fruity surprise. The chewiness of the dried fruit harmonizes splendidly with the bars.
-
Choco-Fudge Delight: Use dark chocolate chips instead of mini chocolate chips for a richer, more intense chocolate flavor.
-
Extra Crunch: Swap out shredded coconut for crushed nuts like almonds or walnuts for a delightful crunch and added nutrition.
-
Protein Punch: Experiment with flavored protein powders like chocolate or vanilla to infuse your bars with an exciting taste twist.
-
Heat It Up: Add a pinch of cayenne pepper for a surprising spicy kick! The warmth contrasts perfectly with the sweetness, creating a truly unique flavor profile.
-
Texture Variations: Incorporate puffed rice or quinoa for additional texture and a fun crunch that complements the chewiness.
Don’t forget to explore other delicious snack ideas like my Holiday Gooey Butter cookies or a savory Garlic Butter Steak to keep your taste buds entertained!
What to Serve with Homemade Peanut Butter Protein Bars
These chewy delights are perfect for creating a well-rounded meal or snack experience!
-
Fresh Fruit Salad: Bright, juicy fruits offer a refreshing contrast to the rich nuttiness of the bars, making for a vibrant snack or breakfast option. Paired with the protein bars, they satisfy both sweet and savory cravings.
-
Greek Yogurt Parfait: Layer yogurt with granola and berries for a creamy, crunchy combo that complements the chewy texture of the bars and adds protein for an energizing start to your day.
-
Nutty Trail Mix: A handful of trail mix brings an additional crunch and a variety of flavors that enhance the bars while providing an extra protein boost. Great for on-the-go snacking!
-
Smoothie: Blend up a nutrient-packed smoothie filled with spinach, banana, and almond milk. This refreshing drink not only hydrates but also pairs perfectly with the bars for an energizing snack.
-
Chia Seed Pudding: The creamy texture and mild flavors enhance the nutty profile of the peanut butter bars while adding healthy fats and fiber, making for a satisfying combination.
-
Iced Herbal Tea: A refreshing cup of iced herbal tea balances the richness of the protein bars without adding calories. Opt for a lightly fruity flavor, like hibiscus, to keep it interesting.
Storage Tips for Peanut Butter Protein Bars
Room Temperature: Keep these bars in a cool, dry spot for up to 3 days; they may soften but will still taste delightful.
Fridge: Store your Peanut Butter Protein Bars in an airtight container in the refrigerator for up to 1 month to maintain their freshness and chewy texture.
Freezer: For longer shelf life, freeze the bars for up to 3 months. Wrap them individually or place them in a sealed bag, allowing for easy grab-and-go snacks.
Reheating: If enjoying slightly warm, microwave them for 10-15 seconds to bring back their deliciously soft texture without losing flavor.
Make Ahead Options
These Homemade Peanut Butter Protein Bars are a fantastic choice for meal prep, ensuring that you always have a healthy snack on hand! You can prepare the mixture up to 24 hours in advance and press it into the pan, then refrigerate it until you’re ready to enjoy. Simply follow the original instructions up to Step 6, then cover the prepared pan and store it in the fridge. When you’re ready to finish the recipe, chill the mixture for an additional 10-15 minutes to set before cutting it into bars. To maintain freshness and texture, store the bars in an airtight container; they’ll stay delicious for up to one month in the fridge or can be frozen for up to 3 months!
Expert Tips for Peanut Butter Protein Bars
-
Quality Matters: Use high-quality natural creamy peanut butter to ensure the best flavor and texture. Cheaper brands can lead to a gritty finish.
-
Adjust Sweetness: If you prefer a sweeter bar, feel free to increase the amount of honey or chocolate chips. Taste the mixture before setting to balance it to your liking.
-
Chill Time Counts: Don’t skip the chilling step! It’s essential for the bars to firm up, ensuring that they maintain their shape when cutting and eating.
-
Easier Cutting: To make cutting the bars easier, allow them to chill just until firm—not rock solid. This will help them stay chewy rather than crumbly.
-
Flavor Variations: Get creative! Try adding different ingredients like dried fruits or nuts, or switch the peanut butter for almond or cashew butter to personalize your Peanut Butter Protein Bars.

Peanut Butter Protein Bars Recipe FAQs
How can I tell if my ingredients are fresh enough for the Peanut Butter Protein Bars?
Absolutely! For peanut butter, ensure it’s smooth and doesn’t have any dark spots. Honey should be clear and free of crystallization. Oats should smell nutty, while cinnamon should retain its fragrant aroma. If you’re unsure about your flax meal or protein powder, check for any clumps or off smells—fresh ingredients are key to delicious bars!
Advertisement
What’s the best way to store the Peanut Butter Protein Bars?
Very! Store these bars in an airtight container in the refrigerator for up to one month. If you’re looking for longer storage, feel free to freeze them for up to three months. Just make sure to use parchment paper in between layers to prevent sticking! When ready to enjoy, simply thaw overnight in the fridge.
Can I freeze the Peanut Butter Protein Bars?
Without a doubt! To freeze, individual wrap each bar in plastic wrap or aluminum foil, making it easy to grab one when needed. You can also place them in a freezer-safe bag. When you want to indulge, just pull out your desired number of bars, let them thaw in the fridge for a few hours or at room temperature for about 30 minutes, and enjoy!
What should I do if my Peanut Butter Protein Bars are too crumbly?
Rest assured, it happens to the best of us! If you find the bars too crumbly, next time ensure the peanut butter mixture is slightly warm when mixing in the dry ingredients; this helps bind everything together. Additionally, consider adding a bit more honey or coconut oil to increase moisture. Pressing the mixture firmly into the pan will also help maintain their shape.
Can these bars accommodate dietary allergies?
Absolutely! They’re quite customizable! Substitute the peanut butter with sunflower seed butter for a nut-free option, and choose gluten-free oats to make them suitable for those avoiding gluten. If you or someone you’re serving has a honey allergy, maple syrup is a great alternative sweetener. Always check all ingredient labels for any specific allergies!
What alternative ingredients can I use to switch up the taste?
Very much! You can easily swap the peanut butter for almond butter or cashew butter for different flavors—just keep proportions similar. For added texture, consider throwing in some chopped nuts or dried fruits like cranberries or apricots. Mixing in flavored protein powders or spices such as nutmeg can add delightful twists to the original recipe!
Irresistible Peanut Butter Protein Bars for Healthy Snacking
Ingredients
Equipment
Method
- Prepare the Pan: Lightly spray an 8x8 or 9x9 inch pan with cooking oil or line with parchment paper.
- Melt the Mixture: Combine 1 cup of creamy peanut butter, 1/3 cup of honey, and 1/4 cup of coconut oil in a bowl and microwave for 30-45 seconds until soft. Stir until smooth.
- Add Flavorful Ingredients: Stir in 1 teaspoon of vanilla extract, 1/4 teaspoon of salt, and 1/2 teaspoon of cinnamon. Add 1/4 cup of flax meal and 1 scoop of protein powder, mixing until fully combined.
- Incorporate Oats and Coconut: Add 1 cup of old-fashioned oats and 1/2 cup of shredded coconut, stirring until well coated.
- Fold in Chocolate Chips: If desired, fold in 1/2 cup of mini chocolate chips once the mixture has cooled enough.
- Press and Smooth: Transfer the mixture to the prepared pan and press firmly into the corners, smoothing the top.
- Chill to Set: Place the pan in the refrigerator or freezer for about 10-15 minutes until firm.
- Cut and Store: Remove from the pan, cut into squares or rectangles, and store in an airtight container.