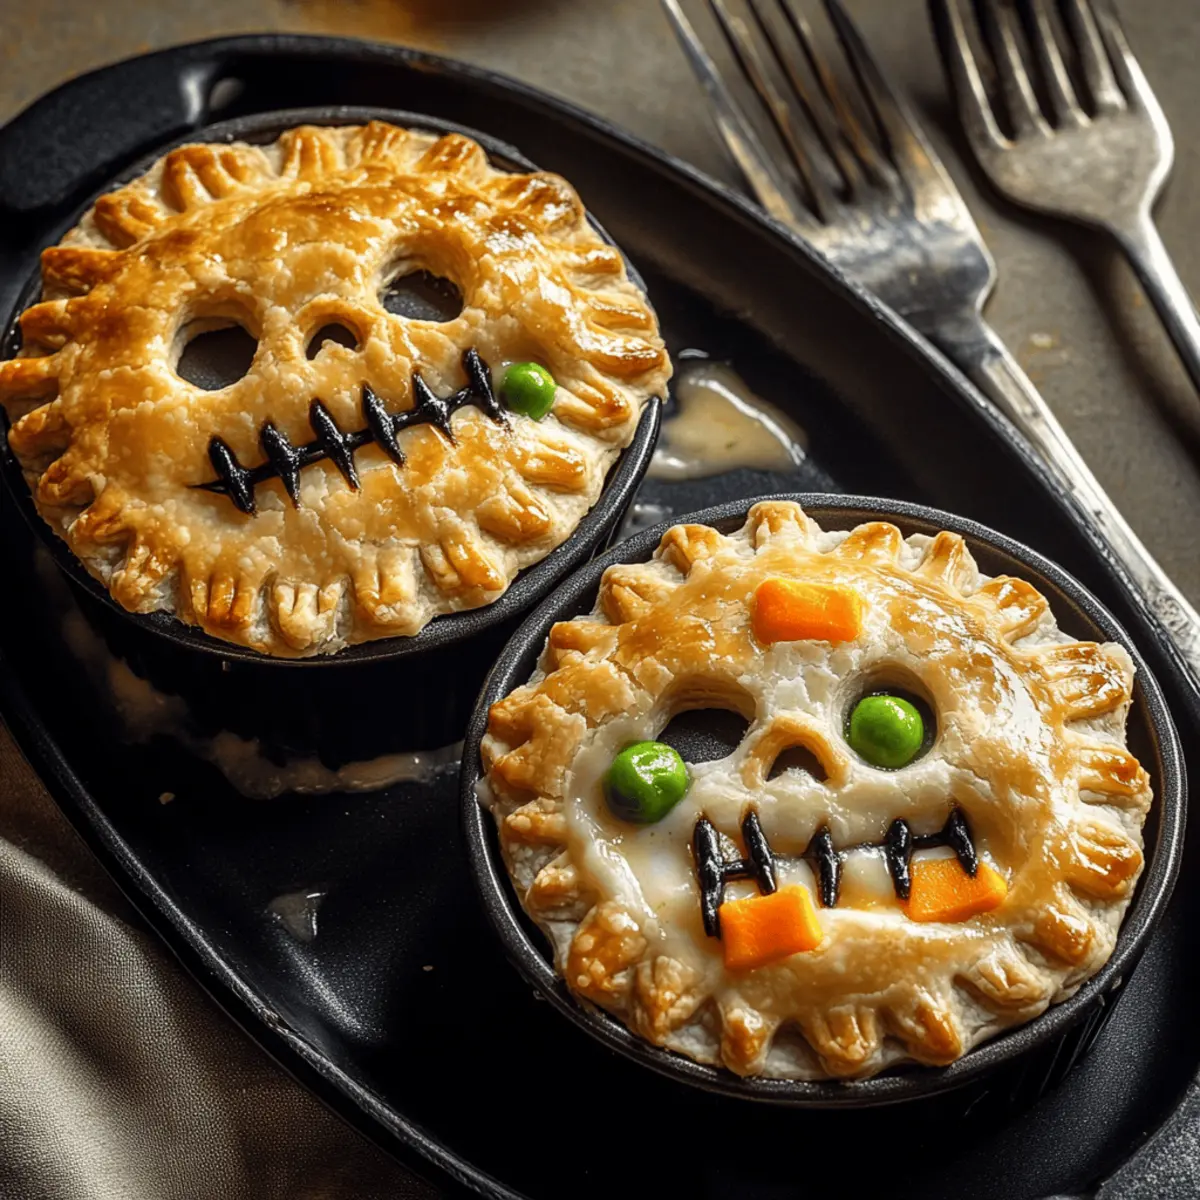
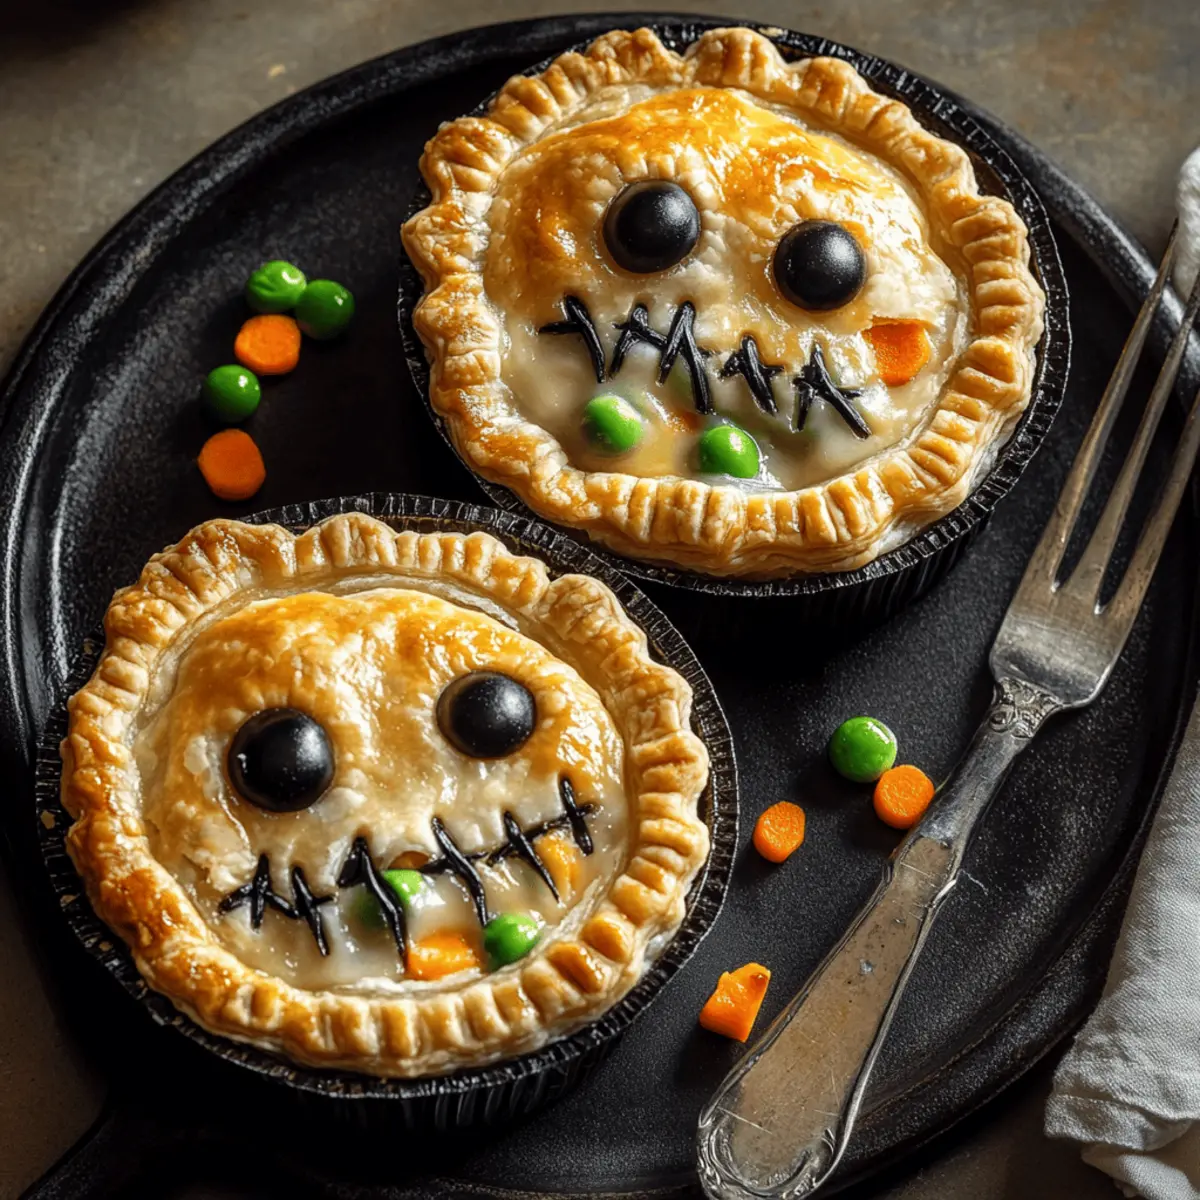
As the air turns crisp and the leaves swirl like ghosts at dusk, I find myself yearning for a meal that evokes both comfort and whimsy. Enter my Zombie Pot Pies, a spine-tingling twist on the classic that’s not only fun but also incredibly satisfying. Each pie features a creamy chicken filling nestled within flaky puff pastry, charmingly designed with eerie zombie faces that will delight kids and adults alike. Perfect for Halloween gatherings, these little wonders are quick to prepare and guaranteed to win over any crowd. So, why not add a touch of spookiness to your dinner table? Ready to uncover just how easy it is to whip up this festive feast?

Why Are Zombie Pot Pies So Irresistible?
Comfort and Creativity: Zombie Pot Pies transform a classic dish into a playful feast for the eyes and the stomach. Kid-Friendly Fun: Their spooky design is sure to captivate even the pickiest eaters, making dinner a thrilling experience. Quick and Easy: With convenient ingredients like rotisserie chicken and frozen veggies, you can whip these up in no time, making them a perfect weeknight meal. Deliciously Versatile: Feel free to swap out the filling with your favorite minced meat or additional veggies for a twist! Serve alongside a refreshing witches’ brew salad to enhance the festive spirit.
Zombie Pot Pie Ingredients
Get ready to create these spooky delights with some simple ingredients!
For the Filling
• Cooked, shredded chicken – Your main protein for hearty goodness; feel free to use rotisserie chicken for a quick meal.
• Frozen peas and carrots – Adds vibrant color and sweetness; mixed frozen vegetables work as a great substitute if you prefer.
• Corn (optional) – Enhances the sweetness and texture; can be omitted if it’s not your favorite.
• Butter – Forms the base for a rich roux; margarine or oil can replace it if needed.
• Flour – Thickens the sauce for the creamy filling; swap in cornstarch for a gluten-free option.
• Chicken broth – Brings deep flavor to the filling; opt for vegetable broth for a vegetarian take.
• Milk – Creates a luscious creamy texture; almond or oat milk can be used for a dairy-free choice.
• Salt and pepper – Essential seasonings for balanced taste; be sure to adjust according to your preference.
• Garlic powder – Adds delicious depth of flavor; fresh minced garlic works well—just use it sparingly.
For the Crust
• Puff pastry – This flaky crust gives the pies their delightful texture; pie crust is also an option, but remember to pre-bake it.
• Egg (for egg wash) – Ensures a golden-brown finish; skip it for vegan pies and brush with milk instead.
Embrace the spirit of Halloween with these flavorful Zombie Pot Pies, where each ingredient contributes to a dish that is comforting, creative, and just a bit eerie!
Step‑by‑Step Instructions for Zombie Pot Pies
Step 1: Preheat the Oven
Begin by preheating your oven to 400°F (200°C), ensuring it’s hot enough to create that perfect flaky texture. This step is crucial for your Zombie Pot Pies to puff beautifully. While the oven warms up, gather your ramekins or a baking dish, as you’ll soon be filling them with your delicious mixture.
Step 2: Make the Roux
In a medium saucepan, melt 4 tablespoons of butter over medium heat, ensuring it does not brown. Once melted, whisk in 1/4 cup of flour for about a minute until it turns light golden. Gradually pour in 2 cups of chicken broth and 1 cup of milk, stirring consistently. Cook the mixture until it thickens and bubbles, creating a rich and creamy base for your filling.
Step 3: Combine the Filling
Remove the roux from heat and add in 2 cups of shredded chicken, 1 cup of frozen peas and carrots, and season with salt, pepper, and 1 teaspoon of garlic powder. Stir the mixture well, letting the warmth blend the flavors together. This luscious filling will be the heart of your Zombie Pot Pies, ready to ooze creamy goodness.
Step 4: Prepare the Pastry
On a lightly floured surface, roll out your puff pastry sheet into a rectangle that’s about 1/8 inch thick. Cut the pastry into shapes that correspond with your ramekins, ensuring each piece is slightly larger than the opening. Feel free to get creative by carving spooky zombie faces into the pastry for a fun Halloween flair that pairs perfectly with your Zombie Pot Pies.
Step 5: Assemble the Pies
Fill each ramekin with a generous amount of the chicken filling, leaving a bit of space at the top. Place the pastry shapes over each filling, pressing the edges together to seal and brush the edges with a beaten egg for a shiny, golden finish. Make a few slits in the pastry for steam to escape, ensuring your pies bake evenly and become wonderfully puffy.
Step 6: Bake for Perfection
Carefully place the assembled Zombie Pot Pies in the preheated oven and bake for 20-25 minutes. You’ll know they’re ready when the pastry is a gorgeous golden brown, puffed up, and the filling is bubbly. Keep an eye on them to avoid over-browning, but feel free to savor the delightful aroma wafting through your kitchen!
Step 7: Let Them Rest
Once baked, remove the pies from the oven and let them rest for about 5-10 minutes. This is a crucial step as the filling will be very hot. As they cool, the flaky pastry will settle, making it easier to serve and enjoy your Zombie Pot Pies without burning your tongue on that delicious creamy filling.

Expert Tips for Zombie Pot Pies
- Chill Your Pastry: Keep puff pastry cold until you’re ready to use it. This helps maintain its flakiness and prevents it from becoming too soft during assembly.
- Watch the Egg Wash: Apply egg wash generously for a rich golden color; skipping this step can lead to a pale and less appetizing finish on your Zombie Pot Pies.
- Steam Venting: Don’t forget to cut slits in the pastry! This allows steam to escape, ensuring a perfectly baked crust without sogginess.
- Rest Before Serving: Allow your pies to rest for 5-10 minutes after baking. The filling will be extremely hot, and resting helps avoid tongue burns while enhancing flavors.
- Mix and Match: Feel free to personalize your filling! Experiment with different proteins or veggies to make your Zombie Pot Pies truly unique, keeping your family’s preferences in mind.
Make Ahead Options
These Zombie Pot Pies are perfect for busy weeknights when you want to save time without sacrificing flavor! You can prepare the creamy chicken filling up to 3 days in advance—just refrigerate it in an airtight container to maintain quality. Additionally, you can cut and shape the puff pastry, storing it in the refrigerator overnight. When you’re ready to serve, simply fill the pastry with the chilled filling and follow the baking instructions, adding an extra minute or two to account for the cold filling. This approach not only keeps your kitchen organized but also ensures that your Zombie Pot Pies are just as delicious as if they were freshly made!
What to Serve with Zombie Pot Pies
Elevate your Halloween feast with delicious sides that will charm your guests and complement these spooky delights.
- Witches’ Brew Salad: This fresh, colorful salad with a light vinaigrette brings a crisp contrast to the creamy pies, adding a refreshing element.
- Garlic Breadsticks: Warm, buttery breadsticks make for a comforting side that pairs perfectly with the cheesy filling, perfect for dipping. A delightful combination!
- Pumpkin Soup: A velvety pumpkin soup enhances the autumn vibe, making each bite a cozy hug in a bowl—ideal for a festive gathering.
- Cranberry Sauce: The tartness of a homemade cranberry sauce cuts through the richness of the pot pies, creating a balanced flavor experience.
- Mashed Potatoes: Creamy mashed potatoes offer a familiar comfort that complements the flaky texture of the Zombie Pot Pies beautifully. Top them with gravy for a heartwarming side.
- Apple Crisp: Delightful and sweet, this warm dessert topped with a scoop of vanilla ice cream makes for a memorable ending to a Halloween feast.
- Spooky Mocktails: Whip up spooky mocktails with sparkling grape juice and gummy worms to add a festive drink that kids and adults alike will love!
- Cornbread Muffins: These sweet muffins pair perfectly with the savory filling, adding an extra layer of warmth and comfort to your Halloween table.
Enjoy these delectable pairings as you celebrate with family and friends, ensuring your Zombie Pot Pies shine with even more delight!
How to Store and Freeze Zombie Pot Pies
Fridge: Store baked Zombie Pot Pies in an airtight container for up to 3 days, ensuring they remain fresh and delicious.
Freezer: These pies can be frozen before baking. Wrap each unbaked pie tightly in plastic wrap and then in foil for up to 2 months.
Reheating: To reheat, bake frozen pies directly from the freezer at 400°F (200°C) for about 30-35 minutes or until heated through and the crust is golden.
Make-Ahead Tip: Prepare the filling ahead of time and refrigerate it for up to 2 days, adjusting baking time if using cold filling for your Zombie Pot Pies.
Zombie Pot Pies: Deliciously Spooky Variations
Feel free to play with these Zombie Pot Pies by giving them your own unique twist, making each bite even more thrilling!
-
Protein Swap: Use turkey or beef instead of chicken for a different flavor profile. Whichever protein you choose, make sure it’s cooked and shredded for that tender bite.
-
Veggie Boost: Add mushrooms or bell peppers for extra texture and flavor. Diced vegetables add a fresh crunch, making each pie irresistibly delicious.
-
Seasonal Spices: Incorporate creamy ranch seasoning or a pinch of allspice for a warm, flavorful filling that turns your pies into a comforting hug. A little extra seasoning goes a long way in enhancing the flavor.
-
Pastry Fun: Create Halloween-themed shapes with the puff pastry, such as bats or pumpkins, to delight your guests even further. Your baking doesn’t just taste good—it can be an artwork, too!
-
Heat It Up: Add ** diced jalapeños or red pepper flakes** for a spicy kick that contrasts beautifully with the creamy filling. Embrace the heat for a more exhilarating dish.
-
Shortcut Version: Use store-bought fillings like creamy chicken soup for a quicker prep time. This simple swap allows you to enjoy homemade flavors without the fuss.
-
For Vegans: Replace chicken with chickpeas or lentils and use plant-based milk and broth for a hearty, vegan-friendly twist. You won’t miss the meat with these protein-packed alternatives.
-
Doubled Up: Prepare a mini version using phyllo dough or make individual servings in muffin tins for a fun appetizer perfect for Halloween parties. Everyone loves bite-sized goodies!
Embrace the charm of these Zombie Pot Pies, and if you’re looking for more comforting recipes, check out this delightful Sweet Potato Casserole or these scrumptious Spicy Chipotle Ranch burritos for your next gathering!
Zombie Pot Pies Recipe FAQs
How do I select the best chicken for the filling?
Absolutely! Use cooked, shredded chicken for your Zombie Pot Pies. If you’re pressed for time, rotisserie chicken is a fantastic shortcut. Just ensure it’s moist and flavorful, as this will enhance your filling’s overall taste. If cooking from raw, poach the chicken in seasoned water until cooked through, about 15-20 minutes.
Advertisement
What’s the best way to store leftover Zombie Pot Pies?
Very! Place any uneaten Zombie Pot Pies in an airtight container in the fridge for up to 3 days. To maintain crispness, you can place a paper towel in the container to absorb extra moisture. Reheat in the oven at 350°F (175°C) for about 15-20 minutes until warmed through.
Can I freeze Zombie Pot Pies before baking?
Yes, you can! To freeze your Zombie Pot Pies, wrap each unbaked pie tightly in plastic wrap and then in foil. They can be stored in the freezer for up to 2 months. When you’re ready to enjoy them, bake directly from frozen at 400°F (200°C) for 30-35 minutes or until the crust is golden and filling is bubbly.
What if my filling turns out too thick or too thin?
No worries! If your filling ends up too thick, add a splash of chicken broth or milk to loosen it up while cooking over low heat. If it’s too thin, continue cooking it for a few more minutes to evaporate excess liquid, or add a bit more flour to thicken it up. Always taste and adjust seasonings afterward!
Are these Zombie Pot Pies kid-friendly, and do they have any allergens?
Absolutely! These Zombie Pot Pies are designed to be kid-friendly, making them a fun meal for the whole family. If you have allergies, consider substitutions like using dairy-free milk or gluten-free flour. Always check labels on pre-made items like puff pastry to ensure they meet your dietary needs.
Zombie Pot Pies: Creepy Comfort Food for Halloween Fun
Ingredients
Equipment
Method
- Preheat your oven to 400°F (200°C). Gather your ramekins or a baking dish.
- Melt 4 tablespoons of butter in a medium saucepan over medium heat, then whisk in 1/4 cup of flour until light golden. Gradually stir in 2 cups of chicken broth and 1 cup of milk, cooking until thickened.
- Remove roux from heat, add 2 cups of shredded chicken, 1 cup of frozen peas and carrots, seasoned with salt, pepper, and 1 teaspoon of garlic powder. Stir well.
- Roll out puff pastry to 1/8 inch thick, cut into shapes for your ramekins, optionally carving spooky faces.
- Fill each ramekin with the chicken filling, cover with pastry, seal edges, brush with egg wash, and cut slits for steam.
- Bake for 20-25 minutes until golden brown and filling is bubbly.
- Let pies rest for 5-10 minutes before serving to cool filling.