Introduction to Sopapilla Cheesecake Recipe
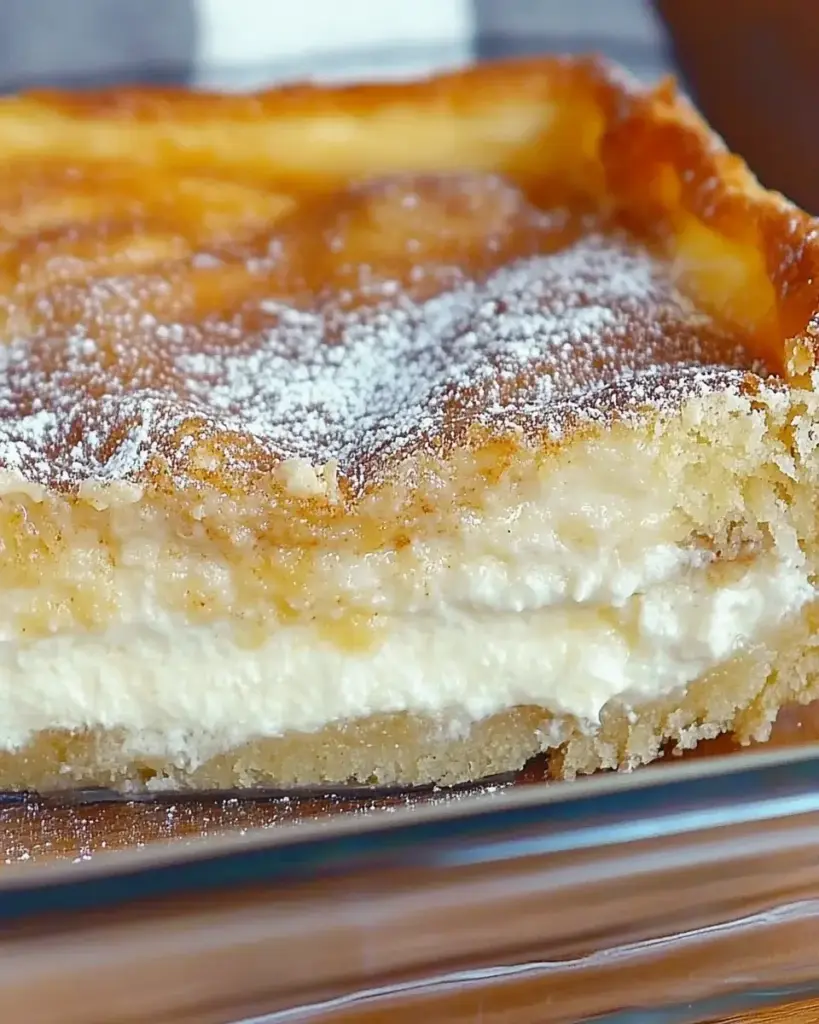
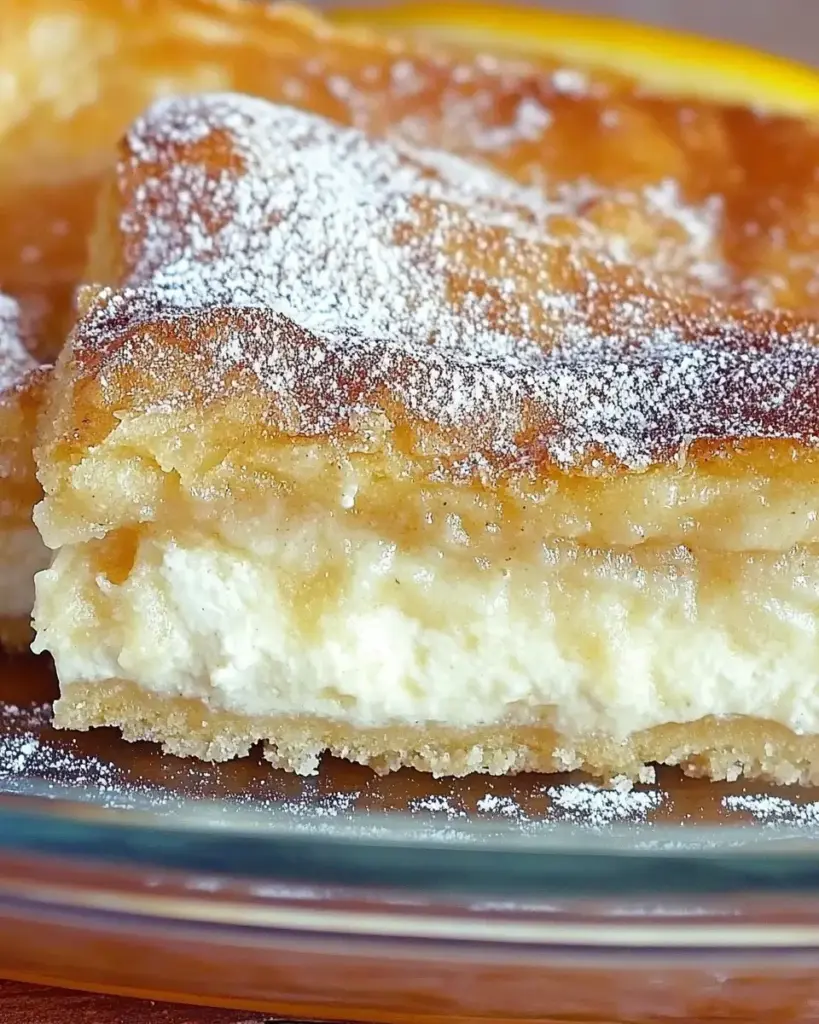
If you’re looking for a dessert that combines creamy goodness with a delightful crunch, the Sopapilla Cheesecake Recipe is just what you need. This sweet treat is a perfect blend of traditional Mexican flavors and classic cheesecake, making it a favorite for many. Imagine biting into a warm, flaky crust that gives way to a rich, creamy filling, all topped with a sprinkle of cinnamon sugar. It’s a dessert that not only satisfies your sweet tooth but also brings a smile to your face.
This recipe is incredibly easy to make, requiring just a few simple ingredients that you might already have in your kitchen. With its layers of crescent roll dough and a luscious cream cheese mixture, it’s a dish that can impress guests or simply be enjoyed at home with family. Whether you’re hosting a gathering or just want to treat yourself, this Sopapilla Cheesecake is sure to be a hit.
Moreover, the versatility of this dessert allows for various adaptations. You can add different flavors or toppings to make it your own. From drizzling honey to adding chocolate sauce, the possibilities are endless. So, let’s dive into the ingredients and get started on creating this delightful dessert!
Ingredients for Sopapilla Cheesecake Recipe
To create the delicious Sopapilla Cheesecake, you’ll need a handful of simple ingredients. Each one plays a vital role in achieving that perfect balance of flavors and textures. Here’s what you’ll need:
- 2 (8-ounce) packages of cream cheese, softened
- 1 cup granulated sugar
- 1 teaspoon vanilla extract
- 2 (8-ounce) cans of refrigerated crescent roll dough
- 1/2 cup unsalted butter, melted
- 1/2 cup granulated sugar (for topping)
- 1 teaspoon ground cinnamon
These ingredients come together to create a delightful dessert that’s both creamy and flaky. The cream cheese provides a rich filling, while the crescent roll dough forms a light and crispy crust. The sugar and cinnamon topping adds a sweet and aromatic finish that makes every bite irresistible.
Feel free to customize your ingredients! For instance, you can swap out the vanilla extract for almond extract for a unique twist. Or, if you prefer a sweeter touch, consider adding a drizzle of honey or chocolate sauce before serving. The beauty of this recipe lies in its flexibility, allowing you to make it your own!
Step-by-Step Preparation of Sopapilla Cheesecake Recipe
Now that you have gathered all your ingredients, it’s time to dive into the fun part: preparing your Sopapilla Cheesecake! Follow these simple steps to create a dessert that will leave everyone asking for seconds.
Step 1: Preheat the Oven
First things first, preheat your oven to 350°F (175°C). This step is crucial as it ensures that your cheesecake bakes evenly. While the oven heats up, you can move on to the next step.
Step 2: Prepare the Cream Cheese Mixture
In a mixing bowl, combine the softened cream cheese, 1 cup of granulated sugar, and 1 teaspoon of vanilla extract. Using an electric mixer, beat the mixture until it becomes smooth and creamy. This should take about 2-3 minutes. Make sure there are no lumps, as a smooth filling is key to a delicious cheesecake.
Step 3: Assemble the Sopapilla Layers
Next, unroll one can of crescent roll dough. Carefully press it into the bottom of a greased 9×13-inch baking dish. Make sure to seal the seams well to create a solid base. Once that’s done, spread the cream cheese mixture evenly over the dough layer. Then, unroll the second can of crescent roll dough and place it on top of the cream cheese layer, sealing the seams again. This will create a lovely layered effect.
Step 4: Bake the Sopapilla Cheesecake
Now it’s time to bake! Place your assembled cheesecake in the preheated oven and bake for 30-35 minutes. Keep an eye on it, and look for a golden brown top. This is a sign that your cheesecake is ready to come out of the oven. The aroma will fill your kitchen, making it hard to wait!
Step 5: Add the Topping
Once your cheesecake is baked to perfection, remove it from the oven and let it cool for about 10 minutes. While it cools, prepare the topping. In a small bowl, mix together 1/2 cup of granulated sugar and 1 teaspoon of ground cinnamon. Drizzle the melted butter evenly over the top layer of dough, then sprinkle the cinnamon-sugar mixture generously over it. This will add a sweet and spicy finish to your dessert.
After adding the topping, let the cheesecake cool completely before slicing it into squares. This will help the layers set nicely, making it easier to serve. Now, you’re ready to enjoy your delicious Sopapilla Cheesecake Delight!
Variation of Sopapilla Cheesecake Recipe
One of the best things about the Sopapilla Cheesecake Recipe is its versatility. You can easily switch up the ingredients to create different flavors that suit your taste. Here are some alternative ingredients you can try for a unique twist on this delightful dessert.
Alternative Ingredients for Different Flavors
- Fruit Additions: Consider adding fresh fruit like blueberries, strawberries, or peaches to the cream cheese mixture. This will not only enhance the flavor but also add a pop of color.
- Chocolate Lovers: For a chocolatey version, mix in some cocoa powder into the cream cheese mixture or add chocolate chips. You can also drizzle melted chocolate on top before serving.
- Nutty Flavor: Chopped nuts, such as pecans or walnuts, can be added to the cream cheese layer for a crunchy texture. They pair wonderfully with the creamy filling.
- Spiced Up: If you enjoy a bit of spice, try adding a pinch of nutmeg or a dash of cayenne pepper to the cinnamon-sugar topping. This will give your cheesecake a warm, spicy kick.
- Different Extracts: Swap out the vanilla extract for almond or coconut extract. Each will give your cheesecake a distinct flavor profile that’s equally delicious.
These alternative ingredients can help you create a Sopapilla Cheesecake that’s uniquely yours. Feel free to experiment and find the combination that you love the most!
Serving Suggestions for Variations
When it comes to serving your Sopapilla Cheesecake, there are plenty of fun ideas to make it even more special. Here are some serving suggestions:
- Drizzle with Sauce: A drizzle of caramel or chocolate sauce on top can elevate the dessert. It adds an extra layer of sweetness that everyone will enjoy.
- Whipped Cream: Serve with a dollop of whipped cream for a light and airy touch. You can even sprinkle some cinnamon on top for added flavor.
- Ice Cream: Pair your cheesecake with a scoop of vanilla or cinnamon ice cream. The cold ice cream contrasts beautifully with the warm cheesecake.
- Garnish with Fresh Fruit: Top each slice with fresh fruit or a sprig of mint. This not only looks appealing but also adds a refreshing taste.
- Mini Versions: For a fun twist, consider making mini versions in muffin tins. These bite-sized treats are perfect for parties or gatherings.
With these variations and serving suggestions, your Sopapilla Cheesecake Recipe can be a delightful centerpiece for any occasion. Enjoy experimenting and sharing your delicious creations!
Cooking Note for Sopapilla Cheesecake Recipe
When preparing your Sopapilla Cheesecake, there are a few important cooking notes to keep in mind. These tips will help ensure that your dessert turns out perfectly every time. Let’s explore some key points to consider while baking this delightful treat.
First, make sure your cream cheese is softened before mixing. This step is crucial for achieving a smooth and creamy filling. If your cream cheese is too cold, it can result in lumps that are hard to blend. To soften it quickly, you can cut it into small cubes and let it sit at room temperature for about 15-20 minutes.
Next, be mindful of the baking time. Every oven is different, so keep an eye on your cheesecake as it bakes. You want the top to be golden brown, but not overcooked. If you notice that the edges are browning too quickly, you can cover them with aluminum foil to prevent burning.
Additionally, allowing the cheesecake to cool for at least 10 minutes after baking is essential. This cooling period helps the layers set, making it easier to slice into squares. If you try to cut it too soon, the layers may not hold together well, resulting in a messy presentation.
Lastly, consider letting your Sopapilla Cheesecake chill in the refrigerator for a few hours before serving. This extra time allows the flavors to meld together beautifully and enhances the overall taste. Plus, serving it cold can be a refreshing treat, especially on warm days.
By following these cooking notes, you’ll be well on your way to creating a delicious Sopapilla Cheesecake that will impress your family and friends. Happy baking!
Serving Suggestions for Sopapilla Cheesecake Recipe
Once your Sopapilla Cheesecake is baked and cooled, it’s time to think about how to serve this delightful dessert. Presentation can elevate the experience, making it even more enjoyable for you and your guests. Here are some creative serving suggestions to consider:
- Drizzle with Sauce: A drizzle of warm caramel or rich chocolate sauce can add a decadent touch. The sweet sauce complements the creamy filling and flaky crust beautifully.
- Whipped Cream: Serve each slice with a generous dollop of whipped cream. This light addition balances the richness of the cheesecake and adds a lovely texture.
- Ice Cream: Pair your cheesecake with a scoop of vanilla or cinnamon ice cream. The cold ice cream contrasts perfectly with the warm cheesecake, creating a delightful combination.
- Garnish with Fresh Fruit: Top each slice with fresh berries, such as strawberries or blueberries, for a pop of color and freshness. A sprig of mint can also add a nice touch.
- Mini Versions: For a fun twist, consider making mini versions of the cheesecake in muffin tins. These bite-sized treats are perfect for parties and easy to serve.
- Chocolate Shavings: Add a sprinkle of chocolate shavings on top for a touch of elegance. This simple addition can make your dessert look gourmet.
- Cinnamon Sugar Dusting: Before serving, dust a little extra cinnamon sugar on top for added flavor and a beautiful finish. This simple step can enhance the overall presentation.
These serving suggestions can help you create a memorable dessert experience. Whether you’re hosting a gathering or enjoying a quiet night at home, your Sopapilla Cheesecake will surely impress. Enjoy sharing this delightful treat with family and friends!
Tips for Perfecting Your Sopapilla Cheesecake Recipe
Creating the perfect Sopapilla Cheesecake is all about attention to detail and a few helpful tips. With these suggestions, you can elevate your dessert to new heights, ensuring it’s a hit every time you make it. Let’s explore some essential tips for perfecting your Sopapilla Cheesecake Recipe.
First, always use softened cream cheese. This is crucial for a smooth and creamy filling. If your cream cheese is too cold, it can lead to lumps in your mixture. To soften it quickly, cut it into small cubes and let it sit at room temperature for about 15-20 minutes. This simple step can make a big difference in the texture of your cheesecake.
Next, don’t skip the sealing of the crescent roll seams. When you press the dough into the baking dish, make sure to seal the seams well. This helps create a sturdy base and prevents the filling from leaking out during baking. A well-sealed crust will hold the layers together beautifully.
Another important tip is to keep an eye on the baking time. Ovens can vary, so check your cheesecake a few minutes before the suggested baking time. You want the top to be golden brown, but not overcooked. If the edges start to brown too quickly, cover them with aluminum foil to prevent burning.
After baking, allow your cheesecake to cool for at least 10 minutes before slicing. This cooling period helps the layers set, making it easier to cut into neat squares. If you try to slice it too soon, the layers may not hold together, resulting in a messy presentation.
Lastly, consider chilling your Sopapilla Cheesecake in the refrigerator for a few hours before serving. This extra time allows the flavors to meld together and enhances the overall taste. Plus, serving it cold can be a refreshing treat, especially on warm days.
By following these tips, you’ll be well on your way to creating a Sopapilla Cheesecake that’s not only delicious but also visually appealing. Enjoy the process and happy baking!
Breakdown of Time for Sopapilla Cheesecake Recipe
Understanding the time needed for each step in the Sopapilla Cheesecake Recipe can help you plan better. Whether you’re preparing for a special occasion or just a family treat, knowing the time breakdown is essential. Here’s a detailed look at the time required for each part of the process.
Prep Time
The prep time for this delightful dessert is approximately 15-20 minutes. This includes gathering your ingredients, softening the cream cheese, and assembling the layers. Make sure to have everything ready before you start mixing. This will make the process smoother and more enjoyable.
Cooking Time
Once your cheesecake is assembled, it will need to bake in the oven for about 30-35 minutes. Keep an eye on it as it bakes. You want the top to turn a lovely golden brown. The aroma will fill your kitchen, making it hard to wait!
Total Time
In total, you can expect to spend around 50-55 minutes from start to finish. This includes both prep and cooking time. After baking, allow your cheesecake to cool for at least 10 minutes before slicing. If you choose to chill it in the refrigerator for a few hours, that will enhance the flavors even more. However, the active time in the kitchen is relatively short, making this recipe a great option for any occasion.
With this time breakdown, you can easily plan your baking session. Enjoy the process and the delicious results of your Sopapilla Cheesecake!
Nutritional Information for Sopapilla Cheesecake Recipe
Understanding the nutritional information of your favorite desserts can help you make informed choices. The Sopapilla Cheesecake Recipe is not only delicious but also provides some nutritional benefits. Here’s a breakdown of the key nutritional components for each serving of this delightful treat.
Calories
Each serving of Sopapilla Cheesecake contains approximately 280 calories. This makes it a satisfying dessert that can fit into a balanced diet. While it’s important to enjoy treats in moderation, knowing the calorie content can help you plan your meals better.
Protein
In terms of protein, each serving offers about 3 grams. While this may not seem like a lot, the cream cheese contributes to this protein content. Protein is essential for building and repairing tissues, making it an important part of your diet.
Sodium
The sodium content in each serving of Sopapilla Cheesecake is around 200 milligrams. This is a moderate amount, and it’s good to be mindful of your sodium intake, especially if you are watching your salt consumption. Balancing your meals with lower-sodium options can help maintain a healthy diet.
Overall, the Sopapilla Cheesecake Recipe can be enjoyed as an occasional treat. With its creamy filling and flaky crust, it’s a dessert that brings joy to any gathering. Just remember to savor each bite and enjoy the delightful flavors!
FAQs about Sopapilla Cheesecake Recipe
What is a Sopapilla Cheesecake?
A Sopapilla Cheesecake is a delightful dessert that combines the flavors of traditional sopapillas with the creamy texture of cheesecake. It features layers of crescent roll dough filled with a rich cream cheese mixture, topped with a sweet cinnamon-sugar blend. This dessert is known for its flaky crust and creamy filling, making it a favorite among many dessert lovers.
Advertisement
Can I make Sopapilla Cheesecake ahead of time?
Absolutely! You can prepare the Sopapilla Cheesecake a day in advance. Simply follow the recipe and bake it as directed. Once it cools, cover it tightly with plastic wrap or aluminum foil and store it in the refrigerator. This allows the flavors to meld together, enhancing the taste. Just remember to let it sit at room temperature for a few minutes before serving for the best texture.
How do I store leftover Sopapilla Cheesecake?
To store leftover Sopapilla Cheesecake, place it in an airtight container or cover it tightly with plastic wrap. Keep it in the refrigerator, where it can last for about 3-4 days. If you want to enjoy it later, make sure to check for any signs of spoilage before consuming. This way, you can savor the deliciousness of your cheesecake even after the initial serving!
Can I freeze Sopapilla Cheesecake?
Yes, you can freeze Sopapilla Cheesecake! To do this, allow it to cool completely after baking. Then, cut it into squares and place them in a single layer on a baking sheet. Freeze until solid, then transfer the squares to an airtight container or freezer bag. They can be stored in the freezer for up to 2 months. When you’re ready to enjoy, simply thaw in the refrigerator overnight before serving.
Conclusion on Sopapilla Cheesecake Recipe
In conclusion, the Sopapilla Cheesecake Recipe is a delightful dessert that brings together the best of both worlds: the flaky goodness of sopapillas and the creamy richness of cheesecake. This recipe is not only easy to prepare but also offers endless possibilities for customization. Whether you choose to stick to the classic version or experiment with different flavors, each bite is sure to be a treat.
As you gather your ingredients and follow the simple steps, remember that the joy of baking lies in the process. The aroma of the cheesecake baking in your oven will fill your kitchen with warmth and anticipation. Once it’s ready, the golden-brown top and sweet cinnamon-sugar topping will make it hard to resist. Your family and friends will surely be impressed by your culinary skills!
Moreover, the versatility of this dessert allows you to adapt it to suit any occasion. From holiday gatherings to casual family dinners, the Sopapilla Cheesecake is a crowd-pleaser. With the tips and variations provided, you can make it uniquely yours, ensuring that every serving is special.
So, roll up your sleeves, preheat that oven, and get ready to create a dessert that will not only satisfy your sweet tooth but also create lasting memories. Enjoy every moment of baking and, most importantly, enjoy sharing this delicious Sopapilla Cheesecake with those you love!
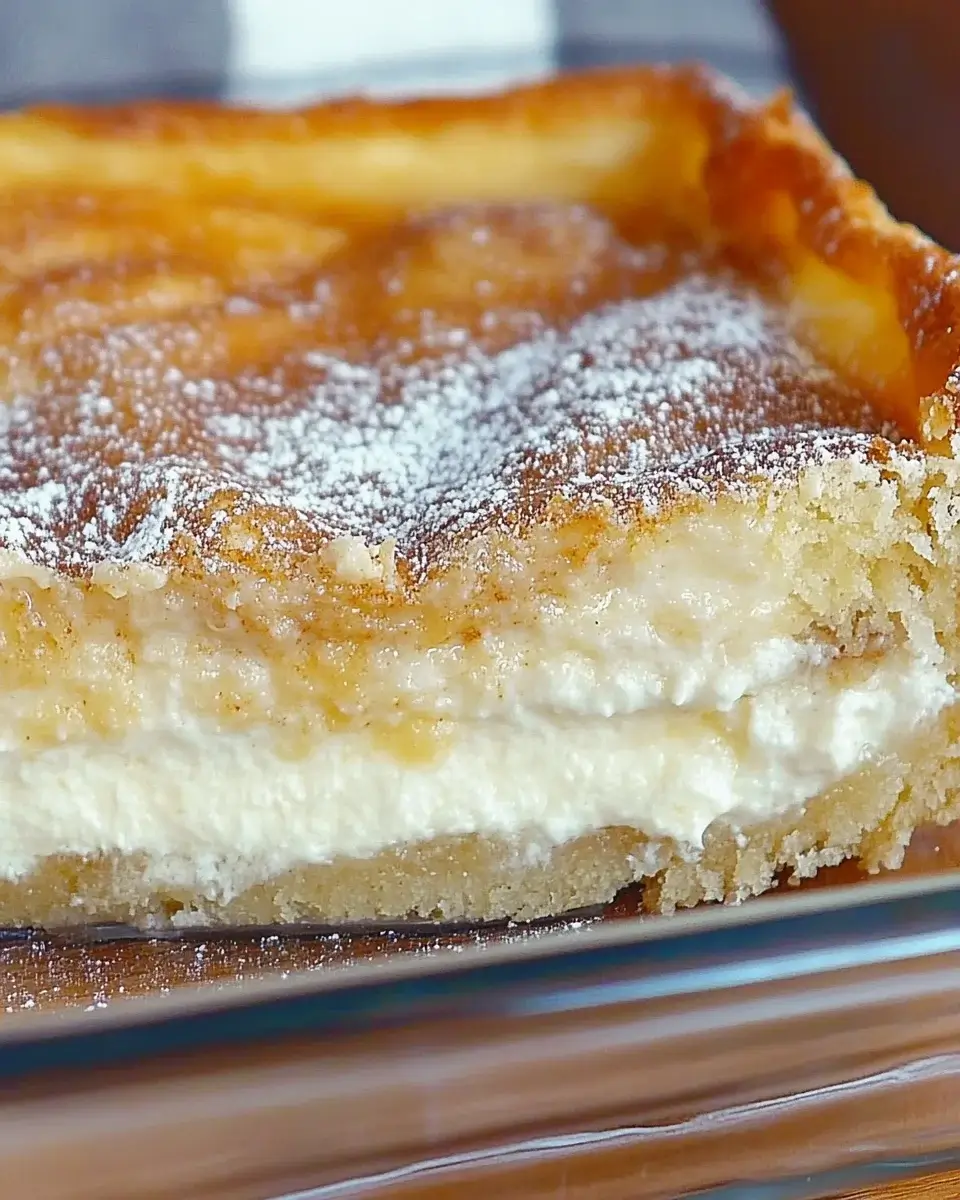
Sopapilla Cheesecake Recipe is a must-try dessert!
Ingredients
Method
- Preheat the oven to 350°F (175°C). Lightly grease a 9×13 inch baking dish.
- Unroll one can of crescent roll dough and press it into the bottom of the dish, pinching seams to seal.
- In a medium bowl, mix the softened cream cheese, 1 cup sugar, and vanilla extract until smooth and creamy.
- Spread the cream cheese mixture evenly over the bottom dough layer.
- Unroll the second can of crescent dough and lay it over the cream cheese filling. Pinch seams to seal.
- Pour melted butter evenly over the top.
- In a small bowl, mix the remaining 1/2 cup sugar with cinnamon, then sprinkle the mixture over the buttered top layer.
- Bake for 30 minutes, or until the top is golden brown and crisp.
- Let cool slightly before serving warm, or chill completely before slicing for neat bars.
Notes
- For an extra cinnamon kick, add a pinch of nutmeg or a splash of maple extract to the filling.
- These bars taste great warm, but chilling them before slicing gives cleaner, firmer pieces—perfect for parties or make-ahead dessert trays.
- Store leftovers in the fridge in an airtight container for up to 4 days.

