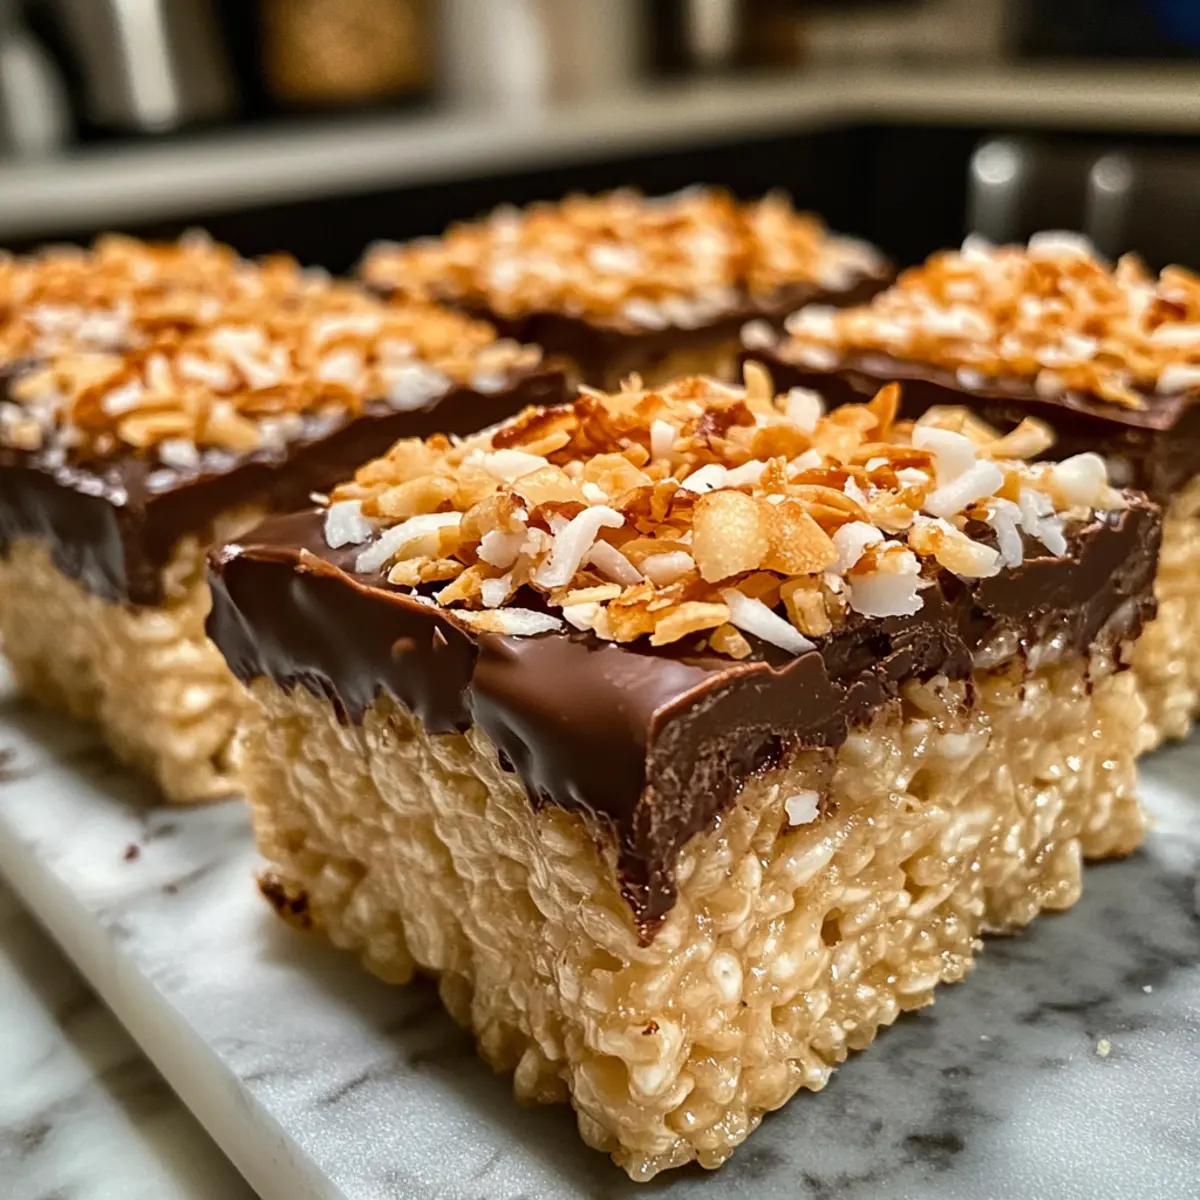
The kitchen filled with a sweet, nutty aroma as I toasted coconut to golden perfection. It’s a memory that brings back the joy of making delicious treats, transportingly reminiscent of those beloved Girl Scout Samoa cookies. Enter my Samoa Rice Krispie Treats: a triumphant blend of crispy, chewy, and gooey textures that will have you swooning with every bite. This no-bake dessert not only saves time but also serves as a delightful crowd-pleaser, making it perfect for any occasion. Whether you’re looking for a quick sweet fix or a fun project to share with friends and family, these treats fit the bill. Curious how to bring a taste of nostalgia to your kitchen? Let’s dive into this irresistible recipe!
Why Are Samoa Rice Krispie Treats So Special?
Unforgettable flavors: Each bite combines the rich caramel of dulce de leche with the nutty crunch of toasted coconut, creating a flavor sensation.
No-bake convenience: Perfect for busy schedules, this recipe requires minimal prep and no oven time!
Chewy and crispy: The delightful contrast of textures keeps every mouthful interesting and satisfying.
Easy customization: Feel free to swap ingredients, like using vegan marshmallows or adding nuts for extra crunch!
Crowd-pleaser: These treats are a hit at any gathering, satisfying kid and adult sweet cravings alike!
Effortless storage: With simple tips, these can be made ahead and stored for a sweet treat anytime.
Samoa Rice Krispie Treats Ingredients
For the Base
- Mini Marshmallows – Sweetness and structure; ensure they’re fresh for optimal melting.
- Butter – Adds richness and assists in melting marshmallows; can substitute with coconut oil for a dairy-free option.
- Rice Krispie Cereal – Provides crunch and structure; use any puffed rice for a gluten-free version.
For the Coconut Layer
- Sweetened Shredded Coconut – Enhances flavor and texture; unsweetened coconut can be used for a less sweet treat.
- Dulce de Leche – Main source of caramel flavor; can replace with chocolate or caramel sauce for different flavor profiles.
For the Topping
- Semisweet Chocolate – Offers a chocolatey topping to the treat; dark chocolate or white chocolate can also be used as an alternative.
- Milk – Thins out the dulce de leche for easier mixing; any milk or non-dairy milk can be substituted.
Feel free to get creative with your Samoa Rice Krispie Treats by experimenting with different toppings and textures!
Step‑by‑Step Instructions for Samoa Rice Krispie Treats
Step 1: Toast the Coconut
In a large sauté pan, heat over medium-high heat and add the sweetened shredded coconut. Stir constantly for about 4–5 minutes until the coconut turns a golden brown, releasing a fragrant aroma. Remove from heat and set aside ½ cup of toasted coconut for later garnish, allowing the rest to cool for easy mixing into your Samoa Rice Krispie Treats.
Step 2: Heat Dulce de Leche
In a microwave-safe bowl, combine the dulce de leche with a splash of milk. Heat for about 1.5 minutes or until the mixture is warm and slightly thinner, stirring halfway through. This thinned dulce de leche will easily blend with the toasted coconut in your next step, creating a rich caramel layer for your delicious Samoa Rice Krispie Treats.
Step 3: Mix Caramel Layer
Once heated, add the toasted coconut (reserve the previously set aside portion) to the dulce de leche mixture. Stir thoroughly until the coconut is evenly coated in the sweet caramel. This delightful mixture will become a chewy layer in your Samoa Rice Krispie Treats that adds delicious texture and flavor.
Step 4: Melt Marshmallows and Butter
In a clean microwave-safe bowl, combine the mini marshmallows and butter. Heat for about 2 minutes, stopping every 30 seconds to stir. When completely melted and smooth, ensure there are no lumps; this mixture forms the sticky base essential for holding your Samoa Rice Krispie Treats together perfectly.
Step 5: Combine with Cereal
Once the marshmallow mixture is ready, add the Rice Krispie cereal directly into the bowl. Gently fold the cereal into the melted marshmallows using a spatula, ensuring every piece is well-coated. This key step combines crunchiness and gooeyness, making your Samoa Rice Krispie Treats wonderfully delightful.
Step 6: Assemble Treats
Grease an 8×12 pan with cooking spray to prevent sticking. Press half of the cereal mixture evenly into the bottom of the pan, creating a firm base. Next, spread the caramel coconut mixture over this layer, followed by the remaining cereal mixture. Press down firmly to create compact layers for your Samoa Rice Krispie Treats.
Step 7: Chocolate Topping
In a microwave-safe bowl, melt the semisweet chocolate in 30-second intervals until fully melted and smooth, stirring in between. Pour the melted chocolate over the top layer and gently spread it to cover the entire surface. Finish with the reserved toasted coconut sprinkled on top, adding a beautiful garnish to your Samoa Rice Krispie Treats.
Step 8: Set and Serve
Allow the chocolate to harden at room temperature for about 30 minutes before cutting into squares. Once set, the Samoa Rice Krispie Treats can be sliced and served. Store any leftovers in an airtight container at room temperature for a delicious sweet treat whenever you crave it.
Expert Tips for Samoa Rice Krispie Treats
-
Watch the Coconut: Toasting coconut can burn quickly, so stir constantly and keep an eye on it to achieve that perfect golden color.
-
Prevent Sticking: Spray your hands with cooking spray when pressing the cereal mixture into the pan; it makes this step much easier and cleaner.
-
Melt Marshmallows Properly: Ensure your marshmallows are completely melted; any lumps can disrupt the smooth texture of your Samoa Rice Krispie Treats.
-
Cool Before Cutting: Allow the chocolate topping to harden completely before slicing the treats into squares for clean edges and a beautiful presentation.
-
Customize Flavors: Feel free to swap ingredients, like using vegan marshmallows or adding nuts, to make your Samoa Rice Krispie Treats uniquely yours!
How to Store and Freeze Samoa Rice Krispie Treats
Room Temperature: Store your Samoa Rice Krispie Treats in an airtight container at room temperature for up to 1 week, keeping them soft and chewy.
Refrigerator: For extended freshness, place the treats in the fridge where they will stay good for 1-2 weeks. Make sure they’re covered to prevent them from drying out.
Freezer: If you want to keep them even longer, freeze the Samoa Rice Krispie Treats for up to 3 months. Wrap each square tightly in plastic wrap and then place them in a freezer-safe bag.
Reheating: When ready to enjoy, thaw in the fridge overnight, or leave them at room temperature for a couple of hours. Enjoy them at their best—soft and delicious!
What to Serve with Samoa Rice Krispie Treats?
As you delight in these sweet, chewy creations, consider pairing them with delightful accompaniments that elevate your snacking experience.
-
Hot Chocolate: A warm cup of rich hot chocolate adds a cozy touch, perfect for indulging on a chilly evening.
-
Coffee: Brewed to perfection, coffee complements the sweetness of the treats, balancing flavors beautifully while providing a delightful caffeine boost.
-
Fresh Berries: Juicy strawberries or raspberries add a tart freshness that cuts through the sweetness and enhances the overall flavor profile.
-
Ice Cream: A scoop of vanilla or coconut ice cream beside your treats adds a creamy texture that contrasts splendidly with their chewy, crunchy nature.
-
Whipped Cream: Topping your treats with a dollop of airy whipped cream elevates their presentation and provides a light, luscious taste.
-
Nut Mix: A small bowl of salted nuts brings a salty crunch that not only complements the sweetness but also adds interest to your snack experience.
-
Milk: A classic pairing, a glass of cold milk rounds out your treat experience and serves as a delightful palate cleanser.
-
Chocolate Drizzle: Consider drizzling extra chocolate sauce on top for an indulgent flourish that will impress your friends and family.
-
Fruit Salad: A light fruit salad brings brightness and healthiness to the table, balancing the indulgence of the treats with refreshing flavors and textures.
Make Ahead Options
These Samoa Rice Krispie Treats are perfect for meal prep enthusiasts! You can prepare the toasted coconut and the dulce de leche mixture up to 24 hours in advance, refrigerating them separately to maintain their textures. When you’re ready to assemble, simply melt the marshmallows and butter, mix with the Rice Krispie cereal, and layer as directed. To keep the treats fresh, store them in an airtight container at room temperature once they’ve set; they’ll stay delicious for up to one week. With these make-ahead options, you’ll have a delightful sweet treat ready to enjoy, making your busy days a little bit sweeter!
Samoa Rice Krispie Treats Variations & Substitutions
Feel free to let your creativity shine as you customize these delightful treats; the possibilities are endless!
- Dairy-Free: Swap the butter for coconut oil and use vegan marshmallows to ensure everyone can enjoy these treats.
- Nutty Addition: Stir in pecans, almonds, or walnuts for an extra crunch that will elevate the texture and flavor profile.
- Flavor Twist: Drizzle with caramel sauce instead of chocolate, or use a combination of both for a sweet contrast.
- Gluten-Free: Use any gluten-free puffed rice cereal to keep these treats suitable for those with gluten sensitivities.
- Coconut Lovers: Increase the amount of sweetened shredded coconut for an extra burst of flavor and aroma in every bite.
- Chocolate Variations: Experiment with dark chocolate or white chocolate for the topping; each will create a unique flavor experience.
- Add a Dash of Spice: Sprinkle a pinch of sea salt or add a hint of cinnamon to the marshmallow mixture for a cozy, warm flavor.
- Mini Treats: Use a mini muffin tin to make bite-sized treats perfect for parties or lunchboxes that are just as irresistible!
And if you’re looking for something to pair these treats with, consider serving them alongside some warm Sticky Chicken Rice to satisfy both sweet and savory cravings!
Samoa Rice Krispie Treats Recipe FAQs
How do I choose the right coconut for my Samoa Rice Krispie Treats?
Absolutely! For the best flavor, use sweetened shredded coconut, as it adds a delightful sweetness and chewiness to the treats. Make sure it’s fresh to avoid any stale flavors. If you’re looking for a less sweet option, unsweetened shredded coconut can also work—just adjust the sweetness of the rest of your ingredients accordingly.
Advertisement
How should I store my Samoa Rice Krispie Treats, and how long will they last?
You can store your Samoa Rice Krispie Treats in an airtight container at room temperature for up to 1 week. For longer storage, refrigerate them, and they’ll stay fresh for 1-2 weeks. Just be sure to keep them covered to prevent drying out!
Can I freeze Samoa Rice Krispie Treats? If so, how?
Yes, you can absolutely freeze your Samoa Rice Krispie Treats! Wrap each square tightly in plastic wrap, then place them in a freezer-safe bag. They will keep well for up to 3 months. When you’re ready to enjoy, simply thaw them in the fridge overnight or at room temperature for a couple of hours. They’ll be just as delicious!
What if my marshmallows don’t melt smoothly?
Very! If your marshmallows don’t melt down completely and are lumpy, try zapping them in the microwave for an additional 30 seconds, stirring in between. Be patient—stirring helps achieve that silky consistency you need for your Samoa Rice Krispie Treats. Remember, getting them perfectly melted is key to a delightful treat!
Are there any dietary considerations I should keep in mind?
Absolutely! If you’re making these treats for someone with dietary restrictions, you can use vegan marshmallows and coconut oil instead of butter for a dairy-free version. Additionally, be sure to check that your Rice Krispie cereal is gluten-free, as some brands might contain gluten. Always double-check for any allergies, especially with nuts if you choose to add them!
Samoa Rice Krispie Treats That Are Irresistibly Chewy
Ingredients
Equipment
Method
- Toast the Coconut: In a large sauté pan, heat over medium-high heat and add the sweetened shredded coconut. Stir constantly for about 4–5 minutes until the coconut turns a golden brown, releasing a fragrant aroma. Remove from heat and set aside ½ cup of toasted coconut for later garnish.
- Heat Dulce de Leche: In a microwave-safe bowl, combine the dulce de leche with a splash of milk. Heat for about 1.5 minutes or until the mixture is warm and slightly thinner, stirring halfway through.
- Mix Caramel Layer: Once heated, add the toasted coconut to the dulce de leche mixture. Stir thoroughly until the coconut is evenly coated in the caramel.
- Melt Marshmallows and Butter: In a clean microwave-safe bowl, combine the mini marshmallows and butter. Heat for about 2 minutes, stopping every 30 seconds to stir until completely melted and smooth.
- Combine with Cereal: Once the marshmallow mixture is ready, add the Rice Krispie cereal directly into the bowl. Gently fold the cereal into the melted marshmallows.
- Assemble Treats: Grease an 8x12 pan with cooking spray. Press half of the cereal mixture into the bottom of the pan, creating a firm base. Spread the caramel coconut mixture over this layer, followed by the remaining cereal mixture. Press down firmly.
- Chocolate Topping: In a microwave-safe bowl, melt the semisweet chocolate in 30-second intervals until fully melted and smooth. Pour the melted chocolate over the top layer and spread it to cover the entire surface. Sprinkle the reserved toasted coconut on top.
- Set and Serve: Allow the chocolate to harden at room temperature for about 30 minutes before cutting into squares. Store any leftovers in an airtight container.