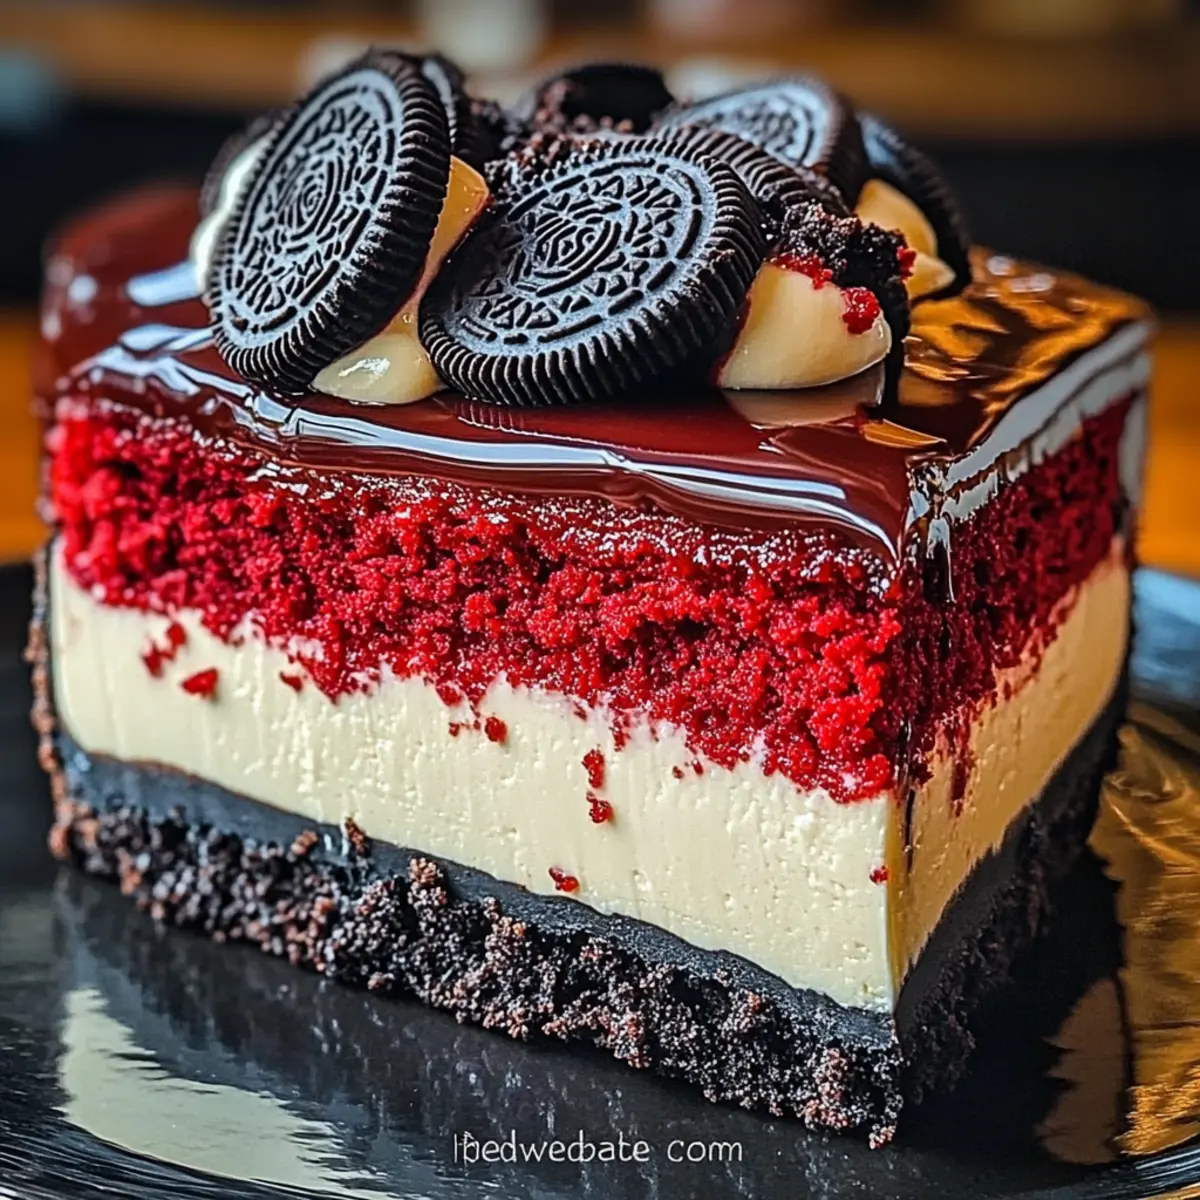
The moment I laid eyes on that vibrant red velvet cheesecake, I knew I was in for something special. Layered to perfection, this Red Velvet Oreo Cheesecake is a luscious fusion of rich red velvet, dreamy cream cheese, and a crunchy Oreo crust—a dessert designed to dazzle at any special occasion. What truly delights me about this indulgent dessert is not only its stunning appearance but also how effortlessly it comes together, making it a go-to when I want to impress without spending hours in the kitchen. Perfect for gatherings or simply a sweet escape when you need a pick-me-up, this cheesecake hits all the right notes. Ready to create something unforgettable? Let’s dive in!
Why is this cheesecake a showstopper?
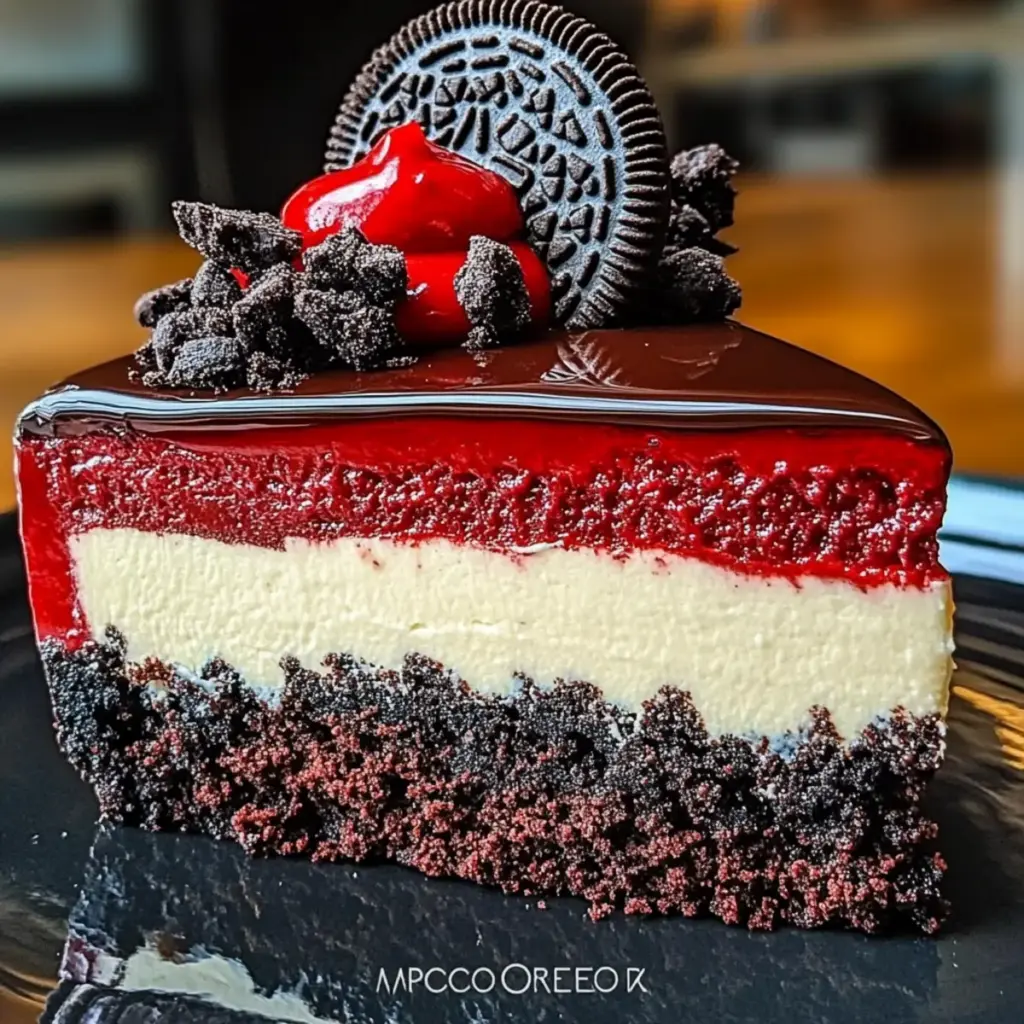
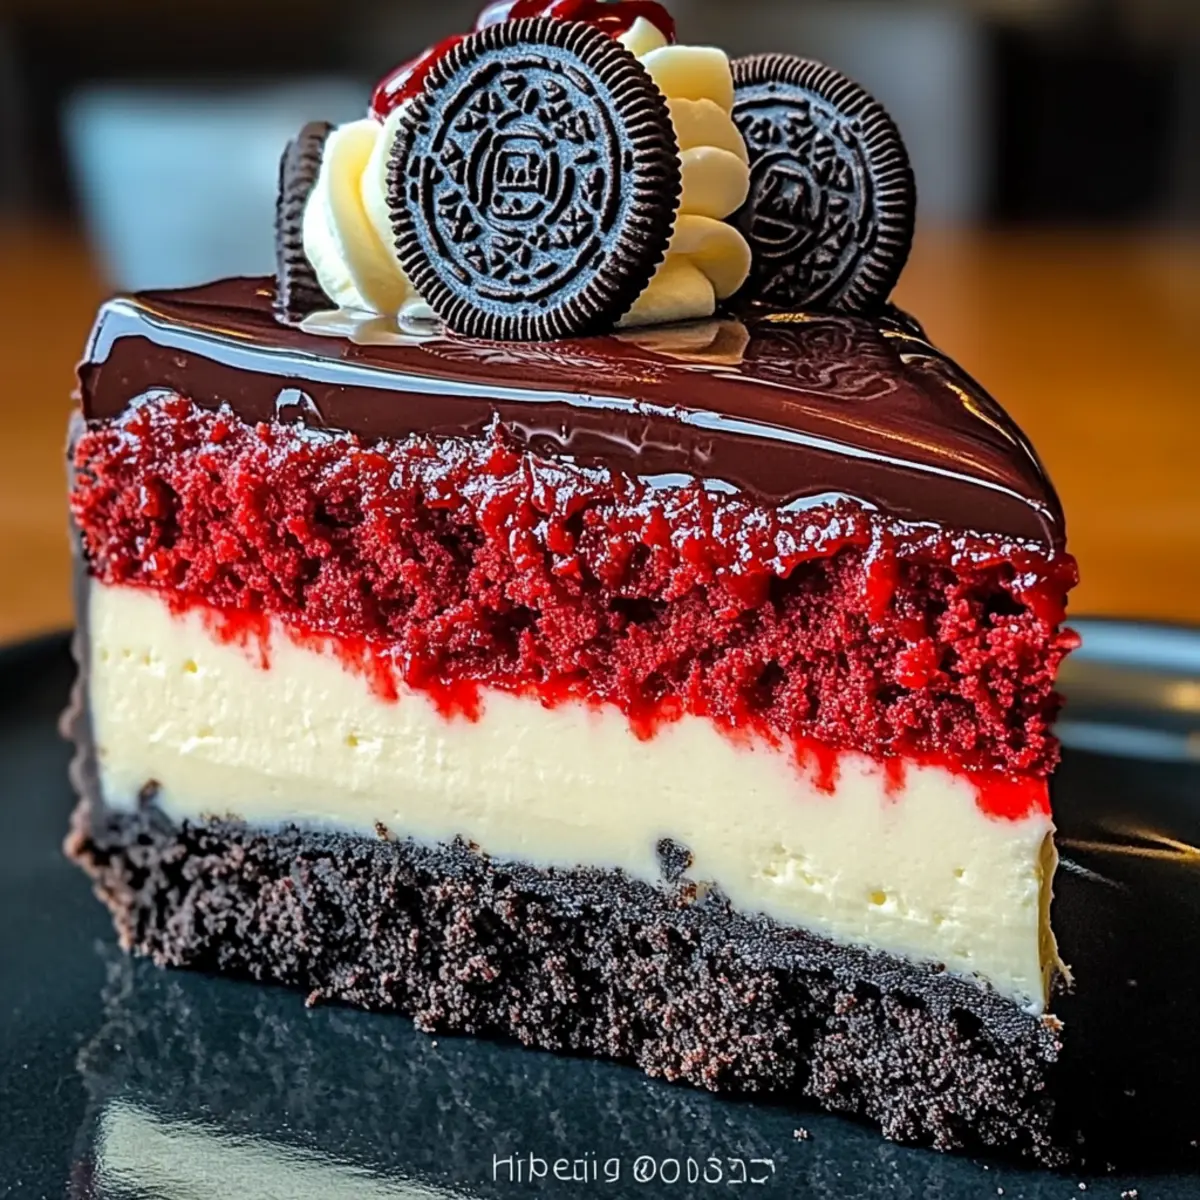
Stunning Visuals: Each slice reveals layers of vibrant red and creamy white, making it a feast for the eyes.
Irresistible Combination: The rich red velvet pairs exquisitely with the tangy cheesecake, creating a flavor explosion.
Effortless Preparation: Simple enough for even novice bakers; it comes together quickly!
Crowd Favorite: Perfect for parties, this dessert is sure to impress guests of all ages, much like our delightful Frosted Red Velvet or Decadent Red Velvet.
Versatile Options: Feel free to customize by swapping Oreos with your favorite cookies or adding a burst of citrus zest for a fresh twist!
Make-Ahead Perfection: Prepare it a day in advance for the best flavor, making it a hassle-free hosting choice.
Red Velvet Oreo Cheesecake Ingredients
For the Crust
- Oreo Cookies – Provides a crunchy, chocolatey base; substitute with chocolate graham crackers for a unique twist.
- Unsalted Butter – Binds the crust together and adds richness; make sure it’s melted before mixing.
For the Red Velvet Cheesecake Layer
- Cream Cheese – Creates a smooth, creamy texture; opt for full-fat for the best results.
- Granulated Sugar – Sweetens the cheesecake; feel free to reduce the amount for a less sweet experience.
- Eggs – Adds structure and creaminess; using room temperature eggs ensures better incorporation.
- Red Velvet Cake Mix – Imparts flavor and color; alternatively, use a homemade red velvet batter for a fresher touch.
- Vanilla Extract – Enhances the overall flavors; fresh vanilla or vanilla bean paste can elevate the taste.
For the Ganache
- Heavy Cream – Lends richness and glossiness to the topping; can be replaced with coconut cream for a dairy-free version.
- Dark Chocolate – Creates a luscious ganache; opting for milk chocolate will create a sweeter profile.
Each of these ingredients plays a vital role in crafting your dreamy Red Velvet Oreo Cheesecake, ensuring an irresistible dessert that’s sure to steal the spotlight at any gathering!
Step‑by‑Step Instructions for Red Velvet Oreo Cheesecake
Step 1: Prepare the Crust
Begin by preheating your oven to 350°F (175°C). In a food processor, blend 24 Oreo cookies with 6 tablespoons of melted unsalted butter until fine crumbs form. Then, firmly press the mixture into the bottom of a 9-inch springform pan to create a solid crust. Set aside while you prepare the filling.
Step 2: Make Red Velvet Cheesecake Layer
In a large mixing bowl, beat 16 ounces of cream cheese and 1 cup of granulated sugar with an electric mixer until smooth and creamy, about 2-3 minutes. Gradually add in 2 eggs, one at a time, ensuring full incorporation. Next, mix in 1 cup of red velvet cake mix and 1 teaspoon of vanilla extract until you achieve a uniform, vibrant batter.
Step 3: Add Vanilla Cheesecake Layer
In a separate bowl, prepare the vanilla cheesecake mixture by beating together another 16 ounces of cream cheese, 1 cup of sugar, and 1 teaspoon of vanilla extract until creamy and smooth. This layer will contrast beautifully with the rich red velvet layer, ensuring a delightful combination in your Red Velvet Oreo Cheesecake.
Step 4: Layer and Bake
Pour the red velvet cheesecake layer over the prepared Oreo crust, smoothing the top with a spatula. Carefully add the vanilla cheesecake layer on top, ensuring both layers are even. Bake in the preheated oven for 45-50 minutes, or until the edges are set but the center still slightly jiggles. To minimize cracking, avoid opening the oven door during baking.
Step 5: Cool
Once baked, turn off the oven and leave the cheesecake inside for 1 hour to cool gradually. This helps prevent cracks from forming. Afterward, remove it from the oven, let it cool to room temperature, then cover and refrigerate for at least 6 hours or, ideally, overnight to set completely.
Step 6: Prepare Ganache
When ready to serve, heat 1 cup of heavy cream in a small saucepan over medium heat until it simmers, not boiling. Pour it over 8 ounces of chopped dark chocolate in a bowl, allowing it to sit for 5 minutes. Stir until smooth and glossy, then allow it to cool slightly before pouring over the chilled cheesecake.
Step 7: Decorate
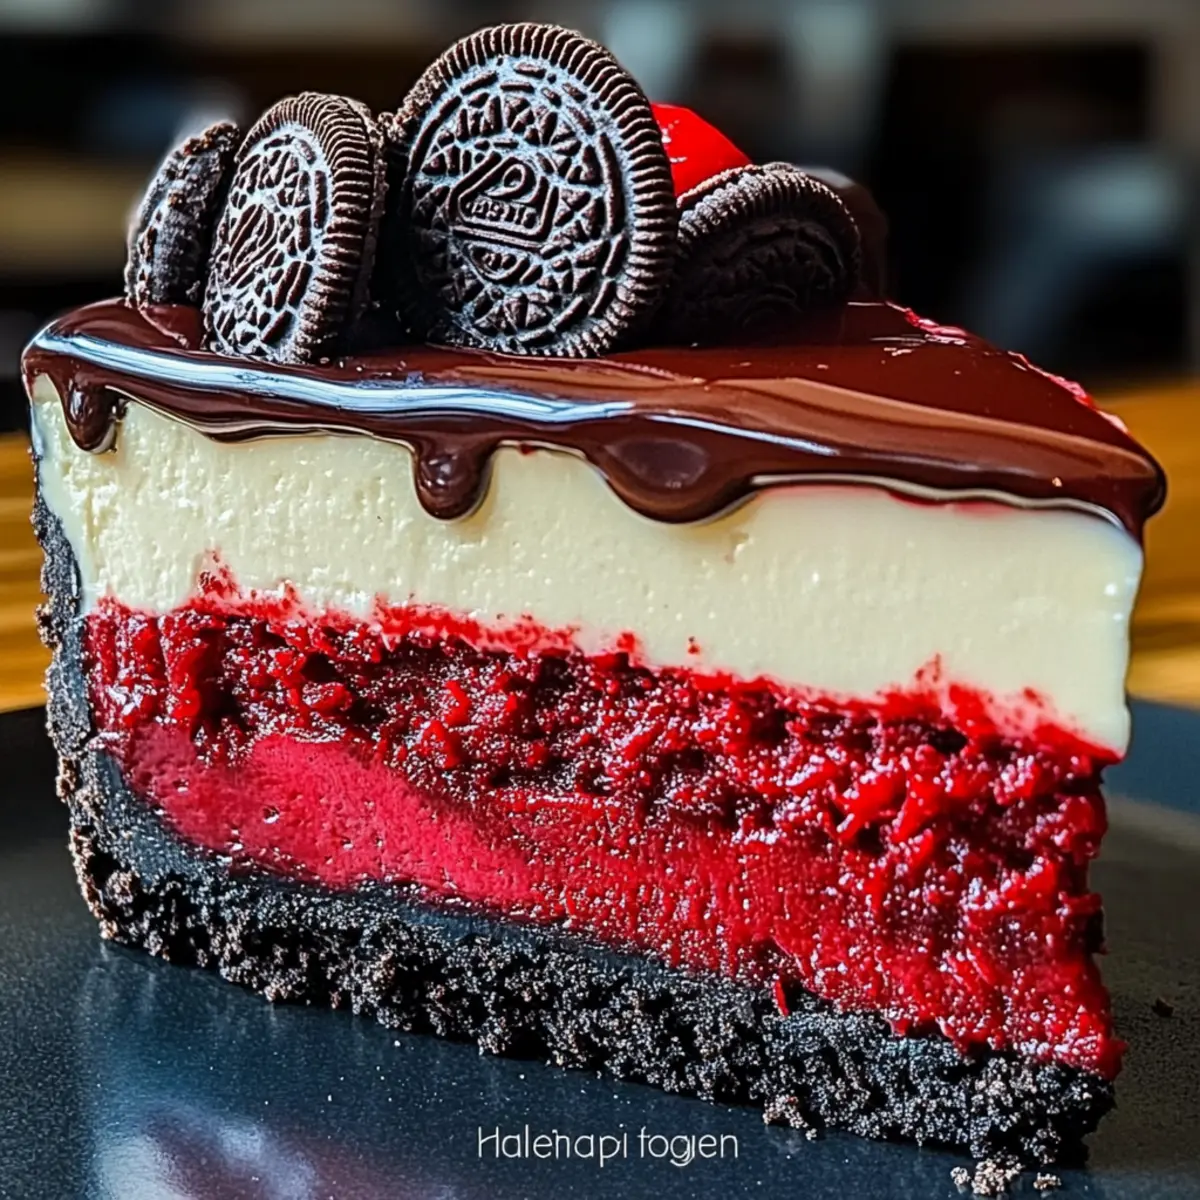
Once the ganache has set slightly, remove the cheesecake from the springform pan. Decorate the top with whipped cream or additional crushed Oreo crumbs to elevate its appearance. Slice and serve your stunning Red Velvet Oreo Cheesecake to delighted guests, bringing joy to every bite.
How to Store and Freeze Red Velvet Oreo Cheesecake
Fridge: Store leftovers in an airtight container in the fridge for up to 5 days. This helps maintain the cheesecake’s creamy texture and delicious flavors.
Freezer: If you want to enjoy your Red Velvet Oreo Cheesecake later, freeze it for up to 3 months. Wrap individual slices in plastic wrap, then place them in a freezer-safe bag to prevent freezer burn.
Thawing: To thaw, place the cheesecake in the fridge overnight before serving. This slow thaw keeps it smooth and delightful!
Serving Suggestions: For an added touch when serving, consider garnishing with whipped cream or fresh fruit to enhance the visual appeal.
What to Serve with Red Velvet Oreo Cheesecake
Elevate your dessert experience by exploring delightful companions that complement this stunning layered treat.
-
Vanilla Ice Cream: The creamy richness of vanilla ice cream beautifully balances the cheesecake’s rich flavors, creating a delightful harmony of textures and temperatures. A warm slice paired with a cool scoop is perfection on a plate.
-
Fresh Berries: Juicy raspberries or strawberries add a refreshing contrast to the decadent cheesecake, cutting through the richness with a burst of tartness. Plus, the vibrant colors bring a touch of summer to your dessert table.
-
Chocolate-Covered Strawberries: For the chocoholics in your life, these sweet bites are a match made in dessert heaven! Their luscious exterior complements the chocolate ganache of the cheesecake perfectly, creating a deliciously indulgent experience.
-
Mint Chocolate Chip Cookies: The cool mint and rich chocolate bring a playful twist that pairs delightfully with the flavors of the cheesecake. The combination offers a familiar yet exciting twist that guests will love.
-
Coffee: A robust cup of coffee or an espresso cuts through the cheesecake’s sweetness, bringing balance to your dessert. The warm, bitter notes of coffee enhance chocolatey flavors, making every morsel more enjoyable.
-
Whipped Cream: Light and airy, whipped cream provides a delicious contrast to the dense cheesecake. Add a sprinkle of cocoa powder or chocolate shavings on top for an extra touch of elegance.
-
Chocolate Ganache Brownies: Serve brownies drizzled with chocolate ganache beside your cheesecake for a double dose of decadence. The fudgy texture pairs beautifully with the creamy layers of the cheesecake.
-
Raspberry Sauce: A tart raspberry sauce drizzled over the plates adds a touch of acidity that brightens the richness of the Red Velvet Oreo Cheesecake. It enhances the overall presentation while offering a refreshing contrast.
-
Champagne or Sparkling Wine: Celebrate any occasion with a glass of bubbly! The effervescence cuts through the creamy texture of the cheesecake, making it a delightful pairing for a more festive setting.
Red Velvet Oreo Cheesecake Variations
Feel free to let your creativity shine as you explore delightful twists on this decadent dessert!
- Gluten-Free: Substitute Oreos with gluten-free cookies or almond flour for a scrumptiously safe crust. Enjoy the same rich flavors, just without the gluten!
- Nutty Crust: Use ground pecans or walnuts in place of Oreos for a crunchy, nutty base. This adds a lovely depth of flavor and pairs wonderfully with the cheesecake layers.
- Chocolate Lover’s Dream: Incorporate chocolate syrup into the red velvet layer for an extra chocolatey boost. A little richness never hurt, especially in a beloved dessert!
- Citrus Zing: Add a teaspoon of orange or lemon zest into the vanilla layer for a refreshing brightness. The zesty notes elevate the flavor profile without overpowering the richness.
- Dairy-Free Delight: Swap out the cream cheese for a plant-based option and use coconut cream for the ganache. A delicious treat for those avoiding dairy!
- Higher Heat: For a spicier kick, mix in crushed red pepper flakes or cayenne into the chocolate ganache. It’s a perfect balance of sweet and spicy.
- DIY Flavor: Create a cookie crust using your favorite store-bought cookies instead of Oreos. Whether it’s chocolate chip or peanut butter, let your sweet tooth choose!
- Layered Up: For an even more indulgent experience, add a third layer of pumpkin cheesecake for a seasonal twist. This layered beauty will leave everyone craving more.
No matter how you choose to customize your Red Velvet Oreo Cheesecake, each variation adds excitement, ensuring you create a dessert that reflects your personal taste!
Make Ahead Options
These Red Velvet Oreo Cheesecakes are perfect for busy home cooks looking to save time without compromising on flavor! You can prepare the crust and cheesecake layers up to 24 hours in advance. Simply complete steps 1 through 4, then let the cheesecake cool completely before covering it with plastic wrap and refrigerating. Make sure to store it in the fridge overnight to enhance the flavors and ensure a delightful texture. When you’re ready to serve, prepare the ganache (steps 6 and 7), and pour it over the chilled cheesecake. This way, you’ll have a show-stopping dessert that’s just as delicious as when freshly made, giving you more time to enjoy with your guests!
Expert Tips for Red Velvet Oreo Cheesecake
-
Room Temperature Ingredients: Ensure cream cheese and eggs are at room temperature for a smooth, lump-free batter. Cold ingredients can result in a gritty texture.
-
Oven Door Etiquette: Avoid opening the oven door while the cheesecake bakes. Allowing cold air in can cause it to crack.
-
Cooling Time: Let your cheesecake cool inside the oven after baking to gradually adjust the temperature. This helps prevent cracks and maintains a velvety texture.
-
Chill Overnight: For the best flavor and texture, refrigerate your Red Velvet Oreo Cheesecake overnight. It allows the flavors to meld beautifully.
-
Swapping Ingredients: Don’t shy away from substitutions. For a twist, try using chocolate graham crackers for the crust or milk chocolate for a sweeter ganache.
Red Velvet Oreo Cheesecake Recipe FAQs
What type of Oreos should I use for the crust?
Absolutely! Regular Oreo cookies are the classic choice for that perfect chocolatey crunch, but feel free to experiment with different flavors like Double Stuff or even seasonal varieties. If you’re looking for a twist, chocolate graham crackers can offer a unique flavor!
How should I store leftovers of the cheesecake?
You can store your Red Velvet Oreo Cheesecake in an airtight container in the refrigerator for up to 5 days. Just make sure to cover it well to keep that creamy texture intact and to prevent it from absorbing any odors from the fridge.
Advertisement
Can I freeze the cheesecake? How?
Certainly! To freeze your cheesecake for later enjoyment, wrap individual slices in plastic wrap tightly, then place them in a freezer-safe bag. This prevents freezer burn and preserves the flavors for up to 3 months! Just remember, when you’re ready to indulge again, thaw them in the fridge overnight for the best results.
What should I do if my cheesecake cracks while baking?
Very often, cheesecakes can crack due to sudden temperature changes. If this happens, don’t worry! Cooling your cheesecake gradually in the oven after it’s finished baking minimizes this risk. Keep the oven door closed for at least an hour post-baking, allowing the cheesecake to gradually adjust to room temperature.
Is this cheesecake safe for those with allergies?
While this Red Velvet Oreo Cheesecake is delicious, it does contain common allergens like dairy (cream cheese, butter) and eggs. If serving to guests with allergies, consider using dairy-free cream cheese and eggs substitutes like flax eggs or aquafaba for a safe option. Always check ingredient labels to ensure they fit dietary needs!
Can I prepare this cheesecake a day in advance?
Absolutely! In fact, making your cheesecake a day ahead is highly recommended. It allows all the rich flavors to meld together beautifully, making it even more delicious. Just be sure to store it properly in the fridge, covered well.

Divine Red Velvet Oreo Cheesecake to Impress Your Guests
Ingredients
Equipment
Method
- Preheat oven to 350°F (175°C). Blend Oreo cookies and melted butter until fine crumbs form. Press into the bottom of a 9-inch springform pan.
- In a bowl, beat cream cheese and granulated sugar with an electric mixer until smooth. Gradually add eggs, then mix in red velvet cake mix and vanilla extract.
- Prepare the vanilla cheesecake by mixing cream cheese, sugar, and vanilla extract until smooth.
- Pour the red velvet layer over the crust, then add the vanilla layer on top. Bake for 45-50 minutes until edges are set.
- After baking, turn off the oven and let cheesecake cool inside for 1 hour. Cool to room temperature, then refrigerate for at least 6 hours.
- For ganache, heat heavy cream until simmering, then pour over chopped dark chocolate. Stir until smooth and glossy, cool slightly before pouring over cheesecake.
- Decorate with whipped cream or crushed Oreo crumbs, slice, and serve.