As the days grow shorter and the air turns crisp, the allure of autumn-inspired gatherings starts to beckon. Enter the Pumpkin-Shaped Cheese Ball – a whimsical and savory delight that doubles as a colorful centerpiece for your fall festivities. This cheese ball is not just a feast for the eyes; its creamy texture and customizable flavors cater to every guest’s palate, from spicy jalapeño to herb garlic. Whether you’re prepping for Halloween or Thanksgiving, this crowd-pleaser is quick to whip up and can easily be tailored to fit various dietary needs. With minimal effort, you’ll impress friends and family while keeping the focus on joy and togetherness. Ready to create a pumpkin that’s as delicious as it is charming? Let’s dive in and uncover the magic behind this festive treat!
Why is Pumpkin-Shaped Cheese Ball a Must-Try?
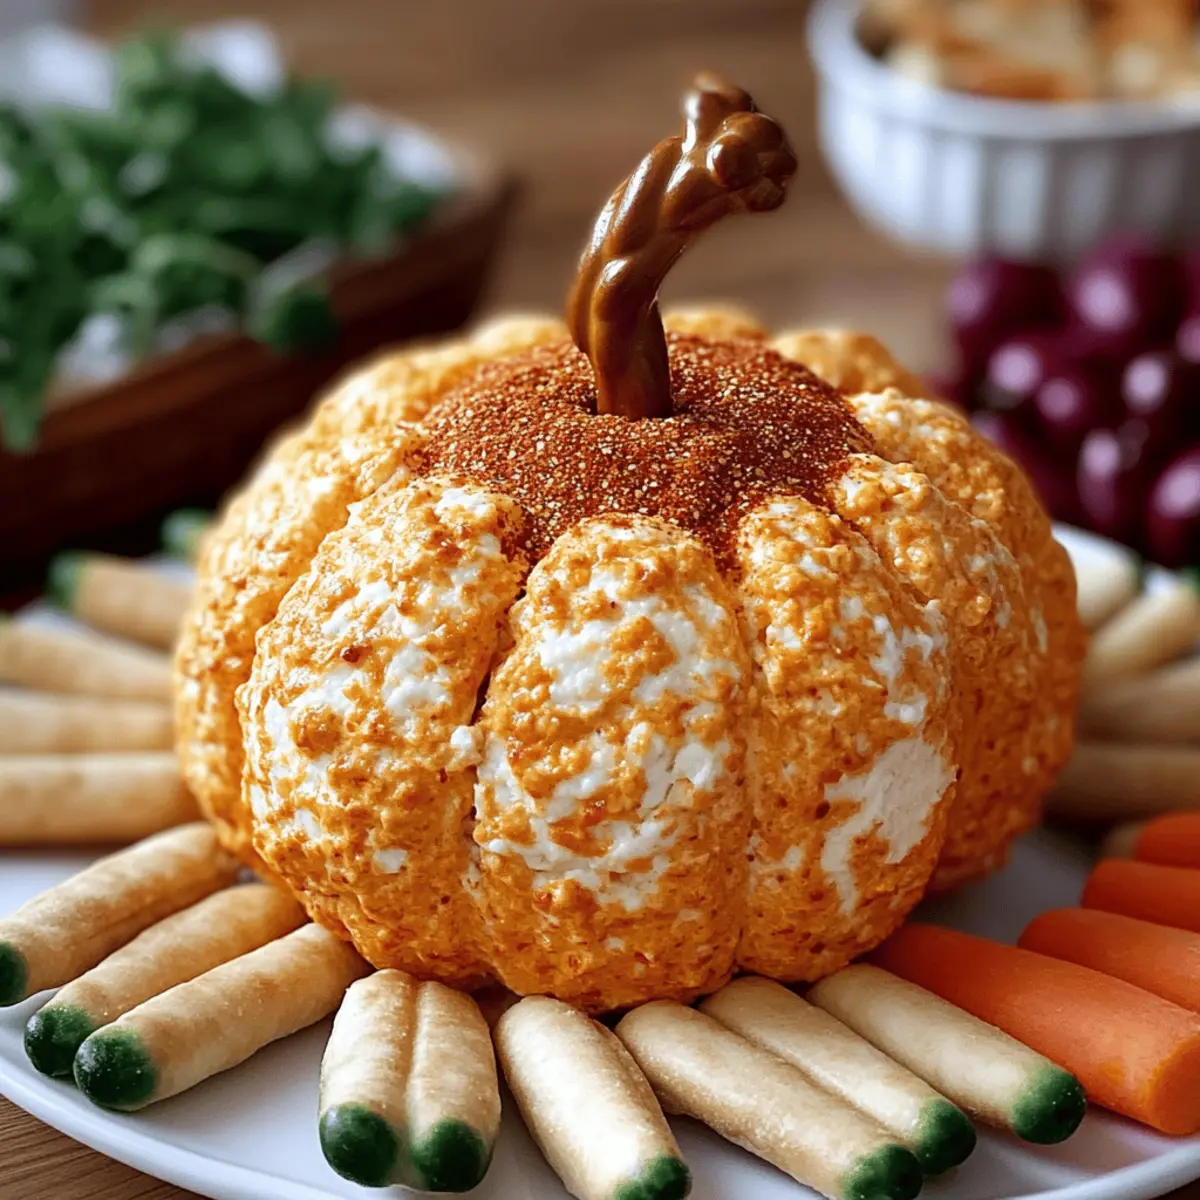
Eye-Catching Presentation: The stunning orange hue and pumpkin shape make this cheese ball an irresistible centerpiece for any gathering.
Customizable Flavors: From spicy jalapeño to herb garlic, you can easily adjust the taste to fit any guest’s preferences, ensuring everyone is satisfied.
Dietary Friendly: This recipe is gluten-free, vegetarian, and keto-friendly, making it ideal for diverse dietary needs.
Quick & Easy: With simple ingredients and effortless preparation, you can whip this delight up in no time—perfect for those busy days before a big event.
Crowd-Pleasing Delight: Its creamy texture and savory taste make it a big hit at Halloween parties and Thanksgiving dinners, ensuring it disappears in no time! Pair it with your favorite dips, such as this Savory Satisfying BLT or serve it alongside this delightful Carrot Sheet Cake for a well-rounded spread.
Pumpkin-Shaped Cheese Ball Ingredients
• Get ready to create a delightful centerpiece!
For the Cheese Mixture
- Cream Cheese – This smooth base gives the cheese ball its creamy texture; consider using plant-based cream cheese for a vegan option.
- Shredded Cheddar Cheese – Adds a rich, tangy flavor to the dish; mixing sharp and mild varieties offers a balanced taste.
- Garlic Powder – Enhances the overall flavor profile; for a bolder taste, feel free to use fresh garlic.
- Onion Powder – Contributes sweetness and complexity to the mixture; fresh onions can be substituted for a different taste if desired.
- Salt & Pepper – Essential for seasoning; adjust according to your preference!
For the Mix-Ins (optional)
- Chopped Nuts, Fresh Herbs, or Bacon Bits – Add these for extra texture and flavor that can be customized based on dietary preferences.
For Coating
- Paprika – Provides a beautiful color and mild smoky flavor; crushed crackers or nuts can be alternates for rolling.
For the Garnish
- Pretzel Sticks, Chives, or Green Onion Tops – These items mimic a pumpkin stem to complete the festive look and make for fun serving.
With these ingredients in hand, you’re all set to create a Pumpkin-Shaped Cheese Ball that will impress your guests and brighten up your autumn gatherings!
Step‑by‑Step Instructions for Pumpkin-Shaped Cheese Ball
Step 1: Soften the Cream Cheese
Begin by leaving 8 ounces of cream cheese at room temperature for about 30 minutes until it’s soft and easily pliable. This step is crucial, as a smooth base will help create the perfect creamy texture for your Pumpkin-Shaped Cheese Ball. You can use a knife or spatula to check its softness; it should be easily spreadable and not cold.
Step 2: Mix the Cheeses
In a mixing bowl, combine the softened cream cheese with 1 cup of shredded cheddar cheese. Using a hand mixer or a sturdy spatula, beat the mixture on medium speed for about 2 minutes until it’s completely smooth and well blended. The goal is to achieve a creamy consistency that will hold shape yet remain deliciously spreadable for your festive cheese ball.
Step 3: Season to Perfection
Gradually add 1 teaspoon of garlic powder, 1 teaspoon of onion powder, and salt and pepper to taste to the cheese mixture. Mix thoroughly for another 1-2 minutes until all the spices are evenly incorporated. Taste the mixture and adjust the seasoning as preferred, ensuring every bite of the Pumpkin-Shaped Cheese Ball will burst with flavor.
Step 4: Fold in Optional Mix-Ins
If desired, fold in your choice of chopped nuts, fresh herbs, or bacon bits into the cheese mixture with a spatula, ensuring even distribution. This adds delightful texture and flavor to your Pumpkin-Shaped Cheese Ball. Mix gently to maintain the creamy consistency while incorporating the mix-ins—this should take about 1 minute.
Step 5: Chill for Firmness
Cover the mixing bowl with plastic wrap and place it in the refrigerator for at least 30 minutes. Chilling the mixture is essential to help it firm up, making it easier to shape into a pumpkin later. You’ll know it’s ready when you can easily scoop it without any excess stickiness.
Step 6: Shape the Cheese Ball
Once chilled, lay out a large piece of plastic wrap on your work surface and spoon the mixture onto it. Using the wrap, carefully form the mixture into a ball, making sure to pack it tightly. The more compact it is, the better your pumpkin will hold its shape. This should take about 2-3 minutes.
Step 7: Create Pumpkin Ridges
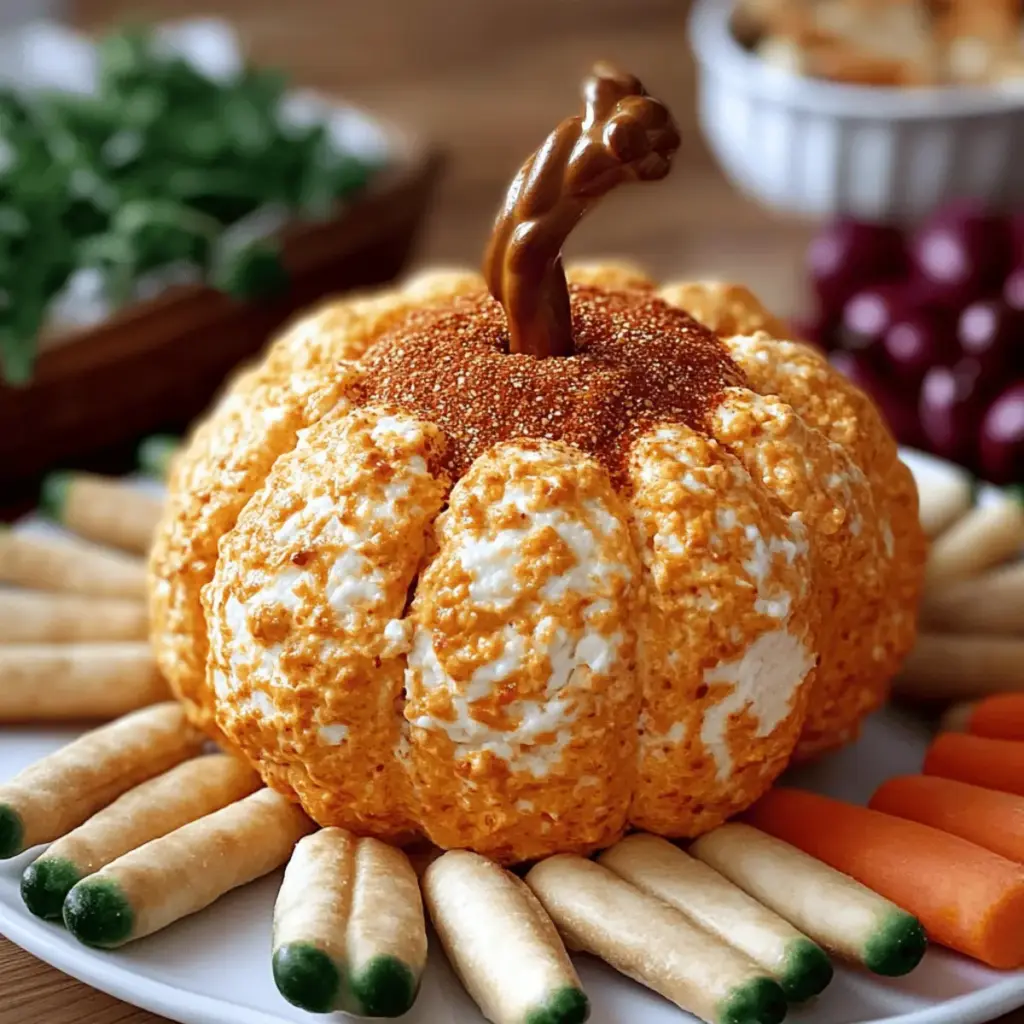
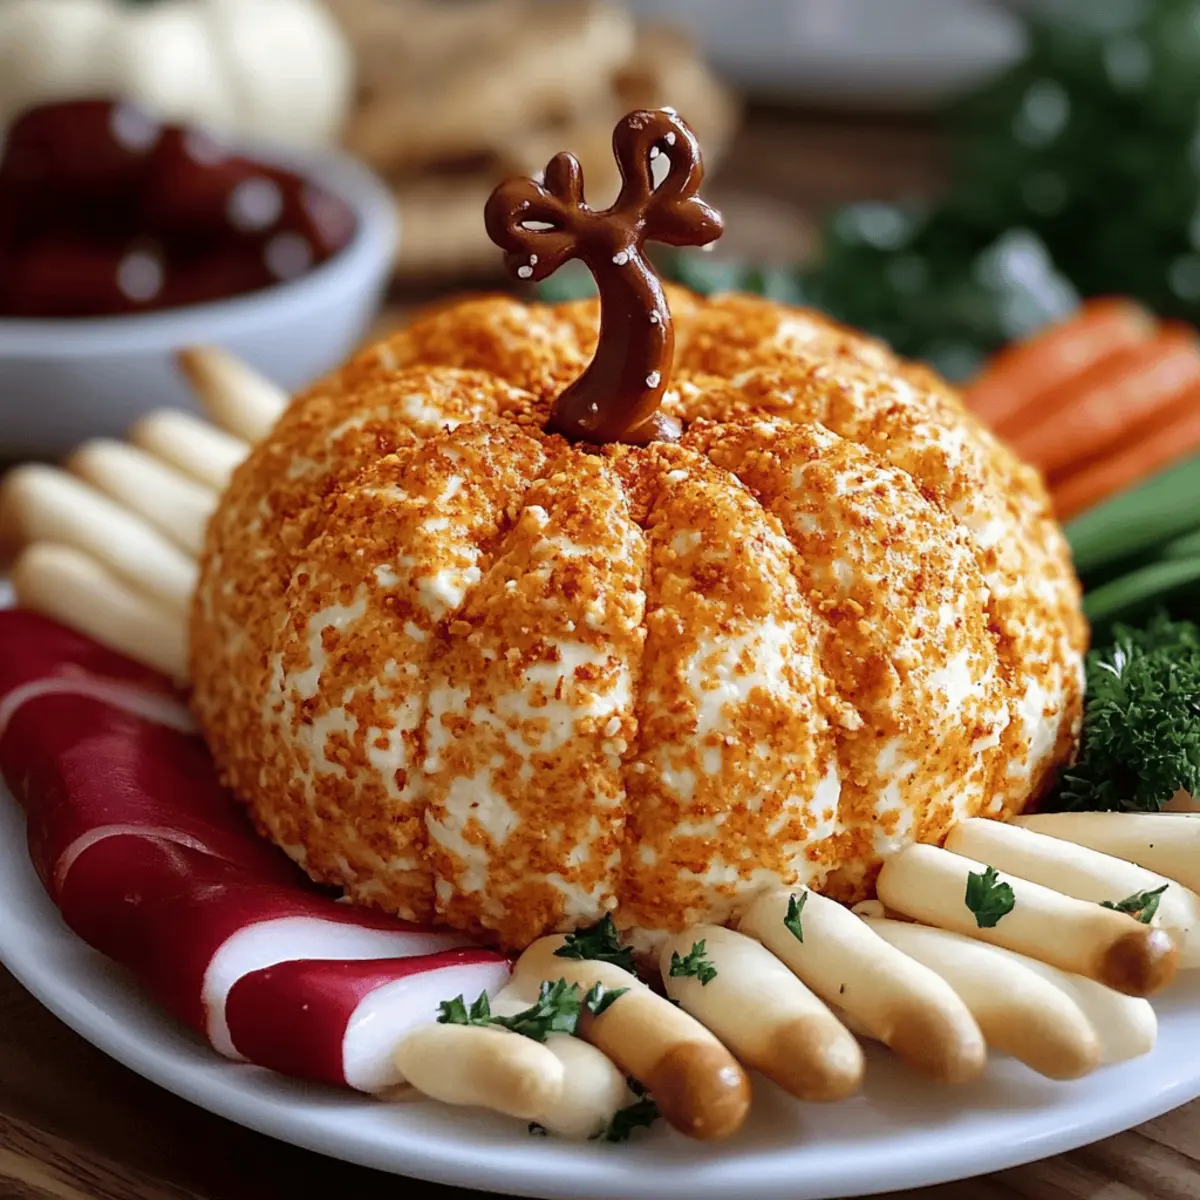
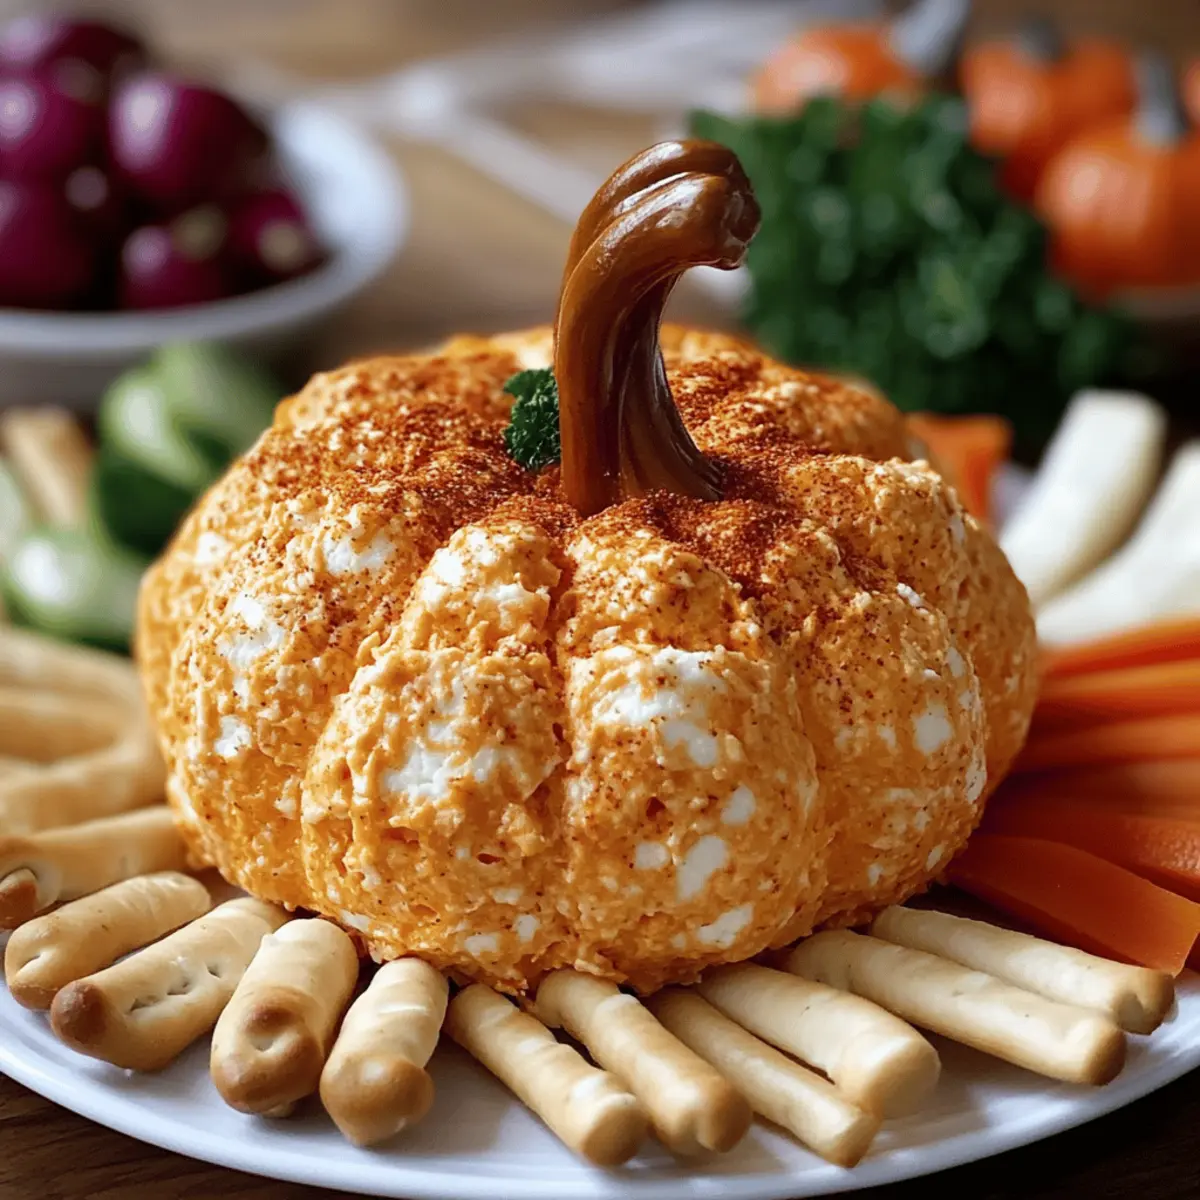
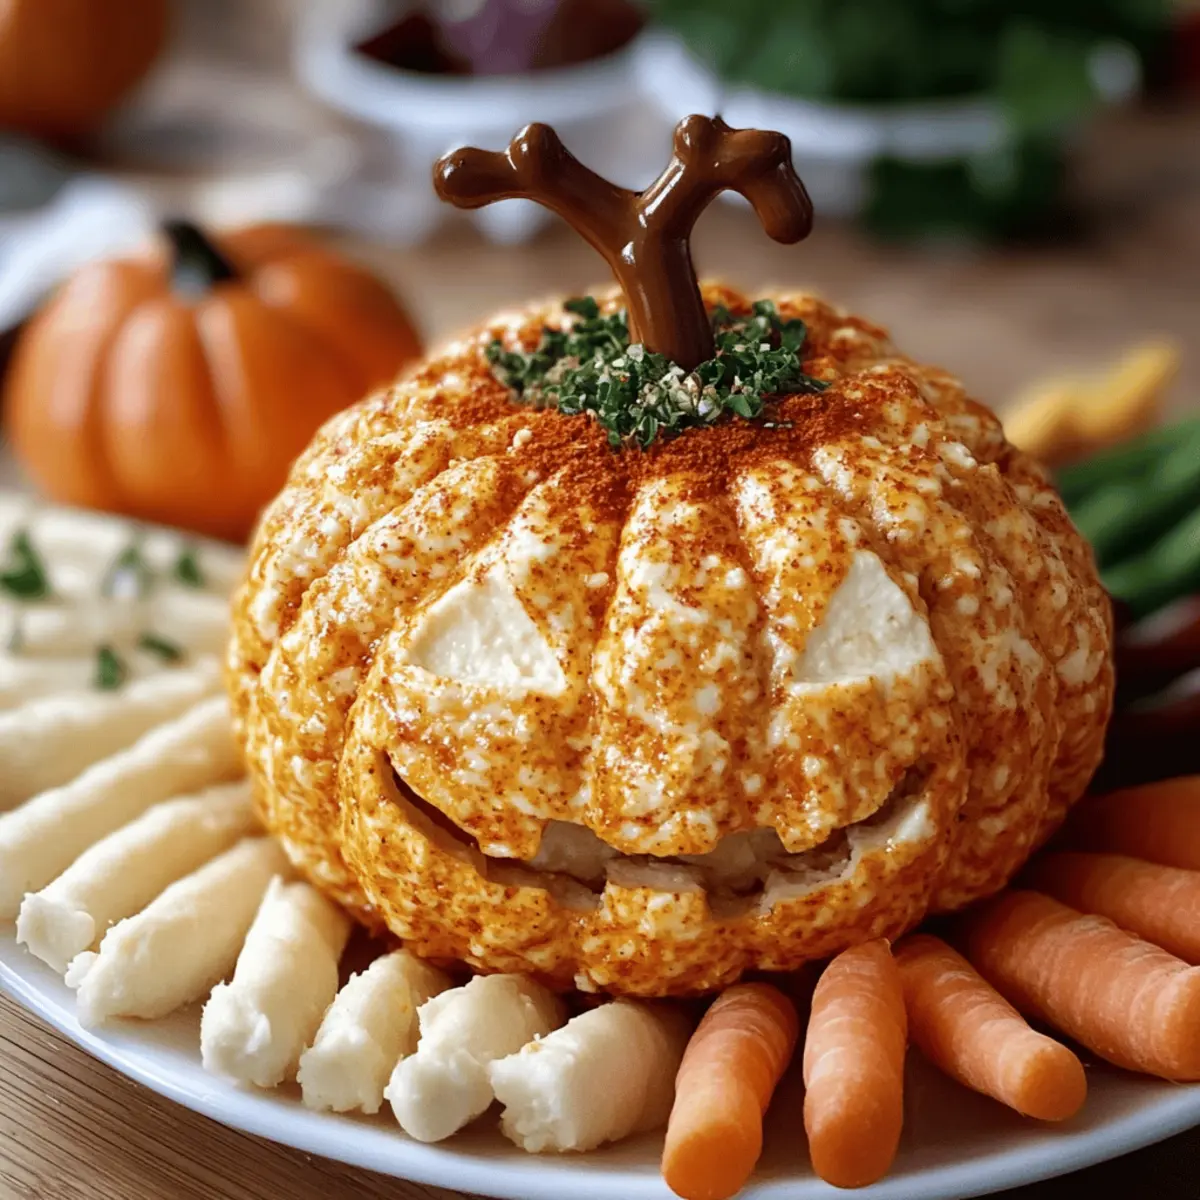
Transfer the ball to a plate and use a fork or toothpick to create ridges around the surface, mimicking a pumpkin’s natural shape. Gently press down and pull upward, repeating this all around the cheese ball. This step will enhance the visual appeal, allowing your Pumpkin-Shaped Cheese Ball to truly shine at your gathering.
Step 8: Add a Stem Garnish
Insert a pretzel stick, chive, or green onion top into the top of the cheese ball to serve as the pumpkin’s stem. Ensure it’s sturdy, allowing for easy serving. This touch adds a whimsical finish and makes your delightful Pumpkin-Shaped Cheese Ball even more festive.
Step 9: Roll in Paprika
Gently roll the entire cheese ball in paprika or your chosen coating, making sure it’s evenly covered. This adds a beautiful orange hue, enhancing the pumpkin appearance. This step should take about 2 minutes—make sure to coat thoroughly for both flavor and presentation!
Step 10: Serve and Enjoy
Finally, present your stunning Pumpkin-Shaped Cheese Ball on a platter surrounded by sturdy crackers or vegetable sticks for dipping. This eye-catching appetizer is ready to impress your guests, showcasing both style and deliciousness at your autumn get-togethers!
Make Ahead Options
These Pumpkin-Shaped Cheese Balls are perfect for busy home cooks looking to save time during festive gatherings! You can prepare the cheese mixture up to 3 days in advance; simply mix all the ingredients, shape it into a ball, and wrap it tightly in plastic wrap. To maintain its delicious quality, refrigerate until you’re ready to serve. On the day of your event, simply roll the chilled cheese ball in paprika, create the pumpkin ridges, and insert your chosen garnish before placing it on a platter. With these make-ahead options, you’ll have a stunning, crowd-pleasing appetizer ready with minimal effort!
Pumpkin-Shaped Cheese Ball Variations
Customize your pumpkin-shaped cheese ball to surprise and delight every palate at your gathering!
- Spicy Kick: Mix in diced jalapeños or crushed red pepper for a zesty twist that packs a punch. This fiery addition will wake up your taste buds and leave guests asking for more.
- Herb Garden: Incorporate fresh herbs like dill or chives into the cheese mixture for a fragrant touch. This variation brings a refreshing flavor that balances out the richness of the cheese.
- Sweet Savory: Add a couple of tablespoons of maple syrup or honey for a delightful sweet-savory harmony. This surprising twist will keep your guests intrigued and coming back for seconds.
- Bacon Cheddar: Mix in crispy, crumbled bacon for an irresistible smoky flavor that enhances the cheddar. The combination guarantees a satisfying crunch and savory depth.
- Nutty Texture: Fold in chopped nuts, such as pecans or walnuts, for added crunch and a delightful earthy flavor. This variation brings a satisfying bite that’s both healthy and delicious.
- Vegan Delight: Substitute plant-based cream cheese and dairy-free cheese to make this treat vegan-friendly. Everyone can enjoy this tip-top delight while catering to dietary needs!
- Gluten-Free: Serve with gluten-free crackers or veggie sticks for dipping. Pair with these delightful Snowman Oreo Balls for a festive platter that dazzles.
- Herbed Cream Cheese: Use herbed cream cheese in place of plain for an instant flavor boost without any extra steps. Who doesn’t love a shortcut when making party food?
Get creative in your kitchen, and let your pumpkin-shaped cheese ball become a joyful centerpiece bursting with flavors that resonate with everyone at your table!
Helpful Tricks for Pumpkin-Shaped Cheese Ball
- Perfectly Softened Cream Cheese: Ensure cream cheese is fully softened before mixing to avoid lumps; this creates that coveted smooth and creamy texture in your Pumpkin-Shaped Cheese Ball.
- Season Gradually: Always taste the mixture as you season; adding spices little by little allows you to fine-tune flavors and avoid overwhelming the dish with salt or spices.
- Chill for Structure: For a sturdier shape, chill the cheese ball longer if needed. This helps maintain its pumpkin form when rolling and handling.
- Creative Mix-Ins: Feel free to experiment with different mix-ins like roasted garlic or caramelized onions; just remember to maintain balance so the pumpkin flavor shines through.
- Coating Alternatives: If paprika isn’t your favorite, consider crushed nuts or a blend of herb-seasoned crackers for a unique look and taste on your Pumpkin-Shaped Cheese Ball.
What to Serve with Pumpkin-Shaped Cheese Ball
As guests gather around your festive centerpiece, complement this creamy, delightful dish with appealing sides and treats that will elevate your gathering’s experience.
-
Sturdy Crackers: These crunchy, buttery options provide the perfect base for dipping, enhancing the cheese ball’s rich creaminess.
-
Fresh Vegetable Sticks: Crisp carrots, celery, and bell peppers add a refreshing crunch and balance the savory flavors of the cheese ball.
-
Sliced Baguette: The soft, warm bread creates a wonderful contrast to the cheese’s texture, making each bite satisfying and indulgent.
Pairing creamy with crunchy adds visual and textural variety to the spread. It allows your guests to mix flavors, creating a fun and interactive tasting experience.
-
Fruit Platter: Sweet fruits like grapes and apple slices offer a delightful tartness that contrasts nicely with the savory cheese ball’s richness.
-
Sparkling Cider: A bubbly beverage brings a festive touch, cleansing the palate with each delicious sip between bites.
-
Pumpkin Spice Dip: The seasonal flavor harmonizes beautifully with the pumpkin theme, creating a cohesive, autumn-inspired menu while surprising your guests with a playful twist!
Storage Tips for Pumpkin-Shaped Cheese Ball
- Fridge: Keep the pumpkin-shaped cheese ball tightly wrapped in plastic wrap or an airtight container in the refrigerator for up to 3 days to preserve its freshness and creaminess.
- Freezer: For longer storage, you can freeze the cheese ball. Wrap it well in plastic wrap, then in aluminum foil. It will stay fresh for up to 2 months. Thaw it in the fridge before serving.
- Reheating: This dish is best enjoyed cold or at room temperature. If you prefer it softer, let it sit out for about 15-20 minutes before serving, again ensuring the delightful flavors of the pumpkin-shaped cheese ball shine through.
- Make-Ahead: Prepare the cheese ball a day in advance to allow flavors to meld together beautifully. Just remember to store it properly to keep it fresh!
Pumpkin-Shaped Cheese Ball Recipe FAQs
What type of cheese should I use for the Pumpkin-Shaped Cheese Ball?
I recommend using a combination of cream cheese for the creamy base and shredded cheddar cheese for flavor and color. You can also experiment with different cheeses, like smoked gouda or pepper jack, to create your unique twist!
Advertisement
How do I know if my cream cheese is soft enough?
The cream cheese should be left at room temperature for about 30 minutes or until it’s easily spreadable. If you can make a dent with a knife without much pressure, it’s ready to blend smoothly into your cheese ball.
Can I store the leftover Pumpkin-Shaped Cheese Ball?
Absolutely! Store your cheese ball tightly wrapped in plastic wrap in the refrigerator for up to 3 days. It can also be made a day in advance for added flavor development—just keep it chilled until serving.
How can I freeze the Pumpkin-Shaped Cheese Ball?
To freeze, first wrap the cheese ball tightly in plastic wrap, then cover it with aluminum foil to prevent freezer burn. When you’re ready to serve, simply thaw it in the refrigerator for about 4-6 hours or overnight before ensuring it’s ready for your guests!
Are there any dietary considerations for this recipe?
Yes! This Pumpkin-Shaped Cheese Ball is gluten-free, vegetarian, and can easily be made keto-friendly. For vegan guests, substitute with plant-based cream cheese and dairy-free cheese. Always double-check your mix-ins for allergens if necessary!
What should I do if the cheese ball is too soft to hold its shape?
If your cheese ball is quite soft after chilling, try placing it back in the fridge for an additional hour or two. For a firmer ball, consider incorporating a bit more shredded cheese or finely chopped nuts, which helps stabilize the shape while enhancing texture.
Pumpkin-Shaped Cheese Ball: A Festive Treat to Impress Guests
Ingredients
Equipment
Method
- Soften the cream cheese at room temperature for about 30 minutes until it's easily pliable.
- Mix the softened cream cheese with shredded cheddar cheese in a mixing bowl using a hand mixer until smooth.
- Gradually add garlic powder, onion powder, salt and pepper to the cheese mixture and mix thoroughly.
- Fold in choice of chopped nuts, fresh herbs, or bacon bits gently.
- Chill the mixture in the refrigerator for at least 30 minutes.
- Shape the mixture into a tight ball using plastic wrap.
- Create ridges on the cheese ball using a fork or toothpick.
- Insert a pretzel stick, chive, or green onion top into the top of the cheese ball for garnish.
- Roll the cheese ball in paprika or chosen coating.
- Serve on a platter with sturdy crackers or vegetable sticks for dipping.