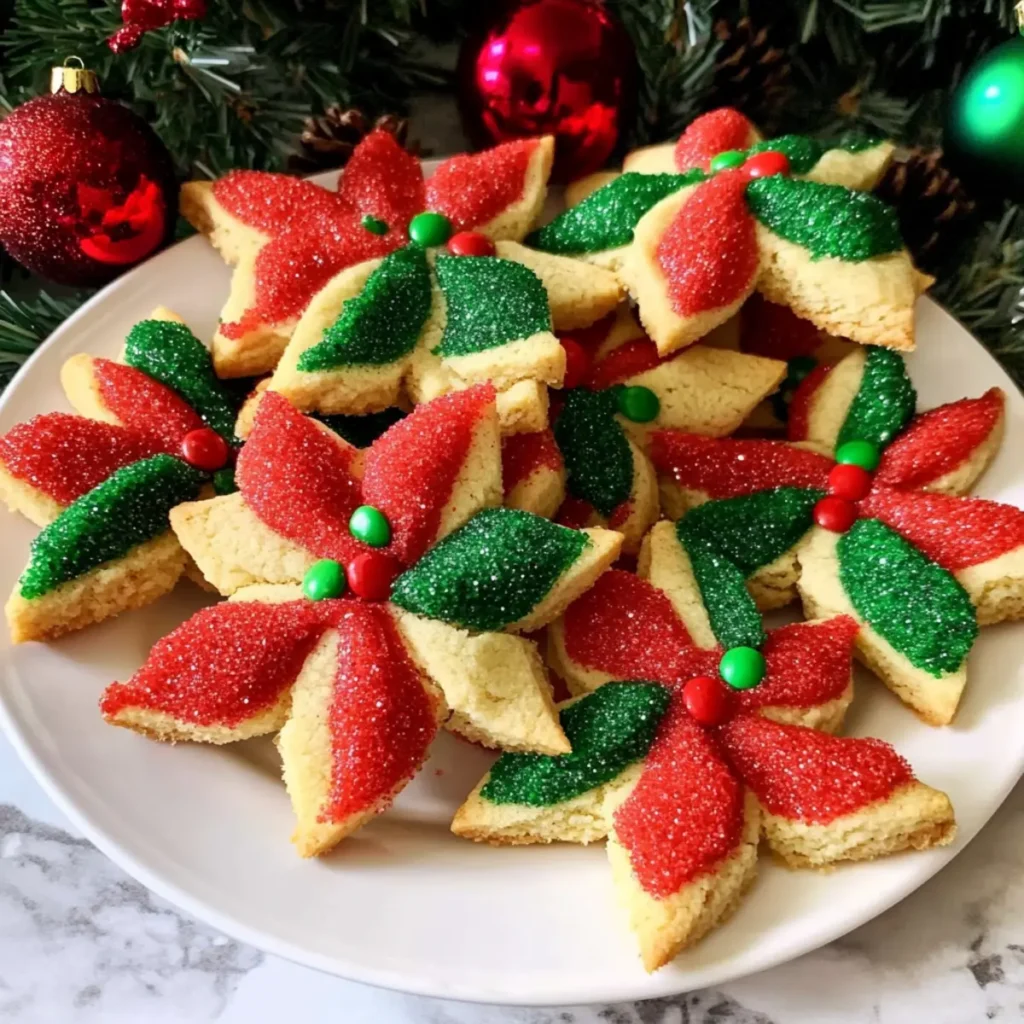
As I sifted through the twinkling ornaments and fragrant pine, a comforting aroma filled the air—my kitchen was ready for the magic of the season. Poinsettia Cookies are my go-to festive delight, blending a creamy, buttery base with the cheerful crunch of M&Ms and colorful sugar that dances like holiday lights. These Christmas cookies aren’t just a treat; they’re a fun, decorative dessert that brings joy to every gathering. Best of all, they come together quickly, allowing you to whip up a batch before the holiday rush takes over. Just imagine a plate full of these delightful creations, bringing smiles to friends and family alike. Ready to spread some cheer with me? Let’s dive into making these stunning Poinsettia Cookies!

Why Are Poinsettia Cookies a Must-Make?
Delightfully Festive: These Poinsettia Cookies are not only beautiful but bursting with flavor, making them the perfect addition to your holiday platter.
Easy to Prepare: With simple ingredients and straightforward steps, you can whip up a batch in under two hours, leaving you plenty of time for holiday fun!
Customizable: Feel free to experiment with different colored sugars or swap M&Ms for holiday-themed chocolates—creativity is encouraged!
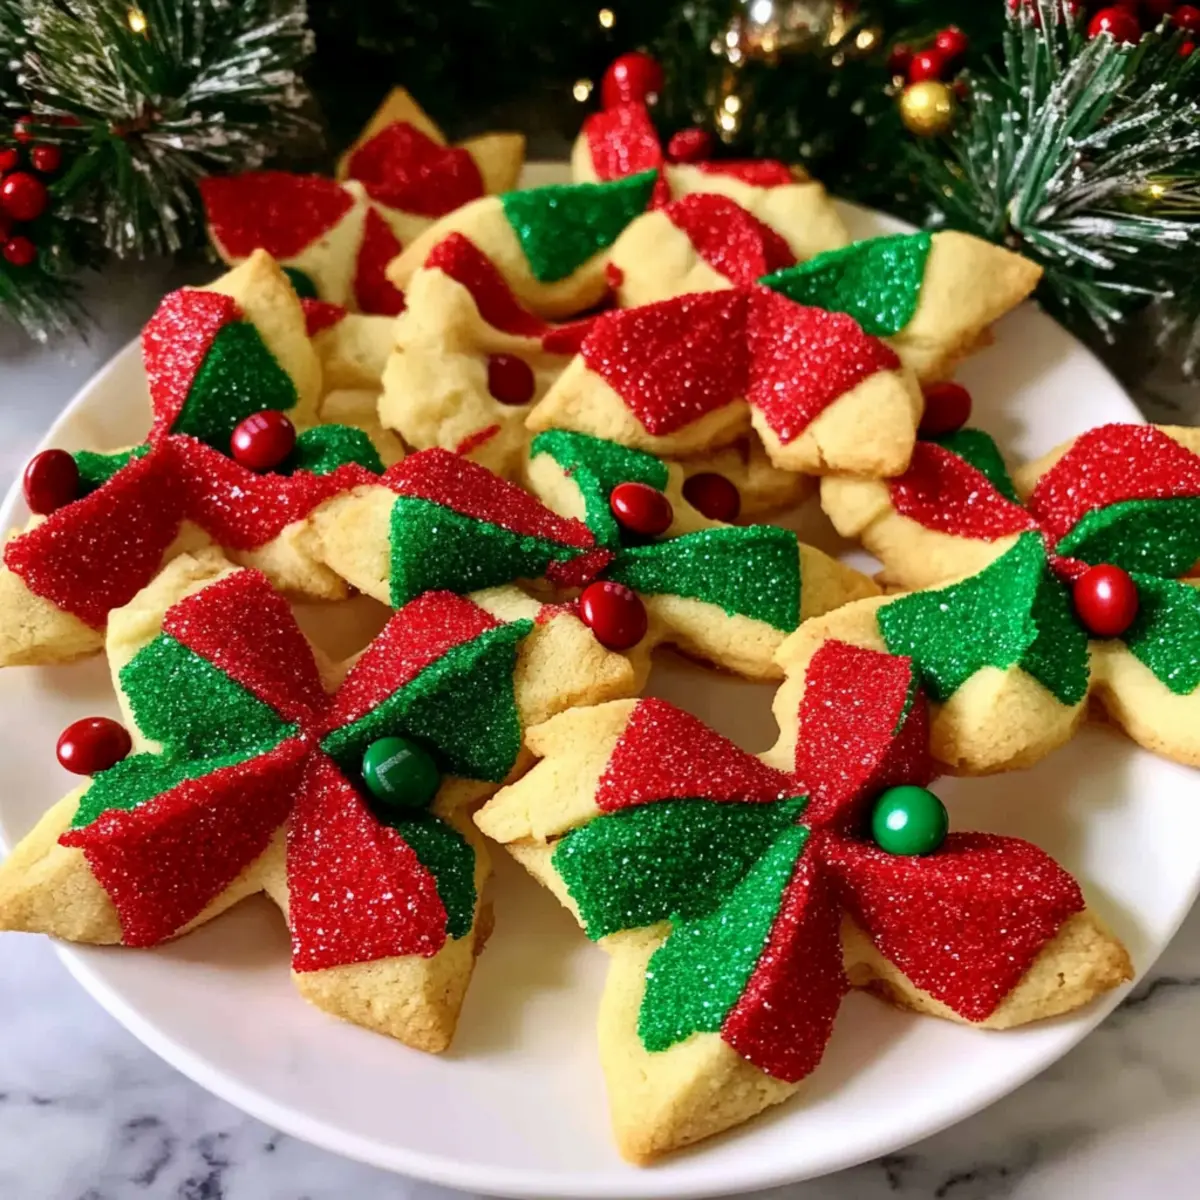
Impressive Presentation: Their vibrant look and unique shape will wow your guests and make your cookie spread stand out.
Perfect for Gifting: Package these cookies as heartfelt gifts—who wouldn’t love a tin filled with these festive delights?
Embrace the festive spirit and create your own Poinsettia Cookies that are sure to leave a lasting impression this holiday season!
Poinsettia Cookies Ingredients
• Get ready for a festive baking adventure!
For the Cookie Base
- Unsalted Butter – Provides richness and moisture; margarine can be used for a dairy-free version.
- Cream Cheese – Adds a delightful tang and tenderness; mascarpone can be a lovely substitute.
- Egg (Yolk) – Acts as a binder for the dough; you can use a whole egg, but remember to separate the white!
- All-Purpose Flour – The foundation for your cookies; a gluten-free flour mix will work beautifully in its place.
- Baking Powder – Ensures your cookies rise perfectly; if unavailable, adjust with baking soda.
For Decoration
- Colored Sugar – Imparts a festive look and extra sweetness; sprinkles or coarse sugar can be used instead.
- M&Ms – Offers a sweet surprise and vibrant color; feel free to swap in chocolate chips or your favorite candies.
Whether whipping up Poinsettia Cookies for a gathering or gifting them to loved ones, these ingredients promise a delightful experience in every bite!
Step‑by‑Step Instructions for Poinsettia Cookies
Step 1: Prepare the Dough
In a mixing bowl, cream together 1 cup of unsalted butter and 8 ounces of cream cheese until smooth and fluffy, about 2-3 minutes. Add the egg yolk and mix until well combined. Gradually blend in 2 cups of all-purpose flour and 1 teaspoon of baking powder until a soft dough forms. Shape the dough into a disk, wrap in plastic wrap, and refrigerate for 1-2 hours until firm.
Step 2: Roll & Cut
Once chilled, preheat your oven to 350°F (175°C). On a well-floured surface, roll half of the dough into a rectangle measuring approximately 15×9 inches thick. Use a sharp knife to cut the dough into 3-inch squares. Gently lift the squares onto a parchment-lined baking sheet, ensuring there’s space between each cookie to allow for spreading during baking.
Step 3: Shape Cookies
Brush each square lightly with egg white to help secure the shape. Cut diagonally from each corner toward the center, being careful not to cut all the way through. Fold the pointed corners into the center to create pinwheel shapes, tucking them gently inwards. Place an M&M in the center of each cookie, adding a delightful pop of color and sweetness to your Poinsettia Cookies.
Step 4: Bake the Cookies
Bake the shaped cookies in the preheated oven for 9-12 minutes, or until they are lightly golden at the edges. Keep a close eye on them to ensure they don’t over-bake. Once done, the cookies should be firm yet tender to the touch. Remove them from the oven and allow them to cool on the baking sheet for a few minutes before transferring to a wire rack.
Step 5: Cool and Store
After baking, allow the Poinsettia Cookies to cool completely on the wire rack. This step is crucial for achieving the perfect texture. Once cooled, store the cookies in an airtight container, placing wax paper between layers to prevent sticking. Enjoy your festive treats within four days, or freeze for longer storage!
Poinsettia Cookies: Sweet Variations
Feel free to get creative with your Poinsettia Cookies and tailor them to your taste buds!
-
Decorative Sugars: Experiment with different colored sugars, allowing your cookies to reflect the joyful spirit of the season. Sparkly patterns will catch the eye of any festive guest!
-
Chocolate Chips: Swap out M&Ms for chocolate chips for a rich twist. They’ll melt beautifully and add a delightful depth of flavor.
-
Dairy-Free Delight: Substitute the cream cheese with vegan cream cheese and use margarine instead of butter for a dairy-free version that everyone can enjoy.
-
Nutty Flavor: Add a handful of chopped nuts like pecans or walnuts for an added crunch and warmth that echoes the cozy feel of the holidays.
-
Citrus Zest: Try incorporating lemon or orange zest into your dough for a zesty aroma that will brighten every bite. This addition can provide a charming contrast to the sweet sugar.
-
Spiced Up: Consider adding a pinch of cinnamon or nutmeg for a hint of warmth and holiday spice. This twist will evoke the comforts of winter baking.
-
Cocoa Powder: For chocolate lovers, blend a little cocoa powder into half of your dough before rolling it out. This surprise in each cookie will thrill every palate.
-
Festive Fillings: Place a small dollop of jam or caramel in the center instead of an M&M for a gooey, flavorful surprise with every bite.
These variations not only enhance the flavor and texture of your Poinsettia Cookies, but they also ensure you have fun in the kitchen! Each cookie can become a unique masterpiece waiting to be enjoyed. For even more delightful cookie ideas, check out these Chocolate Thumbprint Cookies or festive Eggnog Snickerdoodle Cookies that can add to your holiday spread!
Storage Tips for Poinsettia Cookies
Room Temperature: Store Poinsettia Cookies in an airtight container at room temperature for up to 4 days to maintain their delightful flavor and texture.
Fridge: If you’d like to extend their freshness, refrigerate the cookies in an airtight container for up to 1 week. Just allow them to come to room temperature before serving.
Freezer: For longer storage, freeze Poinsettia Cookies for up to 2 weeks. Place them in a single layer in an airtight container, separated by parchment paper to prevent freezer burn.
Reheating: When ready to enjoy, let frozen cookies thaw at room temperature or gently warm them in the oven at 300°F for about 5 minutes to restore their freshness.
Make Ahead Options
These Poinsettia Cookies are perfect for busy home cooks looking to save time during the holiday rush! You can prepare the dough up to 24 hours in advance by following the first step and refrigerating it. If you want to prep even further, shape your cookies (after chilling) and freeze them for up to 3 months; simply arrange the raw, shaped cookies in a single layer on a baking sheet until frozen solid, then transfer to an airtight container. When it’s time to bake, there’s no need to thaw; just pop them into the oven from frozen and add a couple of extra minutes to your baking time for just as delicious results, ready to impress your guests with minimal effort!
What to Serve With Poinsettia Cookies
As the sweet aroma of baked cookies fills your home, it’s time to think about the perfect accompaniments that will elevate your festive gathering.
- Creamy Hot Cocoa: This rich beverage complements the cookies’ sweetness and provides a cozy, indulgent experience on chilly evenings.
- Peppermint Bark: The refreshing minty flavor adds a delightful contrast to the buttery cookies while keeping the holiday spirit alive.
- Fruit Salad: A light and colorful assortment of seasonal fruits balances the richness of the cookies, adding a fresh touch to your dessert table.
- Spiced Eggnog: Warm or chilled, this classic holiday drink pairs wonderfully with Poinsettia Cookies, enhancing the festive atmosphere and flavor.
- Gingerbread Men: Keep the holiday vibe strong with these aromatic cookies, as they bring a delightful chewiness that pairs well with your crisper Poinsettia Cookies.
- Mixed Nuts: A selection of roasted or spiced nuts offers a crunchy contrast, providing a savory element that beautifully offsets the sweetness of the cookies.
- Vanilla Ice Cream: The creamy texture of classic vanilla ice cream can create a delightful dessert sandwich with a Poinsettia Cookie, an irresistible combination!
- Cheese Platter: Include some mild cheese varieties for a surprising twist that adds depth to your dessert spread while complementing the cookies.
- Sparkling Cider: This bubbly drink captures the essence of celebrations and pairs wonderfully with desserts, enhancing the festive experience.
Gather these delightful accompaniments for an unforgettable holiday treat experience!
Expert Tips for Poinsettia Cookies
-
Chilling is Key: Properly chill the dough for at least 1-2 hours. This helps the cookies maintain their shape while baking.
-
Parchment Paper Magic: Line your baking sheet with parchment paper to prevent sticking and ensure easy removal of the cookies once baked.
-
Even Rolling: Roll the dough to an even thickness to guarantee uniform baking. Uneven dough may result in cookies that bake irregularly.
-
Creative Substitutions: Don’t hesitate to swap M&Ms for racy holiday-themed chocolates or colored sugars based on your festive color scheme.
-
Watch the Baking Time: Keep an eye on your cookies; they should be lightly golden at the edges but still tender. Over-baking leads to dryness!
Embrace these handy tips and create Poinsettia Cookies that will delight everyone around the holiday table!

Advertisement
Poinsettia Cookies Recipe FAQs
How do I select the right butter for my Poinsettia Cookies?
Absolutely! For the best flavor and texture, I recommend using unsalted butter, as it allows you to control the saltiness in your cookies. If you need a dairy-free version, you can substitute it with margarine; just ensure it’s a good-quality brand to keep the richness.
What is the best way to store Poinsettia Cookies?
You can store your Poinsettia Cookies in an airtight container at room temperature for up to 4 days. For extended freshness, refrigerate them for up to a week, just remember to let them come to room temperature before serving.
Can I freeze Poinsettia Cookies?
Yes, absolutely! To freeze your Poinsettia Cookies, first ensure they are completely cooled. Then, layer them in an airtight container with parchment paper between each layer to avoid sticking. They can be frozen for up to 2 weeks. When ready to enjoy, let them thaw at room temperature or pop them into a preheated oven at 300°F for about 5 minutes to revive their delightful texture.
What should I do if my dough is too sticky?
If your dough becomes too sticky, don’t worry! This can happen sometimes. You can simply add a little more flour, about a tablespoon at a time, until it reaches a workable consistency. Ensure you mix well between additions. Remember, chilling the dough for 1-2 hours also helps firm it up, making it easier to shape and cut.
Are Poinsettia Cookies safe for pets and people with allergies?
It’s important to note that Poinsettia Cookies contain ingredients that are not safe for pets, particularly chocolate (M&Ms). For allergies, especially to gluten or dairy, consider using gluten-free flour and a dairy-free cream cheese or margarine. Always double-check your ingredient labels, especially if you’re preparing these for someone with food sensitivities!

Poinsettia Cookies: Festive Sweet Treats for the Holidays
Ingredients
Equipment
Method
- In a mixing bowl, cream together 1 cup of unsalted butter and 8 ounces of cream cheese until smooth and fluffy, about 2-3 minutes. Add the egg yolk and mix until well combined. Gradually blend in 2 cups of all-purpose flour and 1 teaspoon of baking powder until a soft dough forms. Shape the dough into a disk, wrap in plastic wrap, and refrigerate for 1-2 hours until firm.
- Once chilled, preheat your oven to 350°F (175°C). On a well-floured surface, roll half of the dough into a rectangle measuring approximately 15x9 inches thick. Use a sharp knife to cut the dough into 3-inch squares. Gently lift the squares onto a parchment-lined baking sheet, ensuring there’s space between each cookie to allow for spreading during baking.
- Brush each square lightly with egg white to help secure the shape. Cut diagonally from each corner toward the center, being careful not to cut all the way through. Fold the pointed corners into the center to create pinwheel shapes, tucking them gently inwards. Place an M&M in the center of each cookie.
- Bake the shaped cookies in the preheated oven for 9-12 minutes, or until they are lightly golden at the edges. Remove them from the oven and allow to cool on the baking sheet for a few minutes before transferring to a wire rack.
- Once cooled, store the cookies in an airtight container, placing wax paper between layers to prevent sticking.