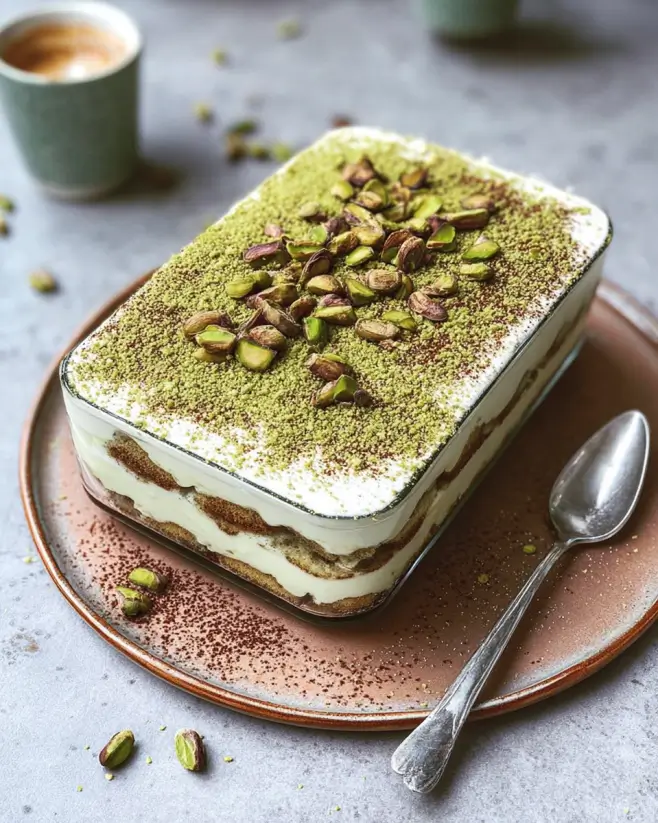
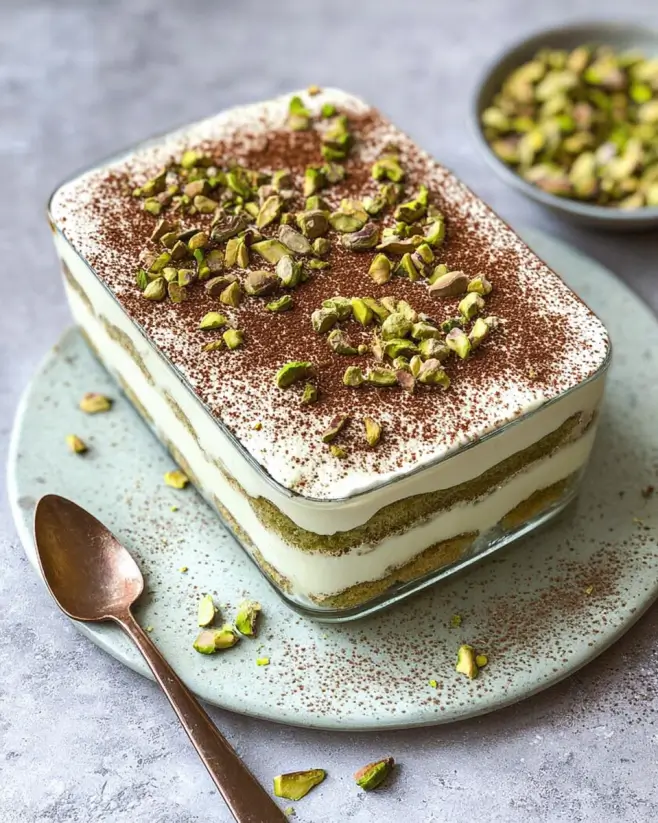
Introduction to Pistachio Tiramisu
There’s something magical about dessert that brings people together, and this Pistachio Tiramisu is no exception. I remember the first time I tried tiramisu; it was a revelation! The creamy layers, the coffee-soaked ladyfingers, and that delightful crunch of pistachios made it unforgettable. This recipe is perfect for those busy days when you want to impress your loved ones without spending hours in the kitchen. With just a few simple steps, you can create a stunning dessert that will have everyone asking for seconds. Trust me, this is a treat you won’t want to miss!
Why You’ll Love This Pistachio Tiramisu
This Pistachio Tiramisu is a game-changer for dessert lovers. It’s incredibly easy to whip up, making it perfect for those hectic weeknights or last-minute gatherings. The rich, creamy texture combined with the nutty crunch of pistachios creates a flavor explosion that’s hard to resist. Plus, it’s a no-bake recipe, so you can spend less time in the kitchen and more time enjoying the company of friends and family.
Ingredients for Pistachio Tiramisu
Gathering the right ingredients is the first step to creating this delightful Pistachio Tiramisu. Here’s what you’ll need:
- Heavy cream: This is the base for your luscious filling, providing that rich, creamy texture.
- Mascarpone cheese: A key player in tiramisu, it adds a smooth, velvety richness that’s simply irresistible.
- Powdered sugar: This sweetens the mascarpone mixture without the graininess of granulated sugar.
- Vanilla extract: A splash of this adds warmth and depth to the flavor profile.
- Brewed espresso: The heart of tiramisu, it infuses the dessert with that classic coffee flavor.
- Coffee liqueur (optional): For those who want an extra kick, this adds a delightful complexity.
- Ladyfinger cookies: These sponge-like cookies soak up the espresso beautifully, creating the perfect texture.
- Crushed pistachios: Not just for garnish, they add a nutty crunch that elevates the entire dessert.
- Cocoa powder: A dusting on top gives a classic finish and a hint of chocolatey goodness.
For those looking to mix things up, you can substitute the pistachios with walnuts or almonds for a different nutty flavor. If you want a lighter version, consider swapping half of the heavy cream with Greek yogurt. You can find the exact measurements for each ingredient at the bottom of the article, ready for printing!
How to Make Pistachio Tiramisu
Creating this Pistachio Tiramisu is a delightful journey that’s as easy as pie—well, easier! Follow these simple steps, and you’ll have a stunning dessert ready to impress.
Step 1: Whip the Cream
Start by pouring the heavy cream into a large mixing bowl. Using an electric mixer, whip the cream until soft peaks form. This means the cream should hold its shape but still be a bit wobbly. Gradually add the powdered sugar while continuing to whip. Keep going until you achieve stiff peaks, where the cream stands tall and proud. This fluffy base is what makes your tiramisu so dreamy!
Step 2: Combine Mascarpone
Now, it’s time to bring in the mascarpone cheese. Gently fold it into the whipped cream using a spatula. Be careful not to deflate the cream; you want to keep that airy texture. Add in the vanilla extract, and continue folding until everything is smooth and well combined. This mixture is the heart of your Pistachio Tiramisu, so make sure it’s perfect!
Step 3: Prepare Espresso Mixture
In a shallow dish, combine your cooled brewed espresso with the coffee liqueur, if you’re using it. This mixture is where the magic happens! The espresso will soak into the ladyfingers, giving them that rich coffee flavor. Make sure it’s deep enough for dipping but not too deep that you drown the cookies.
Step 4: Soak Ladyfingers
Take each ladyfinger and quickly dip it into the espresso mixture. You want them to soak up the coffee but not become soggy. A quick dip on each side should do the trick. This step is crucial; it’s all about finding that perfect balance between soft and firm!
Step 5: Layer the Ingredients
In a 9×9-inch baking dish, start layering! Place half of the soaked ladyfingers at the bottom. Then, spread half of the mascarpone mixture over the ladyfingers, smoothing it out evenly. Sprinkle half of the crushed pistachios on top. This nutty crunch adds a delightful texture that complements the creamy layers beautifully.
Step 6: Repeat Layers
Now, repeat the layering process with the remaining ingredients. Add the rest of the soaked ladyfingers, followed by the mascarpone mixture, and finish with the remaining crushed pistachios. This double-layering creates a beautiful contrast and ensures every bite is packed with flavor!
Step 7: Chill the Tiramisu
Cover your dish with plastic wrap and pop it in the refrigerator. Let it chill for at least 4 hours, or overnight if you can wait. This chilling time allows the flavors to meld together and the tiramisu to set properly. Trust me, the wait is worth it!
Step 8: Serve and Garnish
When you’re ready to serve, dust the top with cocoa powder for that classic finish. If you’re feeling fancy, add a sprinkle of additional crushed pistachios for a pop of color and crunch. Slice it up, serve, and watch as everyone digs in with delight!
Tips for Success
- Use fresh, high-quality ingredients for the best flavor.
- Don’t over-soak the ladyfingers; a quick dip is all you need.
- For a richer taste, let the tiramisu chill overnight.
- Experiment with different nuts for a unique twist.
- Always dust with cocoa powder just before serving for a fresh look.
Equipment Needed
- Mixing bowl: A large bowl for whipping cream; a stand mixer works great too.
- Electric mixer: Essential for achieving those perfect whipped peaks; a whisk can work if you’re up for a workout!
- Shallow dish: For soaking ladyfingers; any wide, flat dish will do.
- Baking dish: A 9×9-inch dish is ideal for layering your tiramisu.
- Spatula: Perfect for folding and spreading the mascarpone mixture smoothly.
Variations
- Nut Substitutions: Swap pistachios for walnuts or almonds for a different nutty flavor.
- Flavor Infusions: Add a splash of almond extract or orange zest to the mascarpone mixture for a unique twist.
- Vegan Option: Use coconut cream and a dairy-free mascarpone alternative for a plant-based version.
- Decaf Delight: Use decaffeinated espresso for a caffeine-free treat that everyone can enjoy.
- Chocolate Lovers: Incorporate chocolate shavings or a layer of chocolate ganache between the mascarpone layers for an indulgent touch.
Serving Suggestions
- Pair with a rich espresso or a creamy cappuccino for a delightful coffee experience.
- Serve alongside fresh berries for a pop of color and a refreshing contrast.
- Garnish with mint leaves for an elegant touch.
- Consider a drizzle of chocolate sauce for added indulgence.
FAQs about Pistachio Tiramisu
Can I make Pistachio Tiramisu ahead of time?
Absolutely! In fact, making it a day in advance enhances the flavors. Just cover it well and refrigerate. The longer it sits, the better it gets!
What can I substitute for ladyfingers?
If you can’t find ladyfingers, you can use sponge cake or even pound cake. Just cut them into strips and soak them in the espresso mixture.
Is there a non-alcoholic version of this recipe?
Yes! Simply omit the coffee liqueur. The espresso alone will provide plenty of flavor, making it just as delicious.
How do I store leftover Pistachio Tiramisu?
Advertisement
Store any leftovers in an airtight container in the refrigerator. It should stay fresh for up to three days, but trust me, it won’t last that long!
Can I use different nuts in this recipe?
Definitely! While pistachios are the star here, feel free to experiment with walnuts or almonds for a different nutty flavor. Each will bring its own unique twist to the dessert!
Final Thoughts
Creating this Pistachio Tiramisu is more than just making a dessert; it’s about crafting a moment of joy. Each layer tells a story, from the rich espresso to the crunchy pistachios, inviting everyone to indulge in a little slice of happiness. Whether you’re celebrating a special occasion or simply treating yourself after a long day, this recipe brings warmth and delight to the table. Plus, the smiles on your loved ones’ faces as they savor each bite? That’s the real reward. So, roll up your sleeves and dive into this delicious adventure—you won’t regret it!
Pistachio Tiramisu: Indulge in this Easy Recipe!
Ingredients
Method
- In a large mixing bowl, whip the heavy cream until soft peaks form. Gradually add the powdered sugar and continue whipping until stiff peaks form.
- Gently fold in the mascarpone cheese and vanilla extract until well combined and smooth.
- In a shallow dish, combine the brewed espresso and coffee liqueur, if using.
- Quickly dip each ladyfinger into the espresso mixture, ensuring they are soaked but not soggy.
- In a 9x9-inch baking dish, layer half of the soaked ladyfingers on the bottom.
- Spread half of the mascarpone mixture over the ladyfingers, smoothing it out evenly.
- Sprinkle half of the crushed pistachios over the mascarpone layer.
- Repeat the layers with the remaining ladyfingers, mascarpone mixture, and crushed pistachios.
- Cover the dish with plastic wrap and refrigerate for at least 4 hours, or overnight for best results.
- Before serving, dust the top with cocoa powder and garnish with additional crushed pistachios if desired.
Nutrition
Notes
- For a lighter version, substitute half of the heavy cream with Greek yogurt.
- You can also swap the pistachios for walnuts or almonds for a different nutty flavor.