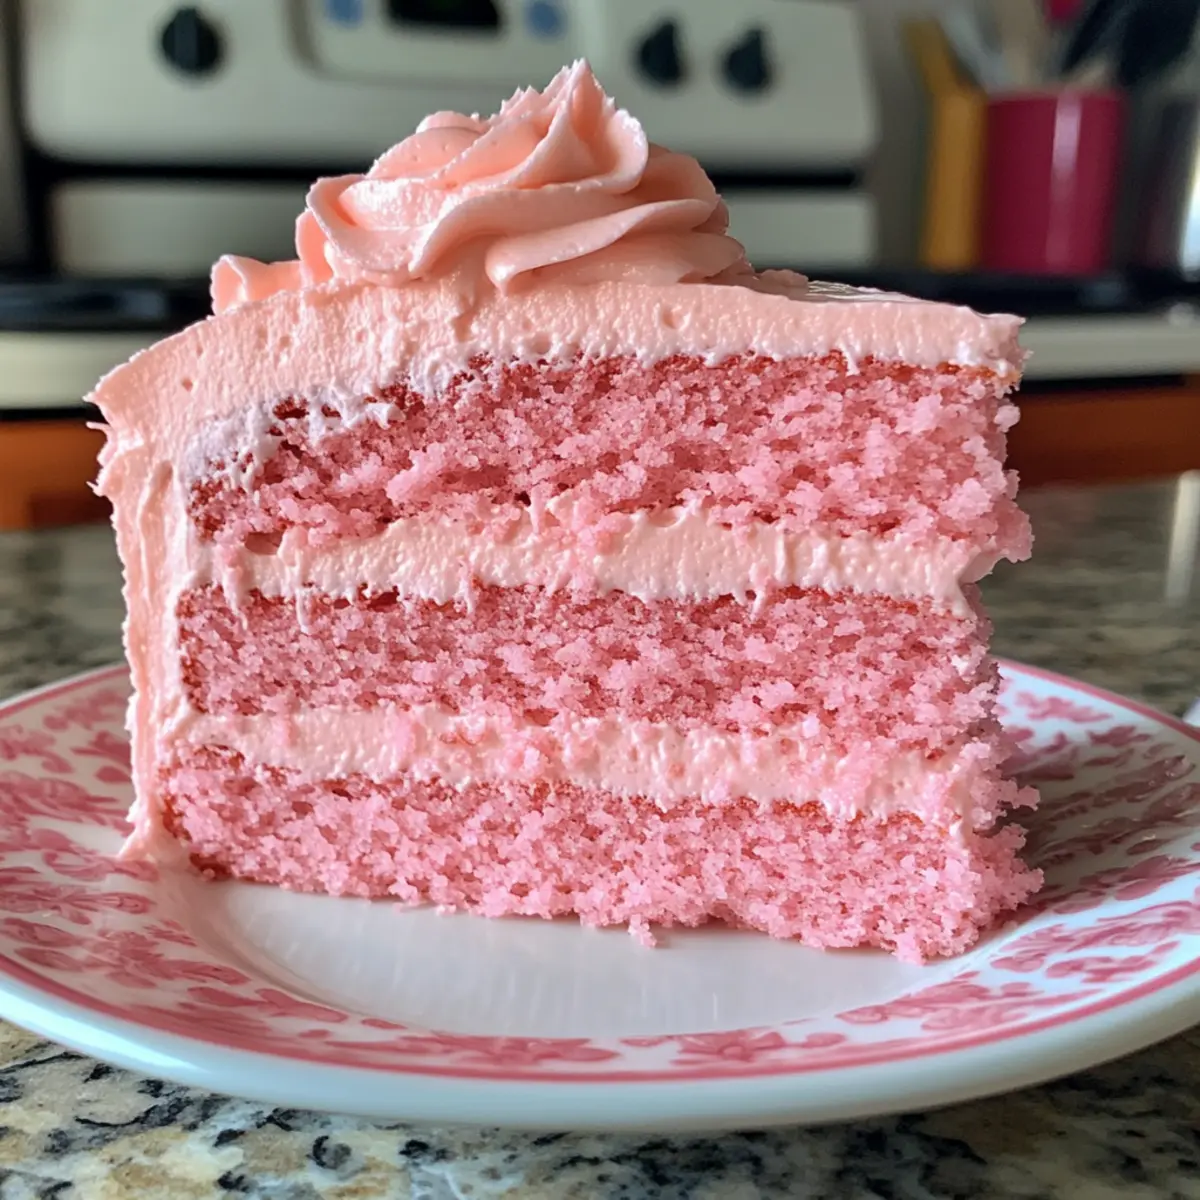
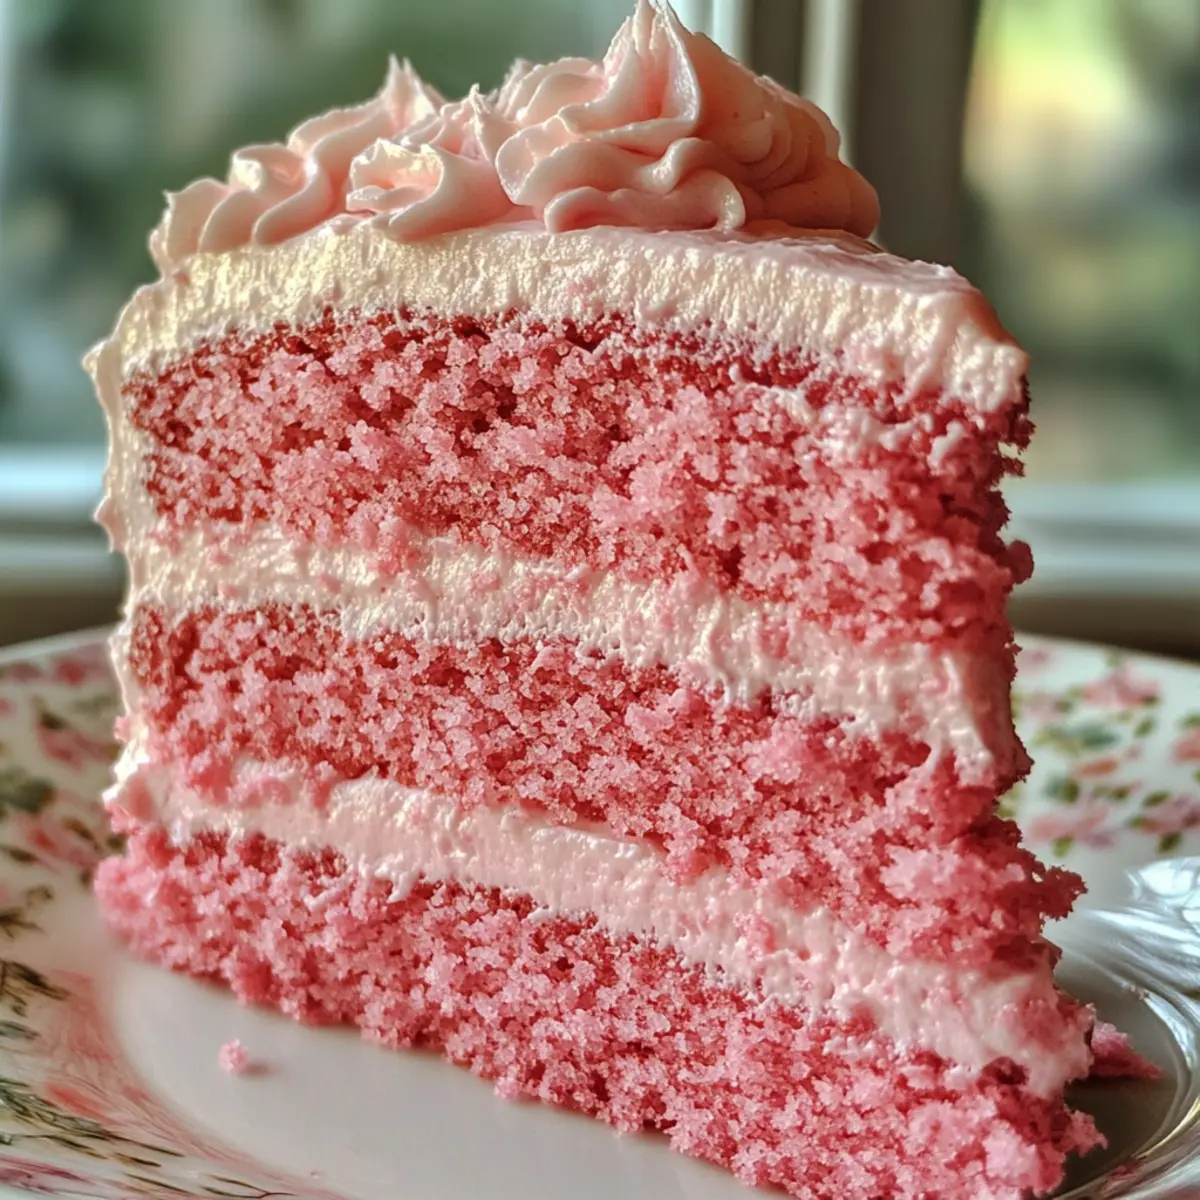
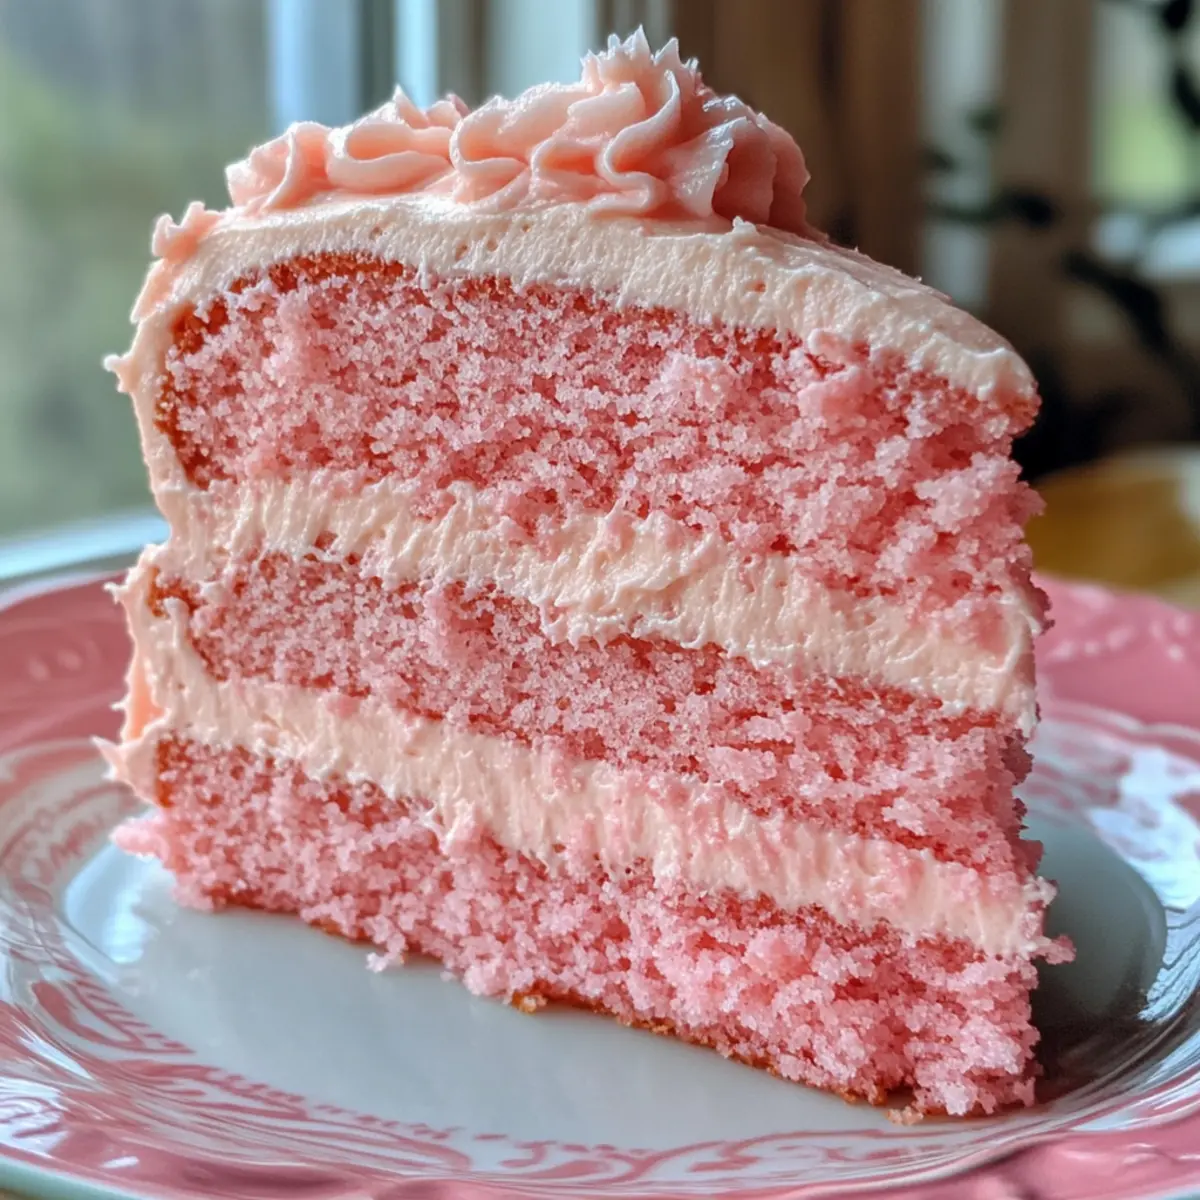
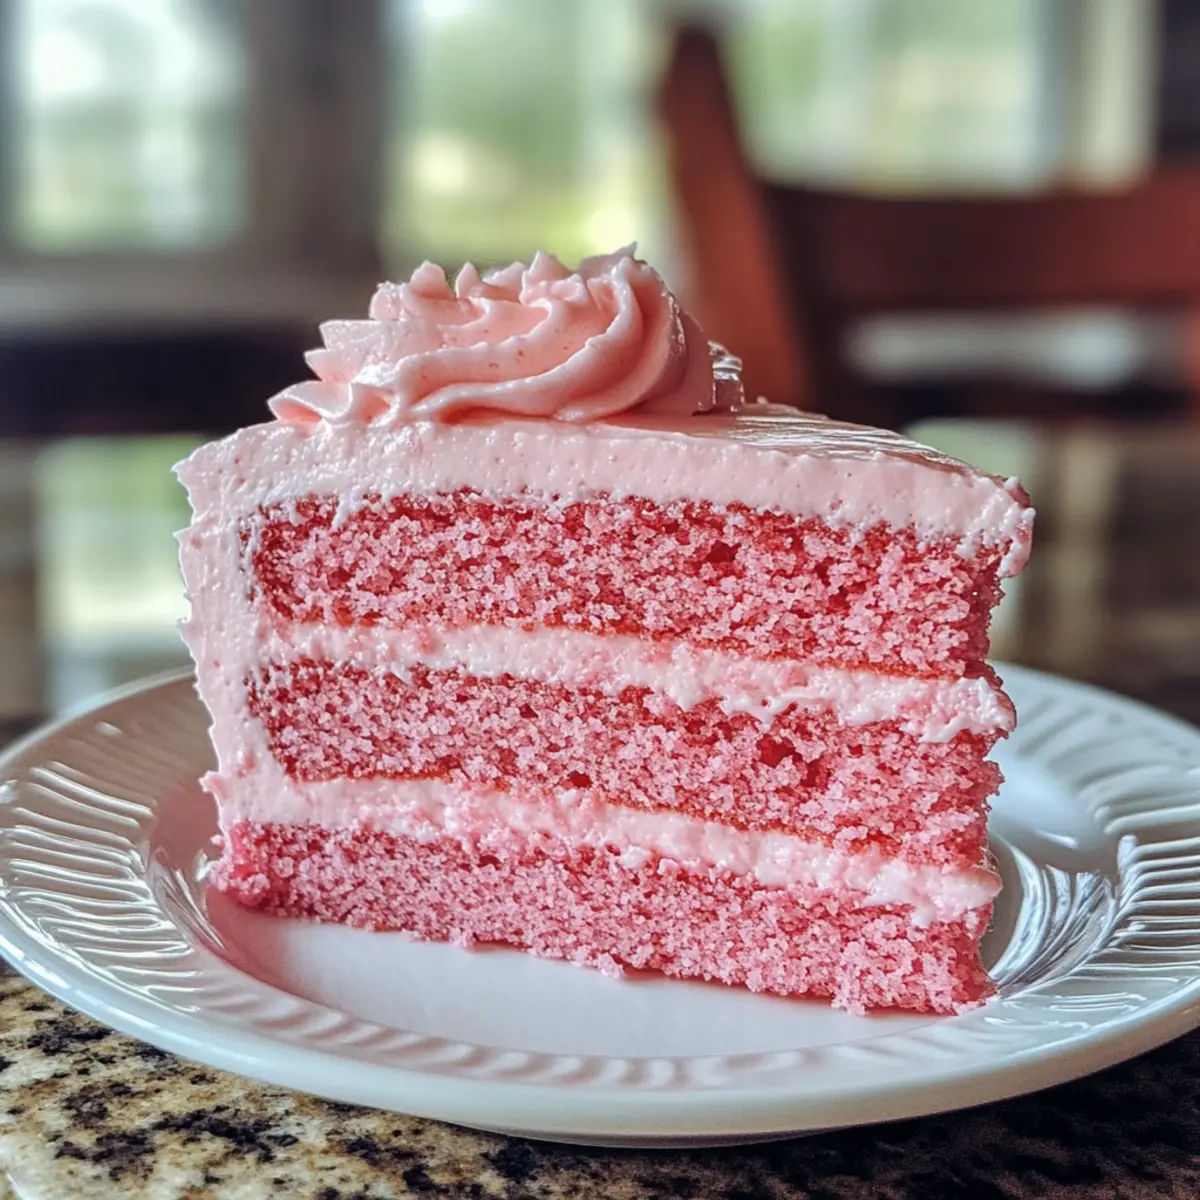
As the oven hums softly in the background, I can’t help but feel excited about the vibrant Pink Velvet Cake that’s about to emerge. This enchanting dessert, with its whisper of vanilla sweetness and lush, creamy frosting, is all set to bring joy to any gathering. What truly sets this recipe apart is its stunning blush hue, making it not just a treat for the palate but also a feast for the eyes. Whether it’s a birthday, an engagement celebration, or simply a desire to indulge, this Pink Velvet Cake is your go-to recipe for that memorable centerpiece. Plus, it’s a breeze to prepare and can easily be made ahead, freeing you up to enjoy your time with family and friends. Ready to whip up a showstopper that will leave everyone asking for seconds?
Why is Pink Velvet Cake So Special?
Unforgettable Aesthetic: This cake’s stunning blush hue makes it a showstopper at any occasion, drawing attention the moment it hits the table.
Delightful Flavor: With a gentle vanilla sweetness and tangy cream cheese frosting, it offers a delightful contrast that leaves taste buds dancing.
Quick and Easy: Made effortlessly with simple ingredients, you can whip it up in no time. It’s a perfect choice for both novice bakers and seasoned chefs!
Impress Your Guests: Your friends and family will be in awe of this delightful dessert, making it an instant favorite at gatherings.
Make-Ahead Friendly: Bake the layers the day before; frost them for freshness just prior to serving. This eliminates last-minute stress and allows you to focus on enjoying your time with loved ones.
Get ready to make an irresistible Pink Velvet Cake that’s sure to become a cherished recipe in your home!
Pink Velvet Cake Ingredients
For the Cake
• Flour – provides structure and base; use cake flour for a softer crumb.
• Cornflour – lightens the texture; can substitute with more all-purpose flour.
• Baking Powder – ensures a light rise; check for freshness for optimal results.
• Baking Soda – contributes to tenderness; can be replaced with additional baking powder if necessary.
• Cocoa Powder – adds a hint of chocolate flavor; omit for a pure vanilla version.
• Salt – enhances the overall flavor; skip if using salted butter.
• Soft Butter – imparts richness and moisture; opt for unsalted butter for better salt control.
• Fine Sugar – sweetens and softens the texture; powdered sugar can substitute in the frosting.
• Eggs – provide moisture and structure; flax eggs work as a vegan alternative.
• Milk – adds creaminess; any plant-based milk can be a suitable substitute.
• Vinegar – activates baking soda for a tender crumb; lemon juice can serve in its place.
• Vanilla Essence – enriches flavor; pure vanilla offers a superior taste.
• Vegetable Oil – ensures moisture and tenderness; melted coconut oil is a delicious alternative.
• Pink Food Color – achieves that eye-catching hue; consider natural options like beet juice for coloring.
For the Frosting
• Cream Cheese – creates a rich, creamy texture; use full-fat for best results.
• Butter – adds to the richness of the frosting; softened butter mixes best.
• Icing Sugar – sweetens and thickens the frosting; sift for a smooth finish.
• Vanilla Essence – enhances flavor; stick to pure for richer taste.
Enjoy creating your own beautiful Pink Velvet Cake that will not only tantalize your taste buds but also be a feast for the eyes!
Step‑by‑Step Instructions for Pink Velvet Cake
Step 1: Create Buttermilk
In a small bowl, combine 1 cup of milk with 1 tablespoon of vinegar, and let it sit for 5 minutes. This will curdle the milk and create a homemade buttermilk, which adds moisture and tenderness to your Pink Velvet Cake.
Step 2: Prepare Dry Ingredients
In a large mixing bowl, sift together 2 cups of cake flour, 1 tablespoon of cornflour, 1 teaspoon of baking powder, 1 teaspoon of baking soda, 2 tablespoons of cocoa powder, and ½ teaspoon of salt. This aeration is crucial for a light texture in your cake, so ensure all dry ingredients are well combined and free of lumps.
Step 3: Cream Butter and Sugar
Using a stand mixer or a large bowl and hand mixer, beat ½ cup of softened unsalted butter with 1 cup of fine sugar until the mixture is light and fluffy. This should take about 3–5 minutes on medium speed. Next, add in 2 large eggs one at a time, mixing well after each addition, followed by 1 teaspoon of vanilla essence and ½ cup of vegetable oil for an extra creamy consistency.
Step 4: Mix in Buttermilk and Color
Gradually pour the prepared buttermilk into the butter-sugar mixture while mixing on low speed. Stir gently until just combined, then add in your pink food color to achieve the desired blush hue. You want this batter to be smooth and well incorporated, with a vibrant color throughout.
Step 5: Combine Wet and Dry Ingredients
Gently fold the sifted dry ingredients into the wet mixture using a spatula. Be careful not to overmix; you want to maintain airiness for a light Pink Velvet Cake. Mix until just combined, ensuring there are no flour pockets left but the batter remains fluffy.
Step 6: Prepare for Baking
Evenly divide the batter between two greased 9-inch round cake pans. Use a spatula to smooth out the tops and gently tap the pans on the counter to remove any trapped air bubbles. Your batter should have a glossy appearance and be ready for the oven!
Step 7: Bake the Cakes
Place the cake pans in a preheated oven at 180°C (350°F) and bake for 30–35 minutes. To check for doneness, insert a toothpick into the center of the cakes; it should come out clean when they’re ready. The cakes will be slightly domed and golden around the edges.
Step 8: Cool Completely
Once baked, remove the cake pans from the oven and let them cool on a wire rack for about 10 minutes. Carefully turn the cakes out of the pans and allow them to cool completely before frosting. This step is crucial to avoid melting your frosting!
Step 9: Make the Frosting
In a mixing bowl, beat together 8 ounces of cream cheese and ¼ cup of softened butter until smooth. Gradually add in 3 cups of icing sugar and 1 teaspoon of vanilla essence, mixing until the frosting is light and fluffy. Adjust the sweetness by adding more icing sugar if needed for that perfect creamy frosting.
Step 10: Assemble and Decorate
Layer the cooled cakes on a serving plate, spreading a generous amount of frosting between the layers and on top. Feel free to be creative! Decorate your Pink Velvet Cake with fresh raspberries, crushed biscuits, and sugar pearls for an eye-catching presentation that will impress your guests.
Step 11: Chill and Serve
Place the assembled cake in the refrigerator for about 30 minutes to let the frosting set. Once chilled, slice and serve your delightful Pink Velvet Cake at your next gathering, ensuring everyone enjoys its stunning look and delicious taste!
Expert Tips for Pink Velvet Cake
• Measure Carefully: Accurate flour measurement is crucial; too much can lead to a dry cake. Use a kitchen scale if possible for best results.
• Don’t Overmix: Gently fold dry ingredients into the wet mixture to keep the texture light and airy; overmixing can result in a dense cake.
• Check Doneness Early: Start checking your cake a few minutes before the suggested bake time; this helps prevent overbaking and drying out the Pink Velvet Cake.
• Use a Serrated Knife: For perfectly sliced pieces, use a serrated knife. It prevents tearing and ensures a clean cut through your soft cake layers.
• Cool Completely: Allow your cakes to cool completely before frosting them. This avoids melting the frosting and ensures a beautiful finish.
Pink Velvet Cake Variations & Substitutions
Feel free to put your own spin on this delightful Pink Velvet Cake with these easy modifications!
-
Natural Coloring: Substitute beet juice for the pink food color for a vibrant, natural tint that enhances both flavor and healthiness. It’s an eye-catching twist that everyone will love!
-
Vegan Option: Use flax eggs instead of traditional eggs to create a compassionate version that doesn’t sacrifice the delightful taste or texture. Just mix one tablespoon of flaxseed meal with three tablespoons of water for each egg.
-
Flavor Twist: Incorporate flavored extracts like almond or mint for a refreshing twist on the classic. These variations add a unique touch that might surprise and captivate your guests!
-
Fruit Garnish: Decorate with seasonal fruits such as strawberries or raspberries for added flavor. Their tangy sweetness complements the creamy frosting beautifully and adds a burst of color.
-
Nutty Crunch: Include chopped pecans or walnuts in the batter for a delightful crunch. This not only boosts the texture but adds an earthy quality that contrasts wonderfully with the cake’s sweetness.
-
Chocolate Lovers: Want a more decadent experience? Add dark chocolate chips to the batter for a dreamy chocolatey surprise in every bite. The pairing of chocolate and pink is simply irresistible!
-
Berry-Infused Layers: Swap out vanilla essence for strawberry or raspberry essence for an fruity depth. This twist makes each slice more exciting and can complement a summer gathering perfectly.
-
Gluten-Free Version: Use a high-quality gluten-free flour blend in place of regular flour for a gluten-free take. It’s a great way to include friends with dietary restrictions without missing out on flavor!
Explore these fun variations, and don’t forget to serve your Pink Velvet Cake with a side of cold milk or a cup of tea. For even more cake ideas, you might enjoy trying a Decadent Red Velvet or a delightful slice of Eggnog Bundt Cake. Happy baking!
What to Serve with Pink Velvet Cake
As you prepare to delight your guests with this beautiful dessert, consider these scrumptious accompaniments that will elevate your dining experience.
-
Creamy Vanilla Ice Cream: The cold, creamy texture perfectly complements the moist layers of Pink Velvet Cake while enhancing its vanilla notes.
-
Fresh Berries: A medley of strawberries, raspberries, or blueberries adds a refreshing burst of flavor and color, balancing the cake’s sweetness.
-
Chai Tea: The warm spices of chai create a cozy atmosphere and contrast beautifully with the gentle sweetness of the cake, perfect for a relaxed gathering.
-
Sparkling Lemonade: This bubbly, citrus drink refreshes the palate, making each bite more enjoyable and adding a festive touch to your table.
-
Chocolate Ganache Drizzle: A rich chocolate ganache can be drizzled on top to create a decadent twist, enhancing the cake’s elegance and appealing to chocolate lovers.
-
Whipped Cream Topping: Light and airy whipped cream adds a delightful texture and can be flavored with vanilla or almond to complement the cake’s profile.
Pairing these delightful options with your Pink Velvet Cake will create an unforgettable dining experience that has everyone coming back for more!
Make Ahead Options
Preparing your Pink Velvet Cake ahead of time is a fantastic way to save precious minutes for those busy evenings! You can bake the cake layers up to 24 hours in advance. Once they are completely cooled, wrap them tightly in plastic wrap to prevent drying out and store them in the refrigerator. If you’re planning further ahead, the wrapped cake can even last up to 3 days in the fridge. When you’re ready to serve, simply frost the cake layers and garnish with your favorite toppings. This approach ensures your Pink Velvet Cake remains just as delicious and visually stunning, allowing you to enjoy the celebration stress-free!
How to Store and Freeze Pink Velvet Cake
Airtight Container: Store your Pink Velvet Cake in an airtight container at room temperature for up to 2 days to keep it fresh and moist.
Refrigeration: If you need to keep it longer, refrigerate the cake for up to 5 days. Just ensure it’s well covered to prevent it from drying out.
Freezing: For longer storage, freeze the layers wrapped separately in plastic wrap and placed in a freezer-safe bag for up to 3 months. Thaw in the fridge overnight when ready to enjoy.
Reheating Suggestions: If serving again after freezing, let it sit at room temperature for a couple of hours before frosting. This helps regain that delightful texture!
Advertisement
Pink Velvet Cake Recipe FAQs
What type of flour should I use for Pink Velvet Cake?
I recommend using cake flour for a softer crumb, which is essential in achieving that light and airy texture. If you only have all-purpose flour, it’s okay to use that as well; just be aware the cake might be slightly denser.
How should I store leftover Pink Velvet Cake?
Store your Pink Velvet Cake in an airtight container at room temperature for up to 2 days. If you wish to keep it longer, refrigerate the cake for up to 5 days. Just make sure it’s well covered so it doesn’t dry out!
Can I freeze Pink Velvet Cake?
Absolutely! To freeze, wrap the cooled cake layers separately in plastic wrap, then place them in a freezer-safe bag. This will keep them fresh for up to 3 months. When you’re ready to enjoy it, simply thaw in the fridge overnight.
What should I do if my cake is too dense?
If your Pink Velvet Cake comes out dense, it might be due to overmixing or adding too much flour. Next time, try measuring your flour accurately using a kitchen scale, and gently fold the dry ingredients into the wet mixture until just combined. This will help maintain that light and fluffy texture.
Is there a vegan option for the Pink Velvet Cake?
Yes, you can easily make this cake vegan! Substitute the eggs with flax eggs (1 tablespoon ground flaxseed mixed with 2.5 tablespoons water for each egg), use plant-based milk, and opt for plant-based butter. It’ll still be deliciously moist and enjoyable!
What natural alternatives can I use for the pink food color?
I love using beet juice or pomegranate juice as natural alternatives to achieve that lovely blush hue without any artificial dyes. Just a couple of tablespoons should do the trick to give you the beautiful color you desire for your Pink Velvet Cake!
Decadent Pink Velvet Cake That Will Wow Your Guests
Ingredients
Equipment
Method
- Step 1: Create Buttermilk - In a small bowl, combine 1 cup of milk with 1 tablespoon of vinegar, and let it sit for 5 minutes.
- Step 2: Prepare Dry Ingredients - In a large mixing bowl, sift together the dry ingredients.
- Step 3: Cream Butter and Sugar - Beat butter with sugar until light and fluffy, then add eggs and mix well.
- Step 4: Mix in Buttermilk and Color - Gradually add the buttermilk and mix together with the pink food color.
- Step 5: Combine Wet and Dry Ingredients - Fold the dry mix into the wet mixture gently.
- Step 6: Prepare for Baking - Divide and smooth the batter into greased pans.
- Step 7: Bake the Cakes - Bake in a preheated oven at 180°C (350°F) for 30–35 minutes.
- Step 8: Cool Completely - Let the cakes cool for about 10 minutes before removing from pans.
- Step 9: Make the Frosting - Beat together frosting ingredients until light and fluffy.
- Step 10: Assemble and Decorate - Layer cakes with frosting and decorate as desired.
- Step 11: Chill and Serve - Refrigerate for 30 minutes before slicing to serve.