As I pulled out the chilled tray of my latest creation, the tantalizing aroma of melted chocolate mingled with the sweet crunch of honeycomb captured my senses. Today, I’m thrilled to share my 5-Ingredient No-Bake Crunchie Slice, a delightful treat that requires no baking and only a few simple steps. This quick and easy dessert is perfect for those busy afternoons when you crave something sweet without the fuss. With just five ingredients, you can whip this up in no time, making it an ideal choice for spontaneous gatherings or afternoon coffee breaks. Trust me, once you take a bite of this delectable slice, you’ll be keeping it in your recipe rotation! Are you ready to dive into this incredibly simple yet irresistible treat?
Why is the No-Bake Crunchie Slice a Must-Try?
Quick and Easy: With just five ingredients, this slice is incredibly simple to prepare, ensuring even novice chefs can whip it up in no time.
Deliciously Unique: The delightful combination of chocolate and honeycomb creates a satisfying flavor profile that will impress your family and friends.
Perfect for Any Occasion: Whether it’s a casual movie night or an elaborate dinner party, this treat always steals the spotlight.
Make-Ahead Friendly: You can prepare it ahead of time, making it a go-to option for spontaneous gatherings. Plus, it keeps well in the fridge for up to a week!
Versatile Variations: Feel free to experiment by adding crushed nuts or trying out different biscuits to suit your taste! You can even explore Bake Biscoff Cheesecake for another quick dessert idea.
Crowd-Pleasing Texture: The chewy base paired with a silky chocolate topping offers a delightful crunch that everyone will love!
No-Bake Crunchie Slice Ingredients
• To create this delightful dessert, gather just five simple ingredients.
For the Base
- Digestive Biscuits (350 g / 12.4 oz) – Provides a sturdy structure and satisfying crunch; substitute with Graham crackers if you prefer.
- Condensed Milk (300 g) – Acts as a creamy binding agent to hold everything together; always use sweetened condensed milk for the best flavor.
- Salted Butter (100 g / 7 tbsp) – Adds richness to the base; you can opt for unsalted butter but may need to sprinkle in a bit of salt.
For the Chocolate Topping
- Milk Chocolate (200 g / 7 oz) – Creates a smooth, sweet layer that complements the crispy base; dark chocolate can be swapped in for a richer taste.
- Additional Salted Butter (10 g / ¾ tbsp, melted) – Ensures your chocolate topping stays silky and smooth; this is optional but highly recommended for that perfect texture.
For the Crunch
- Crunchie Bars (6 bars + 2 bars for topping) – Infuses the slice with a delectable honeycomb texture and flavor; Butterfingers are a great alternative if Crunchie isn’t available in your area.
Start your no-bake Crunchie slice journey with these five ingredients, and you’ll discover a world of delightful flavors!
Step‑by‑Step Instructions for No-Bake Crunchie Slice
Step 1: Prepare the Biscuit Base
Begin by crushing 350 g of digestive biscuits in a food processor until they resemble fine crumbs. If you don’t have a food processor, place them in a sealed bag and use a rolling pin. In a bowl, combine the crushed biscuits with 100 g of melted salted butter and 300 g of sweetened condensed milk. Mix until fully incorporated, then fold in chopped Crunchie bars, ensuring even distribution. Press the mixture firmly into a lined 8×8-inch baking tin to form a solid base.
Step 2: Make the Chocolate Topping
In a microwave-safe bowl, melt 200 g of milk chocolate in 40-second intervals, stirring in between until smooth and creamy. This gentle heating ensures the chocolate doesn’t burn. Once melted, blend in an additional 10 g of melted salted butter for a silkier texture. Stir until fully combined. The topping will be glossy and ready to pour over your biscuit base.
Step 3: Assemble the Slice
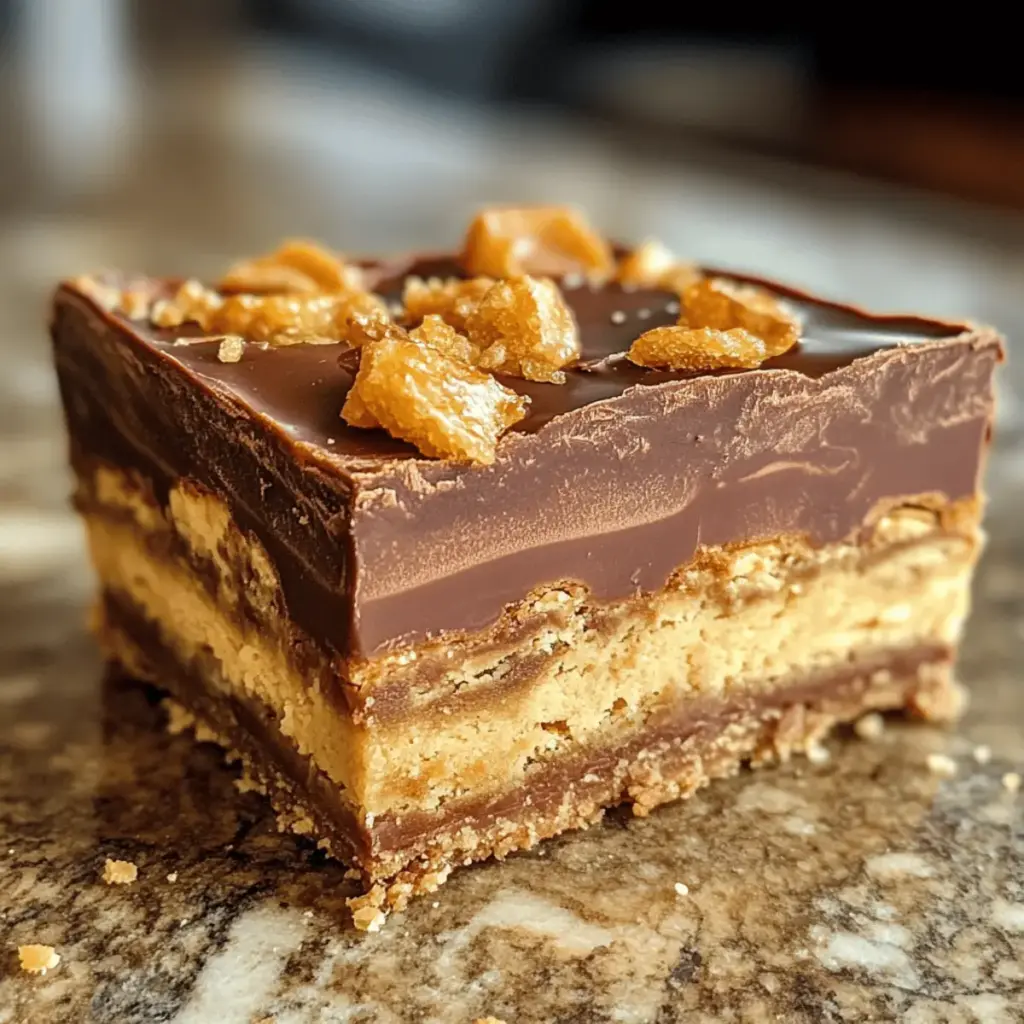
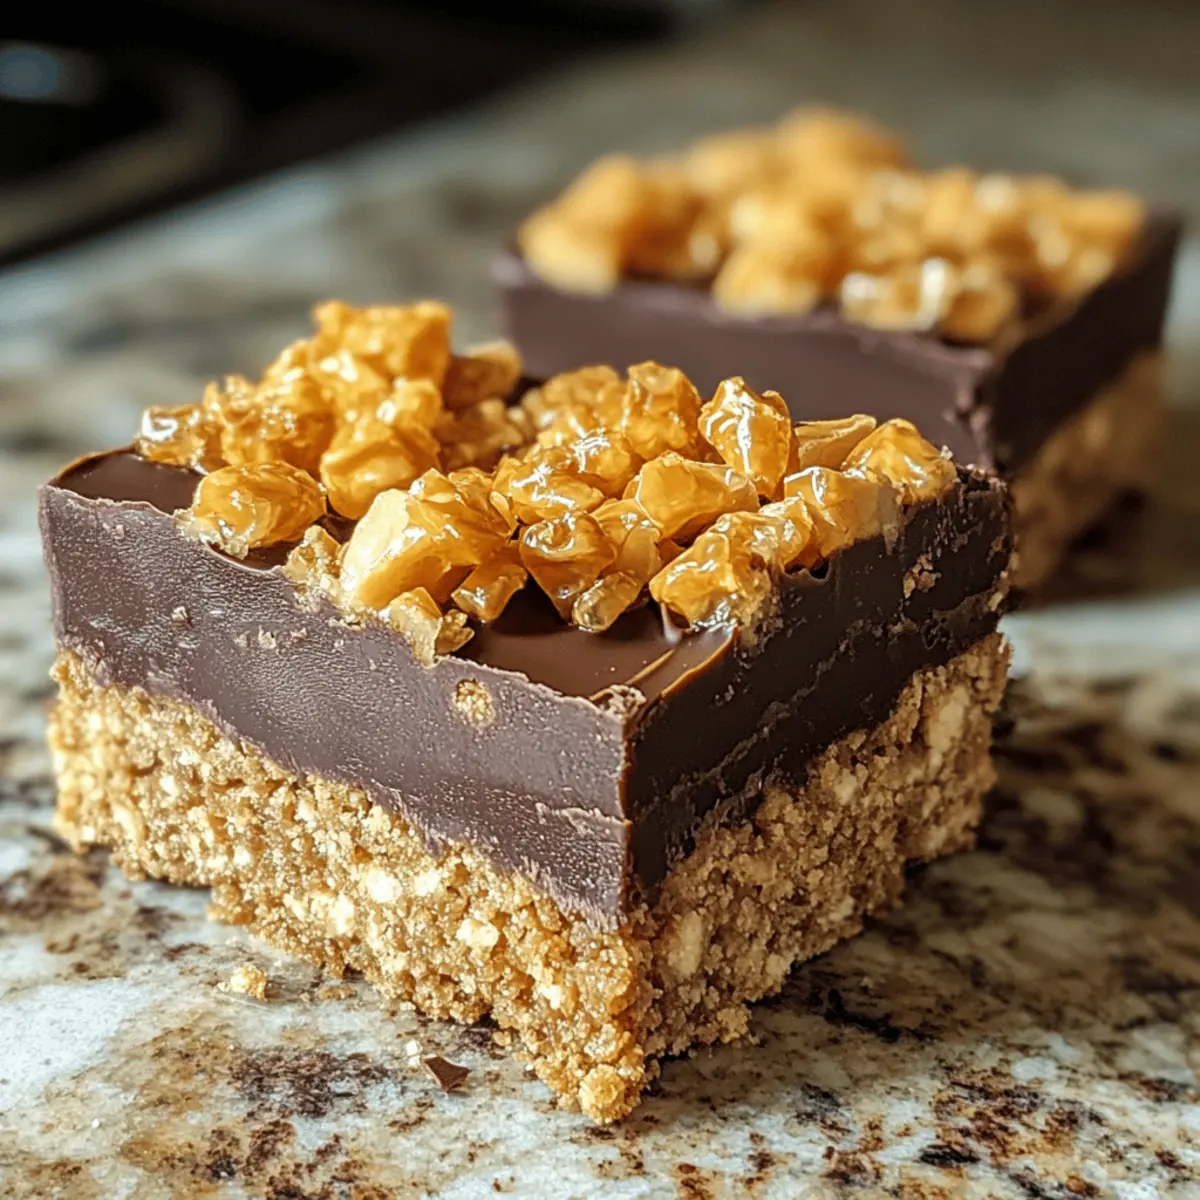
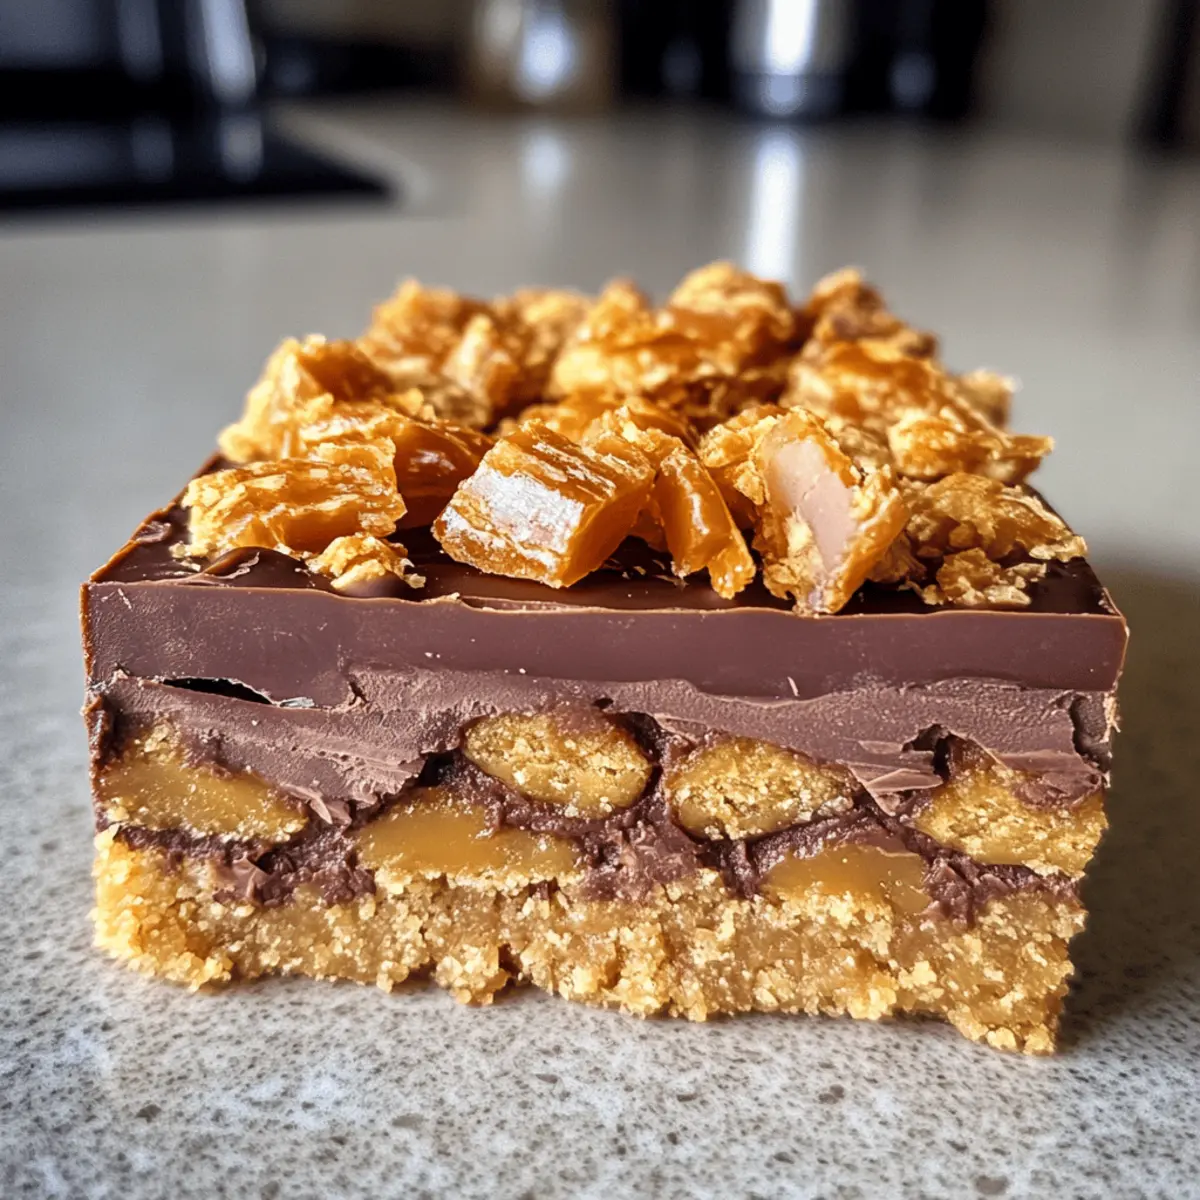
Carefully pour the melted chocolate mixture over the pressed biscuit base. Use a spatula to spread the chocolate evenly across the top, ensuring full coverage. Next, chop the remaining 2 Crunchie bars and sprinkle them over the chocolate layer, lightly pressing them into the chocolate for a delightful crunch throughout the No-Bake Crunchie Slice.
Step 4: Chill and Serve
Refrigerate the assembled slice for at least 3 hours, allowing it to set completely. After chilling, it should be firm to the touch. Once set, remove it from the tin and cut into 12–16 squares with a hot knife for clean edges. Serve chilled to enjoy the best texture and flavor of this delicious no-bake treat.
How to Store and Freeze No-Bake Crunchie Slice
Fridge: Keep the no-bake Crunchie slice in an airtight container in the fridge for up to 1 week. This helps maintain its delicious texture and flavor.
Freezer: For longer storage, wrap the slice tightly in plastic wrap and aluminum foil, freezing it for up to 3 months. Thaw in the fridge overnight before serving.
Serving: When ready to enjoy, cut the slice while still cold for neat portions. Let it sit at room temperature for about 10-15 minutes before serving for better texture.
Reheating: There’s no need to reheat this delightful treat, as it is best enjoyed chilled!
Expert Tips for No-Bake Crunchie Slice
-
Firmly Press: Make sure to press the biscuit mixture down firmly into the baking tin. This creates a solid base and prevents the slice from crumbling when cut.
-
Melt Chocolate Gently: Take your time when melting the chocolate. Stir it regularly in 40-second intervals to avoid burning; smooth chocolate is key for a perfect topping on your no-bake Crunchie slice.
-
Hot Knife Method: For a clean and neat cut, use a hot knife to slice through the chilled treat. This technique helps avoid a messy appearance while serving.
-
Keep It Chill: Let the slice chill in the fridge for at least 3 hours for the best texture. Cutting it too early can lead to a softer base that doesn’t hold together well.
-
Variety of Crunch: Don’t be afraid to experiment with different biscuits or chocolate types. This can lead to delightful variations of your no-bake Crunchie slice, keeping it interesting!
What to Serve With No-Bake Crunchie Slice
Elevate your dessert experience with delightful accompaniments that beautifully complement this indulgent treat.
-
Fresh Berries: Juicy strawberries or raspberries provide a refreshing contrast to the rich, chocolatey slice, adding a burst of natural sweetness.
-
Ice Cream Delight: A scoop of vanilla bean or salted caramel ice cream brings creaminess that pairs wonderfully with the crunchy texture, creating a dreamy dessert combination.
-
Coffee or Espresso: The bold flavors of a steaming cup enhance the sweetness of the slice, making for a delightful afternoon break feeling warm and cozy.
-
Whipped Cream Topping: Lightly sweetened whipped cream offers a fluffy texture that balances the chewiness of the Crunchie slice, inviting you to savor each bite even more.
-
Chocolate Sauce Drizzle: An extra drizzle of chocolate sauce intensifies the dessert experience, adding an indulgent touch that chocolate lovers will adore.
-
Nutty Granola: For a surprising crunch, serve with a side of nutty granola; the earthy flavors harmonize beautifully with the honeycomb pieces.
-
Crisp Sparkling Water: A refreshing sparkling water with a splash of lemon cleanses the palate, making each bite of your no-bake Crunchie slice even more enjoyable.
No-Bake Crunchie Slice Variations
Feel free to put your own spin on the beloved No-Bake Crunchie Slice, adding your favorite twists to this delightful treat.
-
Ginger Nut Biscuits: Swap digestive biscuits for ginger nut biscuits for a spicy kick that contrasts beautifully with the sweetness.
-
Nutty Crunch: Stir in a cup of crushed nuts, like almonds or hazelnuts, to the biscuit base for added texture and flavor.
-
Chocolate Overload: Use dark chocolate instead of milk chocolate for a richer, more decadent topping. It enhances the overall chocolate flavor!
-
Coconut Flake Twist: Incorporate a handful of unsweetened coconut flakes into the base for a tropical essence. The coconut adds a lovely chewiness that complements the honeycomb.
-
Salted Caramel Drizzle: Once set, drizzle with melted caramel sauce then sprinkle with a pinch of sea salt for a gourmet touch. This elevates your dessert into a sweet-salty masterpiece!
-
Heated Up: Add a bit of cayenne pepper to your melted chocolate topping for a subtle kick that contrasts with the sweet honeycomb crunch.
-
Butterscotch Bars: If Crunchie bars are hard to find, sub them with butterscotch chips for a differently delicious flavor that still adds the much-loved crunch.
Explore these delightful variations, and don’t forget to check out the recipe for Bake Biscoff Cheesecake for even more delicious dessert options to enjoy!
Make Ahead Options
These No-Bake Crunchie Slices are perfect for meal prep enthusiasts looking to save time during busy weeks! You can prepare the biscuit base and assemble the slices up to 24 hours in advance, storing them in the fridge for optimal freshness. To do this, simply follow the steps for the biscuit base, press it into the lined baking tin, and store it covered. When you’re ready to serve, melt the chocolate topping and pour it over the set base, adding the crunchy toppings as specified. This way, you’ll have a delightful dessert that’s just as delicious as if made fresh, ready to impress family and friends with minimal effort!

No-Bake Crunchie Slice Recipe FAQs
How do I choose the right digestive biscuits for the base?
Absolutely! Look for digestive biscuits that are crisp and fresh, as they provide the perfect crunch. If you notice any dark spots or breakage in the packaging, it’s best to choose another batch. For a twist, feel free to substitute them with Graham crackers, which offer a sweeter taste.
Advertisement
How should I store the No-Bake Crunchie Slice?
Very easy! Store your no-bake Crunchie slice in an airtight container in the fridge for up to 1 week. This ensures it remains fresh and tasty. Make sure to cut it into squares before storing to make it convenient for a quick snack!
Can I freeze the No-Bake Crunchie Slice?
Yes, you can! To freeze, wrap the entire slice tightly in plastic wrap and then again in aluminum foil. This will keep it fresh for up to 3 months. When you’re ready to enjoy it, simply thaw the slice in the fridge overnight before cutting and serving.
What if my chocolate topping is too thick?
If you find your chocolate topping has become too thick after melting, don’t worry! Just add a small amount of melted butter to the bowl and stir until you reach the desired smooth consistency. Melted chocolate should be glossy and pourable. If you stir regularly when melting, it can help avoid this issue altogether.
Is this No-Bake Crunchie Slice safe for kids and pets?
While this slice is safe for kids to enjoy in moderation, be cautious with pets! The chocolate and sweetened condensed milk are not suitable for pets, especially dogs, due to potential toxicity from chocolate. Always keep sweet treats out of reach of furry friends to ensure they stay safe.
Can I adjust the sweetness of the No-Bake Crunchie Slice?
Absolutely! If you prefer a less sweet treat, consider using dark chocolate for the topping, which has a deeper flavor with less sugar. Additionally, you can reduce the amount of condensed milk slightly, but be mindful that it may affect the binding consistency. Enjoy experimenting!

Delicious No-Bake Crunchie Slice: Easy 5-Ingredient Treat
Ingredients
Equipment
Method
- Crush 350 g of digestive biscuits in a food processor until fine. Mix with 100 g melted salted butter and 300 g sweetened condensed milk. Fold in chopped Crunchie bars, press into lined baking tin.
- Melt 200 g milk chocolate in 40-second intervals until smooth. Blend in 10 g melted salted butter for silkier topping.
- Pour melted chocolate over the biscuit base, spreading evenly. Chop remaining 2 Crunchie bars and sprinkle over chocolate.
- Refrigerate for at least 3 hours. Once set, cut into 12-16 squares with a hot knife and serve chilled.