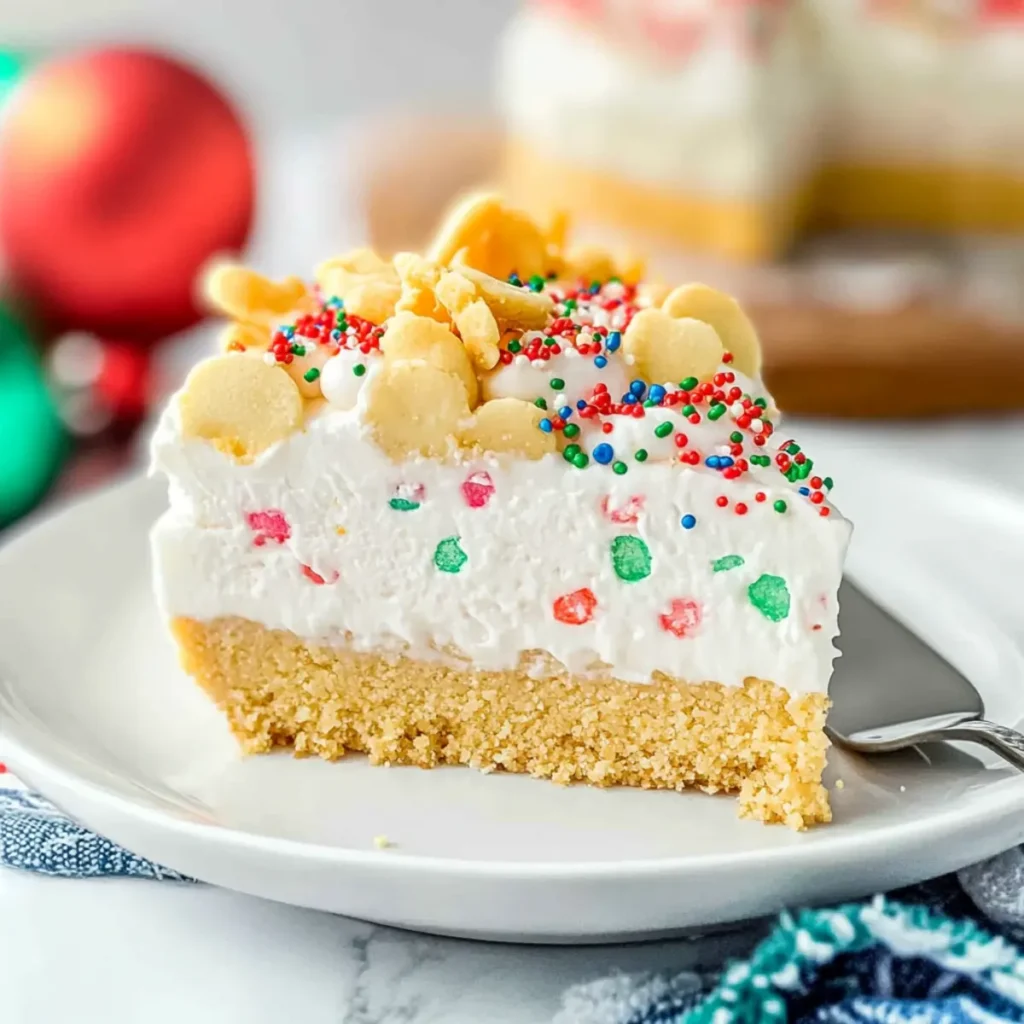
It was a cozy evening, snow gently falling outside, when I stumbled upon the ultimate holiday dessert that requires no baking: the No Bake Christmas Cookie Lush. This delightful treat layers rich cheesecake and creamy pudding on a buttery vanilla cookie crust, adorned with festive sprinkles for that extra holiday cheer. Not only is this dessert super easy to whip up, but it also makes for an impressive centerpiece at potlucks and family gatherings. The combination of smooth creaminess and a satisfying crunch will have everyone asking for seconds! Ready to spread some cheer in the kitchen and create a dessert that is as visually stunning as it is delicious? Let’s dive into this festive recipe together!
Why is this dessert a must-try?
No Bake Convenience: This festive dessert is perfect for those busy holiday days, requiring no oven time and minimal effort.
Crowd-Pleasing Appeal: The combination of creamy layers and crunchy cookie base is a universal favorite, making it an instant hit at any gathering.
Vibrant Presentation: Adorned with colorful holiday sprinkles, it’s not just delicious but also a stunning centerpiece that will wow your guests.
Customizable Options: Feel free to swap the vanilla Oreos for chocolate or add layers of fresh fruit, making it versatile for different tastes!
Make Ahead Perfection: Prepare it a day in advance for optimal flavor and a stress-free hosting experience, leaving you more time to enjoy the festivities.
No Bake Christmas Cookie Lush Ingredients
-
For the Crust
• Vanilla Oreo Cookies – These are the base and topping; feel free to substitute with any vanilla-flavored sandwich cookie or graham crackers for a different flavor profile.
• Butter – Essential for binding the cookie crumbs into a cohesive crust; use melted butter for the best results. -
For the Creamy Layers
• Cream Cheese – Provides rich creaminess; using full-fat cream cheese ensures the best texture, and make sure it’s at room temperature for easy mixing.
• Powdered Sugar – Sweetens the cream cheese without any grittiness, achieving a smooth layer.
• Whipped Topping – Adds a light texture to the creamy layers; you can use a tub variety for ease or substitute homemade whipped cream for freshness. -
For the Pudding Layer
• Cheesecake Instant Pudding Mix – Imparts a delightful cheesecake flavor to this luscious dessert; you can swap this for vanilla or white chocolate pudding mix for variety.
• Cold Milk – Crucial for preparing the pudding mix; whole milk is recommended for added richness. -
For Decoration
• Holiday Sprinkles – These add a festive touch for decoration; opt for vibrant varieties for a more colorful appearance.
Enjoy making this No Bake Christmas Cookie Lush and watch it become a beloved holiday tradition at your gatherings!
Step‑by‑Step Instructions for No Bake Christmas Cookie Lush
Step 1: Prepare the Pan
Start by optionally lining a 9×13 baking dish with parchment paper for easy removal. This step can save you time when serving the No Bake Christmas Cookie Lush, allowing you to lift the dessert out cleanly. Set the prepared pan aside while you move on to creating the crust.
Step 2: Crust Preparation
Crush 36 vanilla Oreo cookies into fine crumbs using a food processor or a zip-top bag with a rolling pin. In a mixing bowl, combine the cookie crumbs with ½ cup of melted butter and ½ tablespoon of holiday sprinkles until fully moistened. Press this mixture firmly into the bottom of your baking dish, forming an even layer that will serve as the base for your luscious dessert.
Step 3: Make Cream Cheese Layer
In a large mixing bowl, beat 8 ounces of softened cream cheese with 1 cup of powdered sugar and a splash of peppermint extract using an electric mixer until the mixture is smooth and creamy. Gently fold in 1 tub of whipped topping along with the remaining ½ tablespoon of holiday sprinkles until well combined. Spread this delightful cream cheese mixture evenly over the cookie crust.
Step 4: Prepare Pudding Layer
In another bowl, whisk together the cheesecake instant pudding mix with 2 cups of cold milk for about 2 minutes until it thickens. This should take around 2 minutes of vigorous whisking. Gently stir in another ½ tablespoon of holiday sprinkles to create a festive touch. Once thickened, spread this creamy pudding layer over the cream cheese layer, ensuring an even distribution.
Step 5: Final Assembly
Top the No Bake Christmas Cookie Lush with the remaining whipped topping, smoothing it out using a spatula. Crush the remaining 12 Oreo cookies into small pieces and sprinkle them on top, along with any leftover holiday sprinkles to add visual appeal. This final touch will make your dessert look even more festive and inviting.
Step 6: Chill
Refrigerate the assembled dessert for at least 4 hours, or preferably overnight, to allow all the layers to set beautifully. If you desire a firmer texture, you can freeze it for about 2 hours. The chilling time will enhance the flavors and ensure every scoop is perfectly layered.
Step 7: Serve
Once chilled, cut the No Bake Christmas Cookie Lush into squares using a sharp knife. For clean slices, consider allowing the dessert to thaw for about an hour after freezing. Serve this delightful holiday treat to your family and friends, and watch as they indulge in every creamy, crunchy layer!
Make Ahead Options
These No Bake Christmas Cookie Lush are perfect for busy home cooks looking to save time during the holiday rush! You can prepare each layer up to 24 hours in advance, allowing the flavors to meld beautifully. To do this, make the crust and cream cheese layer early and refrigerate them separately. Then, assemble the pudding layer right before serving for the best texture. If you make them a day ahead, simply let your assembled dessert chill overnight. This way, the dessert remains just as delicious and festive. When it’s time to serve, top with whipped cream, crushed Oreos, and sprinkles, and you’ll impress your guests with minimal effort!
What to Serve with No Bake Christmas Cookie Lush
Looking to create a full holiday meal that will delight your loved ones? Here are some festive side options to complement this delightful dessert.
-
Rich Hot Cocoa: This creamy and velvety drink enhances the festive atmosphere, balancing the sweet layers of your dessert with its chocolatey goodness.
-
Gingerbread Cookies: The spiced flavors of ginger and cinnamon in these classic cookies contrast beautifully with the creamy lush and add a delightful crunch.
-
Fresh Fruit Salad: A refreshing combination of seasonal fruits brings a burst of color, lightening the meal while providing a sweet, tart contrast to the lush.
-
Pumpkin Spice Latte: This warm, spiced beverage captures the essence of the season, creating a cozy moment paired with your indulgent dessert.
-
Peppermint Bark: The crisp, minty chocolate treats echo the refreshing notes in the lush, offering a synchrony of flavors that are sure to please everyone.
-
Nutty Caramel Cheesecake Bars: These rich bars have a satisfying crunch, harmonizing with the creamy texture of your No Bake Christmas Cookie Lush while introducing additional layers of flavor.
Each of these suggestions brings its own unique flair to your holiday spread, promising to elevate your dessert experience to new festive heights!
No Bake Christmas Cookie Lush Variations
Feel free to get creative with this festive dessert and customize it to suit your taste buds!
-
Fruit Additions: Add layers of fresh berries or fruit preserves for a vibrant pop of flavor that brightens each bite.
-
Chocolate Cookies: Swap vanilla Oreos for chocolate cookies to create a rich, decadent layer that chocolate lovers will adore.
-
Nutty Crunch: Sprinkle chopped nuts like pecans or walnuts on top for a delightful crunch that adds texture to your dessert.
-
Seasonal Spices: Incorporate spices like cinnamon or nutmeg into the cream cheese layer for a warm, holiday-inspired twist.
-
Flavored Whipped Topping: Use flavored whipped toppings like chocolate or vanilla bean for a unique layer that enhances the dessert’s creaminess.
-
Peppermint Twist: Stir in crushed peppermint candies into the cream cheese layer for a refreshing minty taste that’s perfect for the holidays.
-
Caramel Drizzle: Drizzle caramel sauce over the top before serving for an indulgent touch that contrasts beautifully with the creamy layers.
-
Marshmallow Fluff: Mix marshmallow fluff into the pudding layer for an extra sweet, pillowy texture that will have everyone craving more.
And if you’re looking for more delightful treats to serve alongside this lush dessert, consider checking out my Gingerbread Cupcakes Christmas or maybe some festive Christmas Cookie Exchange ideas to complete your holiday spread!
How to Store and Freeze No Bake Christmas Cookie Lush
-
Fridge: Store leftovers in an airtight container for up to 4 days to maintain freshness and flavor. Make sure to wrap the dessert tightly if it’s not in an airtight container.
-
Freezer: This delightful no bake dessert can be frozen for up to a month. Ensure it’s well-covered with plastic wrap, and consider using a container that can be sealed tightly for best results.
-
Thawing: When you’re ready to enjoy, thaw the No Bake Christmas Cookie Lush in the refrigerator overnight, allowing the creaminess to return to its luscious texture and the flavors to meld beautifully.
-
Serving After Freezing: For the best experience, let the dessert sit at room temperature for about 30 minutes after thawing before serving. This ensures it’s perfectly creamy and ready to impress!
Expert Tips for No Bake Christmas Cookie Lush
-
Softened Cream Cheese: Ensure cream cheese is fully softened to avoid lumps; cut it into smaller pieces and let it sit at room temperature for easier mixing.
-
Clean Slices: For neat slices, freeze the dessert briefly before cutting, allowing it to thaw for about an hour for easy serving.
-
Chill Time: Preparing the No Bake Christmas Cookie Lush a day in advance enhances the flavors and helps the layers set beautifully—chilling overnight is ideal!
-
Cookie Variations: Feel free to experiment with different cookie bases. While vanilla Oreos are delicious, using chocolate cookies can add a unique twist!
-
Layering Fun: Don’t hesitate to add fresh fruits or jams to your layers for extra flavor and a festive touch—your guests will love the added freshness!
No Bake Christmas Cookie Lush Recipe FAQs
What type of cookies should I use for the crust?
Absolutely! For the crust, I highly recommend using Vanilla Oreo Cookies, as they provide a perfect blend of flavor and crunch. However, if you’re looking for a different taste, you can substitute them with any vanilla-flavored sandwich cookie or even graham crackers for a delightful twist.
How long can I store the leftovers of this dessert?
Very! You can store the No Bake Christmas Cookie Lush in an airtight container in the refrigerator for up to 4 days. Just make sure it’s tightly wrapped if it’s not in an airtight container to keep it fresh and delicious!
Advertisement
Can I freeze the No Bake Christmas Cookie Lush? If so, how?
Definitely! You can freeze this luscious dessert for up to a month. First, ensure it’s well-covered with plastic wrap. I often recommend using a sealed container to prevent freezer burn. When you’re ready to enjoy, thaw it in the refrigerator overnight and let it sit at room temperature for about 30 minutes before serving for the best texture.
What if my cream cheese layer has lumps?
No worries! If your cream cheese layer has lumps, this likely means that the cream cheese was too cold. Make sure to let it sit out at room temperature for at least 30 minutes before mixing it. Cutting it into smaller pieces can also help it soften more quickly.
Are there any allergy considerations for this recipe?
Yes! This No Bake Christmas Cookie Lush contains dairy and gluten due to the butter, cream cheese, and cookies. If you have a gluten allergy, you can use gluten-free cookies and make sure to select gluten-free pudding mix. Additionally, check for any lactose sensitivities, as there are dairy ingredients; using lactose-free cream cheese and whipped topping can be a great alternative.
Can I customize the sprinkles used on top?
The more the merrier! Feel free to customize the holiday sprinkles based on your preference. Vibrant colors enhance the festive appearance, but if you want a more subtle look, even a simple dusting of powdered sugar can be beautiful!

No Bake Christmas Cookie Lush: A Festive Delight for Everyone
Ingredients
Equipment
Method
- Optionally line a 9x13 baking dish with parchment paper for easy removal.
- Crush 36 vanilla Oreo cookies into fine crumbs. Combine with melted butter and holiday sprinkles.
- Press the mixture into the bottom of the baking dish.
- Beat cream cheese with powdered sugar until smooth; fold in whipped topping and holiday sprinkles.
- Spread the cream cheese mixture over the crust.
- Whisk pudding mix with cold milk until thick, then fold in more holiday sprinkles.
- Spread the pudding over the cream cheese layer.
- Top with remaining whipped topping, crushed Oreo cookies, and sprinkles.
- Refrigerate for at least 4 hours or overnight before serving.
- Cut into squares and serve.