Introduction to Matilda’s Chocolate Cake
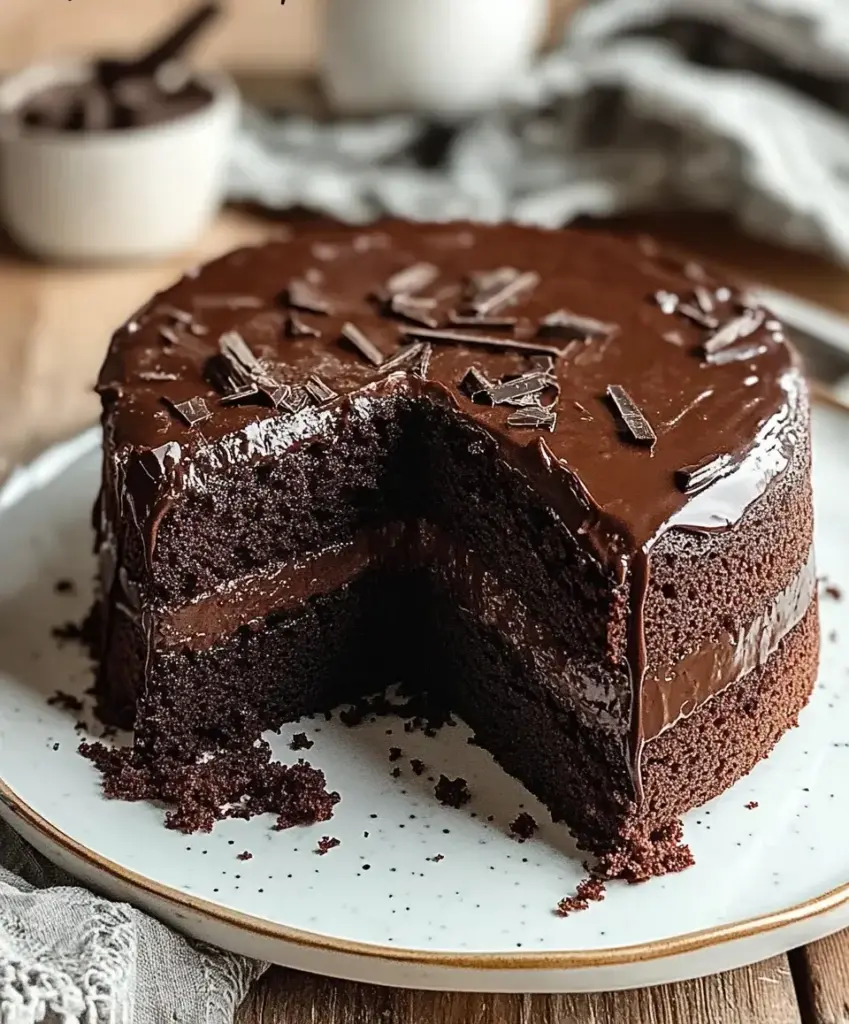
There’s something magical about a rich, moist chocolate cake that brings people together. Matilda’s Chocolate Cake is just that—a delightful treat that can turn an ordinary day into a celebration. Whether you’re looking to impress your loved ones or simply satisfy a sweet craving, this recipe is your go-to solution. It’s easy to whip up, making it perfect for busy weeknights or special occasions. Trust me, once you take that first bite, you’ll understand why this cake has a special place in my heart and kitchen.
Why You’ll Love This Matilda’s Chocolate Cake
This Matilda’s Chocolate Cake is a dream come true for any home cook. It’s incredibly easy to make, requiring just a handful of ingredients you likely already have. The rich, chocolatey flavor is simply irresistible, making it a hit at any gathering. Plus, it bakes up quickly, so you can satisfy your sweet tooth without spending hours in the kitchen. Trust me, this cake will become your new favorite dessert!
Ingredients for Matilda’s Chocolate Cake
Gathering the right ingredients is the first step to creating Matilda’s Chocolate Cake. Each component plays a vital role in achieving that rich, moist texture and decadent flavor. Here’s what you’ll need:
- All-purpose flour: The backbone of the cake, providing structure and stability.
- Granulated sugar: Sweetens the cake and helps create a tender crumb.
- Unsweetened cocoa powder: Adds that deep chocolate flavor we all crave.
- Baking powder: A leavening agent that helps the cake rise beautifully.
- Baking soda: Works with the cocoa to enhance the cake’s texture.
- Salt: Balances the sweetness and enhances the overall flavor.
- Large eggs: Provide moisture and richness, helping to bind the ingredients together.
- Whole milk: Adds creaminess and contributes to the cake’s moistness.
- Vegetable oil: Keeps the cake tender and adds moisture.
- Vanilla extract: A must-have for that warm, aromatic flavor.
- Boiling water: This secret ingredient makes the batter thin, resulting in a super moist cake.
For the frosting, you’ll need:
- Unsalted butter: Creates a creamy base for the frosting.
- Unsweetened cocoa powder: Infuses the frosting with rich chocolate flavor.
- Powdered sugar: Sweetens and thickens the frosting to the perfect consistency.
- Whole milk: Helps achieve a smooth, spreadable texture.
- Vanilla extract: Adds depth to the frosting’s flavor.
For those looking to mix things up, consider adding a teaspoon of espresso powder to the batter for an extra flavor boost. You can also swap half of the all-purpose flour with whole wheat flour for a slightly healthier twist. Exact measurements for all these ingredients can be found at the bottom of the article, ready for printing!
How to Make Matilda’s Chocolate Cake
Step 1: Preheat and Prepare
Start by preheating your oven to 350°F (175°C). This ensures your cake bakes evenly. While the oven warms up, grab two 9-inch round cake pans. Grease them with butter or cooking spray, then dust with flour. This step is crucial; it prevents the cake from sticking. Trust me, there’s nothing worse than a cake that won’t come out of the pan!
Step 2: Mix Dry Ingredients
In a large mixing bowl, combine the all-purpose flour, granulated sugar, cocoa powder, baking powder, baking soda, and salt. Whisk these dry ingredients together until they’re well blended. This step is essential for even distribution of flavors. The cocoa powder should be fully incorporated, ensuring every bite of Matilda’s Chocolate Cake is rich and chocolatey. It’s like a dance party for your dry ingredients!
Step 3: Combine Wet Ingredients
Now, it’s time to add the wet ingredients. Crack in the large eggs, pour in the whole milk, vegetable oil, and vanilla extract. Beat this mixture on medium speed for about two minutes until it’s smooth and creamy. This is where the magic begins! The wet ingredients will bring life to the dry mix, creating a luscious batter that’s hard to resist.
Step 4: Add Boiling Water
Here’s the secret weapon: boiling water. Carefully stir in one cup of boiling water into the batter. It may seem odd, but this step is vital for achieving that moist texture. The hot water helps to bloom the cocoa powder, enhancing the chocolate flavor. Don’t worry if the batter looks thin; that’s exactly how it should be!
Step 5: Bake the Cake
Pour the batter evenly into your prepared cake pans. Slide them into the preheated oven and bake for 30-35 minutes. To check for doneness, insert a toothpick into the center of the cakes. If it comes out clean, you’re good to go! The aroma wafting through your kitchen will be heavenly, making it hard to wait for the cakes to cool.
Step 6: Cool the Cakes
Once baked, let the cakes cool in the pans for about 10 minutes. This allows them to set properly. After that, gently remove them from the pans and transfer them to wire racks. Cooling completely is crucial; frosting a warm cake can lead to a melty mess. Patience is key here, but the wait will be worth it!
Step 7: Make the Frosting
While the cakes cool, let’s whip up the frosting. In a medium bowl, beat the softened unsalted butter until it’s creamy. Gradually add the unsweetened cocoa powder and powdered sugar, alternating with the whole milk. Mix until smooth and fluffy. Stir in the vanilla extract for that extra kick. This frosting is rich and decadent, just like the cake!
Step 8: Assemble the Cake
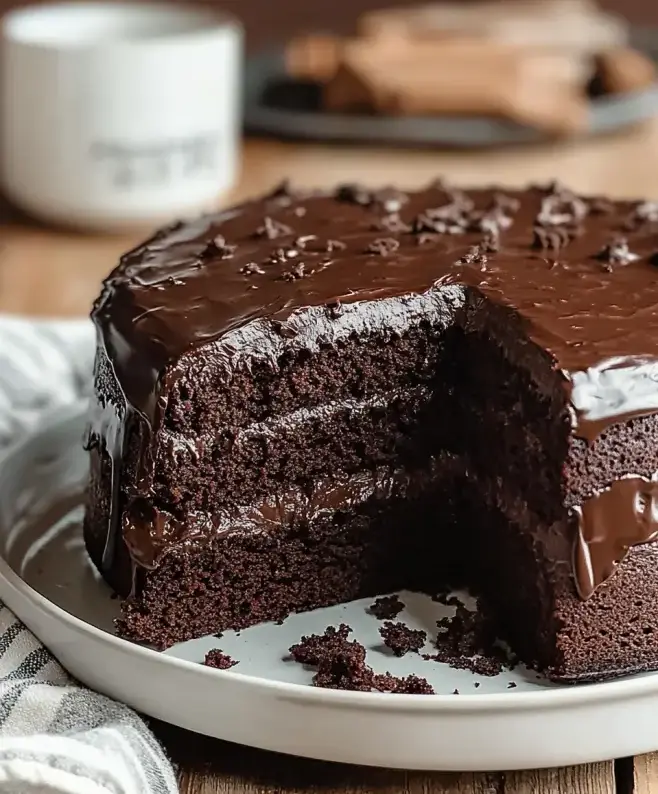
Once the cakes are completely cool, it’s time to assemble. Place one layer on a serving plate and spread a generous layer of frosting on top. Carefully place the second layer on top and frost the top and sides of the cake. Don’t be shy with the frosting; it’s the best part! Your Matilda’s Chocolate Cake is now ready to impress!
Tips for Success
- Measure your ingredients accurately for the best results.
- Use room temperature eggs and milk for a smoother batter.
- Don’t skip the cooling time; it prevents frosting from melting.
- For a richer flavor, add a teaspoon of espresso powder to the batter.
- Store leftovers in an airtight container to keep the cake moist.
Equipment Needed
- Mixing bowls: A large bowl for dry ingredients and a medium bowl for wet ingredients.
- Whisk: Essential for blending dry ingredients; a fork can work in a pinch.
- Measuring cups and spoons: Accurate measurements are key; use a kitchen scale for precision.
- 9-inch round cake pans: If you don’t have these, any similar-sized pans will do.
- Cooling racks: Helps cakes cool evenly; a plate can substitute if needed.
Variations
- Gluten-Free Option: Substitute all-purpose flour with a gluten-free flour blend for a delicious gluten-free version.
- Vegan Twist: Replace eggs with flaxseed meal and use almond or soy milk instead of whole milk.
- Mint Chocolate Cake: Add a teaspoon of peppermint extract to the batter for a refreshing minty flavor.
- Chocolate Chip Delight: Fold in a cup of chocolate chips into the batter for extra chocolatey goodness.
- Nutty Addition: Incorporate chopped walnuts or pecans for a delightful crunch and added flavor.
Serving Suggestions
- Pair with a scoop of vanilla ice cream for a classic dessert combo.
- Serve alongside fresh berries for a burst of color and flavor.
- Drizzle with chocolate sauce for an extra indulgent touch.
- Enjoy with a cup of coffee or a glass of milk.
- Garnish with chocolate shavings or sprinkles for a festive presentation.
FAQs about Matilda’s Chocolate Cake
Can I make Matilda’s Chocolate Cake ahead of time?
Absolutely! This cake actually tastes better the next day as the flavors meld together. Just store it in an airtight container at room temperature for up to three days, or refrigerate it for longer freshness.
What can I substitute for eggs in this recipe?
If you’re looking for an egg substitute, try using 1/4 cup of unsweetened applesauce or a flaxseed meal mixture (1 tablespoon of flaxseed meal mixed with 2.5 tablespoons of water). Both options work well in Matilda’s Chocolate Cake!
How do I store leftover cake?
To keep your Matilda’s Chocolate Cake moist, store it in an airtight container. If you have a lot left, you can also wrap individual slices in plastic wrap and freeze them for a sweet treat later on.
Can I use a different type of frosting?
Advertisement
Of course! While the chocolate frosting is a classic choice, you can experiment with cream cheese frosting, whipped cream, or even a simple glaze. Each will give a unique twist to your Matilda’s Chocolate Cake.
Is this cake suitable for special diets?
Yes! With a few adjustments, you can make Matilda’s Chocolate Cake gluten-free or vegan. Just follow the variations mentioned earlier, and you’ll have a delicious cake that everyone can enjoy!
Final Thoughts
Matilda’s Chocolate Cake is more than just a dessert; it’s a celebration of life’s sweet moments. Each slice is a reminder of the joy that comes from sharing something delicious with family and friends. The rich, moist texture and decadent chocolate flavor create a delightful experience that lingers long after the last bite. Whether it’s a birthday, a casual gathering, or simply a treat for yourself, this cake brings smiles and warmth to any occasion. So, roll up your sleeves, embrace the process, and let Matilda’s Chocolate Cake become a cherished part of your culinary adventures!
Matilda's Chocolate Cake: Discover the Ultimate Recipe!
Ingredients
Method
- Preheat your oven to 350°F (175°C). Grease and flour two 9-inch round cake pans.
- In a large mixing bowl, combine the flour, sugar, cocoa powder, baking powder, baking soda, and salt. Whisk together until well blended.
- Add the eggs, milk, vegetable oil, and vanilla extract to the dry ingredients. Beat on medium speed for 2 minutes until smooth.
- Carefully stir in the boiling water until the batter is well combined (the batter will be thin).
- Pour the batter evenly into the prepared cake pans. Bake for 30-35 minutes or until a toothpick inserted in the center comes out clean.
- Allow the cakes to cool in the pans for 10 minutes, then remove them from the pans and transfer to wire racks to cool completely.
- For the frosting, beat the softened butter in a medium bowl until creamy. Gradually add the cocoa powder and powdered sugar, alternating with the milk, and mix until smooth. Stir in the vanilla extract.
- Once the cakes are completely cool, place one layer on a serving plate and spread a layer of frosting on top. Place the second layer on top and frost the top and sides of the cake.
- Serve immediately or refrigerate for up to 3 days.
Nutrition
Notes
- For a richer flavor, consider adding a teaspoon of espresso powder to the batter.
- You can also substitute half of the all-purpose flour with whole wheat flour for a slightly healthier version.