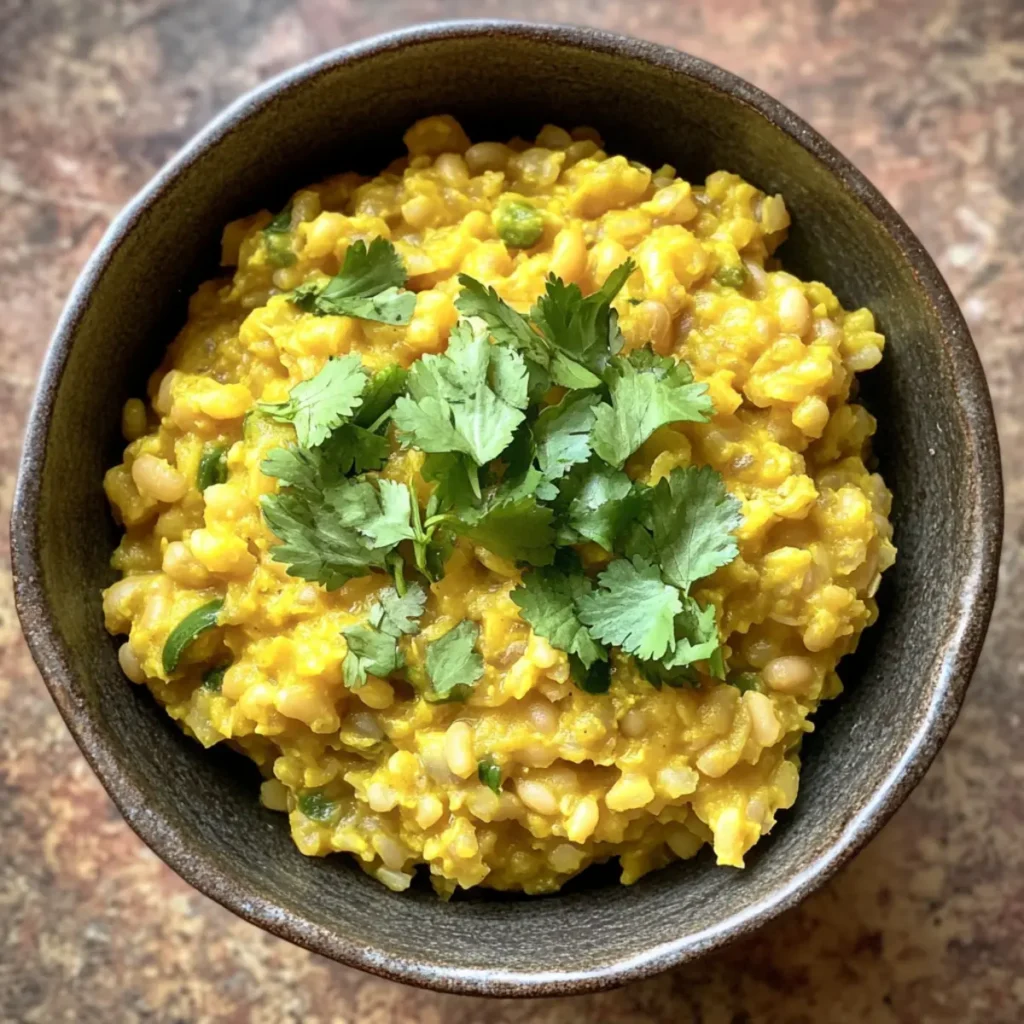
As I stirred the pot, the inviting aroma of toasted cumin seeds danced through my kitchen, instantly transporting me to a cozy, sunlit corner of India. This is the magic of Kitchari—a traditional Ayurvedic dish that harmoniously blends yellow split mung beans and fragrant Basmati rice. With its creamy, porridge-like texture, this nourishing meal is not only gluten-free and vegan-friendly but also a warming comfort food that brings solace after a long day. What I love most about Kitchari is how effortlessly you can make it—perfect for those busy evenings when all you crave is a bowl of pure, wholesome goodness. Are you ready to dive into a world of flavors that heal and satisfy? Let’s get cooking!
Why is Kitchari a must-try recipe?
Nourishing, Kitchari is a powerhouse of nutrition, bringing together protein-rich mung beans and fiber-filled rice for a wholesome meal. Comforting, its creamy texture promises to warm your soul, making it ideal for cozy dinners. Versatile, you can easily adjust spices or toss in seasonal veggies, allowing for endless customization. Quick and easy, it’s perfect for busy weeknights, with minimal prep and cooking time. Why settle for fast food when you can indulge in homemade, healing flavors? Discover more nourishing meal ideas like this one in our Ayurvedic recipe collection.
Kitchari Ingredients
Unlock the secrets to this nourishing Ayurvedic dish!
-
For the Base
-
Moong Dal (Split Mung Beans) – Provides essential protein and fiber; while authenticity dictates this choice, feel free to substitute with red lentils for a different flavor.
-
Basmati Rice – Acts as the aromatic cornerstone of the dish; Jasmine rice can also be used if you prefer a slightly sweeter taste.
-
Water – Essential for cooking; using vegetable broth will deepen the flavor and enhance the overall dish experience.
-
For Flavor and Texture
-
Oil/Ghee – Adds a silky richness; for a vegan option, coconut oil or avocado oil are fabulous alternatives.
-
Cumin Seeds – Infuse a warm, nutty flavor when toasted; ground cumin works in a pinch but won’t provide the same texture.
-
Fresh Ginger – Contributes a zingy warmth; opt for ground ginger if fresh is unavailable, though fresh is preferred.
-
Turmeric – A vital ingredient for its color and anti-inflammatory properties; don’t skip this for a traditional taste.
-
Sea Salt & Black Pepper – Fundamental to enhance flavors; taste and adjust according to your preference.
-
For Garnish
-
Fresh Cilantro – Brightens the dish and gives a fresh finish; consider pairing with lime or lemon slices for a zesty accent when serving.
With just these simple yet impactful Kitchari ingredients, you’re on your way to crafting a dish that nourishes both body and soul!
Step‑by‑Step Instructions for Kitchari
Step 1: Soak Rice and Beans
In a mixing bowl, combine the Basmati rice and moong dal (split mung beans), then cover them with water. Let the mixture soak for 15-20 minutes to soften the grains. After soaking, drain and rinse until the water runs clear, ensuring any excess starch is removed for a fluffy texture in your Kitchari.
Step 2: Warm Oil and Spices
In a large pot, heat 2 tablespoons of oil or ghee over medium heat. Once the oil is warm, add the cumin seeds and toast them for about 1 minute until fragrant. As the seeds begin to sizzle, stir in the chopped fresh ginger and turmeric, allowing them to infuse the oil for a delightful aroma that enhances the flavors of the Kitchari.
Step 3: Combine Ingredients
After your spices are aromatic, carefully add the soaked rice and dal to the pot, stirring to coat them with the oil and spices. Pour in 4 cups of water, season with sea salt and black pepper, and mix everything together well. This mixture is the foundation of your Kitchari, so ensure all ingredients are evenly combined.
Step 4: Simmer
Increase the heat to bring the Kitchari to a gentle boil, then reduce it to a simmer, leaving the pot uncovered. Let the Kitchari cook for approximately 30 minutes, stirring occasionally. Keep an eye on the mixture; you want it to thicken to a creamy, porridge-like consistency, perfect for a nourishing meal.
Step 5: Taste and Adjust
After simmering, check the texture of your Kitchari. If it feels too thick, stir in a splash of additional water to reach your desired consistency. Additionally, taste the dish and adjust the seasoning of salt and pepper as needed, ensuring every bowl of Kitchari is full of flavor before serving.
Step 6: Serve
Once your Kitchari has reached the perfect creamy texture, serve it hot in bowls. Garnish with fresh cilantro for a burst of color and flavor. Kitchari can be enjoyed on its own or paired with a wedge of lime or yogurt for a meal that is both comforting and satisfying.
How to Store and Freeze Kitchari
-
Fridge: Store Kitchari in an airtight container for up to 3 days. Ensure it has cooled completely before sealing to maintain freshness.
-
Freezer: Freeze Kitchari in a freezer-safe container for up to 2 months. Allow it to cool before portioning for convenient reheating later.
-
Reheating: When ready to enjoy, add a splash of water to your Kitchari and warm it on the stovetop over low heat. Stir well to achieve that creamy texture once again.
-
Texture Tip: The consistency may thicken while stored; don’t hesitate to adjust with a little extra water as you reheat to bring back its deliciously creamy nature.
Kitchari Variations & Substitutions
Feel free to get creative with your Kitchari, allowing the flavors and ingredients to dance to your liking!
- Dairy-Free: Replace ghee with coconut oil or avocado oil for a smooth, vegan-friendly alternative.
- Vegetable Boost: Add chopped carrots, spinach, or peas in the last few minutes of cooking for a nutrition-packed twist.
- Spicy Kick: Stir in a pinch of cayenne pepper or fresh chopped green chilies while cooking for a zing that awakens your taste buds.
- Lentil Alternatives: Substitute moong dal with red lentils for a different flavor profile; they’ll still create a creamy consistency.
- Broth Upgrade: Use vegetable or mushroom broth instead of water for a deeper, umami flavor in your Kitchari.
- Herb Infusion: Toss in fresh herbs like basil or mint during cooking for an aromatic lift to your comforting dish.
- Nutty Texture: Add a handful of toasted nuts or seeds on top before serving for a satisfying crunch that contrasts with the creaminess.
- Curry-Style: Incorporate mustard seeds or curry leaves for an authentic Ayurvedic touch that elevates the flavor depth.
With these variations, your Kitchari can transform into a delightful new experience with each serving. If you enjoy experimenting more with Ayurvedic cooking, check out our Ayurvedic recipe collection for other delicious ideas!
Expert Tips for Kitchari
-
Soaking Matters: Start by soaking the rice and moong dal for 15-20 minutes. It enhances the texture and helps cook everything evenly in your Kitchari.
-
Balance the Spices: Kitchari is meant to be comforting. Taste as you go and adjust spices to match your personal preference, ensuring the dish remains warming and wholesome.
-
Watch the Simmer: Simmer uncovered to allow excess water to evaporate. This is crucial for achieving that desired creamy, porridge-like consistency in your Kitchari.
-
Add Veggies for Nutrition: Enhance your dish by adding seasonal vegetables like spinach or carrots in the last few minutes of cooking for a nutritious twist.
-
Reheat with Care: When reheating your Kitchari, add a splash of water to maintain its creamy texture. This way, you’ll enjoy a delightful bowl every time!
What to Serve with Kitchari
Embrace the comforting flavors of Kitchari by pairing it with delightful accompaniments that elevate your dining experience.
- Crisp Side Salad: A fresh mix of greens, cucumber, and tomatoes brings brightness and crunch, balancing the creamy textures of Kitchari.
- Cooling Yogurt: A dollop of plain yogurt or a dollop of coconut yogurt offers a soothing contrast, enhancing each flavorful bite.
- Roasted Vegetables: Seasonal roasted veggies like carrots and zucchini add savory sweetness, complementing the earthy flavors of your nourishing dish.
- Spiced Chutney: A tangy cilantro or mango chutney provides a zesty kick, enhancing the aromatic spices in the Kitchari.
- Warm Naan or Roti: Cozy up with warm Indian flatbreads, perfect for scooping up Kitchari and adding delightful layers of flavor.
- Lime Wedges: A squeeze of fresh lime juice brightens the dish, bringing out the aromatic spices and refreshing every mouthful.
- Mint Tea: End your meal on a soothing note with a warm cup of mint tea, which aids digestion and complements the flavors beautifully.
- Apple Crisp: For a sweet finish, serve a warm apple crisp—it balances the savory profile of Kitchari wonderfully, rounding out your meal.
Make Ahead Options
Kitchari is a fantastic choice for meal prep enthusiasts! You can soak the moong dal and Basmati rice up to 24 hours in advance, which not only saves time but also helps them cook more evenly. After soaking, drain and store the mixture in an airtight container in the refrigerator. Additionally, the spices can be pre-measured and combined ahead of time, enhancing the flavors when you cook. When you’re ready to enjoy your Kitchari, simply warm your oil, add the spices for a fragrant infusion, then mix in the soaked and rinsed rice and dal with water. You’ll have a nourishing meal ready in no time, just as delicious as when prepared fresh!
Kitchari Recipe FAQs
What type of moong dal should I use for Kitchari?
Absolutely! For an authentic Kitchari experience, I recommend using split mung beans (moong dal). They provide a mild flavor and creamy texture. However, if you’re looking for an alternative, red lentils work in a pinch, but keep in mind they will change the dish’s traditional taste slightly.
How should I store leftover Kitchari?
Store Kitchari in an airtight container in the fridge for up to 3 days. It’s important to let it cool completely before sealing to preserve its freshness. If you’d like to enjoy it later, you can freeze it!
Can I freeze Kitchari, and if so, how?
Yes, you can! To freeze Kitchari, let it cool completely before portioning it into freezer-safe containers. It can be stored for up to 2 months. When you’re ready to enjoy it, simply thaw in the refrigerator overnight and reheat on the stovetop with a splash of water, stirring well to restore its creamy consistency.
Advertisement
What if my Kitchari turns out too thick?
Very! If your Kitchari is too thick after cooking, it’s an easy fix. Just add a little water, about a ¼ cup at a time, and stir it in until you reach your desired texture. Remember to adjust the salt and seasoning if necessary.
Is Kitchari suitable for those with food allergies?
Indeed! Kitchari is naturally gluten-free and can be made vegan. However, always be sure to check your spices and oils for any potential allergens. If you have nut allergies, opt for oils like avocado or sunflower instead of ghee, and feel free to customize the spices according to your dietary needs.
Can I add vegetables to my Kitchari?
Absolutely! Adding vegetables like spinach, carrots, or peas toward the end of cooking not only boosts the nutritional content but also enhances the flavors. Just remember to adjust your cooking time accordingly, keeping an eye on the veggies so they don’t become overly soft while still maintaining their brightness.

Creamy Kitchari: Comforting Ayurvedic Bliss at Home
Ingredients
Equipment
Method
- Soak rice and beans in water for 15-20 minutes, then drain and rinse.
- Warm oil or ghee in a large pot, add cumin seeds, toast for 1 minute.
- Stir in fresh ginger and turmeric, then add soaked rice and dal, stirring to coat.
- Pour in water, season with salt and pepper, and combine well.
- Bring to a boil, reduce to simmer uncovered for about 30 minutes.
- Check and adjust the texture, then serve hot garnished with cilantro.