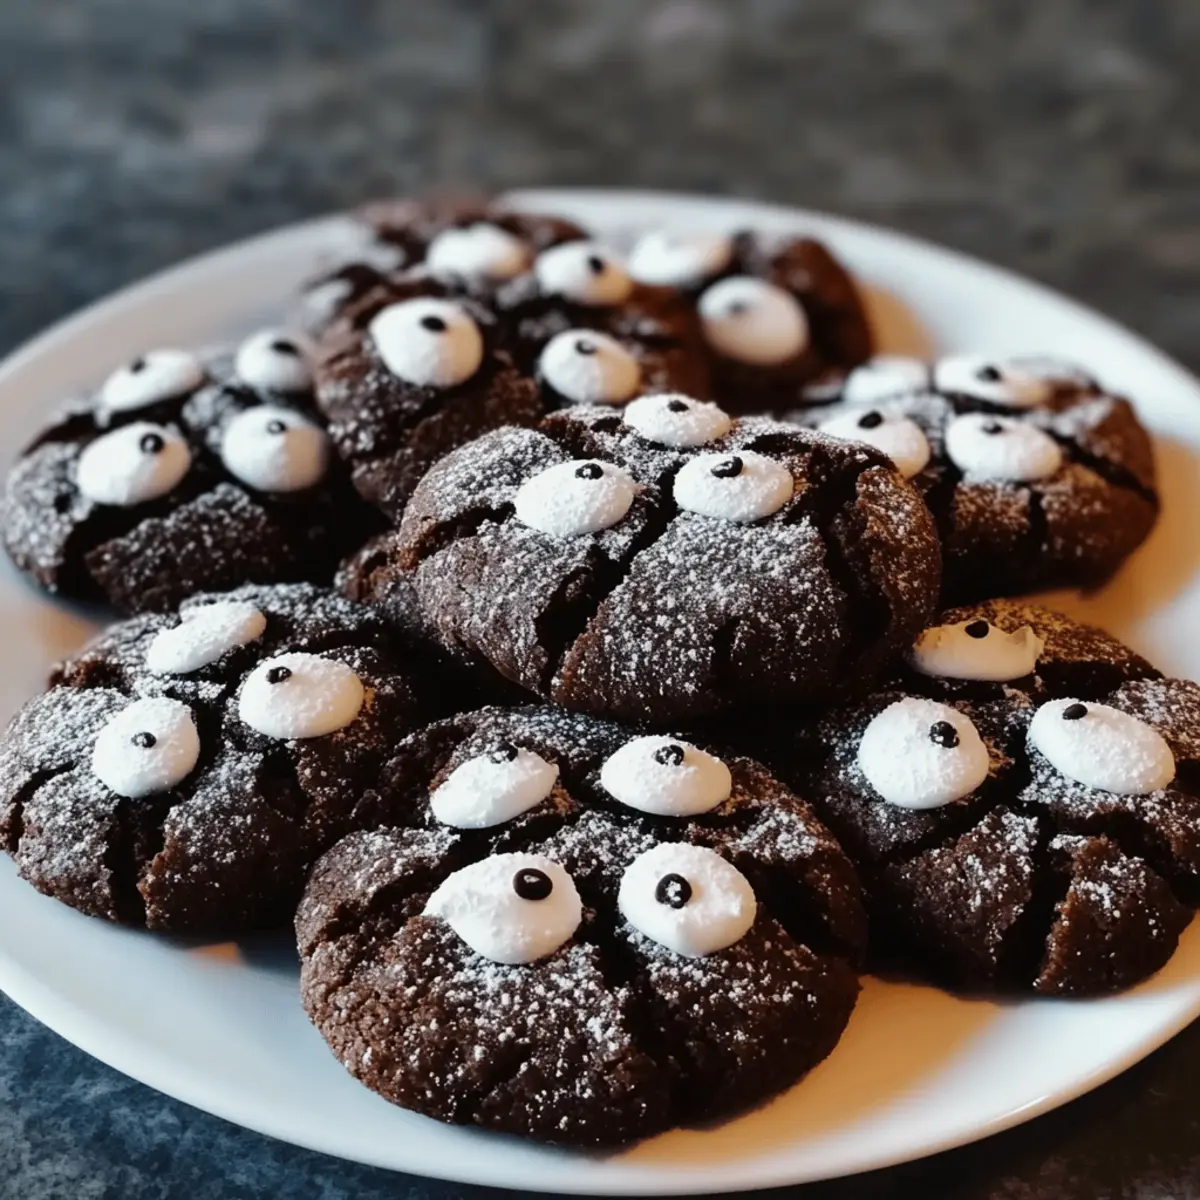
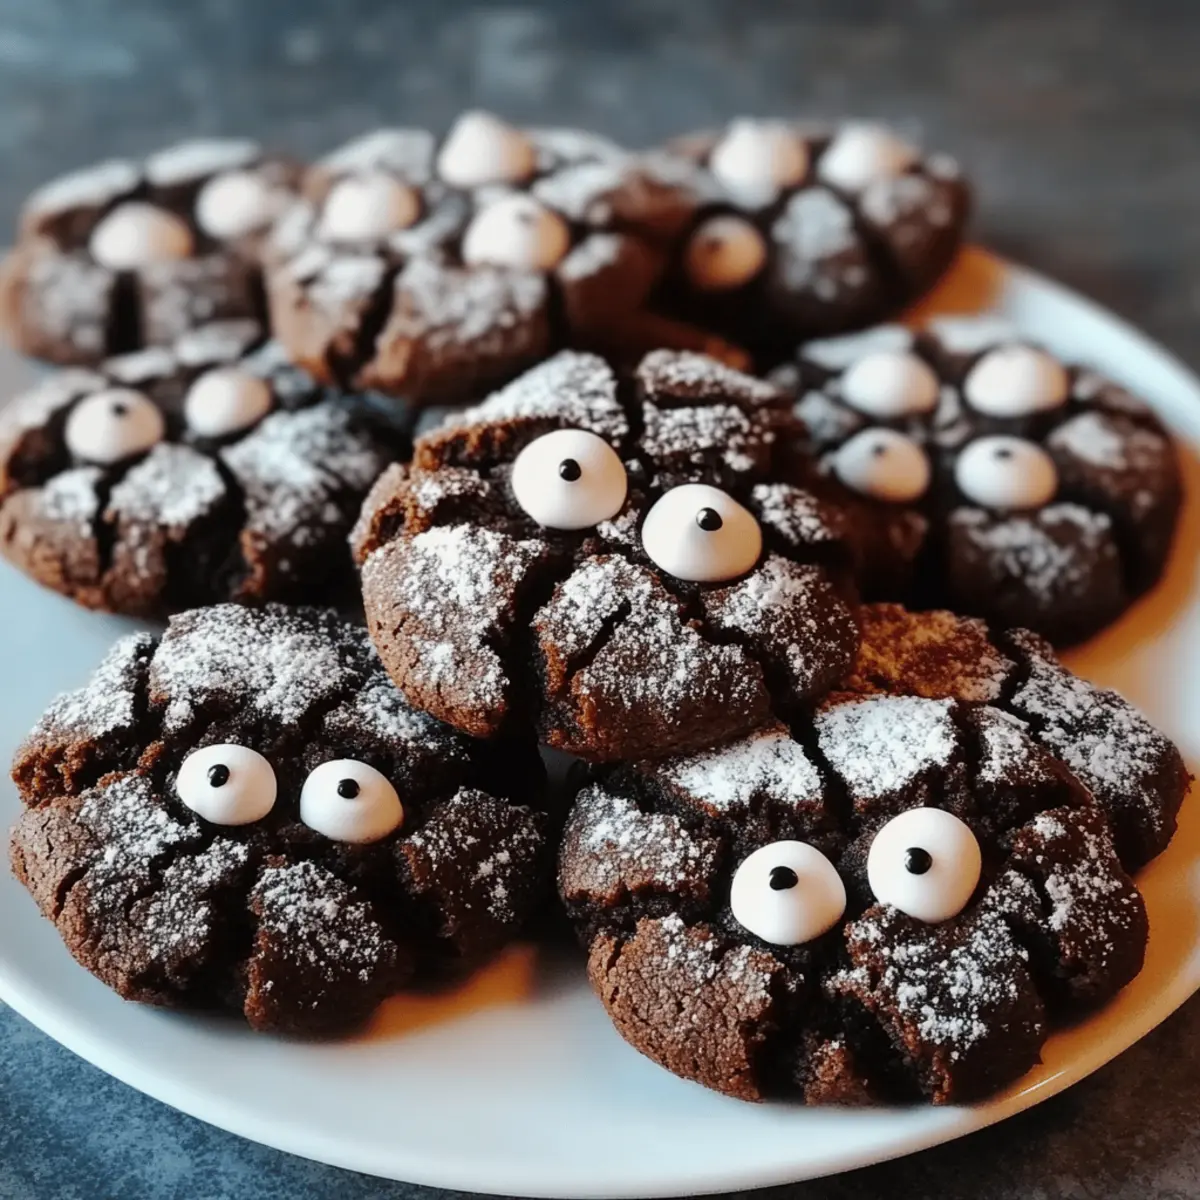
As the leaves start to fall and the air gets a little crisper, I can almost taste the excitement of Halloween. There’s something truly enchanting about snuggling up with a plate of Halloween Crinkle Cookies—fudgy, soft, and a little spooky! These cookies are not just a treat; they bring joy to kids and adults alike, transforming any gathering into a celebration of flavor and fun. With their delightful crackled tops and the option to adorn them with candy eyes or spooky decorations, they’re perfect for parties or cozy movie nights at home. Plus, they come together in no time, making them a go-to recipe for busy evenings. Curious about how to create these festive delights? Let’s dive into the delicious world of Halloween baking together!
Why Celebrate Halloween with These Cookies?
Joyful Experience: Baking these Halloween Crinkle Cookies is a delightful adventure that will spark creativity in both kids and adults.
Fudgy Goodness: Each bite reveals a soft, brownie-like center, making them a perfect indulgence for chocoholics.
Quick and Easy: With straightforward instructions, they can be in the oven in no time, leaving you with more hours to enjoy spooky festivities.
Versatile Design: Whether you’re adding candy eyes for a fun twist or experimenting with black cocoa for a dramatic effect, the possibilities are endless! For another festive treat, check out my Caramel Apple Cookies.
Crowd-Pleasing: Their playful look and irresistible taste make them an instant hit at any gathering, ensuring no cookie is left behind!
Halloween Crinkle Cookies Ingredients
Discover the magic behind these festive delights!
For the Batter
- All-purpose flour – Provides the structure of the cookies.
- Natural cocoa (½ cup) or a mix of black cocoa (¼ cup) and natural cocoa (¼ cup) – Adds deep chocolate flavor; black cocoa gives a striking color for Halloween.
- Baking powder (1 tsp) and baking soda (¼ tsp) – Helps the cookies rise and achieve that signature crinkly texture.
- Fine salt (¼ tsp) – Enhances flavor and balances sweetness.
- Granulated sugar (½ cup + extra for coating) – Sweetness and a base for sugar coating.
- Light brown sugar (½ cup) – Adds moisture and depth of flavor.
- Neutral oil (⅓ cup) or softened butter (½ cup) – Source of fat for moisture; oil makes for a more tender cookie.
- Large eggs (2) – Binds the ingredients and adds moisture.
- Vanilla extract (1 tsp) – Adds aromatic flavor that complements the chocolate.
For the Coating
- Confectioners’ sugar (½ – ¾ cup for coating) – Creates the signature crackled appearance.
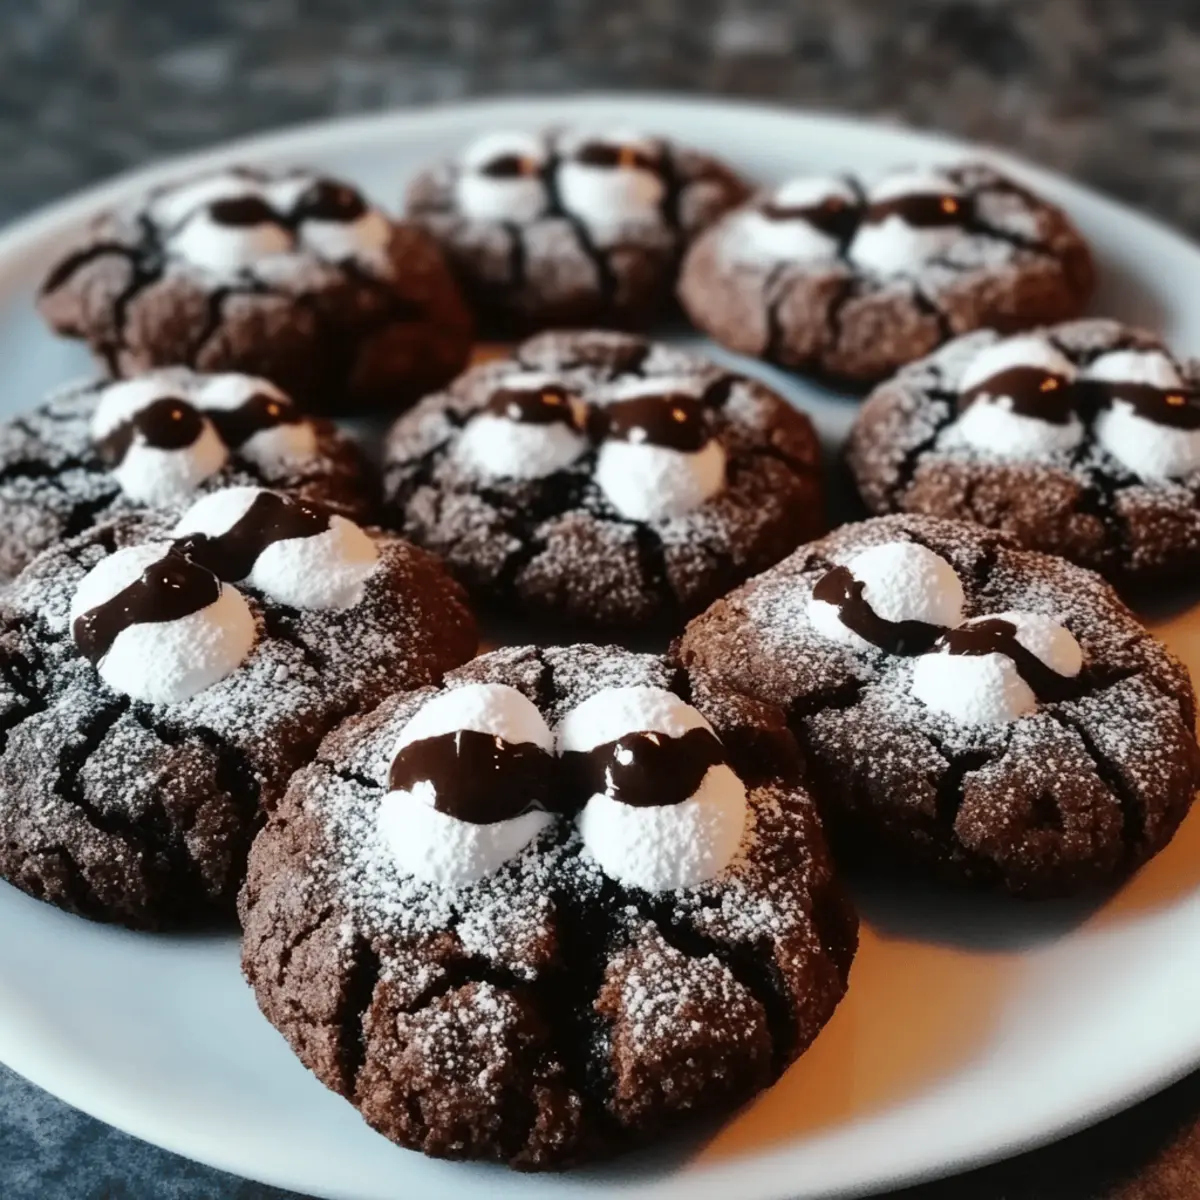
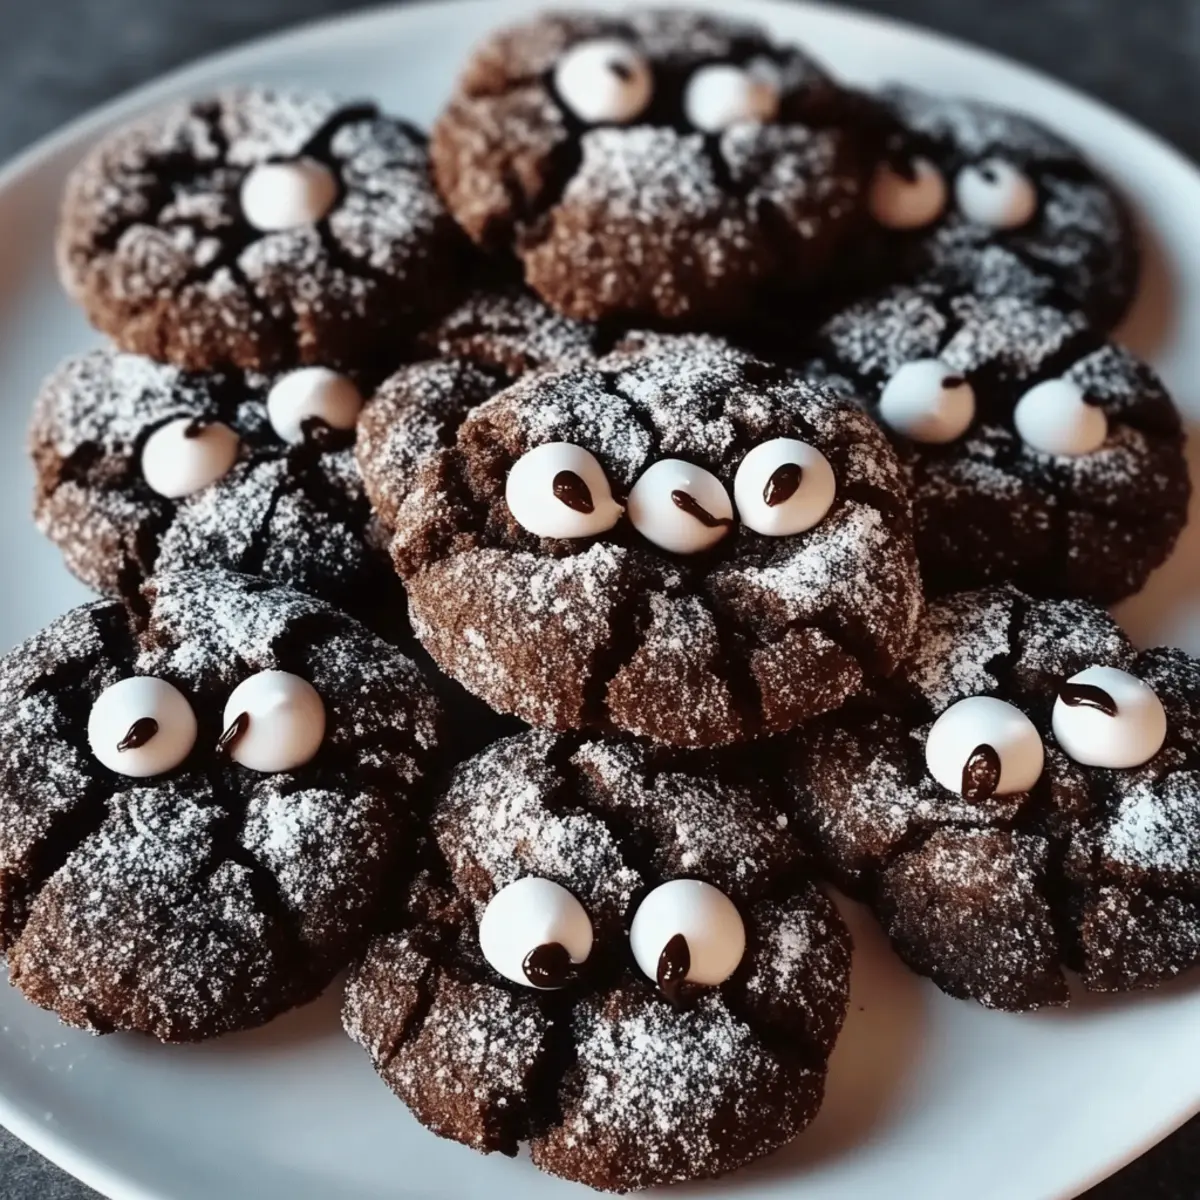
- Candy eyes (optional) – Fun decoration for a spooky Halloween twist!
Get ready to whip up these Halloween Crinkle Cookies and spread joy with every bite!
Step‑by‑Step Instructions for Halloween Crinkle Cookies
Step 1: Preheat Your Oven
Begin by preheating your oven to 350°F (175°C). While the oven warms up, line two baking sheets with parchment paper to prevent sticking and ensure easy cleanup. This preparation is essential for our Halloween Crinkle Cookies, giving them a beautiful finish and ensuring even baking.
Step 2: Mix Dry Ingredients
In a medium-sized mixing bowl, whisk together 1 cup of all-purpose flour, ½ cup of natural cocoa (or a blend of black and natural cocoa), 1 teaspoon of baking powder, ¼ teaspoon of baking soda, and ¼ teaspoon of fine salt. Ensure the ingredients are well combined to create a uniform dry mixture that adds structure and flavor to your Halloween Crinkle Cookies.
Step 3: Cream Wet Ingredients
In another large bowl, combine ½ cup of granulated sugar, ½ cup of light brown sugar, ⅓ cup of neutral oil (or softened butter), 2 large eggs, and 1 teaspoon of vanilla extract. Beat these ingredients together using an electric mixer until the mixture is glossy and smooth—this typically takes about 2-3 minutes, creating a delightful base for our cookie dough.
Step 4: Combine Mixtures
Gently fold the dry ingredients into the wet mixture, being careful not to overmix. The dough for your Halloween Crinkle Cookies will be quite sticky, which is perfectly normal. Stop mixing just as the flour disappears; this ensures a chewy texture when baked.
Step 5: Chill the Dough (Optional)
If your cookie dough feels too sticky to handle, cover the bowl with plastic wrap and chill it in the fridge for about 10-20 minutes. This step is optional but helpful for making the dough easier to roll and shape into balls, enhancing the finished look of your Halloween Crinkle Cookies.
Step 6: Shape the Cookies
Scoop out portions of dough ranging from 1 to 1.5 tablespoons and roll them into balls using your hands. Roll each ball first in granulated sugar, allowing it to coat thoroughly. Then, roll it again in confectioners’ sugar to create that signature crackled appearance of Halloween Crinkle Cookies, which will make them look festive and fun!
Step 7: Arrange on Baking Sheets
Place the dough balls on the prepared baking sheets, making sure to space them about 2 inches apart. This gives them room to spread while baking, ensuring beautiful, crinkly cookies. You should be able to fit about 12 balls on each sheet, creating a delightful batch for your Halloween feast.
Step 8: Bake the Cookies
Slide the baking sheets into your preheated oven and bake for 8-11 minutes. Keep an eye on them; the edges should look set while the centers remain soft and slightly underbaked. This is the key to achieving that fudgy, brownie-like center that makes Halloween Crinkle Cookies so irresistible.
Step 9: Add Candy Eyes
Once baked, remove the cookies from the oven and immediately press candy eyes gently onto each warm cookie. This step not only adds a spooky touch but also elevates the fun factor of your treats. Allow the cookies to cool on the baking sheets for about 5 minutes before transferring them to a wire rack.
Step 10: Cool Completely
Let your Halloween Crinkle Cookies cool completely on the wire rack. This cooling step ensures that the cookies set properly, developing their signature chewiness. Once cooled, your delicious and festive treats are ready to be enjoyed or showcased at your Halloween gatherings!
Storage Tips for Halloween Crinkle Cookies
Room Temperature: Store cooled cookies in a tin or container that is not fully airtight to maintain their crisp exterior while keeping the insides soft for up to 3 days.
Fridge: For longer storage, keep cookies in an airtight container in the fridge for up to 1 week, but be aware that this may affect their texture.
Freezer: Freeze baked cookies for up to 1 month in a well-sealed zip-top bag or container. To enjoy, thaw at room temperature or microwave briefly.
Dough Freezing: Freeze unbaked dough for up to 3 months. Roll the portions in sugar before freezing, then bake straight from the freezer—just add an extra minute or two to the baking time for perfectly delicious Halloween Crinkle Cookies!
What to Serve with Halloween Crinkle Cookies
As Halloween festivities beckon, these fudgy treats invite delightful pairings that enhance their magic.
- Spicy Pumpkin Pie: The warm spices and creamy filling create a cozy contrast to the rich chocolate of the cookies.
- Ghostly Marshmallow Treats: Light and fluffy, these add a playful, chewy texture that makes for a fun contrast to the crinkle cookies.
- Crisp Apple Slices: The fresh crunch and tartness beautifully balance the sweet decadence of the cookies, perfect for a refreshing bite.
- Hot Chocolate Bar: Rich, creamy hot chocolate pairs beautifully, allowing for a festive warming drink to accompany the spooky treats.
- Vanilla Ice Cream: A scoop of vanilla ice cream adds a delightful creaminess that complements the rich, chocolatey sweetness of your Halloween Crinkle Cookies.
When you’re ready to celebrate, these pairings will create a festive spread that delights every guest!
Make Ahead Options
These Halloween Crinkle Cookies are perfect for meal prep enthusiasts! You can prepare the dough up to 24 hours in advance by following these simple steps: once combined, cover the bowl tightly with plastic wrap and refrigerate the dough. This chilling helps to deepen the flavors while making it easier to handle the dough later. You can also roll the dough balls and coat them in sugar, ready to bake within 3 days. Just place them on a baking sheet and store in the fridge until you’re ready to pop them into the oven. When you’re set to serve, bake the cookies and add candy eyes right after they come out of the oven for that extra festive touch. Rest assured, these make-ahead Halloween Crinkle Cookies will taste just as delicious!
Halloween Crinkle Cookies Variations & Substitutions
Ready to put your own spin on these Halloween Crinkle Cookies? Let’s unleash your creativity in the kitchen!
- Black Cocoa: Use all black cocoa for an ultra-dark cookie experience that intensifies chocolate flavor—perfect for an eerie vibe!
- Red Velvet Twist: Add red food coloring along with cocoa powder for a fun red velvet version—delightfully festive for Halloween celebrations!
- Cake-Mix Shortcuts: Switch to a boxed cake mix for a quicker version, simply add candy eyes or sprinkles for personalized flair. Enjoy the effortless joy of baking!
- Pumpkin Spice Kick: Add a teaspoon of pumpkin spice to the dough for a warm, autumn-inspired flavor that complements the cocoa beautifully.
- Chocolate Chip Addition: Fold in a handful of mini chocolate chips to the dough for added texture and a chocolatey surprise with every bite!
- Nutty Crunch: Incorporate chopped nuts, like pecans or walnuts, into the dough for a delightful crunch and added depth of flavor.
- Vegan Variation: Substitute eggs with flaxseed meal (1 tablespoon mixed with 2.5 tablespoons water) and use a plant-based butter or oil for a vegan treat that doesn’t skimp on taste!
- Cyclops Cookies: Transform them into one-eyed cyclops cookies by adding a single large candy eye on each cookie before they cool for a whimsical touch!
For more festive flavors, you might also enjoy experimenting with my Cheesecake Cookies Salted or surprise loved ones with something seasonal like Lemon Lavender Cookies. Each variation invites delicious creativity while keeping the spirit of Halloween alive!
Expert Tips for Halloween Crinkle Cookies
Double the Sugar: Ensure a striking crackle by rolling the dough balls twice—first in granulated sugar, then in confectioners’ sugar before baking.
Chill Wisely: If the dough is sticky, chill briefly; too much chilling can affect the cookie’s texture.
Avoid Overbaking: To keep the chewy center, bake until the edges are set but the centers are still soft, creating that fudgy texture we love in Halloween Crinkle Cookies.
Experiment with Flavors: Don’t hesitate to use flavors like peppermint or almond extract for a unique twist on the classic chocolate flavor.
Keep it Festive: Enhance your cookies with different themed decorations like colored sprinkles or spooky shapes for a fun Halloween touch!
Advertisement
Halloween Crinkle Cookies Recipe FAQs
What type of cocoa should I use for the best flavor?
I recommend using a mix of natural cocoa and black cocoa. The natural cocoa gives a deep chocolate flavor, while the black cocoa enhances the cookies’ striking color and makes them even more festive for Halloween!
How should I store my Halloween Crinkle Cookies?
Store these delightful cookies at room temperature in a tin or container that isn’t fully airtight for up to 3 days to maintain their crispy exterior. If you want them to last longer, an airtight container in the fridge can keep them fresh for up to 1 week, although this might change their texture slightly.
Can I freeze Halloween Crinkle Cookies?
Absolutely! You can freeze the baked cookies for up to 1 month. Just ensure they are in a well-sealed zip-top bag or container. To enjoy them later, let them thaw at room temperature or quickly reheat in the microwave. Alternatively, you can freeze the dough itself for up to 3 months. Simply scoop and roll the dough portions in sugar before freezing. When you’re ready to bake, take them straight from the freezer and add an extra minute or two to your baking time.
What should I do if my cookie dough is too sticky?
If your dough feels overly sticky, try chilling it in the fridge for about 10-20 minutes. This simple step will firm it up and make it easier to roll into balls. Just keep in mind that chilling for too long may affect the cookies’ texture, so monitor closely.
Are these cookies suitable for anyone with food allergies?
While the Halloween Crinkle Cookies are primarily vegetarian, they contain ingredients like eggs. If you’re making these for someone with allergies, be sure to check for any specific concerns. For a dairy-free version, you can substitute neutral oil for butter. Always consult with anyone who has allergies before serving!
Can I add decorations without affecting the cookie mixture?
Yes! Feel free to get creative and add festive decorations like candy eyes or themed sprinkles. Just be sure to press any decorations firmly onto the warm cookies right after baking so they stick well. Enjoy making these Halloween Crinkle Cookies festively spooky!
Halloween Crinkle Cookies that Spark Joy and Sweet Surprises
Ingredients
Equipment
Method
- Preheat your oven to 350°F (175°C). Line two baking sheets with parchment paper.
- In a bowl, whisk together flour, cocoa, baking powder, baking soda, and salt.
- In a separate bowl, mix granulated sugar, brown sugar, oil, eggs, and vanilla until smooth.
- Gently fold the dry ingredients into the wet mixture until just combined.
- If the dough is too sticky, chill it in the fridge for 10-20 minutes.
- Roll the dough into balls, coat in granulated sugar and then confectioners’ sugar.
- Place dough balls on baking sheets, spaced about 2 inches apart.
- Bake for 8-11 minutes until edges are set but centers are soft.
- Press candy eyes onto warm cookies. Cool on wire rack.
- Let cool completely before serving.