Introduction to Gluten-Free Pita Bread Recipe
What is Pita Bread?
Pita bread is a type of flatbread that has a unique pocket in the middle. This pocket makes it perfect for stuffing with delicious fillings. Traditionally, pita bread is made from wheat flour, which gives it a soft and chewy texture. It is popular in many cuisines, especially in Mediterranean and Middle Eastern dishes. You can enjoy pita bread with dips, salads, or as a wrap for your favorite meats and veggies. However, for those who cannot consume gluten, traditional pita bread is not an option.
Why Choose a Gluten-Free Option?
Choosing a gluten-free option is essential for individuals with celiac disease or gluten sensitivity. Gluten is a protein found in wheat, barley, and rye, and it can cause serious health issues for those affected. Fortunately, gluten-free alternatives are now widely available, allowing everyone to enjoy delicious foods like pita bread without worry. By making gluten-free pita bread, you can savor the same delightful flavors and textures while keeping your diet safe and healthy. Plus, gluten-free recipes often use a variety of wholesome ingredients, making them nutritious and satisfying.
Ingredients for Gluten-Free Pita Bread Recipe
To create your own gluten-free pita bread, you’ll need a few simple ingredients. These ingredients are easy to find and will help you achieve that perfect texture and flavor. Here’s what you’ll need:
- 2 cups gluten-free all-purpose flour
- 1 teaspoon baking powder
- 1 teaspoon sea salt
- 1 tablespoon extra virgin olive oil
- 3/4 cup lukewarm water
- 1 teaspoon agave syrup or honey (optional)
Each ingredient plays a vital role in the recipe. The gluten-free all-purpose flour serves as the base, providing structure. Baking powder helps the pita bread rise, giving it that lovely puff. Sea salt enhances the flavor, while olive oil adds moisture and richness. The lukewarm water is essential for binding everything together, and the optional agave syrup or honey can add a hint of sweetness if desired.
Gather these ingredients before you start cooking. Having everything ready will make the process smoother and more enjoyable. Now that you have your ingredients, you’re one step closer to making delicious gluten-free pita bread!
Step-by-Step Preparation of Gluten-Free Pita Bread Recipe
Step 1: Gather Your Ingredients
Before you start, make sure you have all your ingredients ready. This will help you stay organized and make the cooking process smoother. Gather your gluten-free all-purpose flour, baking powder, sea salt, extra virgin olive oil, lukewarm water, and optional agave syrup or honey. Having everything in one place will make it easier to follow the recipe step by step.
Step 2: Mix the Dry Ingredients
In a large mixing bowl, combine the gluten-free all-purpose flour, baking powder, and sea salt. Use a whisk or a fork to mix these dry ingredients thoroughly. This step is important because it ensures that the baking powder and salt are evenly distributed throughout the flour. A well-mixed dry mixture will help your pita bread rise properly and taste great!
Step 3: Combine Wet Ingredients
Next, create a well in the center of your dry mixture. Pour in the extra virgin olive oil and lukewarm water. If you’re using agave syrup or honey, add it now as well. The lukewarm water helps activate the baking powder, while the olive oil adds moisture. Stir the mixture with a spoon until it starts to come together as a dough. You want it to be slightly sticky but manageable.
Step 4: Form the Dough
Once your mixture resembles a dough, transfer it onto a lightly floured surface. Knead the dough gently for about 1-2 minutes. If it feels too sticky, sprinkle a little more gluten-free flour on top. Kneading helps develop the dough’s texture, making it easier to shape later. When the dough is smooth and elastic, you’re ready for the next step!
Step 5: Shape the Pitas
Now, divide the dough into 6 equal portions. Roll each piece into a ball. Using your hands or a rolling pin, flatten each ball into a disc that is about 1/4 inch thick. Make sure the discs are even in thickness to ensure they cook uniformly. If you prefer thicker pitas, you can roll them to about 1/2 inch thick. This will give you a heartier bread!
Step 6: Bake the Pita Bread
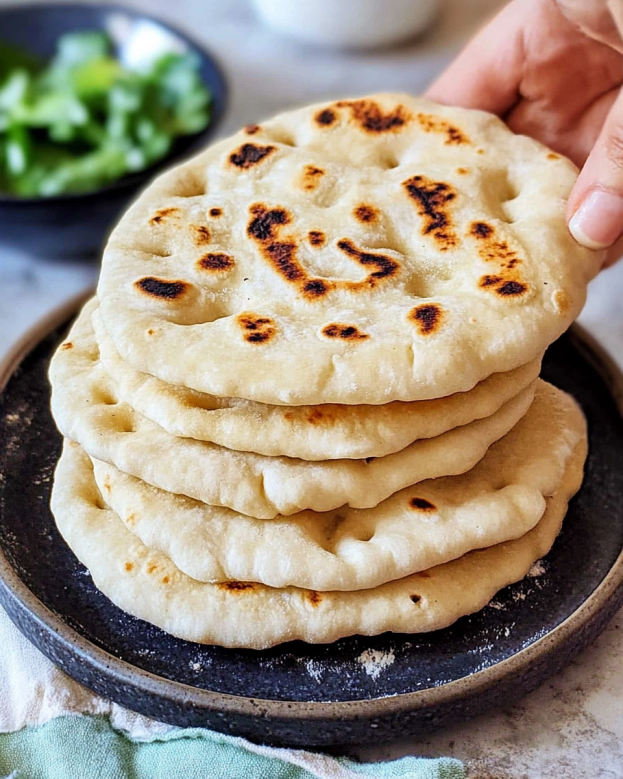
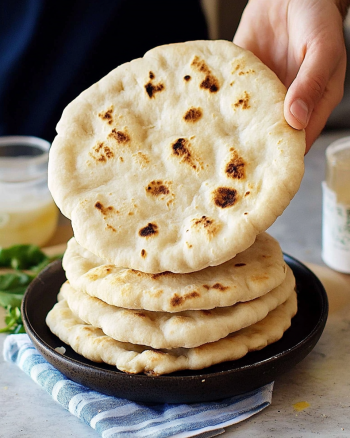
Heat a non-stick skillet or griddle over medium-high heat. Once hot, place each flatbread in the skillet. Cook for 2-3 minutes on each side. Watch for the pitas to puff up and develop golden brown spots. This is a sign that they are cooking perfectly! After cooking, stack the flatbreads and cover them with a clean kitchen towel. This will keep them warm and soft until you’re ready to serve.
Variations of Gluten-Free Pita Bread Recipe
Adding Herbs and Spices
One of the best things about making gluten-free pita bread is the ability to customize it to your taste. Adding herbs and spices can elevate the flavor profile of your pita bread. For instance, you can mix in 1 teaspoon of dried basil or rosemary with the dry ingredients. These herbs will infuse your pita with a delightful aroma and taste. You can also experiment with garlic powder, onion powder, or even a pinch of cayenne pepper for a bit of heat. The options are endless! Just remember to adjust the quantities based on your preference. A little goes a long way, so start small and taste as you go.
Using Different Gluten-Free Flours
If you want to try something new, consider using different gluten-free flours. While the recipe calls for gluten-free all-purpose flour, you can substitute it with other options like almond flour, coconut flour, or chickpea flour. Each type of flour will give your pita bread a unique flavor and texture. For example, almond flour will make your pita slightly nutty, while chickpea flour will add a hearty taste. Just keep in mind that different flours may require adjustments in the amount of liquid used. Always start with the recommended amount and add more as needed to achieve the right dough consistency.
Cooking Note for Gluten-Free Pita Bread Recipe
When making gluten-free pita bread, there are a few important cooking notes to keep in mind. First, the temperature of your skillet or griddle is crucial. If it’s too hot, the outside of the pita may burn while the inside remains undercooked. Conversely, if it’s not hot enough, the pita won’t puff up properly. Aim for a medium-high heat to achieve that perfect balance.
Additionally, make sure to cook one pita at a time if your skillet is small. This will allow each piece to cook evenly and puff up nicely. If you have a larger skillet, you can cook multiple pitas at once, but keep an eye on them to ensure they don’t overcook.
Another tip is to avoid pressing down on the pitas while they cook. This can prevent them from puffing up, which is what gives pita bread its signature pocket. Instead, let them cook undisturbed until they naturally rise. If you notice that a pita isn’t puffing up, you can gently lift the edges with a spatula to check if it’s cooking evenly.
Lastly, remember that gluten-free dough can behave differently than traditional dough. It may not have the same elasticity, so be gentle when handling it. With these cooking notes in mind, you’ll be well on your way to creating delicious gluten-free pita bread that’s perfect for any meal!
Serving Suggestions for Gluten-Free Pita Bread Recipe

Pairing with Dips and Spreads
Gluten-free pita bread is incredibly versatile and pairs wonderfully with a variety of dips and spreads. One of the most popular options is hummus. This creamy chickpea dip is not only delicious but also packed with protein. You can enjoy it plain or try different flavors like roasted red pepper or garlic.
Another great option is tzatziki, a refreshing yogurt-based dip made with cucumber and herbs. It complements the warm pita perfectly and adds a cool contrast. For a spicy kick, consider serving your pita with baba ganoush, a smoky eggplant dip that’s rich in flavor.
Don’t forget about guacamole! This avocado-based dip is a crowd-pleaser and works well with gluten-free pita bread. You can also try a simple olive tapenade for a Mediterranean twist. The combination of flavors will make your meal exciting and satisfying.
Using in Sandwiches and Wraps
Gluten-free pita bread is not just for dipping; it’s also fantastic for making sandwiches and wraps! You can fill your pita with a variety of ingredients to create a delicious meal. For a classic option, stuff your pita with grilled chicken, fresh veggies, and a drizzle of your favorite dressing. This makes for a healthy and filling lunch.
If you’re in the mood for something vegetarian, try filling your pita with roasted vegetables, feta cheese, and a sprinkle of herbs. This combination is not only tasty but also colorful and nutritious. You can also make a Mediterranean wrap by adding falafel, lettuce, and tahini sauce.
For a quick snack, consider spreading some nut butter inside your pita and adding banana slices. This sweet treat is perfect for kids and adults alike. The possibilities are endless, so feel free to get creative with your fillings!
Tips for Perfect Gluten-Free Pita Bread Recipe
Making gluten-free pita bread can be a delightful experience, especially when you know a few handy tips to ensure perfection. Here are some essential tips to help you achieve the best results:
- Measure Accurately: Always measure your gluten-free flour accurately. Too much flour can make your dough dry, while too little can lead to a sticky mess. Use a kitchen scale for the best precision.
- Use Fresh Ingredients: Ensure your baking powder is fresh. Old baking powder may not provide the necessary rise, resulting in flat pitas. Check the expiration date before using.
- Let the Dough Rest: After kneading, let the dough rest for about 10-15 minutes. This allows the flour to hydrate fully, making it easier to shape and improving the texture.
- Preheat Your Cooking Surface: Make sure your skillet or griddle is hot before adding the pitas. A properly preheated surface helps the pitas puff up quickly, creating that signature pocket.
- Don’t Overcrowd the Pan: If you’re cooking multiple pitas, give them enough space in the skillet. Overcrowding can lead to uneven cooking and prevent them from puffing up.
- Keep Them Warm: After cooking, stack the pitas and cover them with a clean kitchen towel. This keeps them warm and soft until you’re ready to serve.
- Experiment with Thickness: If you prefer thicker pitas, roll the dough to about 1/2 inch thick. Just remember that thicker pitas may take a bit longer to cook.
- Practice Makes Perfect: Don’t be discouraged if your first batch isn’t perfect. Like any recipe, practice will help you improve your technique and get the desired results.
By following these tips, you’ll be well on your way to creating delicious gluten-free pita bread that everyone will love. Enjoy the process and have fun experimenting with flavors and fillings!
Breakdown of Time for Gluten-Free Pita Bread Recipe
Prep Time
The prep time for making gluten-free pita bread is quite manageable. You’ll need about 15 minutes to gather your ingredients and mix them together. This includes measuring the flour, baking powder, and salt, as well as combining the wet ingredients. If you take your time to ensure everything is well mixed, you’ll set yourself up for success!
Cooking Time
Once your dough is ready, the cooking time is relatively quick. Each pita will take about 2-3 minutes to cook on each side. If you’re cooking multiple pitas, you can expect to spend around 15-20 minutes in total for cooking. Just keep an eye on them to ensure they puff up nicely and develop those golden brown spots.
Total Time
In total, you can expect to spend around 30-35 minutes from start to finish. This includes both prep and cooking time. With just a little bit of effort, you’ll have fresh, warm gluten-free pita bread ready to enjoy. It’s a quick and rewarding process that’s perfect for any meal!
Nutritional Information for Gluten-Free Pita Bread Recipe

Calories
When it comes to enjoying gluten-free pita bread, understanding its caloric content is essential. Each serving of this delightful bread contains approximately 150 calories. This makes it a relatively light option for those looking to maintain a balanced diet. You can enjoy it without feeling guilty, especially when paired with healthy fillings or dips. Remember, moderation is key, and incorporating it into a well-rounded meal can be both satisfying and nutritious.
Protein
Protein is an important nutrient that helps build and repair tissues in our bodies. Each serving of gluten-free pita bread provides about 3 grams of protein. While this may not seem like a lot, it can contribute to your daily protein intake, especially when combined with protein-rich fillings like grilled chicken, hummus, or beans. For those following a gluten-free diet, finding sources of protein is crucial, and this pita bread can be a tasty addition to your meals.
Sodium
Monitoring sodium intake is important for maintaining heart health. Each serving of gluten-free pita bread contains around 200 milligrams of sodium. This amount is relatively moderate, making it a suitable choice for most people. However, if you are watching your sodium levels, consider pairing your pita with low-sodium dips or fillings. This way, you can enjoy the flavors without exceeding your daily sodium limit.
FAQs about Gluten-Free Pita Bread Recipe
Can I freeze gluten-free pita bread?
Yes, you can freeze gluten-free pita bread! Freezing is a great way to preserve the freshness of your pitas. To do this, allow the cooked pitas to cool completely. Then, stack them with parchment paper in between each pita to prevent sticking. Place the stack in a freezer-safe bag or container, and seal it tightly. When you’re ready to enjoy them, simply remove the desired number of pitas from the freezer. You can thaw them in the refrigerator overnight or warm them directly in a skillet or microwave. This way, you’ll always have fresh pita bread on hand!
Advertisement
How do I store gluten-free pita bread?
Storing gluten-free pita bread properly is essential to keep it fresh. After cooking, let the pitas cool completely. Then, place them in an airtight container or a resealable plastic bag. You can keep them at room temperature for up to 2 days. If you want to store them for a longer period, consider freezing them as mentioned earlier. Just remember to separate each pita with parchment paper to avoid sticking. This will help maintain their texture and flavor, ensuring you can enjoy them later!
What can I use instead of gluten-free flour?
If you don’t have gluten-free all-purpose flour on hand, there are several alternatives you can try. Almond flour, coconut flour, and chickpea flour are popular options. However, keep in mind that each type of flour has different properties. For instance, almond flour is denser and may require more liquid, while coconut flour absorbs moisture quickly. You might need to experiment with the ratios to achieve the right dough consistency. Additionally, you can also look for pre-mixed gluten-free flour blends available in stores, which often contain a combination of different flours and starches for optimal results.
Conclusion on Gluten-Free Pita Bread Recipe
In conclusion, making gluten-free pita bread is a rewarding and enjoyable experience. With just a few simple ingredients and steps, you can create delicious, soft, and fluffy pitas that everyone can enjoy. Whether you’re gluten-sensitive or simply looking to try something new, this recipe offers a fantastic alternative to traditional pita bread.
By following the steps outlined in this article, you can easily whip up a batch of gluten-free pita bread in under an hour. The versatility of this bread allows you to pair it with a variety of dips, spreads, and fillings, making it perfect for any meal or snack. From hummus to grilled veggies, the possibilities are endless!
Remember to experiment with different herbs, spices, and gluten-free flours to find the combination that suits your taste best. With practice, you’ll master the art of making gluten-free pita bread, impressing family and friends with your culinary skills.
So, gather your ingredients, roll up your sleeves, and get ready to enjoy the delightful taste of homemade gluten-free pita bread. It’s not just a recipe; it’s a way to bring joy to your table and share delicious moments with loved ones. Happy cooking!


