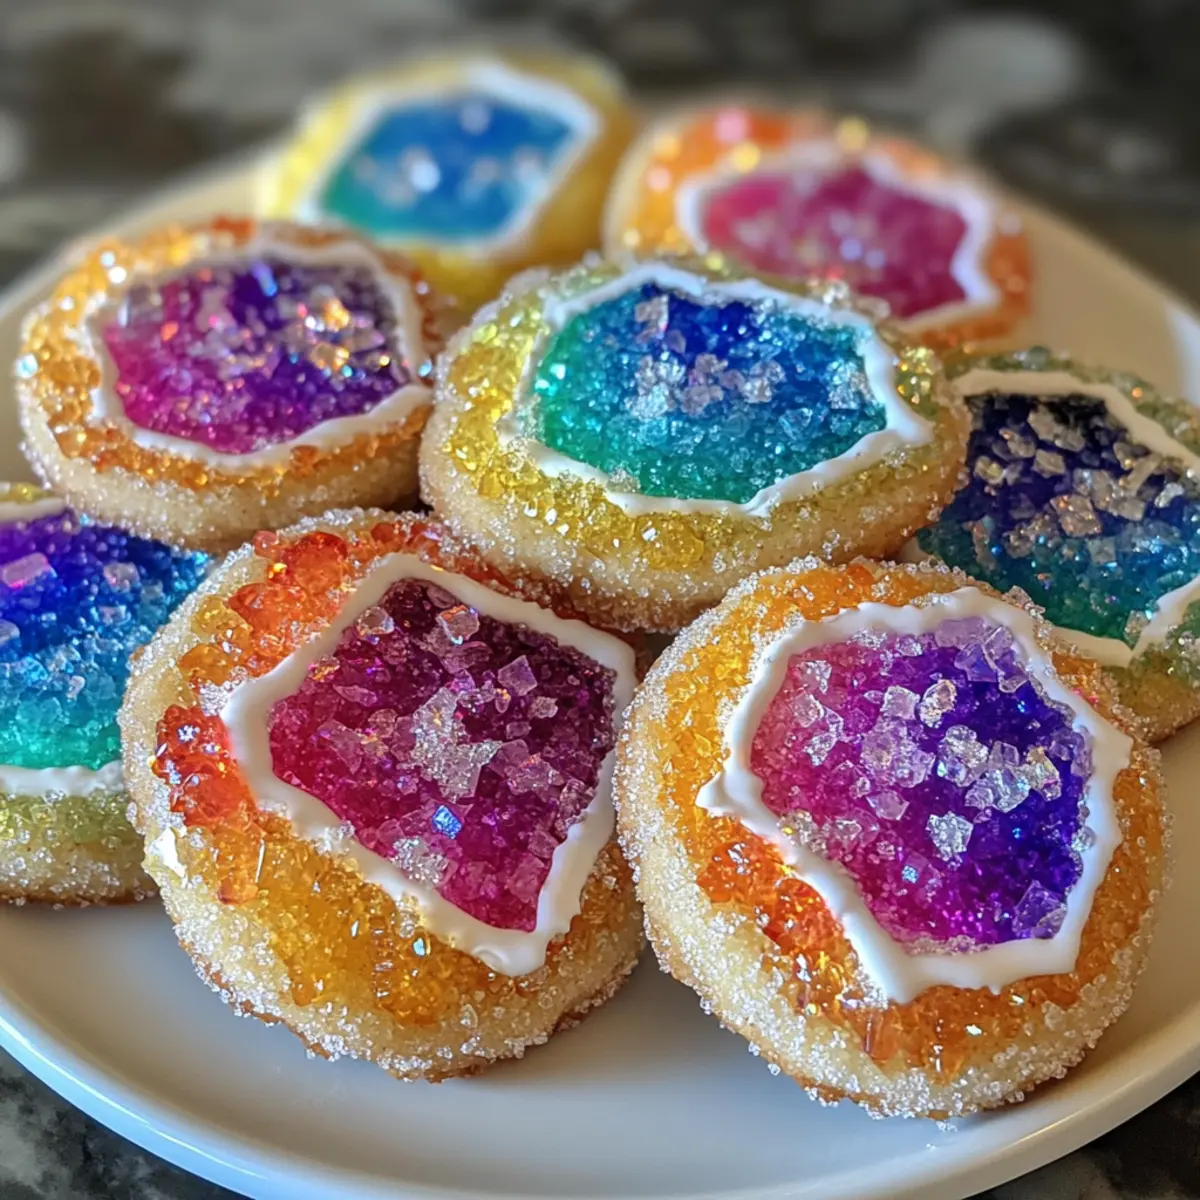
As I sat at the kitchen table, my 8-year-old niece was mesmerized by the colors swirling in our mixing bowl. That’s when I knew our baking adventure was going to be more than just cookies; we were creating Dazzling Geode Cookies! These artistic treats not only sparkle with vibrant colors mimicking the beauty of real geodes, but they’re also incredibly simple to make. With each bite, you’ll enjoy a delightful crunch on the outside and a chewy core, making them perfect for celebrations or cozy nights in. Plus, the customizable options are endless—whether you want to try different toppings or color themes, your imagination is the only limit! Ready to turn your kitchen into a vibrant cookie wonderland?
Why are Geode Cookies a must-try?
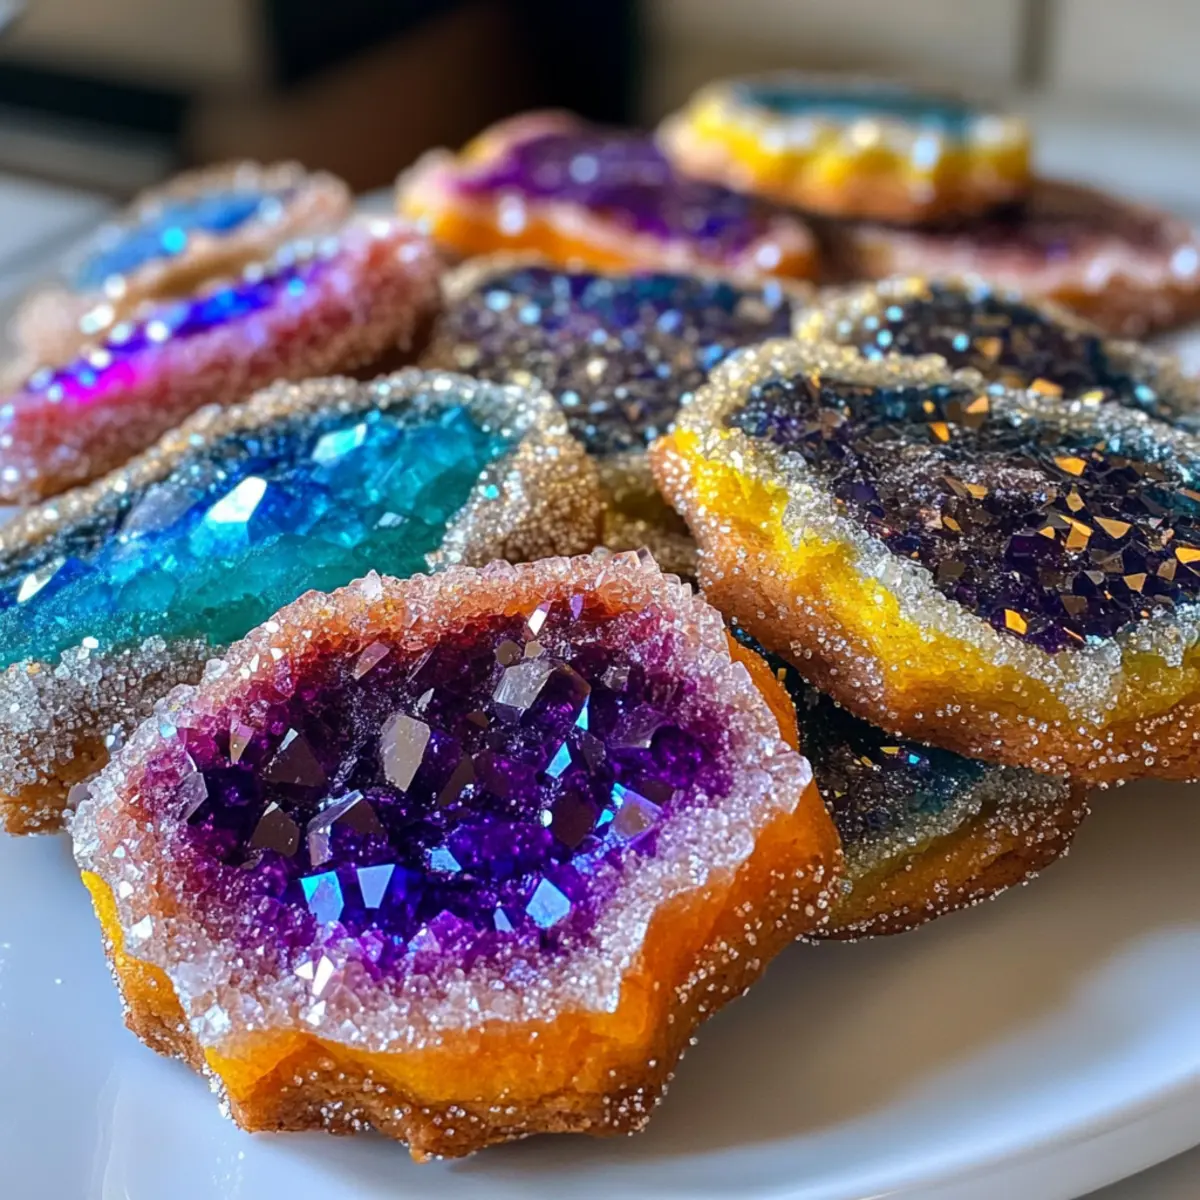
Eye-Catching Design: With their stunning colors and sparkly sugar crystals, these cookies are a feast for the eyes, perfect for impressing guests at any gathering.
Limitless Customization: You can easily tweak colors and toppings, making them versatile for every occasion, from birthdays to holidays.
Simple Preparation: The straightforward instructions mean you can whip these up with minimal effort, making baking accessible and enjoyable for all skill levels.
Unique Flavor: Each bite offers a delightful crunch and chew, setting them apart from your ordinary cookie experience.
Kid-Friendly Fun: Kids love the artful process of mixing colors and decorating, making it a perfect family activity.
Crowd-Pleasing: Whether it’s a school bake sale or a cozy family night, these cookies are sure to be a hit, much like our delicious Caramel Apple Cookies or Fudgy Chewy Cookies that everyone adores!
Dazzling Geode Cookies Ingredients
For the Cookie Base
- All-Purpose Flour – Provides structure; can substitute with a gluten-free blend for a gluten-free option.
- Granulated Sugar – Adds sweetness and contributes to the cookie’s crisp texture; no alternatives recommended without altering taste.
- Unsalted Butter – Offers a rich flavor and chewy texture; use vegan butter as a dairy substitute.
- Eggs – Acts as a binder to provide moisture; an egg substitute like flaxseed meal can be used for a vegan variation.
- Baking Powder – Ensures the cookies rise and are soft; no substitutions recommended; double-check freshness.
For the Color and Sparkle
- Food Coloring – Creates vibrant hues to emulate crystal formations; gel colors provide a better effect.
- Sugar Crystals/Rock Candy – Provides the sparkling exterior that mimics geodes; can be replaced with edible glitter for a different sparkle effect.
These Dazzling Geode Cookies promise to be a delightful treat, infusing joy and creativity into your baking experiences!
Step‑by‑Step Instructions for Dazzling Geode Cookies
Step 1: Preheat the Oven
Begin your baking journey by preheating your oven to 350°F (175°C). While waiting, line two baking sheets with parchment paper. This will ensure easy cleanup and prevent the cookies from sticking. Take a moment to gather your ingredients and equipment so everything is within reach, setting the stage for a fun baking experience.
Step 2: Cream Butter and Sugar
In a large mixing bowl, add 1 cup of softened unsalted butter and 1 cup of granulated sugar. Using a hand mixer, beat these together for about 3 minutes until the mixture is light and fluffy, becoming almost pale in color. This step is crucial for achieving the tender texture of your Dazzling Geode Cookies, so keep mixing until you achieve that delightful creaminess.
Step 3: Incorporate Eggs
Next, add in 2 large eggs, one at a time, mixing well after each addition. Continue to blend until the egg is fully incorporated and the mixture looks smooth. This step not only adds moisture but also helps bind the ingredients together. The rich buttery aroma will start to fill your kitchen as you blend!
Step 4: Mix Dry Ingredients
In a separate bowl, whisk together 3 cups of all-purpose flour and 2 teaspoons of baking powder until thoroughly combined. Gradually add this dry mixture to your wet ingredients, folding it in gently until just combined. The batter should be slightly lumpy, which is perfect for your Dazzling Geode Cookies. Avoid overmixing to maintain that lovely chewy texture.
Step 5: Color the Dough
Divide the cookie dough into several bowls based on how many colors you’d like to create. Add food coloring to each bowl, mixing thoroughly until you reach your desired vibrant shades. This is the fun part! Let your creativity shine as you create beautiful hues that mimic the stunning crystal formations of geodes.
Step 6: Form Cookies
Using a cookie scoop or tablespoon, drop rounded portions of dough onto the prepared baking sheets. Feel free to mix the colors together for a more artistic look if you wish! Gently press sugar crystals or rock candy into the top of each cookie mound to enhance the sparkling appearance of your Dazzling Geode Cookies.
Step 7: Bake
Slide the baking sheets into your preheated oven and bake for 10-12 minutes, keeping an eye out for golden edges while ensuring the centers remain soft. The cookies will puff slightly as they bake, creating that delightful texture you’re after. The aromatic scent wafting from the oven is sure to excite everyone around!
Step 8: Cool
Once baked, remove the cookies from the oven and allow them to cool on the baking sheets for about 5 minutes. Afterward, transfer the cookies to wire racks to cool completely before serving. This cooling time helps them set perfectly while preserving their soft centers, making your Dazzling Geode Cookies a delightful treat to share!
How to Store and Freeze Dazzling Geode Cookies
- Room Temperature: Store cookies in an airtight container at room temperature for up to 1 week, ensuring they remain fresh and delicious.
- Fridge: For extended freshness, place cookies in the fridge, where they can last up to 2 weeks. Just be sure to let them come back to room temperature before enjoying!
- Freezer: Unbaked cookie dough or fully decorated cookies can be frozen for up to 3 months. Wrap tightly in plastic wrap and place in a resealable bag for best results.
- Reheating: To enjoy soft cookies again, simply warm them in the microwave for a few seconds or let them rest at room temperature for about 20 minutes after taking them out of the fridge or freezer.
Expert Tips for Dazzling Geode Cookies
- Avoid Overmixing: Ensure a tender cookie by mixing the dough until just combined; overmixing can lead to tough cookies.
- Use Gel Colors: For the best vibrant results, opt for gel food coloring; it provides a more intense hue without altering the dough’s consistency.
- Chill the Dough: Consider chilling the colored dough for 30 minutes before baking; this makes the dough easier to handle and improves flavor.
- Press Toppings Gently: When adding sugar crystals or rock candy, press them lightly into the dough to prevent them from falling off during baking.
- Check Oven Temperature: Always confirm your oven temperature with a thermometer, as even slight variations can affect the baking outcome of your Dazzling Geode Cookies.
What to Serve with Dazzling Geode Cookies?
Indulging in colorful Geode Cookies opens the door to a delightful meal experience—let’s explore pairings that enhance their vibrancy!
- Creamy Vanilla Ice Cream: The rich, smooth texture contrasts beautifully with the colorful cookies, making each bite a combo of crunch and creaminess.
- Fresh Berries: Zesty blueberries or sweet strawberries add a refreshing burst that complements the sweetness of the cookies while introducing a pop of freshness.
- Sparkling Lemonade: A cool, fizzy drink brightens the palate, perfectly balancing the sugary cookies and adding a festive touch to gatherings.
- Warm Chocolate Fondue: Dip your cookies into melted chocolate for an indulgent treat that amplifies flavors and creates a fun, interactive dessert experience.
- Fluffy Whipped Cream: Adding a dollop of fresh whipped cream provides a lightness that enhances the cookies’ richness without overpowering them.
- Fruit-Infused Water: Refreshing citrus or berry-infused water not only quenches thirst but also provides a lovely aromatic complement to the vibrant cookie experience.
- Nutty Trail Mix: For a simple snack alternative, a mix of nuts and dried fruits offers a satisfying crunch that contrasts nicely with the soft center of the cookies.
- Mini Cheesecake Bites: These rich, creamy desserts harmonize beautifully, bringing a decadent element that elevates your treat experience beyond ordinary sweets.
- Coffee or Hot Chocolate: Sipping these warm beverages alongside Geode Cookies creates a cozy atmosphere for family gatherings or a quiet evening at home.
Variations & Substitutions for Dazzling Geode Cookies
Feel free to switch things up with these variations that will enhance the delight of your Dazzling Geode Cookies!
-
Gluten-Free: Use a gluten-free flour blend instead of all-purpose flour for a deliciously inclusive cookie that everyone can enjoy. It’s a simple swap that maintains the cookie’s structure!
-
Vegan-Friendly: Substitute unsalted butter with vegan butter and eggs with flaxseed meal mixed with water to create a tasty dairy-free version. Enjoy guilt-free baking with this delightful twist!
-
Flavor Boost: Experiment with extracts like almond or lemon instead of vanilla to add a unique flavor profile. Each variation brings its own special character to these vibrant cookies!
-
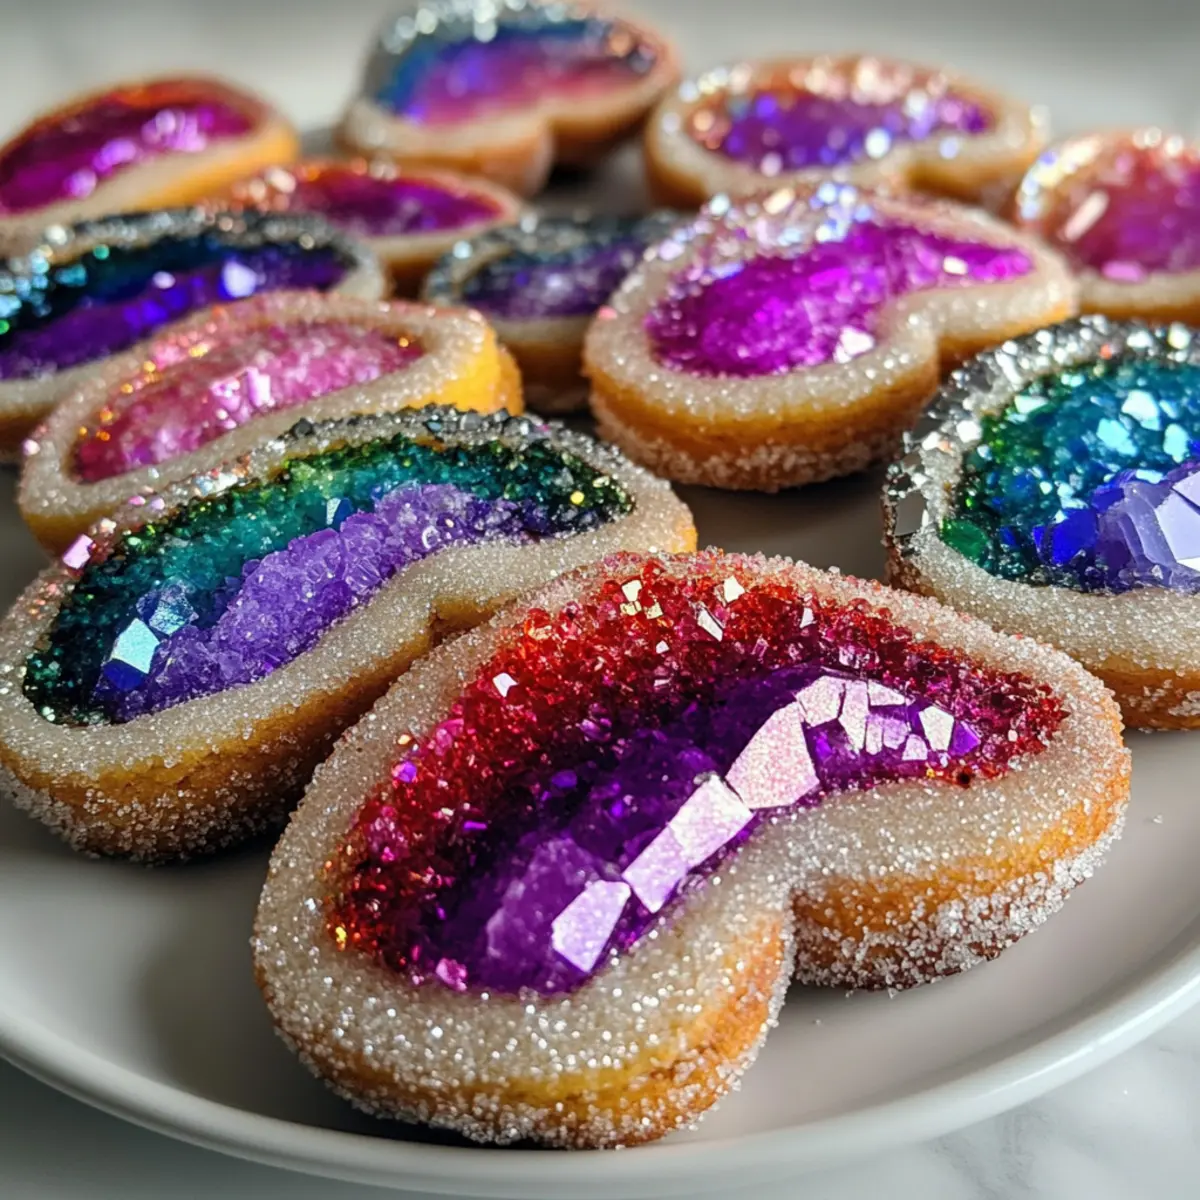
Edible Glitter: Swap out sugar crystals for edible glitter to create a shimmering effect. This enchanting addition makes your cookies look even more magical and enticing at celebrations.
-
Seasonal Shapes: Use festive cookie cutters to create seasonal shapes, such as hearts for Valentine’s Day or stars for the holidays. Adjusting shapes adds an extra layer of creativity!
-
Candy Mix-Ins: Add in crushed candies, like toffee bits or chocolate chunks, for a surprising burst of flavor. These little surprises will delight everyone who takes a bite!
-
Layered Colors: Create a marbled effect by only partially mixing different colored doughs together instead of blending them fully. This artistic approach truly mimics the geode theme beautifully!
Make sure to try out some of these variations next time you whip up a batch of Dazzling Geode Cookies, and don’t forget to complement them with a delightful glass of milk or a cozy hot cocoa, much like our scrumptious Eggnog Snickerdoodle Cookies. Enjoy your creative baking journey!
Make Ahead Options
These Dazzling Geode Cookies are perfect for busy home cooks looking to save time without sacrificing taste! You can prepare the cookie dough up to 24 hours in advance. Simply mix the dough as instructed and then wrap it tightly in plastic wrap before refrigerating. When ready to bake, allow the dough to come to room temperature for about 15 minutes, then scoop and decorate with sugar crystals or rock candy as desired. Additionally, you can pre-mix the dry ingredients (flour and baking powder) up to 3 days in advance and store them in an airtight container to streamline your baking process. This way, when the craving hits, all you have to do is combine the wet ingredients and mix in your colorful dough for those delightful, cheerful cookies that are just as delicious when prepared in advance!
Dazzling Geode Cookies Recipe FAQs
What is the best way to select ripe ingredients for my Dazzling Geode Cookies?
Absolutely! For the best results, use fresh ingredients. Choose butter that is just slightly softened, not melted, as this will create the right texture. Also, for your eggs, opt for medium to large-sized eggs, ideally fresh, with smooth shells and no cracks for optimal binding.
How should I store my Dazzling Geode Cookies for freshness?
You can store the cooled cookies in an airtight container at room temperature for up to one week. For added freshness, layer parchment paper between them to prevent sticking. If you prefer a firmer texture, refrigerating them in the same container is an option for up to 5 days.
Can I freeze Dazzling Geode Cookies, and how?
Absolutely! To freeze your Dazzling Geode Cookies, you have two options: You can freeze the unbaked cookie dough or the fully decorated cookies. For dough, scoop individual portions onto a baking sheet and freeze until solid, then transfer to an airtight container for up to 3 months. To bake, thaw in the fridge overnight and follow your baking instructions. For baked and decorated cookies, place them in a single layer in an airtight container lined with parchment paper and freeze for up to 3 months. When ready to enjoy, thaw at room temperature!
Advertisement
What should I do if my cookie dough feels too sticky?
Very! If your dough is too sticky to handle, don’t hesitate to refrigerate it for about 30 minutes. Chilling the dough helps it firm up, making it easier to scoop and shape. Once chilled, it will also help the colors adhere better during baking, ensuring your Dazzling Geode Cookies look vibrant and colorful!
Are there any dietary considerations for Dazzling Geode Cookies?
Yes, definitely! If you’re accommodating allergies, ensure your baking powder is gluten-free if using gluten-free flour. You can substitute eggs with flaxseed meal (1 tablespoon mixed with 2.5 tablespoons of water per egg) for a vegan version. Be cautious with toppings; double-check that any sugar crystals or rock candy are allergy-friendly as some may contain gluten or other allergens.
What should I do if my cookies spread too much while baking?
If your Dazzling Geode Cookies flatten too much during baking, it often points to an issue with the butter temperature—too soft or melted can lead to spreading. Next time, ensure your butter is just softened. Additionally, chilling the dough for 30 minutes before baking helps to minimize spreading while maintaining a lovely chewy texture!

Dazzling Geode Cookies: Artful Treats to Brighten Any Occasion
Ingredients
Equipment
Method
- Preheat your oven to 350°F (175°C) and line two baking sheets with parchment paper.
- Cream together 1 cup softened unsalted butter and 1 cup granulated sugar for about 3 minutes until light and fluffy.
- Incorporate 2 large eggs one at a time, mixing well after each addition.
- Mix 3 cups all-purpose flour and 2 teaspoons baking powder in a separate bowl, then gradually fold into wet ingredients.
- Divide dough into bowls and add food coloring to create desired vibrant shades.
- Drop rounded portions of dough onto prepared baking sheets and press sugar crystals or rock candy into the tops.
- Bake for 10-12 minutes, until the edges are golden and centers remain soft.
- Cool cookies on baking sheets for 5 minutes, then transfer to wire racks to cool completely.