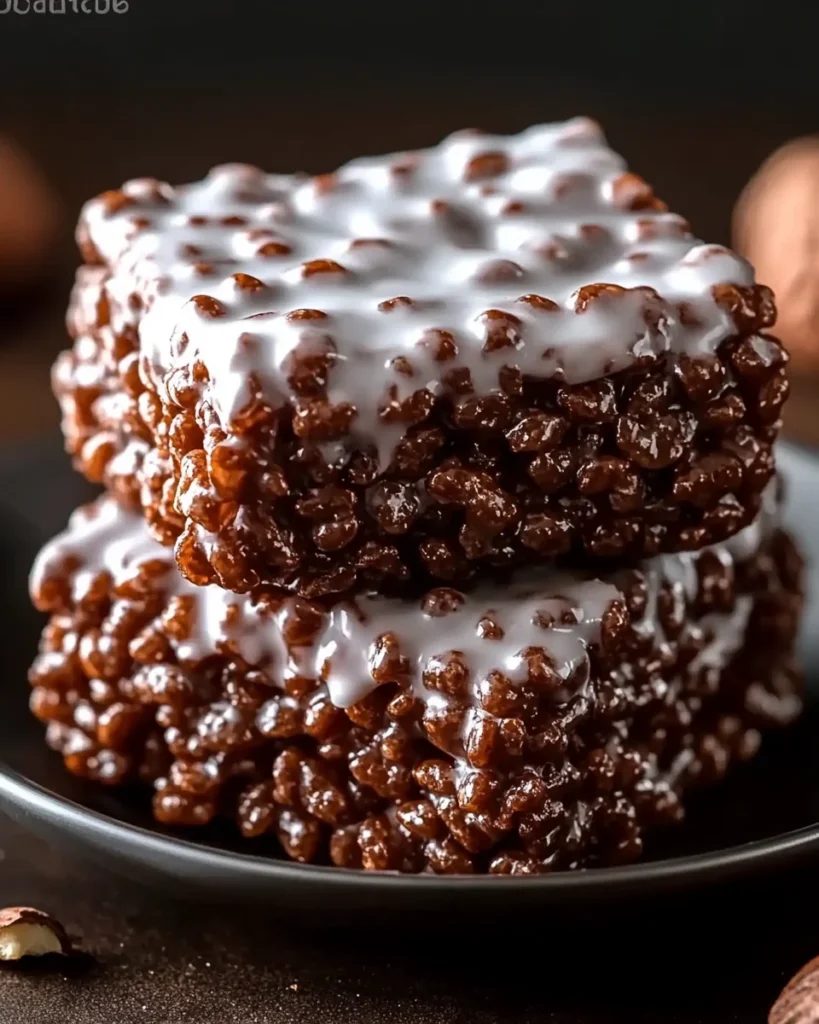
If you’re a fan of the classic chocolate and peanut butter combination, these Chocolate Peanut Butter Rice Krispies will quickly become your go-to treat. They’re crunchy, chewy, and irresistibly delicious, with just the right balance of sweetness and richness. Whether you’re making them for a party, a quick dessert, or an after-school snack, these bars are a hit every time. Let’s dive into the recipe and discover how to make these delectable bars step by step.
Why You’ll Love This Recipe
These Chocolate Peanut Butter Rice Krispies are the ultimate snack. Here’s why you’ll absolutely love them:
- Simple and Quick: Ready in under 30 minutes with just a few basic ingredients.
- No-Bake Recipe: Perfect for hot days when you don’t want to turn on the oven.
- Customizable: Add your favorite toppings or mix-ins for endless variations.
- Crowd-Pleaser: Loved by kids and adults alike, they’re perfect for any occasion.
- Portable and Shareable: Great for parties, picnics, or lunchboxes.
Ingredients You’ll Need
Here’s a breakdown of the ingredients required for this recipe:
| Ingredient | Amount |
|---|---|
| Rice Krispies cereal | 6 cups |
| Chocolate chips | 2 cups |
| Creamy peanut butter | 1/2 cup |
| Unsalted butter | 1/4 cup |
| Vanilla extract | 1 teaspoon |
| Powdered sugar | 1 1/2 cups (shaken) |
Step-by-Step Instructions
Step 1: Measure the Ingredients
- Gather all your ingredients, including the Rice Krispies cereal, chocolate chips, peanut butter, unsalted butter, vanilla extract, and powdered sugar.
Step 2: Melt the Chocolate and Peanut Butter
- In a microwave-safe bowl, combine the chocolate chips and creamy peanut butter.
- Heat in 30-second intervals, stirring in between, until the mixture is smooth and fully melted.
Step 3: Add Butter and Vanilla
- Stir the melted butter and vanilla extract into the chocolate-peanut butter mixture until well combined.
Step 4: Coat the Cereal
- In a large mixing bowl, pour the chocolate-peanut butter mixture over the Rice Krispies cereal.
- Gently fold the mixture until the cereal is evenly coated.
Step 5: Spread and Set
- Spread the coated cereal mixture evenly onto a baking sheet or into a pan.
- Allow it to cool and set at room temperature or in the refrigerator for faster results.
Step 6: Add Powdered Sugar
- Transfer the cooled bars into a large resealable plastic bag.
- Add the powdered sugar, seal the bag, and gently shake to coat the bars. Alternatively, lightly dust the bars with powdered sugar for a decorative touch.
Step 7: Cut and Serve
- Cut the bars into squares and serve. Enjoy the delightful blend of crunchy, chewy, and sweet flavors!
Tips for Success
Use Fresh Ingredients
- Fresh Rice Krispies cereal ensures maximum crunchiness.
Don’t Overheat the Chocolate
- Melt the chocolate and peanut butter mixture gently to avoid scorching.
Customize the Recipe
- Add mini marshmallows, chopped nuts, or candy pieces for extra texture and flavor.
Use Non-Stick Tools
- Use a silicone spatula to mix the cereal and chocolate mixture for easy handling.
Chill for Clean Cuts
- Refrigerate the bars for a cleaner cut when slicing into squares.
Nutritional Information
Here’s an approximate breakdown of the nutritional content per serving (based on 12 bars):
| Nutrient | Amount (Approx.) |
|---|---|
| Calories | 220 |
| Total Fat | 11g |
| Carbohydrates | 27g |
| Protein | 4g |
| Sugar | 18g |
Note: Nutritional values may vary based on portion size and specific ingredients used.
Frequently Asked Questions
1. Can I use other types of cereal?
Yes! Feel free to substitute Rice Krispies with other crispy cereals like Cocoa Krispies or Corn Flakes for a different twist.
2. Can I make these bars dairy-free?
Yes, use dairy-free chocolate chips and a plant-based butter alternative.
3. How do I store these bars?
Store them in an airtight container at room temperature for up to a week. For longer storage, refrigerate them.
4. Can I freeze these bars?
Absolutely. Wrap them tightly in plastic wrap and store in a freezer-safe container for up to 3 months. Thaw at room temperature before serving.
5. Can I use crunchy peanut butter?
Yes! Crunchy peanut butter adds a delightful texture to the bars.
6. How do I prevent the bars from sticking?
Line your baking sheet or pan with parchment paper to make removal easier.
Creative Variations
Salted Caramel Rice Krispies
- Add a drizzle of salted caramel sauce on top of the bars before they set.
S’mores Rice Krispies
- Mix in mini marshmallows and crushed graham crackers for a campfire-inspired treat.
Trail Mix Bars
- Add dried fruits, seeds, and nuts for a nutritious twist.
Festive Bars
- Decorate with colored sprinkles or drizzle with white chocolate for holiday-themed treats.
Serving Suggestions
Chocolate Peanut Butter Rice Krispies are perfect for:
- Birthday Parties: A crowd-pleasing addition to any dessert table.
- After-School Snacks: A quick and satisfying treat for kids.
- Potlucks and Picnics: Easy to transport and always a hit.
- Movie Nights: Pair with popcorn for a sweet and salty snack combo.
Final Thoughts
Chocolate Peanut Butter Rice Krispies are a simple yet indulgent treat that brings joy to any occasion. With just a handful of ingredients and no baking required, they’re a foolproof recipe for beginners and seasoned bakers alike. Plus, they’re endlessly customizable to suit your taste.
Ready to try this recipe? Gather your ingredients, follow these easy steps, and enjoy the perfect blend of chocolate, peanut butter, and crispy goodness. Share these bars with your friends and family—or keep them all to yourself! Either way, they’re guaranteed to delight.
Print
Chocolate Peanut Butter Rice Krispies
- Total Time: 15 minutes (plus cooling)
- Yield: 12 bars
Description
Chocolate Peanut Butter Rice Krispies combine the beloved duo of chocolate and peanut butter with the satisfying crunch of crispy cereal. These no-bake bars are quick, easy, and perfect for any occasion, from parties to afternoon snacks. With just a handful of ingredients, you can whip up a batch of these irresistibly chewy treats in no time!
Ingredients
- 6 cups Rice Krispies cereal
- 2 cups chocolate chips
- ½ cup creamy peanut butter
- ¼ cup unsalted butter
- 1 teaspoon vanilla extract
- 1 ½ cups powdered sugar
Instructions
Step 1: Melt the Chocolate and Peanut Butter
- In a microwave-safe bowl, combine chocolate chips and peanut butter. Heat in 30-second intervals, stirring between each, until fully melted and smooth.
Step 2: Add Butter and Vanilla
- Stir in unsalted butter and vanilla extract to the melted mixture until thoroughly combined.
Step 3: Coat the Cereal
- In a large mixing bowl, pour the chocolate-peanut butter mixture over the Rice Krispies cereal. Use a silicone spatula to gently fold the mixture until the cereal is evenly coated.
Step 4: Spread the Mixture
- Line a baking pan or sheet with parchment paper. Spread the coated cereal mixture evenly into the pan, pressing lightly to ensure it holds together.
Step 5: Let It Set
- Allow the bars to cool and set at room temperature for about 30 minutes, or refrigerate for faster results.
Step 6: Coat with Powdered Sugar
- Transfer the cooled bars to a large resealable plastic bag. Add powdered sugar, seal the bag, and shake gently to coat the bars evenly. Alternatively, dust the top with powdered sugar for a decorative touch.
Step 7: Slice and Serve
- Once set, cut the bars into squares and serve. Enjoy the perfect balance of chocolate, peanut butter, and crunch!
Notes
- Use parchment paper to line your pan for easy removal.
- If you prefer a sweeter treat, drizzle additional melted chocolate on top before cooling.
- Adjust the peanut butter and chocolate ratio to suit your taste preferences.
- Prep Time: 10 minutes
- Cook Time: 5 minutes
- Category: Dessert, Snack
- Method: No-Bake
- Cuisine: American

