With a satisfying crunch and gooey warmth, these Homemade Cheesy Gordita Crunch Tacos are sure to hit the spot when late-night cravings strike. Forget the drive-thru—this recipe not only comes together quicker than you think but allows you to customize every bite just the way you like it! Imagine fluffy tortillas hugging a crispy shell, all layered with seasoned beef, melty cheese, and your favorite toppings. It’s comfort food at its finest, perfect for relaxed evenings or casual gatherings. Plus, you can whip them up in your pajamas and enjoy the deliciousness of Taco Bell’s classic right at home. Who can resist that? Ready to dive into a recipe that brings the fiesta to your kitchen? Let’s get started!
Why Are These Tacos a Must-Try?
Flavor Explosion: Each bite bursts with the rich and savory goodness of seasoned beef paired with melty cheese, making them utterly irresistible.
Quick & Easy: Whip up these tacos faster than waiting in a drive-thru! Perfect for busy nights or spontaneous gatherings.
Customizable: Top them off with your favorites—add guacamole, jalapeños, or refried beans to create your dream taco.
Comfort Food: Enjoy the cozy combination of crispy and soft textures, bringing familiar fast-food comfort to your table, but homemade!
Crowd-Pleaser: These tacos make a delightful addition to family dinners or taco nights with friends, especially when paired with sides like Mexican rice.
Cheesy Gordita Crunch Tacos Ingredients
For the Taco Filling
• Lean Ground Beef – Provides the main protein; ground turkey or chicken can offer a leaner alternative.
• Taco Seasoning – Adds a burst of flavors; you can easily make your own with spices like chili powder, onion powder, and garlic powder.
For the Taco Base
• Flour Tortillas – The soft base for the tacos; fajita-size works best, but feel free to try other wraps for a different taste.
• Hard Taco Shells – Delivers that perfect crunch; consider flavored taco shells for an extra kick.
For the Assembly
• Cheddar Cheese (shredded) – Melts beautifully and binds the tortillas; feel free to swap for Monterey Jack or a Mexican cheese blend.
• Iceberg Lettuce – Adds a refreshing crunch; replace it with shredded cabbage for a twist.
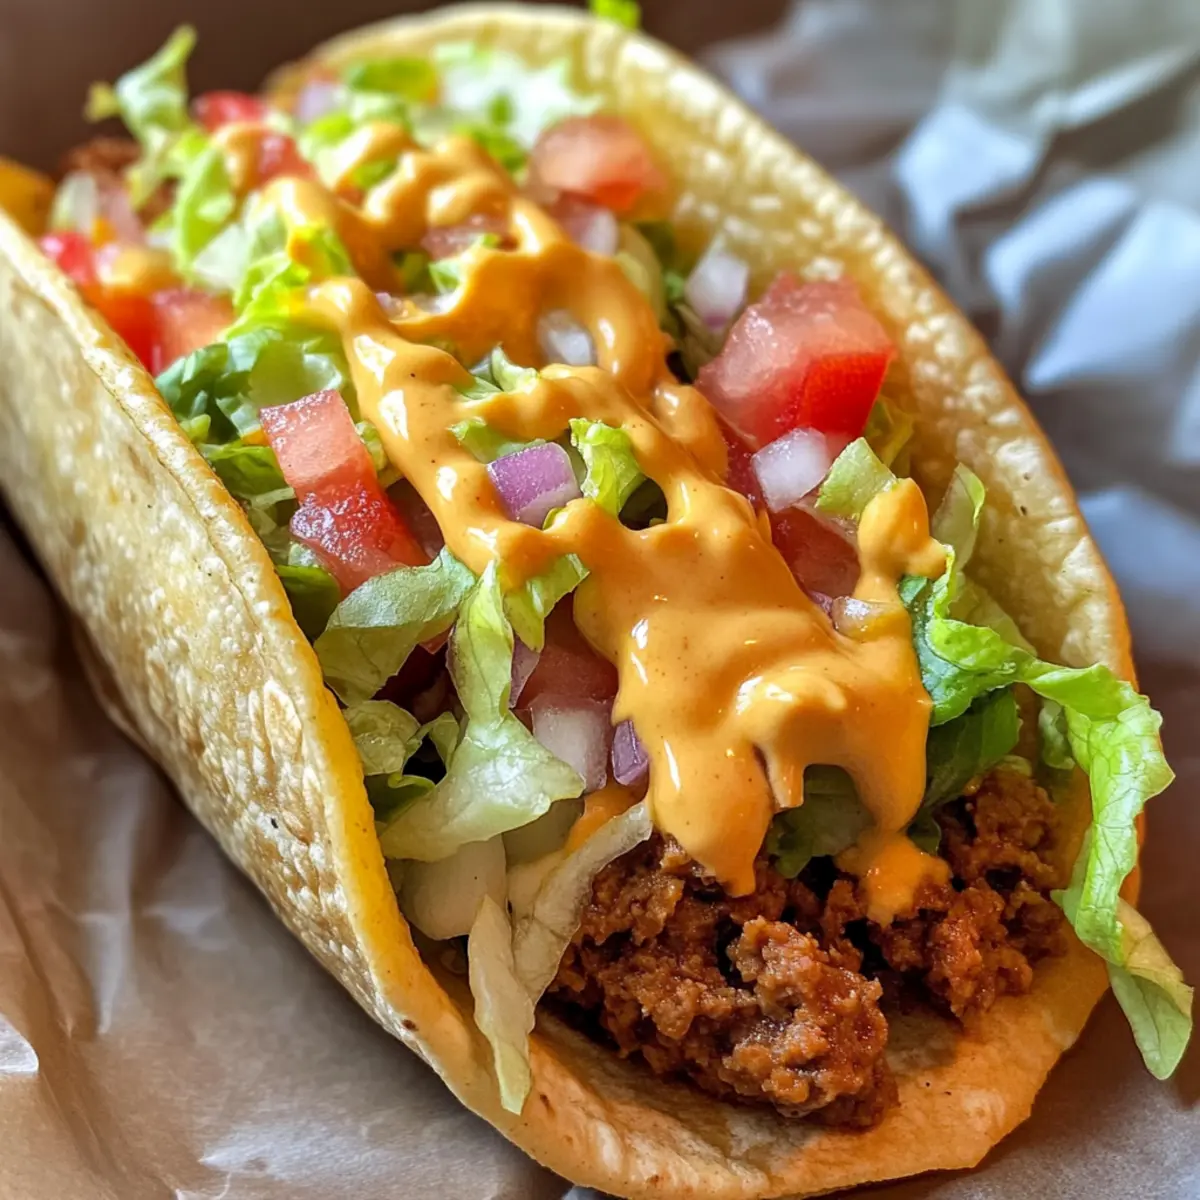
• Tomatoes (diced) – Infuses juiciness into each bite; you can also use salsa or pico de gallo for an added touch.
• Taco Bell Spicy Ranchero Sauce – Enhances flavor with its creamy texture; substitute with your favorite taco sauce or sour cream for variety.
These Cheesy Gordita Crunch Tacos bring the joy of Taco Bell to your home kitchen in a fun, customizable way! Enjoy assembling them just the way you like!
Step‑by‑Step Instructions for Cheesy Gordita Crunch Tacos
Step 1: Preheat the Oven
Begin by preheating your oven to 400°F (200°C). This ensures that the Cheesy Gordita Crunch Tacos will get nicely baked and the cheese will melt perfectly as you assemble the ingredients. Prepare a baking tray lined with parchment paper for easy cleanup later and to help any melted cheese slide off without sticking.
Step 2: Cook the Ground Beef
In a large skillet, over medium-high heat, add your lean ground beef. Using a spatula, break up the meat as it browns for about 5–7 minutes until it’s cooked through and no longer pink. Once done, drain any excess fat to keep your tacos nice and lean. This flavorful beef will be the heart of your Cheesy Gordita Crunch Tacos!
Step 3: Season the Meat
Sprinkle your taco seasoning over the cooked beef, pouring in 1/4 cup of water. Stir well for another 1–2 minutes until everything is combined and the seasoning clings to the beef, giving it that delicious flavor profile. Once ready, remove from heat, and you’ll be set to build your tacos with this nicely seasoned filling.
Step 4: Prepare the Tortillas
Lay out your flour tortillas on the prepared baking tray. Evenly distribute about 1/4 cup of shredded cheddar cheese atop each tortilla. Bake in the preheated oven for 3–5 minutes or until the cheese is melted and bubbly. The warm, cheesy base will create a perfect platform for your Crunch Tacos!
Step 5: Assemble the Taco Shells
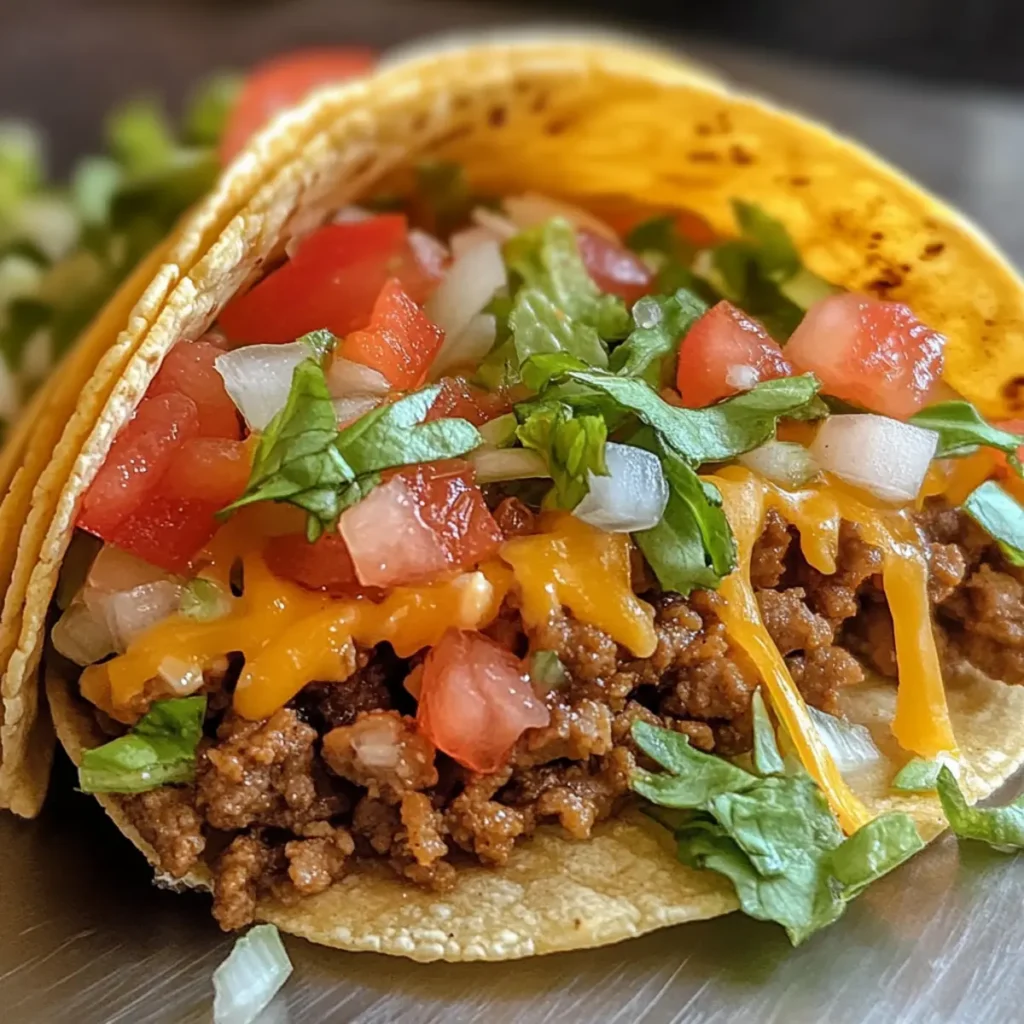
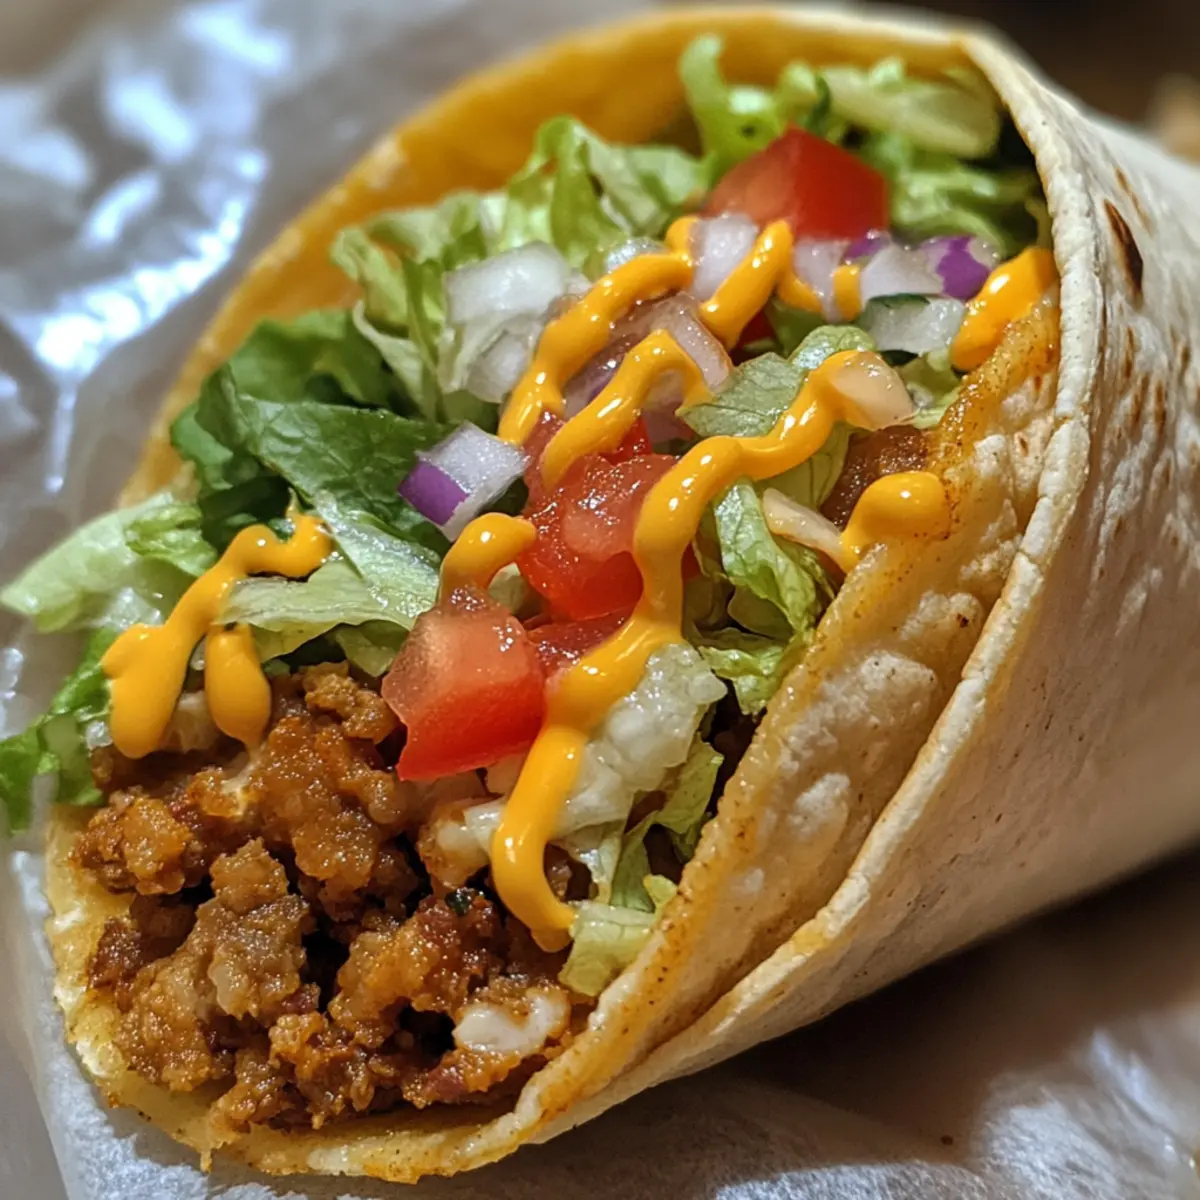
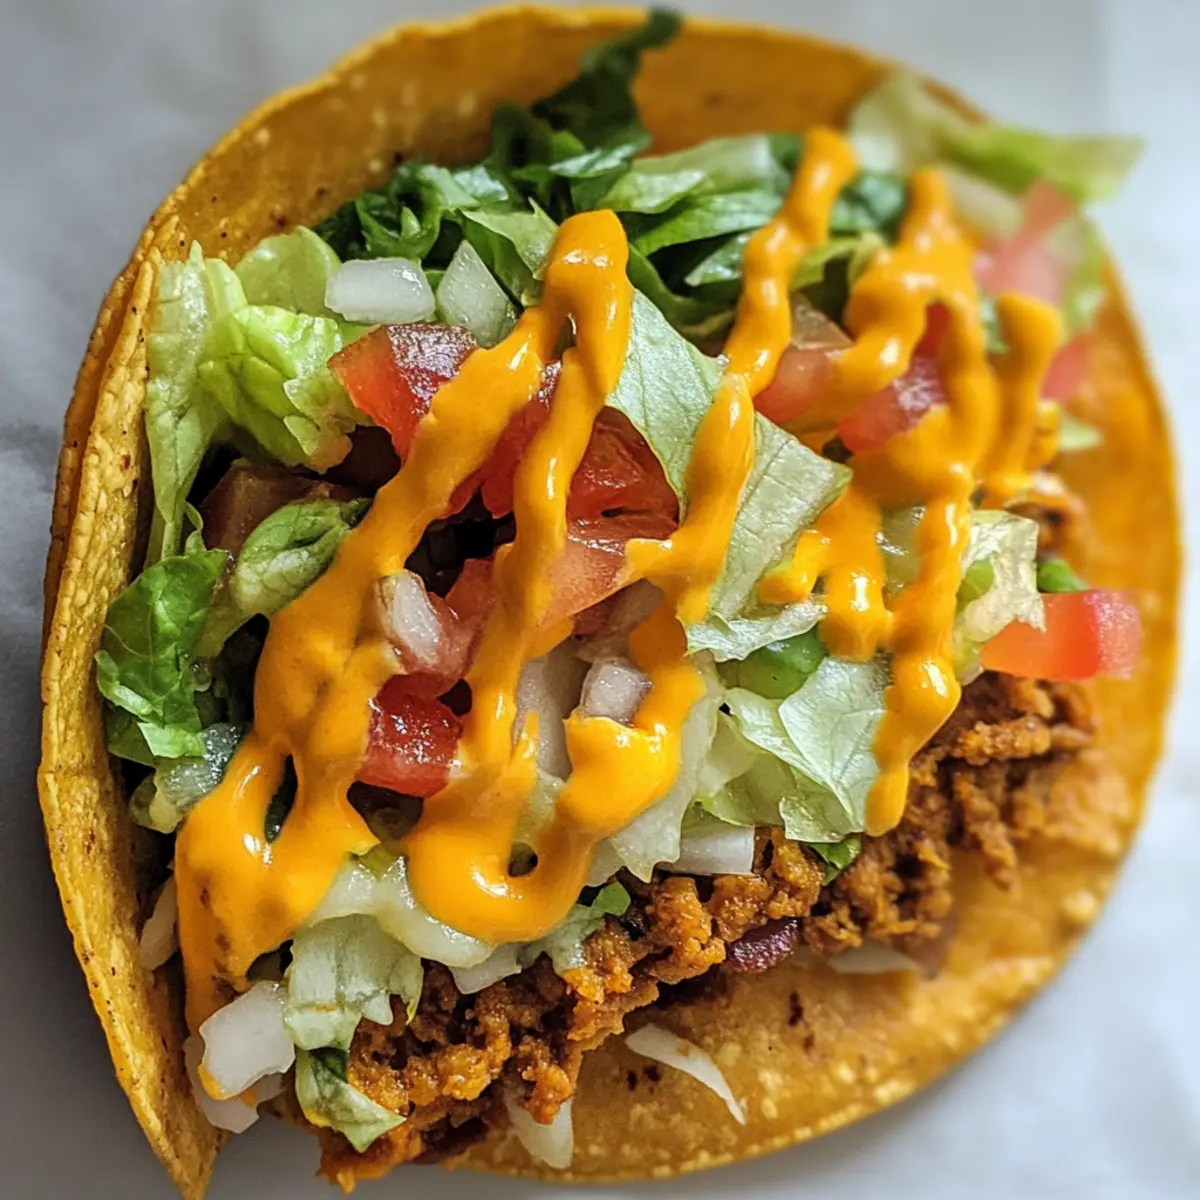
Once the cheese has melted, carefully remove the tortillas from the oven. While the cheese is still warm, press a hard taco shell into the center of each tortilla, making sure it sticks to the gooey cheese. This lovely combination creates that iconic chewy and crunchy texture essential for your Cheesy Gordita Crunch Tacos.
Step 6: Fill the Taco Shells
Now it’s time to fill those hard taco shells! Spoon the seasoned ground beef equally into each taco shell, making sure to pack it well to avoid any spills. This flavorful filling is the star of your Cheesy Gordita Crunch Tacos, adding depth and savory goodness to each bite.
Step 7: Add the Fresh Toppings
Top each taco shell with a handful of crisp iceberg lettuce and a sprinkle of diced tomatoes for freshness and crunch. Feel free to get creative and add any other favorite toppings you desire! It’s all about customizing your Cheesy Gordita Crunch Tacos to suit your taste buds for a delightful meal.
Step 8: Drizzle with Sauce
Finally, drizzle the Taco Bell spicy ranchero sauce over each assembled taco, adding an extra layer of creamy flavor. This finishing touch is what really elevates the taste of your Cheesy Gordita Crunch Tacos, giving them that signature zesty kick. Serve the tacos warm and enjoy the deliciousness!
What to Serve with Cheesy Gordita Crunch Tacos?
Pair your delicious tacos with easy side dishes that bring out the best flavors and textures while enhancing the mealtime experience.
-
Mexican Rice: A flavorful side that adds warmth and heartiness, balancing the crunchiness of the tacos perfectly. It absorbs all the amazing taco flavors too!
-
Refried Beans: Creamy and rich, these beans pair wonderfully with the tacos’ crispiness. They also elevate the overall Mexican-inspired meal with layers of flavor and texture.
-
Fresh Salsa: Bright and zesty, a homemade salsa adds a refreshing burst of flavor that cuts through the richness of the cheese and beef. Perfect for dipping or drizzling!
-
Guacamole: Smooth and creamy, guacamole provides a delectable contrast to the crunchy tacos. Plus, who can resist the vibrant green goodness made from ripe avocados?
-
Corn Salad: A colorful mix of sweet corn, diced peppers, and lime creates a crunchy, sweet side that complements the savory tacos beautifully. This salad is a fiesta for the senses!
-
Churros: For a sweet ending, serve churros dusted with cinnamon sugar. Their warm, crispy exterior contrasts with a soft inside, providing a delightful way to close the meal.
-
Margaritas: Sip on a classic margarita with your tacos for a refreshing beverage that enhances the festive mood, bringing summer vibes to your plate anytime!
Expert Tips for Cheesy Gordita Crunch Tacos
-
Prevent Sogginess: Avoid assembling your tacos if you’re not eating them right away; the hard shells may turn soggy if left unassembled for too long.
-
Prep Ahead: Save time by cooking your ground beef and seasoning in advance. Store them in an airtight container for easy assembly on busy nights.
-
Melt in Style: For a twist, use an air fryer to melt cheese on your tortillas before adding the taco shells, creating an even more delicious fusion of flavors.
-
Flavor Variations: Experiment with different cheese types or swap out taco seasoning for spicy blends to create your own signature Cheesy Gordita Crunch Tacos.
-
Toppings Galore: Don’t hesitate to pile on the toppings! Fresh ingredients like guacamole, jalapeños, or a drizzle of hot sauce can elevate your tacos to the next level.
Make Ahead Options
These Cheesy Gordita Crunch Tacos are a fantastic choice for meal prep, saving you precious time during busy weeknights! You can prepare the seasoned ground beef and store it in an airtight container in the refrigerator for up to 3 days. Additionally, you can pre-melt the cheese onto the flour tortillas and assemble taco shells, storing everything separately to maintain their unique textures. When you’re ready to enjoy, simply reheat the beef mixture on the stovetop or in the microwave, then assemble by placing the beef into the shells, adding your toppings, and drizzling the ranchero sauce. This method keeps your tacos just as delicious as the day you made them!
How to Store and Freeze Cheesy Gordita Crunch Tacos
Fridge: Store any leftover assembled tacos in an airtight container for up to 2 days to maintain freshness, but keep toppings separate to avoid sogginess.
Freezer: For longer storage, freeze the taco meat in an airtight container for up to 3 months, and prepare the shells fresh when ready to enjoy.
Reheating: Reheat the taco filling in the microwave or on the stovetop, then reassemble your Cheesy Gordita Crunch Tacos just before serving for the best texture.
Assembling Fresh: If you have leftover components, store them separately and assemble fresh for optimal crunch and flavor.
Cheesy Gordita Crunch Tacos Variations
Feel free to bring your own flair to these tacos and make them uniquely yours!
-
Dairy-Free: Use vegan cheese and skip the sour cream to create a delicious dairy-free version without sacrificing flavor.
Transforming this dish into a plant-based meal can be just as satisfying. -
Spicy Kick: Add diced jalapeños or a sprinkle of cayenne pepper to the meat for an extra layer of heat.
Heat lovers will appreciate this small twist, which adds a lively bite to each taco. -
Crunchy Add-Ins: Toss in some crushed corn chips or tortilla strips as an extra crunchy topping.
This unexpected element will give your tacos another delightful layer of texture that’s hard to resist. -
Vegetarian Option: Substitute ground beef with a mix of black beans, corn, and diced bell peppers for a hearty vegetarian option.
This colorful filling is just as delightful and packs a flavorful punch while keeping it veggie-friendly. -
Guacamole Delight: Slather on some fresh guacamole in addition to your usual toppings for an irresistibly creamy experience.
This classic topping not only adds flavor but elevates the creamy texture—who doesn’t love guac? -
Herbamatic: Try sprinkling fresh cilantro over your tacos for a burst of aromatic freshness and added color.
This bright herb complements the rich flavors beautifully, transforming each bite into a refreshing experience. -
Baked Rice Layer: Layer some seasoned Mexican rice inside the tacos before adding your fillings for a heartier meal.
This twist ensures every bite is filling, enhancing the overall taco experience with flavors of the south. -
Savory Sweetness: Add a drizzle of honey or agave on top for a sweet contrast to the savory meat—a creative and fun twist!
Believe it or not, this hint of sweetness can elevate the flavors, making your tacos even more unique.
Why not dive further into homemade magic with delectable options like Cheesy Chicken Stuffed potatoes or explore other cheesy delights like Jalapeno Popper Cheesy egg rolls? The possibilities are endless!
Cheesy Gordita Crunch Tacos Recipe FAQs
How do I select the best ground beef for the taco filling?
Choosing lean ground beef is essential for delicious Cheesy Gordita Crunch Tacos. Look for ground beef with around 90% lean content for a healthier option without sacrificing flavor. If you’re looking for a leaner choice, ground turkey or chicken are excellent alternatives; just keep in mind they might have a slightly different taste. Check the package for freshness dates, and ensure the meat is deep red in color without any gray or brown spots.
Advertisement
What’s the best way to store leftover Cheesy Gordita Crunch Tacos?
To keep your leftovers fresh, store any assembled tacos in an airtight container in the fridge for up to 2 days. However, to prevent the hard taco shells from becoming soggy, it’s best to keep any toppings—like lettuce and tomatoes—separate. This way, you can reassemble the tacos just before eating for that perfect texture!
Can I freeze the filling for later use?
Absolutely! To freeze the taco filling, let it cool completely and then transfer it to an airtight container or a resealable freezer bag. It can be stored in the freezer for up to 3 months. When you’re ready to use it, simply thaw it in the fridge overnight and reheat it on the stovetop or microwave, then assemble your tacos using fresh hard shells and toppings.
What should I do if the taco shells become soggy during storage?
If you find the taco shells have become soggy, don’t worry! You can re-crisp them in the oven at 350°F (175°C) for about 5-7 minutes before assembling. Alternatively, for ultimate crunch, consider briefly frying the taco shells in a bit of oil to revive their crispiness before filling them.
Are these tacos suitable for special dietary needs?
Yes, Cheesy Gordita Crunch Tacos can be easily adapted for special diets! For gluten-free options, use corn tortillas instead of flour tortillas and check that your taco seasoning is gluten-free. For dairy-free alternatives, opt for a dairy-free cheese or skip the cheese altogether. Always be mindful of allergies and ingredient labels when selecting store-bought items!

Cheesy Gordita Crunch Tacos: Your Ultimate Homemade Delight
Ingredients
Equipment
Method
- Preheat your oven to 400°F (200°C) and line a baking tray with parchment paper.
- In a large skillet, cook the lean ground beef over medium-high heat for 5–7 minutes until browned, then drain excess fat.
- Add taco seasoning and 1/4 cup of water to the beef, stirring well for 1–2 minutes until combined.
- Lay out flour tortillas on the baking tray and distribute shredded cheddar cheese evenly on top. Bake for 3–5 minutes until melted.
- Remove tortillas from the oven, press a hard taco shell into the center of each while cheese is warm.
- Fill each taco shell with seasoned ground beef, packing it well.
- Top with iceberg lettuce and diced tomatoes, adding any other desired toppings.
- Drizzle spicy ranchero sauce over the assembled tacos before serving warm.