The moment those leaves start to turn and the air gets that crisp bite, I know it’s time to start conjuring up some fun fall treats! Enter the whimsical Cheese Broomsticks, your new go-to Halloween snack. With just three simple ingredients, these enchanting bites are the perfect way to get kids excited about kitchen time while ensuring that deliciousness reigns supreme at your Halloween festivities. Not only are they incredibly easy to whip up, but they also add a delightful twist to your snack table, turning mundane munchies into magical moments. These cheese-y, fun broomsticks promise to be a hit with both young and old alike. Ready to cast your culinary spell? Let’s create some enchanting bites together!

Why Will You Love Cheese Broomsticks?
Fun and Festive: These Cheese Broomsticks are not just snacks; they’re a delightful conversation starter at any Halloween gathering.
Kid-Friendly: Your little ones will love helping to create these magical treats, making it a fun family activity!
Quick and Easy: With just three simple ingredients, this recipe comes together in minutes—perfect for busy schedules.
Versatile: Feel free to experiment with different cheese varieties or flavored pretzels to suit your taste.
Low-Calorie Treat: At approximately 29 calories per serving, these broomsticks are a guilt-free indulgence the whole family can enjoy.
For more easy and delicious ideas, check out my Homemade Mac Cheese or get inspired by my Moist Carrot Frosting. Enjoy the flavors of Halloween with style!
Cheese Broomsticks Ingredients
Get ready to create a spooky snack!
For the Broomsticks
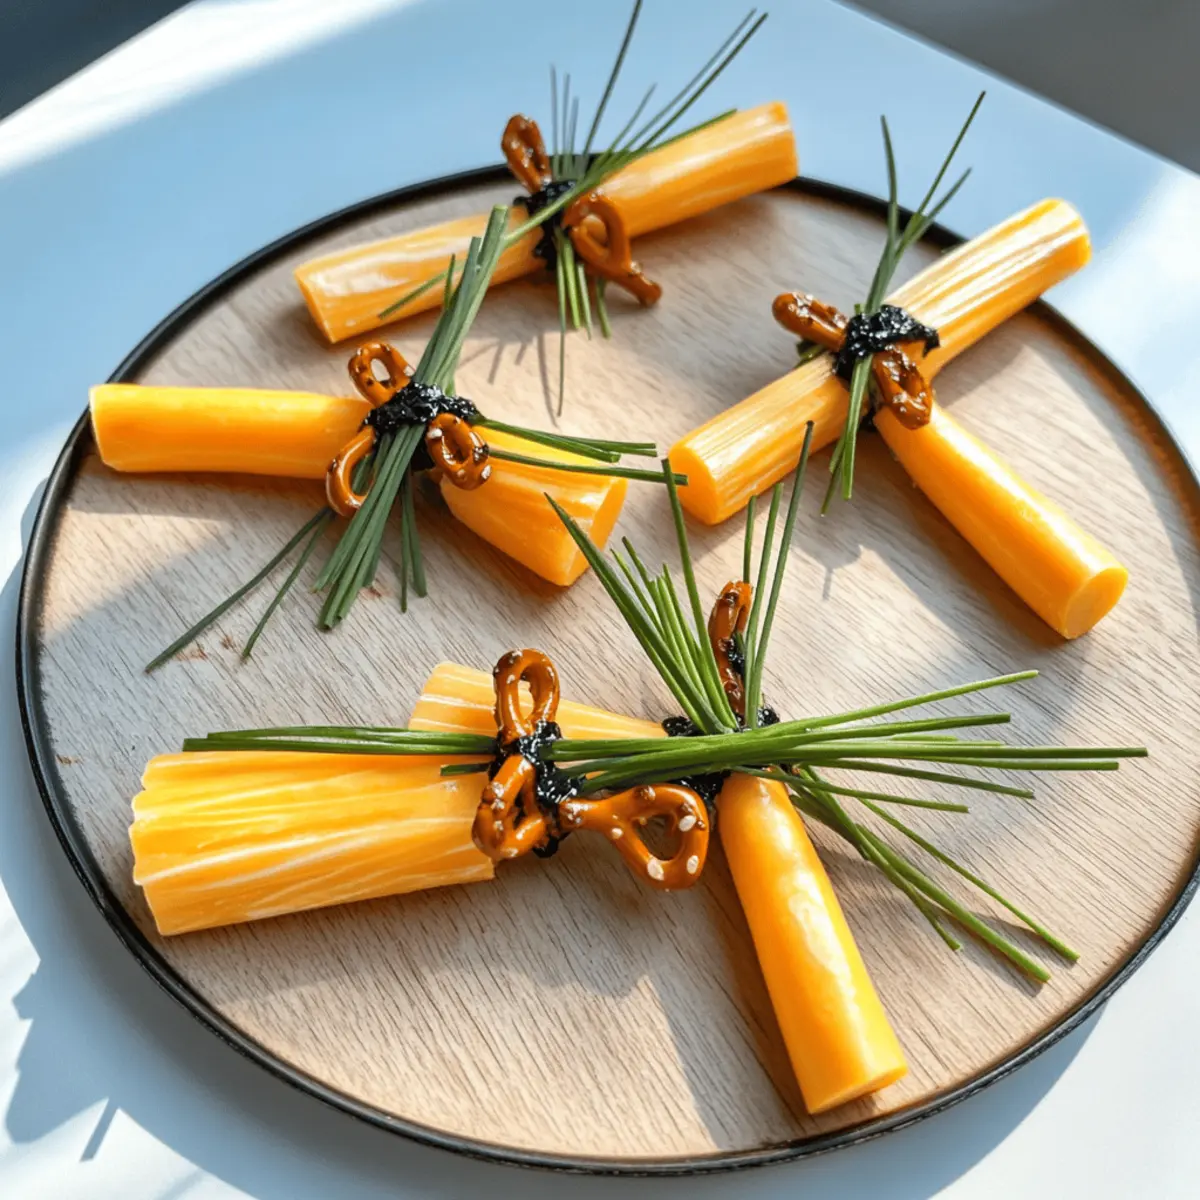
- Pretzel Sticks – The perfect ‘broom’ handle that adds a delightful crunch to every bite.
- Marbled Cheddar String Cheese – This cheese is the main attraction; cut it into thirds for those charming broom bristles. Tip: Firmer varieties work best for preventing breakage.
- Chive Strings – Stylishly wrapped around the cheese to represent the broom tie, adding a pop of color and flavor.
Now that you have the ingredients, let’s conjure up some Cheese Broomsticks for Halloween!
Step‑by‑Step Instructions for Cheese Broomsticks
Step 1: Prepare the Cheese
Begin by cutting each marbled cheddar string cheese stick into thirds. Use a thin, serrated knife to ensure smooth cuts without breaking the cheese. Aim for uniform pieces about 2-3 inches long. This will create the charming broom bristles for your Cheese Broomsticks. Set these pieces aside on a clean cutting board as you prepare to shape them.
Step 2: Create Broom Bristles
Next, take each cheese piece and carefully make lengthwise cuts about 3/4 of the way up to form the broom bristles. Rotate the cheese and repeat with additional cuts, creating a fringe effect without slicing all the way through. This step is key for making the Cheese Broomsticks visually appealing and fun, mimicking a broom perfectly.
Step 3: Assemble the Broomsticks
Now, gently insert a pretzel stick into the top of each cut cheese piece, forming the handle of your Cheese Broomsticks. Push it in until it’s secure, making sure not to break the cheese during this step. The pretzel should stand upright, creating a delightful contrast to the creamy cheese bristles.
Step 4: Add the Chive Tie
To finish your whimsical Cheese Broomsticks, cut chive pieces to roughly 2 inches long. Carefully wrap a chive string around the top of each cheese stick, just below the pretzel, to resemble the broom’s tie. Secure it tightly, making sure it holds the pretzel in place, enhancing the playful look and adding a touch of flavor.
Step 5: Serve Your Creation
Once all your Cheese Broomsticks are assembled, arrange them on a festive platter or serve immediately for the best texture. These snacks are best enjoyed fresh, as refrigeration can soften the pretzel crispness. Watch as your family gathers around to admire and munch on these fun Halloween treats!

How to Store and Freeze Cheese Broomsticks
Room Temperature: Serve your Cheese Broomsticks immediately for the best flavor and crunch. They can stay at room temperature for up to 2 hours.
Fridge: If there are any leftovers, store them in an airtight container in the fridge for up to 1 day. Keep in mind that the pretzels may soften.
Freezer: It’s not recommended to freeze Cheese Broomsticks, as the texture of the cheese and pretzels may suffer. Enjoy fresh for optimal taste!
Reheating: If you choose to reheat any stored Cheese Broomsticks, do so in the oven at a low temperature for a few minutes to regain some crispness, but it’s best to serve them fresh.
Cheese Broomsticks: Customizing Your Treats
Feel free to get creative with your Cheese Broomsticks and discover new flavors that delight the whole family!
-
Cheese Varieties: Swap marbled cheddar for pepper jack or mozzarella to add a spicy or creamy twist. Each cheese brings unique flavors to your broomsticks!
-
Flavored Pretzels: Use seasoned pretzel sticks like garlic or cheddar for an extra punch of flavor, enhancing the taste experience with each crunchy bite.
-
Herb Variants: Instead of chives, try basil leaves or rosemary for a fragrant twist. These herbs will elevate your broomsticks and add a fresh, aromatic touch.
-
Colorful Sprinkles: For an even more festive feel, add edible googly eyes or colorful sprinkles on the cheese before serving. Kids will love the added surprise!
-
Spicy Option: Incorporate a sprinkle of cayenne pepper for adults who crave a little heat. This fiery touch will give your Cheese Broomsticks a fun and zesty kick.
-
Sweet Surprise: If you’re feeling adventurous, try a hint of honey drizzled over the cheese. It pairs surprisingly well with the savory flavors for a sweet twist!
-
Mini Broomsticks: For bite-sized snacks, use mini pretzel sticks and cut your cheese into smaller pieces. These cute mini broomsticks are perfect for parties or lunchboxes.
For more delightful creations, explore my favorite ideas like the comforting Honey Pepper Chicken or the delectable Gingerbread Spice Cheesecake.
What to Serve with Cheese Broomsticks?
As you set out your whimsical Cheese Broomsticks, consider these perfect pairings that will enhance your Halloween gathering.
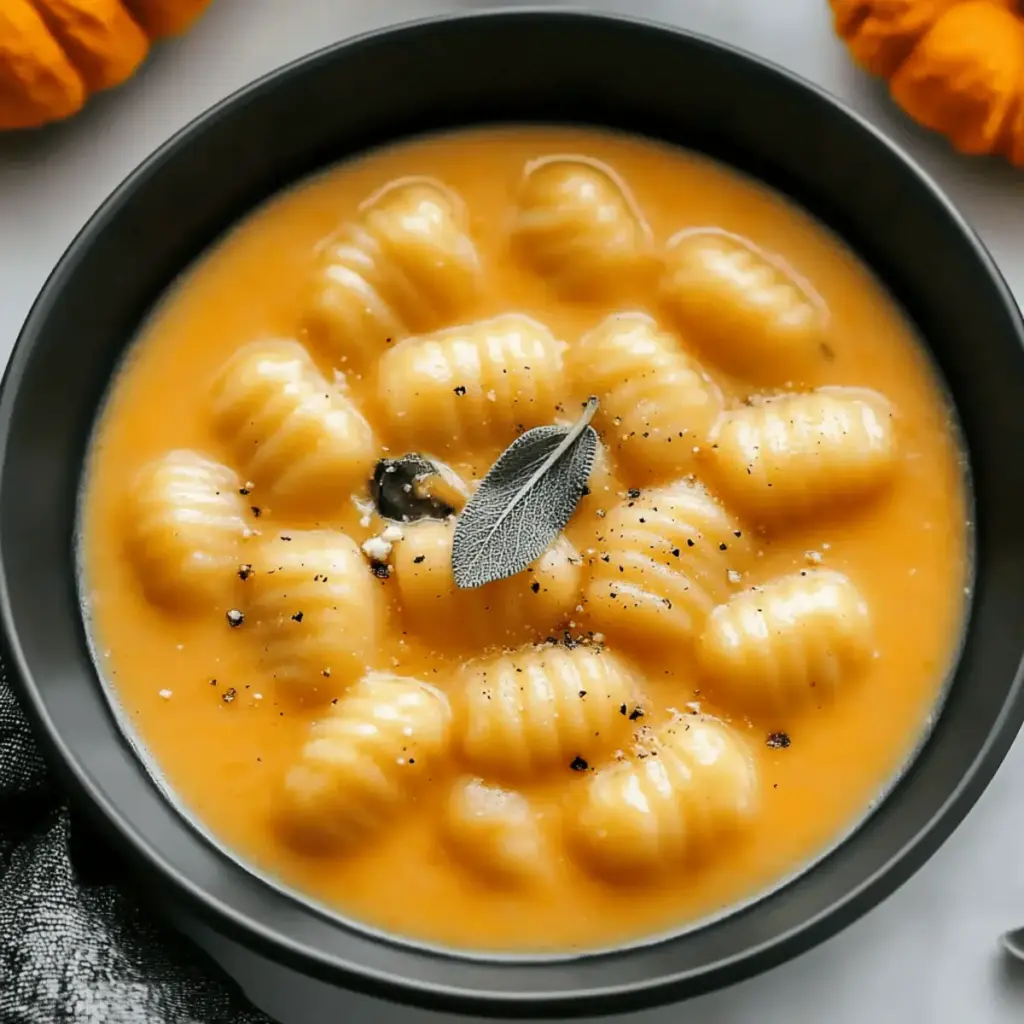
- Pumpkin Soup: This creamy soup complements the crunchy broomsticks, offering a warm and comforting contrast that delights the palate.
- Veggie Platter: A colorful assortment of fresh vegetables adds a vibrant crunch, providing a refreshing counterpart to the cheesy goodness.
- Spooky Fruit Skewers: Thread fruits like grapes and melon onto sticks for a sweet treat that offers a playful and spooky touch to your snack spread.
- Mini Hot Dogs: These savory bites are a meaty contrast to the cheese and add heartiness to your Halloween feast. Pair them with your favorite dipping sauces for extra fun!
- Halloween Punch: A fruity, mocktail punch with ghostly ice cubes sets a festive mood, appealing to both kids and adults alike.
- Chocolate-Covered Pretzels: For a sweet treat that echoes the pretzel crunch in your broomsticks, these sweet and salty delights are a hit! They offer a delightful twist to your snack table.
- Caramel Apples: These gooey delights balance the savory nature of the Cheese Broomsticks, providing a fun, festive dessert option that embodies the spirit of Halloween.
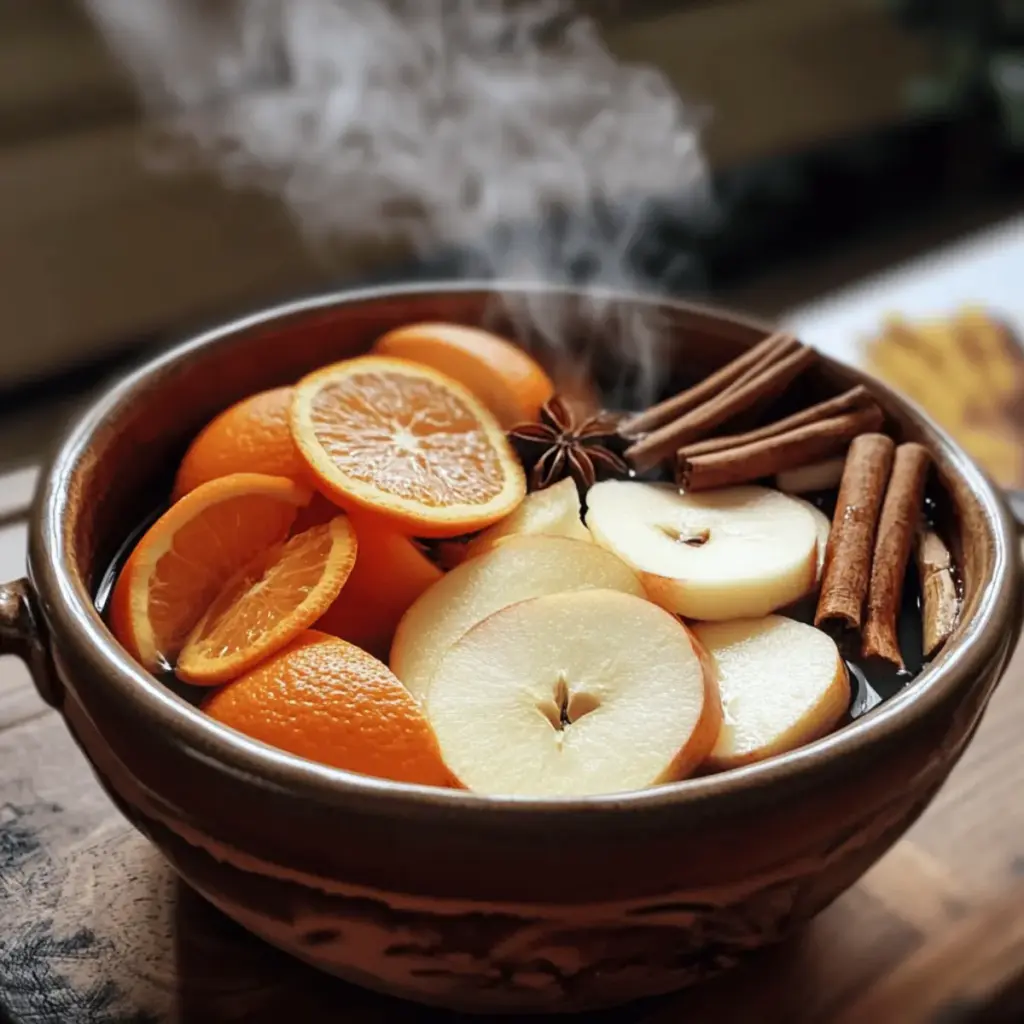
- Cider: Warm or cold, apple cider adds a seasonal flavor and pairs perfectly with cheesy snacks, inviting everyone to gather around and enjoy.
- Popcorn Monsters: Serve a bowl of popcorn mixed with Halloween-themed candies, providing a perfect crunchy snack that brings joy and cheer to your gathering.
- Cinnamon Sugar Cookies: These sweet treats mate fantastically with the savory broomsticks, bridging the gap between salty and sweet in a delightful Halloween-themed dessert.
Make Ahead Options
These delightful Cheese Broomsticks can definitely be a time-saver for busy cooks during the Halloween rush! You can prepare the cheese sticks (cut into thirds and shaped for broom bristles) up to 24 hours in advance. Simply assemble the broomsticks by inserting the pretzel sticks and wrapping with chives just before serving; this keeps the pretzels crispy. To maintain quality, refrigerate the prepared cheese pieces in an airtight container, but avoid fully assembling them until you’re ready to enjoy. This way, you’ll have a charming snack ready to impress your guests with minimal effort, delivering just the right crunch and flavor!
Expert Tips for Cheese Broomsticks
Fresh is Best: Serve immediately for optimal crunch; refrigeration may soften the pretzels and diminish their delightful texture.
Gentle Cuts: Use a thin serrated knife when cutting cheese to minimize the risk of breaking, ensuring perfect broom bristles.
Kid Involvement: Engage your children in the assembly process—it’s a fun, interactive activity that sparks creativity and excitement in the kitchen!
Cheese Variety: Feel free to experiment with firmer cheese types like pepper jack or mozzarella for unique flavors while keeping the structure intact.
Flavorful Pretzels: Consider using flavored pretzel sticks to elevate the taste profile of your Cheese Broomsticks, adding a fun twist to this festive treat.

Cheese Broomsticks Recipe FAQs
What type of cheese should I use for Cheese Broomsticks?
Absolutely! I recommend using marbled cheddar string cheese as it is firm enough to maintain structure when cut into broom bristles. If you’re looking for a twist, try firmer varieties like pepper jack or mozzarella; just make sure they hold up when cut.
Advertisement
How do I store leftover Cheese Broomsticks?
Very! If you have any leftovers, you can store them in an airtight container in the fridge for up to 1 day. However, keep in mind that the pretzels may soften due to moisture in the air, so they’re best enjoyed fresh.
Can I freeze Cheese Broomsticks?
Not recommended! The texture of both the cheese and pretzels tends to suffer when frozen, which can lead to mushy broomsticks upon thawing. It’s best to serve these delightful treats fresh, so everyone can enjoy that lovely crunch.
What’s the best way to make Cheese Broomsticks ahead of time?
While I always encourage enjoying them fresh, you can prepare the cheese and chives in advance. Cut your cheese pieces and chives, then store them in airtight containers in the fridge for up to 3 days. Assemble the broomsticks right before serving to maintain the delightful crunch and presentation!
Can my kids help make Cheese Broomsticks?
Absolutely! Involving your children in the kitchen can turn this recipe into a fun family activity. They will love helping to cut the cheese and assemble the broomsticks. Just supervise while they use the knife, and let their creativity shine as they decorate.
Are Cheese Broomsticks suitable for kids with allergies?
Very! However, be cautious about potential allergies, especially if using substitutes. Always check for allergies to cheese, gluten in pretzels, or any added ingredients in flavored pretzels. You can easily swap in allergy-friendly options for cheese and pretzels to cater to various dietary needs.
Cheese Broomsticks: Fun 3-Ingredient Halloween Treats for Kids
Ingredients
Equipment
Method
- Begin by cutting each marbled cheddar string cheese stick into thirds. Use a thin, serrated knife to ensure smooth cuts without breaking the cheese.
- Next, take each cheese piece and carefully make lengthwise cuts about 3/4 of the way up to form the broom bristles.
- Gently insert a pretzel stick into the top of each cut cheese piece, forming the handle of your Cheese Broomsticks.
- Cut chive pieces to roughly 2 inches long. Wrap a chive string around the top of each cheese stick, just below the pretzel.
- Arrange the Cheese Broomsticks on a festive platter or serve immediately.