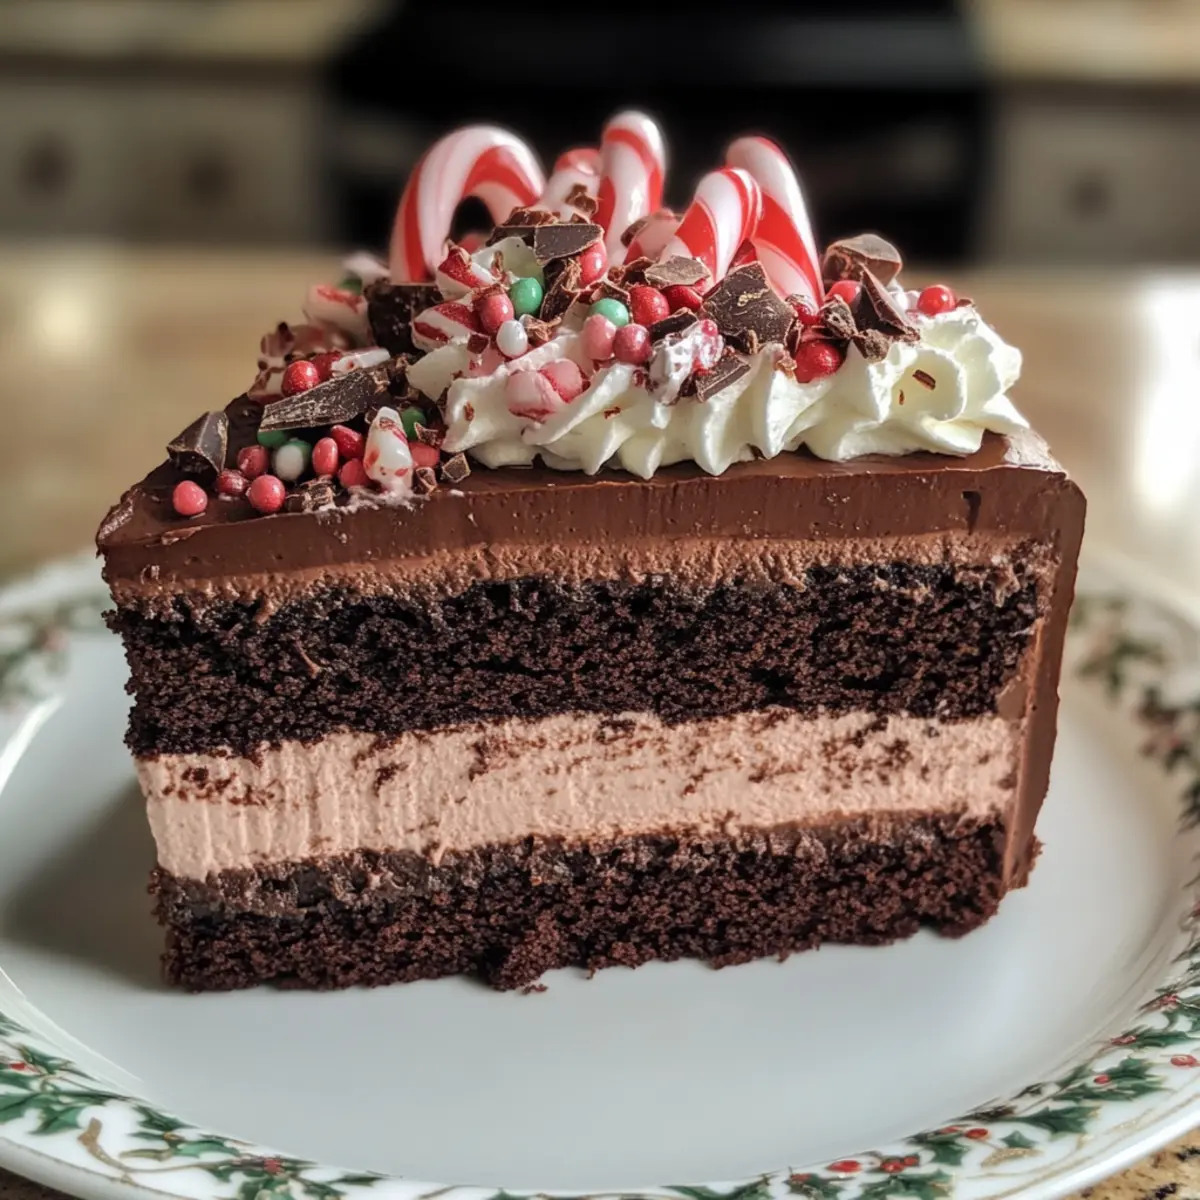
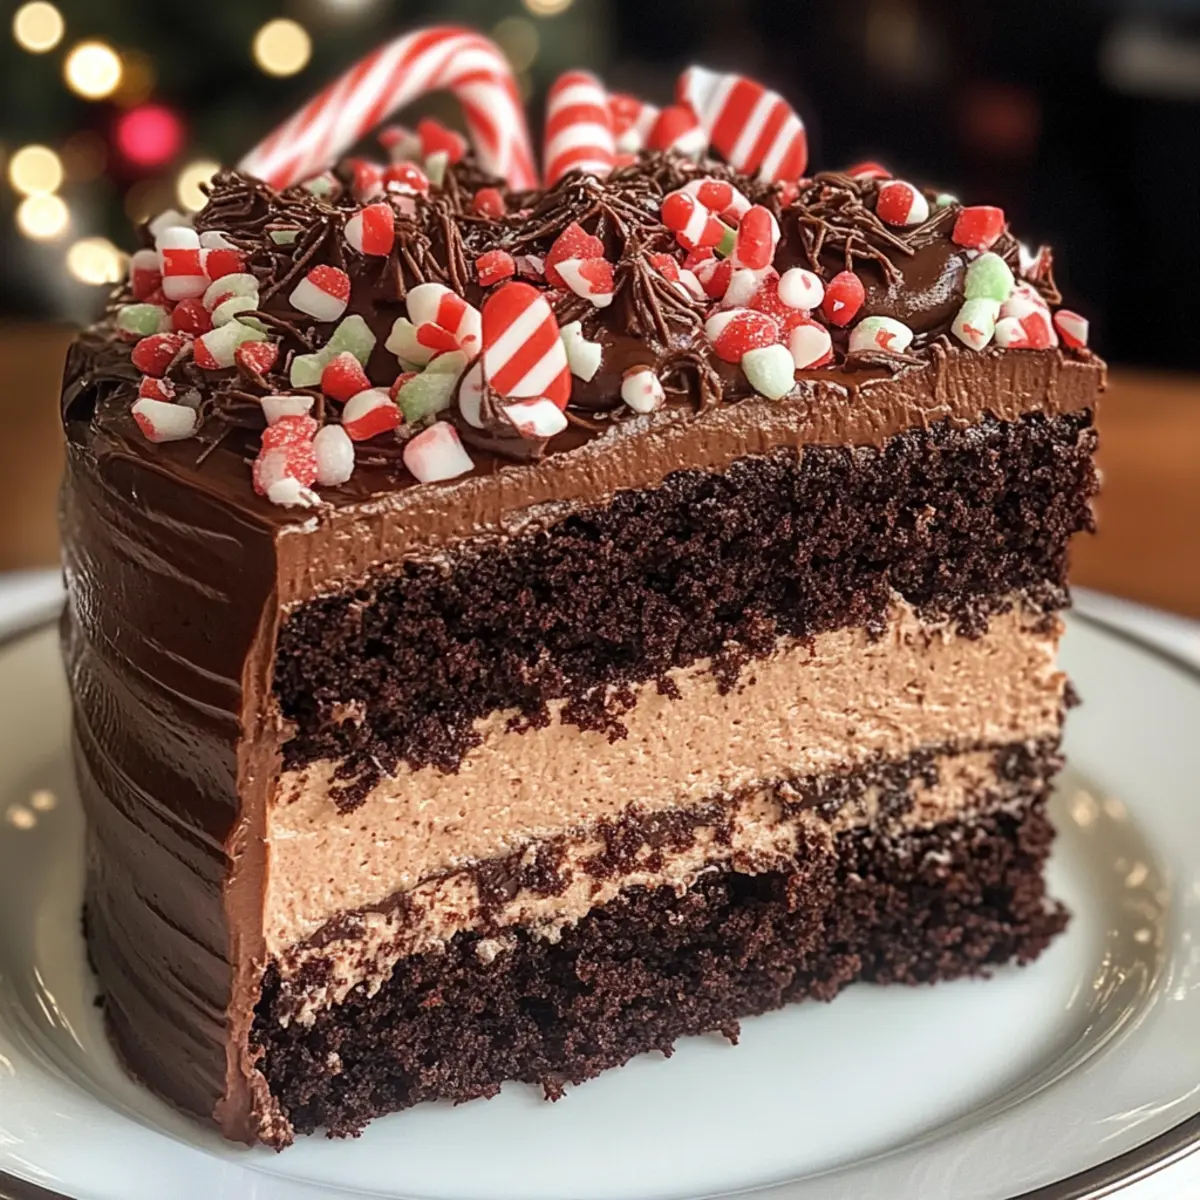
The kitchen was a flurry of festive chaos as I whisked together the ingredients for my Candy Cane Mousse Cake, the ultimate Christmas dessert that I could not wait to share. This delightful creation features layers of rich chocolate cake paired with ethereal, peppermint-infused mousse, making it a showstopper for any holiday gathering. Not only is this mousse cake a visual feast, but it also boasts a quick prep time, allowing you to spend more moments with loved ones during the busy season. Plus, its whimsical appeal is perfect for satisfying both your sweet tooth and holiday spirit. As I poured the glossy chocolate glaze over the finished cake, I couldn’t help but wonder—who will be the first to snag a slice of this peppermint delight?
Why is Candy Cane Mousse Cake a Must-Bake?
Irresistible Flavor Fusion: The blend of chocolate and peppermint creates a delightful holiday experience that captivates your taste buds.
Festive Centerpiece: This cake isn’t just a dessert; its eye-catching layers make it the star of your holiday table.
Simple to Prepare: With straightforward steps, this mousse cake is designed for bakers of all skill levels to impress family and friends.
Make-Ahead Marvel: You can prepare it up to 3 days in advance, freeing up time for more holiday festivities.
Versatile Decoration: Whether you choose crushed candy canes or a rich chocolate ganache, it’s easy to customize for your style.
Crowd-Pleasing Treat: Everyone—young and old—loves the playful combination of flavors, ensuring smiles around the table. Dive into this magical dessert and explore other festive options like the Eggnog Bundt Cake or the stunning Yule Log Cake!
Candy Cane Mousse Cake Ingredients
Get ready to whip up this festive treat!
For the Cake
- Unsalted Butter – Provides moisture and richness. Substitution: Can use salted butter, but reduce added salt.
- Granulated Sugar – Sweetens the cake. Can be replaced with coconut sugar for a richer flavor.
- Brown Sugar – Adds moisture and a hint of caramel flavor. Using light or dark brown sugar depends on preference for depth.
- Eggs – Structural support and moisture. No substitute for a vegan version unless using egg alternatives like flax eggs.
- Vanilla Extract – Enhances flavor depth. Substitution: Use an equal amount of vanilla bean paste.
- Buttermilk – Adds tang and moisture. Substitution: Mix 1 cup of milk with 1 tablespoon of vinegar or lemon juice.
- All-Purpose Flour – Provides structure to the cake. For gluten-free, replace with a cup-for-cup gluten-free blend.
- Unsweetened Cocoa Powder – Adds chocolate flavor. Dutch-processed cocoa can be used for a more mellow taste.
- Baking Soda & Salt – Leavening agent and flavor enhancer. No substitute recommended.
For the Mousse
- White Chocolate Chips – Basis for the mousse providing sweetness and creaminess. Can replace with dairy-free white chocolate for a vegan option.
- Heavy Cream – Essential for mousse texture and decadence. Substitution: Full-fat coconut cream for dairy-free version.
- Unflavored Powdered Gelatin – Stabilizes the mousse. For a vegetarian option, use agar-agar.
- Peppermint Extract – Provides mint flavor. Less concentrated alternatives can be vanilla extract, but the mint flavor will be missed.
- Andes Peppermint Crunch Baking Bits – Adds texture and enhances peppermint flavor. Can substitute with crushed candy canes or similar chocolate-mint candies.
For the Ganache
- Heavy Cream – Brings richness to the ganache. Use the best quality cream for a glossy finish.
- Semi-Sweet Chocolate – Creates the decadent glaze over the mousse cake. Dark chocolate can be used for a deeper flavor.
Step‑by‑Step Instructions for Candy Cane Mousse Cake
Step 1: Prepare Cake Batter
Preheat your oven to 350°F (175°C). In a large mixing bowl, cream together 1 cup of unsalted butter with 1 cup granulated sugar and 1/2 cup brown sugar until the mixture is light and fluffy. Add 3 eggs one at a time, incorporating 1 teaspoon of vanilla extract. Gradually mix in 2 cups of all-purpose flour, alternating with 1 cup of buttermilk, until smooth. Pour into prepared cake pans and bake for 22-25 minutes, or until a toothpick comes out clean.
Step 2: Cool the Cake
Once baked, remove the chocolate cakes from the oven and allow them to cool in the pans for about 10 minutes. Gently run a knife around the edges to loosen and carefully transfer the cakes to a wire rack. Let them cool completely before assembling your Candy Cane Mousse Cake, ensuring the layers maintain their structural integrity.
Step 3: Prepare Mousse Base
In a microwave-safe bowl, combine 1 cup of white chocolate chips with 1 cup of heavy cream and a pinch of salt. Heat in 30-second increments, stirring after each, until the mixture is smooth and glossy. Once cooled to room temperature, this silky mixture will form the base of your festive mousse layer.
Step 4: Bloom the Gelatin
While the white chocolate is cooling, bloom 2 teaspoons of unflavored powdered gelatin in 2 tablespoons of cold water for about 5 minutes. After blooming, gently melt the gelatin in the microwave for about 10 seconds, ensuring it’s liquid but not boiling. Mix the melted gelatin and ½ teaspoon of peppermint extract into the cooled white chocolate mixture until fully incorporated.
Step 5: Whip the Cream
In another bowl, whip 1 cup of heavy cream until firm peaks form, being careful not to overwhip. It should hold its shape but remain soft. Gently fold in the cooled white chocolate mixture along with 1/2 cup of crushed Andes peppermint crunch bits. This will create a light and fluffy mousse that captures the essence of the Candy Cane Mousse Cake.
Step 6: Assemble Layers
Place your first chocolate cake layer in the bottom of a 9-inch high-sided pan. Spread half of the peppermint mousse mixture evenly over the top. Refrigerate for at least 2 hours or until the mousse layer is set. Once set, gently place the second chocolate cake layer on top and repeat the mousse preparation, pouring the remaining mousse over the second layer.
Step 7: Refrigerate Overnight
After completing the layering, cover the Cake with plastic wrap and refrigerate it overnight. This allows the mousse to set fully, ensuring a perfect slice when you’re ready to serve. The wait will be worth it when you unveil your stunning Candy Cane Mousse Cake!
Step 8: Make Ganache
On the day you plan to serve, prepare the ganache by heating 1 cup of heavy cream in a saucepan until just simmering. Pour the hot cream over 8 ounces of chopped semi-sweet chocolate in a bowl and let it sit for 2-3 minutes before whisking until smooth and glossy. This decadent chocolate glaze will elegantly drape over your cake.
Step 9: Decorate and Serve
Pour the chocolate ganache over the chilled Candy Cane Mousse Cake, letting it naturally cascade down the sides. For a festive touch, sprinkle crushed peppermint candies across the top and let sit for about 10-15 minutes. Slice, serve, and enjoy this beautiful and delicious Candy Cane Mousse Cake with friends and family!

Make Ahead Options
These Candy Cane Mousse Cakes are perfect for busy home cooks looking to save time during the holiday season! You can prepare the cake layers up to 3 days in advance by baking and cooling them, then storing them wrapped in plastic wrap in the refrigerator to maintain freshness. The peppermint mousse can also be made 24 hours ahead; simply refrigerate it until you’re ready to layer. On the day of serving, assemble the mousse and cake layers, and chill overnight to ensure the mousse sets perfectly. This way, when you’re ready to impress your guests, simply finish with the ganache, and enjoy a delightful, festive dessert with minimal effort!
How to Store and Freeze Candy Cane Mousse Cake
Fridge: Store the uneaten Candy Cane Mousse Cake in the fridge, covered, for up to 3 days to maintain its freshness and flavor without drying out.
Freezer: If you need to freeze the cake, wrap individual slices tightly in plastic wrap, then in aluminum foil. It can be frozen for up to 3 months.
Reheating: To enjoy frozen slices, thaw them overnight in the fridge before serving. If desired, you can gently warm them in a microwave for 10-15 seconds.
Notes: If making ahead, keep the ganache separate until just before serving, to preserve its glossy finish and avoid stickiness on the mousse.
Expert Tips for Candy Cane Mousse Cake
- Chill Between Layers: Make sure each mousse layer is thoroughly set before adding the next cake layer to prevent them from sinking. This creates distinct layers in your Candy Cane Mousse Cake.
- Gelatin Prep: Always bloom the gelatin properly before adding it to warm mixtures; this ensures it activates correctly and won’t form clumps in your mousse.
- Whip with Care: When whipping cream, stop as soon as you achieve firm peaks. Overwhipping can lead to a grainy texture that affects the mousse’s smoothness.
- Ingredient Temperature: Ensure all your ingredients, especially the butter and cream, are at room temperature for a uniform mixture; this will make the batter smoother and fluffier.
- Check for Doneness: When baking the cake, do a toothpick test a minute or two before the suggested baking time to avoid an overbaked, dry cake.
- Presentation Tip: For a stunning finish, pour the ganache over the cake while it’s still slightly warm, allowing it to create a beautiful, glossy finish that enhances the festive appeal.
What to Serve with Candy Cane Mousse Cake
Make your holiday gathering even more memorable with these delightful pairing ideas for your festive dessert.
-
Creamy Hot Chocolate: Rich, warm cocoa infused with peppermint echoes the cake’s flavors and warms the soul.
-
Festive Coffee: A cup of peppermint mocha or spiced coffee complements the chocolate and mint beautifully, enhancing the festive spirit.
-
Buttery Shortbread Cookies: Silky and crumbly, these cookies add a contrasting texture that complements the airy mousse layers.
-
Vanilla Ice Cream: A scoop of creamy vanilla ice cream balances the rich chocolate, creating a perfect cool and warm interplay with each bite.
-
Cranberry Citrus Salad: Fresh and tart, this salad brightens the palate, providing a refreshing contrast to the indulgent mousse cake. The citrus notes harmonize with the peppermint.
-
Chocolate-Dipped Strawberries: Decadent and juicy, these treats offer a fruity counterpart to the rich sweetness of the mousse cake, making for a visually stunning presentation.
-
Peppermint Tea: A warm cup of peppermint tea soothes and uplifts, making it a lovely after-dinner drink to enjoy alongside each slice.
Candy Cane Mousse Cake Variations
Feel free to personalize your Candy Cane Mousse Cake and create the perfect holiday treat that excites your taste buds!
- Minty Chocolate: Swap Andes peppermint bits for other mint-flavored candies like Junior Mints for a twist.
- Dark Delight: Use dark chocolate instead of semi-sweet for a bolder chocolate flavor that perfectly complements the peppermint.
- Fresh Twist: Decorate with fresh mint leaves alongside your crushed candy canes for a bright pop of color and a refreshing flavor.
- Nutty Crunch: Add crushed nuts, like almonds or pecans, to the mousse or as a layer for an added crunch and depth.
- Vegan Version: Replace heavy cream with full-fat coconut cream and use a plant-based white chocolate for a completely vegan delight.
- Flavor Fusion: Enhance the mousse with a splash of orange liqueur or extract to create a unique orange-mint combo.
- Layered Simplicity: Opt for a single chocolate cake layer and create a mousse parfait by layering in individual desserts for a fun presentation.
- Dairy-Free Indulgence: Use almond milk in place of buttermilk, and coconut milk for the ganache to satisfy dairy-free dietary needs.
Elevate your dessert game this holiday season! With these variations, you’ll create a memorable centerpiece for family gatherings. If you’re looking for other festive recipes, check out my delightful Limoncello Ricotta Cake or the easy and delicious Condensed Milk Cake.

Candy Cane Mousse Cake Recipe FAQs
What is the best way to select ripe ingredients for this cake?
Absolutely! For the best results, choose unsalted butter that’s soft but not overly melted, and eggs at room temperature to help create a lighter batter. The buttermilk should be fresh for optimal flavor, and always check the expiration date of your baking powder to ensure it’s still active.
Advertisement
How should I store leftover Candy Cane Mousse Cake?
Very simple! You should cover the uneaten Candy Cane Mousse Cake with plastic wrap or in an airtight container and refrigerate it for up to 3 days. This keeps the cake moist and prevents it from absorbing any odors from your fridge.
Can I freeze Candy Cane Mousse Cake?
Definitely! To freeze, wrap individual slices tightly in plastic wrap, followed by a layer of aluminum foil to prevent freezer burn. It can be stored in the freezer for up to 3 months. When ready to enjoy, simply thaw in the refrigerator overnight.
What should I do if my mousse isn’t setting properly?
If you find that your mousse isn’t setting, it could be due to insufficient gelatin. Make sure to bloom the gelatin properly in cold water before adding it to the white chocolate mixture. If it’s still too soft, consider adding more bloomed gelatin by melting an additional teaspoon and incorporating it into the mix, ensuring it’s evenly distributed.
Are there any dietary considerations for this recipe?
Of course! If you or your guests have dietary restrictions, you can easily make this cake vegan by using flax eggs in place of regular eggs and coconut cream instead of heavy cream. For a gluten-free option, just replace the all-purpose flour with a gluten-free blend. Always check labels for allergens if serving to guests with food sensitivities!
When is the best time to add the ganache to the cake?
I recommend pouring the ganache over the chilled cake shortly before serving, ideally while it’s still slightly warm. This method creates a glossy finish and prevents the ganache from becoming sticky if left out too long. It also gives the beautiful, indulgent effect you want for this festive dessert!
Delightful Candy Cane Mousse Cake for a Festive Holiday Treat
Ingredients
Equipment
Method
- Preheat your oven to 350°F (175°C). In a large mixing bowl, cream together the butter with granulated sugar and brown sugar until light and fluffy. Add eggs one at a time, incorporating vanilla extract. Gradually mix in flour, alternating with buttermilk, until smooth. Pour into pans and bake for 22-25 minutes.
- Allow the chocolate cakes to cool in pans for about 10 minutes. Gently run a knife around edges to loosen and transfer to a wire rack to cool completely before assembling.
- In a microwave-safe bowl, combine white chocolate chips with heavy cream and a pinch of salt. Heat in 30-second increments until smooth and glossy. Let cool to room temperature.
- Bloom gelatin in cold water for about 5 minutes, then melt gently in the microwave. Mix melted gelatin and peppermint extract into the cooled white chocolate mixture.
- Whip heavy cream until firm peaks form, then gently fold into the white chocolate mixture along with crushed peppermint bits.
- Place the first chocolate cake layer in a high-sided pan. Spread half of the mousse mixture evenly over the top. Refrigerate for at least 2 hours or until mousse is set. Place the second cake layer on top and repeat with remaining mousse.
- Cover the cake with plastic wrap and refrigerate overnight to set the mousse.
- To prepare ganache, heat heavy cream until simmering. Pour over chopped chocolate and let sit before whisking until smooth.
- Pour the ganache over the chilled cake, allowing it to cascade down the sides. Sprinkle crushed peppermint candies on top and let sit before serving.