A Sweet Memory in Every Bite
When I was a child, my grandmother had a way of making every family gathering feel special. Her kitchen was always filled with the scent of vanilla and melted chocolate, a promise of something sweet waiting to be devoured. Among the many desserts she mastered, her Boston Cream Pie was the one that stole the show. It wasn’t just the silky custard or the rich chocolate glaze—it was the love she poured into every step, the way she hummed a tune while whisking the batter, and the way we gathered around the table, forks in hand, eager for that first bite.
Years later, when I found myself craving that nostalgic taste, I realized that while a full-sized Boston Cream Pie is a masterpiece, it isn’t always the most convenient dessert to serve. That’s when the idea of cupcakes struck me—portable, easy to share, and just as indulgent. These Boston Cream Pie Cupcakes capture everything I loved about my grandmother’s dessert, but in a modern, handheld form. Whether you’re making them for a celebration or simply to satisfy a craving, they carry the same warmth, comfort, and irresistible combination of flavors.
The Magic Behind Boston Cream Pie Cupcakes
Boston Cream Pie, despite its name, isn’t actually a pie—it’s a cake. The dessert originated in the 19th century at the Parker House Hotel in Boston, where a chef combined sponge cake, pastry cream, and a glossy chocolate topping. The name likely stuck because, at the time, cakes and pies were often baked in the same pans, and the terms were sometimes used interchangeably.
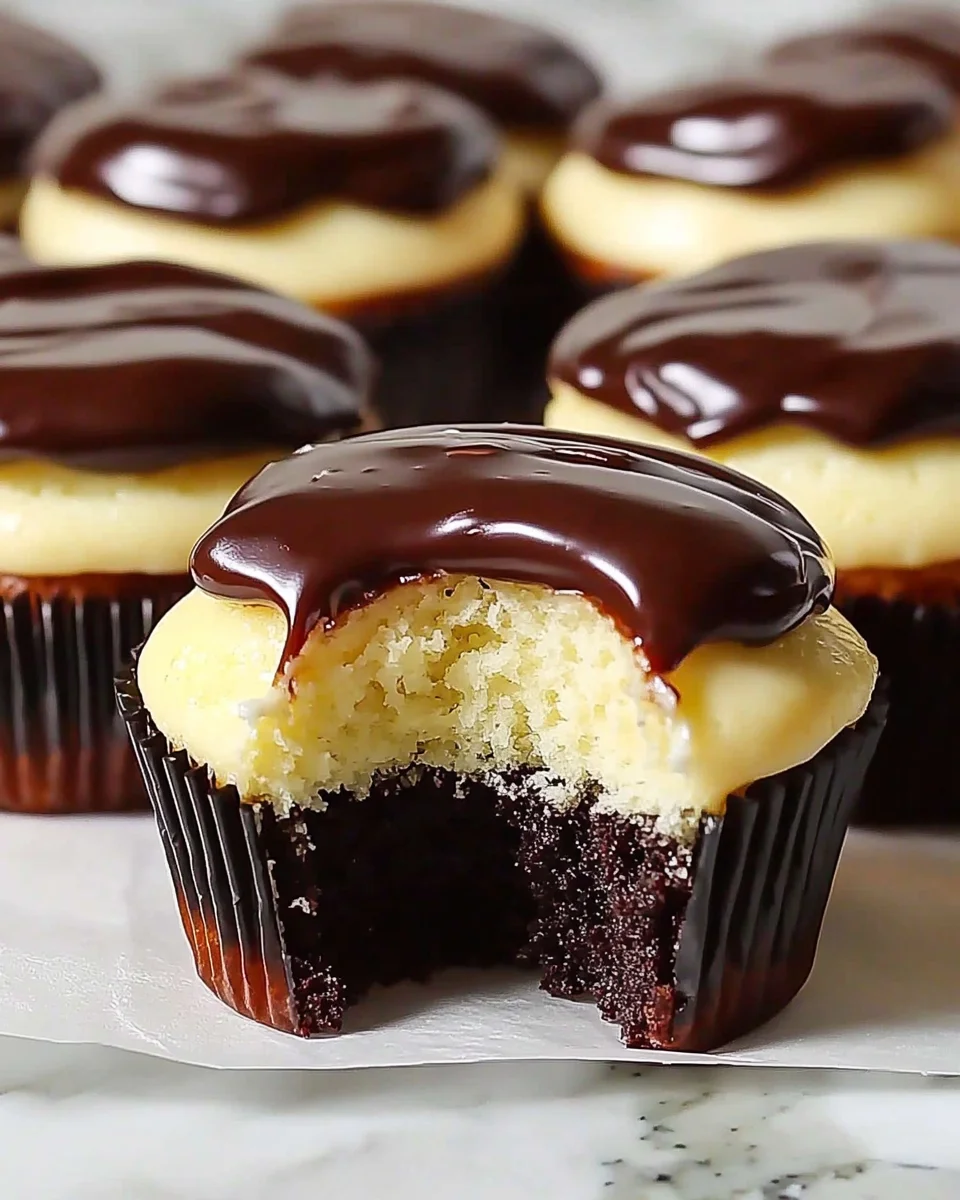
This cupcake version stays true to the classic elements:
- A soft, fluffy vanilla cupcake that mimics the light texture of sponge cake.
- A rich and creamy vanilla filling that replaces the traditional pastry cream.
- A silky chocolate ganache that gives the cupcakes their signature decadent finish.
What makes these cupcakes so special is the balance of textures and flavors—the airy cupcake, the smooth filling, and the luscious chocolate all come together to create a dessert that’s both elegant and comforting.
Why You’ll Love This Recipe
- Perfect for Any Occasion – Whether you’re hosting a party, celebrating a birthday, or simply treating yourself, these cupcakes fit the bill.
- Handheld Convenience – No need for plates and forks; these cupcakes offer all the indulgence of Boston Cream Pie in an easy-to-eat form.
- Make-Ahead Friendly – You can prepare the cupcakes a day in advance, making them ideal for gatherings.
- A Guaranteed Crowd-Pleaser – The combination of vanilla, chocolate, and cream is timeless and appeals to all ages.
Helpful Tips for the Best Boston Cream Pie Cupcakes
1. Choose High-Quality Chocolate for the Ganache
The chocolate ganache is one of the stars of this recipe. To achieve a rich and silky topping, use high-quality semi-sweet or dark chocolate. The better the chocolate, the better the ganache. Aim for at least 60% cocoa content for the best results.
2. Make Sure Your Cupcakes Are Completely Cooled Before Filling
Cutting into warm cupcakes to add the filling can cause them to crumble or absorb the pudding unevenly. Allow them to cool fully to maintain their structure and ensure a perfect, creamy center.
3. Don’t Overmix the Batter
Overmixing can lead to dense cupcakes instead of light, airy ones. Mix just until the ingredients are combined to keep the texture soft and tender.
4. Let the Ganache Set Properly
For the best presentation and texture, allow the chocolate ganache to set before serving. If you’re in a hurry, you can place the cupcakes in the refrigerator for about 10 minutes to speed up the process.
5. Use a Piping Bag for a Professional Finish
When filling the cupcakes with pudding, a piping bag makes the job much easier and results in a cleaner, more even filling. If you don’t have one, a zip-top bag with the corner snipped off works just as well.
What You’ll Need: The Ingredients List
For the Cupcakes:
- 1 cup all-purpose flour
- 1 teaspoon baking powder
- 1/4 teaspoon salt
- 1/2 cup unsalted butter, room temperature
- 1/2 cup granulated sugar
- 2 large eggs
- 1 teaspoon vanilla extract
- 1/2 cup milk
For the Filling:
- 2 cups vanilla pudding
For the Chocolate Ganache:
- 1 cup heavy cream
- 1 cup semi-sweet chocolate chips
Baking Bliss: Step-by-Step Directions
Step 1: Prep and Preheat
Preheat your oven to 350°F (175°C) and line a muffin tin with cupcake liners.
Step 2: Dry Ingredients First
In a medium bowl, whisk together the flour, baking powder, and salt. Set aside.
Step 3: Creamy Foundation
In a large bowl, beat the butter and sugar until light and fluffy. Add eggs one at a time, mixing well after each. Stir in the vanilla extract.
Step 4: Bring It Together
Alternately add the flour mixture and milk to the butter mixture, beginning and ending with the flour. Mix until just combined.
Step 5: Bake to Perfection
Divide the batter evenly among the cupcake liners. Bake for 18-20 minutes, or until a toothpick inserted in the center comes out clean. Let them cool completely.
Step 6: Fill with Creamy Goodness
Once cooled, cut a small circle out of the center of each cupcake and fill with vanilla pudding.
Step 7: Chocolate Magic
In a small saucepan, heat the heavy cream until it just starts to simmer. Remove from heat and pour over the chocolate chips. Let sit for 5 minutes, then stir until smooth and glossy.
Step 8: The Grand Finale
Spoon the chocolate ganache over each cupcake, letting it drip beautifully down the sides. Let the ganache set before serving.
The Sweet Details: Nutritional Info (Per Serving)
Please note these values are approximate.
- Calories: ~
- Total Fat: ~
- Total Carbohydrates: ~
- Protein: ~
Baking Pro Tips:
- Use high-quality chocolate for the ganache—aim for at least 60% cocoa for a rich flavor.
- Instant vanilla pudding works great for convenience, but homemade pudding elevates the texture and taste.
- Store in an airtight container in the fridge for up to 3 days. Let them come to room temperature before serving for the best experience.
Enjoy every bite of these decadent, creamy, and chocolatey delights!
Frequently Asked Questions (FAQs)
1. Can I Use Store-Bought Pudding Instead of Making My Own?
Absolutely! While homemade vanilla pudding or pastry cream offers the best flavor, high-quality store-bought vanilla pudding works just fine and saves time.
2. How Do I Store These Cupcakes?
Store them in an airtight container in the refrigerator for up to three days. Because they contain a creamy filling, they should not be left out at room temperature for extended periods. Allow them to come to room temperature before serving for the best texture.
3. Can I Freeze Boston Cream Pie Cupcakes?
Yes, but it’s best to freeze the cupcakes before filling and frosting them. Once completely cooled, store them in an airtight container or freezer bag for up to three months. When ready to serve, thaw them at room temperature, add the filling, and top with ganache.
4. Can I Make These Gluten-Free?
Yes! Substitute 1:1 gluten-free all-purpose flour for the regular flour. Just ensure your baking powder and other ingredients are gluten-free as well.
5. What’s the Best Way to Cut Out the Centers for the Filling?
You can use a small knife, an apple corer, or even the back of a piping tip to create a neat hole for the pudding filling. Just be sure not to cut too deep—you want enough cupcake left to support the filling and ganache.
Advertisement
6. Can I Use a Different Filling?
Of course! While vanilla pudding is traditional, you can experiment with flavors like chocolate pudding, caramel custard, or even fruit preserves for a unique twist.
Ways to Elevate Your Boston Cream Pie Cupcakes
If you want to get creative, try these variations:
- Chocolate Lover’s Version – Add cocoa powder to the cupcake batter for a double-chocolate experience.
- Coffee-Infused Ganache – Stir in a teaspoon of espresso powder into the ganache for a mocha-inspired twist.
- Nutty Crunch – Sprinkle chopped toasted almonds or hazelnuts over the ganache for extra texture.
- Berry Bliss – Add a layer of raspberry or strawberry jam inside the cupcakes for a fruity contrast.
Final Thoughts: A Dessert That Brings People Together
Food has a special way of connecting us to memories, traditions, and the people we love. These Boston Cream Pie Cupcakes may be a modern take on a classic, but they carry the same comforting flavors and nostalgic charm. Whether you’re sharing them at a family gathering, surprising a friend with a sweet treat, or simply indulging in a well-deserved dessert, each bite is a reminder that some flavors are timeless.
So go ahead—bake a batch, savor the layers of vanilla, cream, and chocolate, and create your own sweet memories.
Boston Cream Pie Cupcakes: A Bite-Sized Twist on a Classic Favorite
Ingredients
Method
- Prep and Preheat – Preheat your oven to 350°F (175°C) and line a muffin tin with cupcake liners.
- Dry Ingredients First – In a medium bowl, whisk together the flour, baking powder, and salt. Set aside.
- Creamy Foundation – In a large bowl, beat the butter and sugar until light and fluffy. Add eggs one at a time, mixing well after each. Stir in the vanilla extract.
- Bring It Together – Alternately add the flour mixture and milk to the butter mixture, beginning and ending with the flour. Mix until just combined.
- Bake to Perfection – Divide the batter evenly among the cupcake liners. Bake for 18-20 minutes, or until a toothpick inserted in the center comes out clean. Let them cool completely.
- Fill with Creamy Goodness – Once cooled, cut a small circle out of the center of each cupcake and fill with vanilla pudding.
- Chocolate Magic – In a small saucepan, heat the heavy cream until it just starts to simmer. Remove from heat and pour over the chocolate chips. Let sit for 5 minutes, then stir until smooth and glossy.
- The Grand Finale – Spoon the chocolate ganache over each cupcake, letting it drip beautifully down the sides. Let the ganache set before serving.
Notes
- Use high-quality chocolate for the ganache—aim for at least 60% cocoa for a rich flavor.
- Instant vanilla pudding works great for convenience, but homemade pudding elevates the texture and taste.
- Store in an airtight container in the fridge for up to 3 days. Let them come to room temperature before serving for the best experience.