Introduction to Basque Burnt Cheesecake Recipe
What is Basque Burnt Cheesecake?
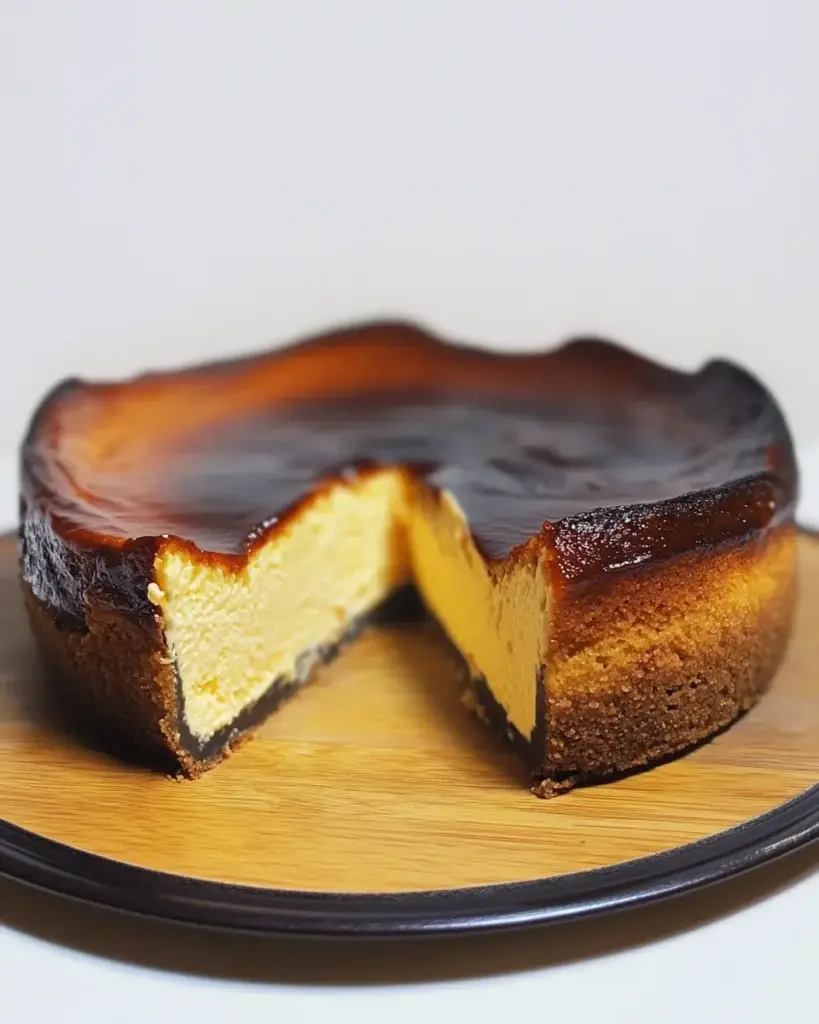
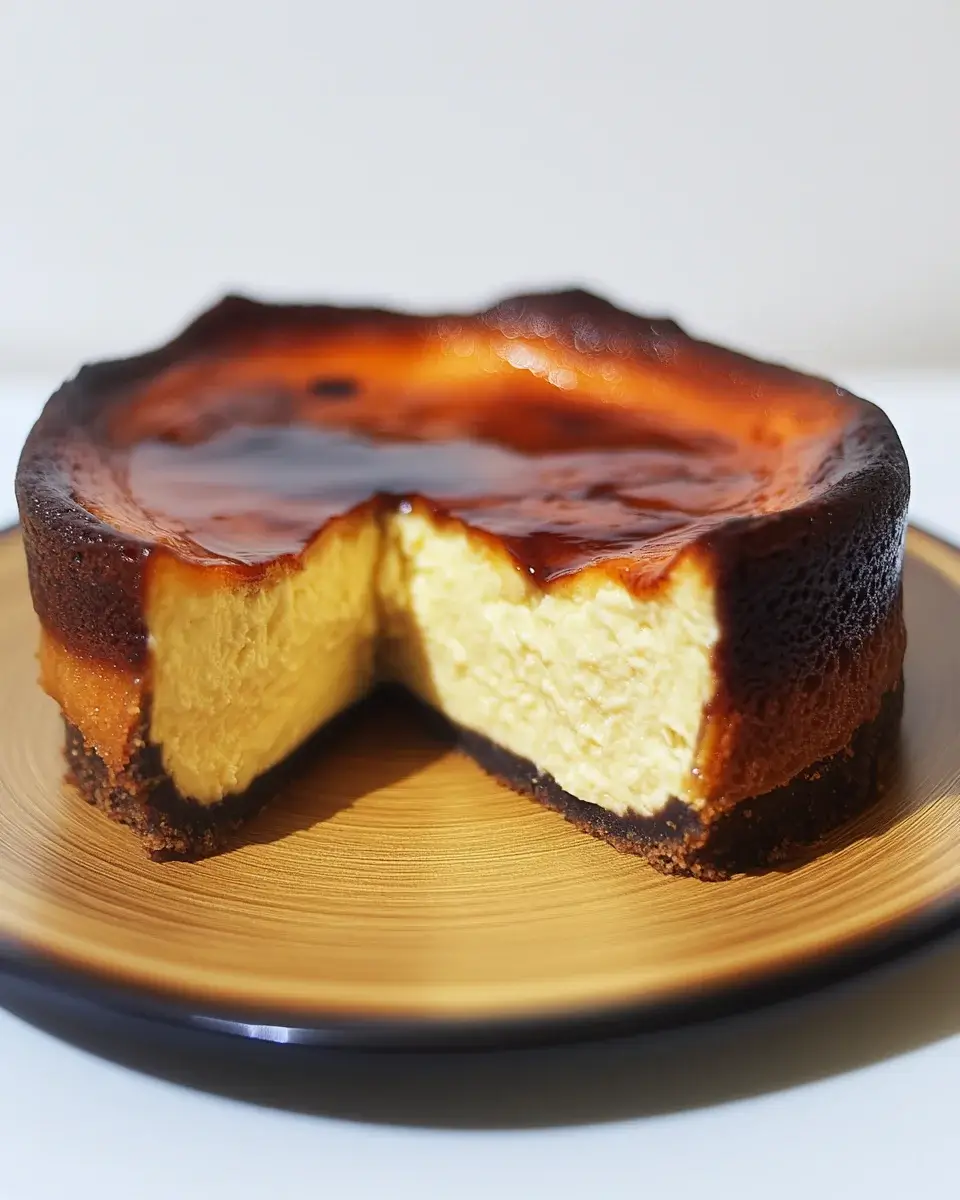
Basque Burnt Cheesecake is a delightful dessert that has taken the culinary world by storm. Unlike traditional cheesecakes, this unique version is known for its charred top and creamy center. The texture is rich and velvety, making each bite a heavenly experience. The burnt exterior adds a smoky flavor that perfectly balances the sweetness of the cheesecake. This dessert is not only visually stunning but also incredibly easy to make, making it a favorite among both novice and experienced bakers.
The Origin of Basque Burnt Cheesecake
The origins of Basque Burnt Cheesecake can be traced back to the Basque region of Spain, specifically from a restaurant called La Viña in San Sebastián. This charming eatery first introduced the cheesecake in the 1990s. The dessert quickly gained popularity, captivating the hearts of locals and tourists alike. Its fame spread beyond Spain, becoming a beloved treat in many countries. Today, Basque Burnt Cheesecake is celebrated for its simplicity and bold flavors, making it a must-try for dessert lovers everywhere.
Ingredients for Basque Burnt Cheesecake Recipe
To create the perfect Basque Burnt Cheesecake, you’ll need a few simple ingredients. Each component plays a vital role in achieving that rich, creamy texture and delightful flavor. Here’s what you’ll need:
- 2 cups cream cheese, softened: This is the star of the cheesecake, providing a rich and creamy base.
- 1 cup granulated sugar: Sugar adds sweetness and helps create that lovely caramelized top.
- 1 cup heavy cream: Heavy cream contributes to the cheesecake’s smooth texture and richness.
- 3 large eggs: Eggs help bind the ingredients together and give the cheesecake its structure.
- 1 teaspoon vanilla extract: Vanilla adds a warm, aromatic flavor that enhances the overall taste.
- 1/4 cup all-purpose flour: Flour helps stabilize the cheesecake, ensuring it holds its shape.
- 1/4 teaspoon salt: A pinch of salt balances the sweetness and enhances the flavors.
Gathering these ingredients is the first step toward making your delicious Basque Burnt Cheesecake. Each item is essential for creating that perfect blend of flavors and textures. Now that you have everything ready, you can move on to the next steps in this delightful baking adventure!
Step-by-Step Preparation of Basque Burnt Cheesecake Recipe
Step 1: Preparing the Baking Pan
Before you start mixing your ingredients, it’s important to prepare your baking pan. Begin by preheating your oven to 400°F (200°C). While the oven heats up, take a 9-inch springform pan and line it with parchment paper. Make sure the paper hangs over the edges. This will make it easier to remove the cheesecake later. A well-prepared pan is key to achieving that perfect shape and presentation.
Step 2: Mixing the Ingredients
Now, let’s get to the fun part—mixing! In a large mixing bowl, add the softened cream cheese. Using an electric mixer, beat it until it’s smooth and creamy. This step is crucial for a lump-free cheesecake. Next, gradually add the granulated sugar while continuing to mix. You want the mixture to be fluffy and well combined. After that, pour in the heavy cream, followed by the eggs and vanilla extract. Beat everything together until fully incorporated.
Once your mixture is smooth, it’s time to sift in the flour and salt. Gently mix until just combined. Be careful not to overmix, as this can affect the texture of your cheesecake. The batter should be thick and creamy, ready to be poured into the prepared pan.
Step 3: Baking the Cheesecake
With your batter ready, pour it into the lined springform pan. Spread it evenly to ensure uniform baking. Place the pan in the preheated oven and bake for 25-30 minutes. You’ll know it’s done when the top is deeply browned and the center is slightly jiggly. This unique baking method is what gives the Basque Burnt Cheesecake its signature look and flavor.
Once the baking time is up, turn off the oven but leave the cheesecake inside for an additional 10 minutes. This helps the cheesecake set without cracking. After that, carefully remove it from the oven and let it cool at room temperature for about an hour.
Step 4: Cooling and Serving
After the cheesecake has cooled, it’s time to refrigerate it. Place it in the fridge for at least 4 hours, or even better, overnight. This chilling time allows the flavors to meld beautifully. When you’re ready to serve, carefully remove the cheesecake from the springform pan using the parchment paper. Slice it into wedges and enjoy! You can serve it plain or add toppings like fresh berries or a drizzle of caramel sauce for an extra touch.
Variations of Basque Burnt Cheesecake Recipe
Adding Flavors to Basque Burnt Cheesecake
While the classic Basque Burnt Cheesecake is delicious on its own, you can easily add your favorite flavors to make it even more exciting. Here are some fun ideas:
- Citrus Zest: Add the zest of one lemon or orange to the batter for a refreshing twist. The citrus will brighten the flavors and add a lovely aroma.
- Chocolate: For chocolate lovers, mix in 1/4 cup of unsweetened cocoa powder. This will give your cheesecake a rich, chocolatey flavor that pairs beautifully with the creamy texture.
- Espresso: If you enjoy coffee, consider adding 1-2 tablespoons of instant espresso powder to the batter. This will infuse your cheesecake with a delightful coffee flavor.
- Spices: A pinch of cinnamon or nutmeg can add warmth and depth to your cheesecake. Just a little goes a long way!
Feel free to experiment with these flavors or even create your own unique combination. The beauty of the Basque Burnt Cheesecake is its versatility, allowing you to tailor it to your taste preferences.
Gluten-Free Options for Basque Burnt Cheesecake
If you or your guests are following a gluten-free diet, you can still enjoy this delicious dessert! Here’s how to make a gluten-free version of the Basque Burnt Cheesecake:
- Substitute the Flour: Instead of all-purpose flour, use a gluten-free flour blend. Make sure it’s a 1:1 substitute to maintain the right texture.
- Check Ingredients: Ensure that all other ingredients, like the cream cheese and vanilla extract, are gluten-free. Most brands are, but it’s always good to double-check.
By making these simple adjustments, you can create a gluten-free Basque Burnt Cheesecake that everyone can enjoy. It’s just as creamy and delicious as the original!
Cooking Note for Basque Burnt Cheesecake Recipe
When it comes to baking the perfect Basque Burnt Cheesecake, a few key points can make all the difference. First, the temperature of your ingredients matters. Make sure your cream cheese is softened to room temperature. This helps achieve a smooth batter without lumps. Cold ingredients can lead to a lumpy texture, which is not ideal for this creamy dessert.
Next, pay attention to your oven’s temperature. Ovens can vary, so it’s wise to use an oven thermometer to ensure accuracy. If your oven runs hot, the cheesecake may burn too quickly. Conversely, if it runs cool, the cheesecake may not brown properly. Adjusting the baking time may also be necessary based on your oven’s performance.
Another important note is to avoid overmixing the batter. While it’s tempting to whip it until perfectly smooth, overmixing can introduce too much air. This can lead to cracks in your cheesecake as it bakes and cools. Mix just until combined for the best results.
Lastly, patience is key! Allowing the cheesecake to cool gradually in the oven and then chilling it in the refrigerator for several hours enhances the flavors. This resting period is essential for achieving that rich, creamy texture that Basque Burnt Cheesecake is known for. So, resist the urge to slice into it right away—your taste buds will thank you later!
Serving Suggestions for Basque Burnt Cheesecake Recipe
Serving your Basque Burnt Cheesecake can be just as delightful as making it! This dessert is not only a treat for the taste buds but also a feast for the eyes. Here are some creative serving suggestions to elevate your cheesecake experience:
- Fresh Berries: Top your cheesecake with a mix of fresh berries like strawberries, blueberries, or raspberries. The tartness of the berries complements the rich, creamy cheesecake beautifully.
- Caramel Sauce: Drizzle warm caramel sauce over each slice for a sweet and indulgent touch. The gooey caramel adds a lovely contrast to the cheesecake’s texture.
- Whipped Cream: Serve with a dollop of freshly whipped cream. This light and airy topping balances the dense cheesecake perfectly.
- Chocolate Shavings: For a chocolatey twist, sprinkle some chocolate shavings on top. This adds a touch of elegance and a hint of extra flavor.
- Nuts: Chopped nuts, such as pistachios or almonds, can add a delightful crunch. Sprinkle them on top or serve them on the side for added texture.
- Fruit Compote: A warm fruit compote made from seasonal fruits can enhance the flavors of the cheesecake. It adds a fruity sweetness that pairs wonderfully with the creamy base.
When serving, consider the presentation. A simple, elegant plate can make your Basque Burnt Cheesecake look even more appetizing. You can also garnish with a sprig of mint for a pop of color. Remember, the way you serve your cheesecake can enhance the overall experience, making it a memorable dessert for any occasion.
Whether it’s a special celebration or a casual family dinner, these serving suggestions will surely impress your guests. Enjoy every creamy, delicious bite of your Basque Burnt Cheesecake!
Tips for Perfecting Your Basque Burnt Cheesecake Recipe
Creating the perfect Basque Burnt Cheesecake is an art that can be mastered with a few helpful tips. Whether you’re a beginner or a seasoned baker, these suggestions will ensure your cheesecake turns out delicious every time.
- Use Quality Ingredients: The flavor of your cheesecake largely depends on the quality of your ingredients. Opt for high-quality cream cheese and fresh eggs. This will enhance the overall taste and texture of your cheesecake.
- Room Temperature Ingredients: Always use room temperature cream cheese and eggs. This helps create a smooth batter without lumps. Cold ingredients can lead to a dense texture, which is not ideal for this creamy dessert.
- Don’t Overmix: While mixing, be careful not to overmix the batter. Overmixing can introduce too much air, leading to cracks in your cheesecake. Mix just until combined for the best results.
- Monitor Baking Time: Every oven is different, so keep an eye on your cheesecake as it bakes. The top should be deeply browned, but the center should still jiggle slightly. This indicates that it’s perfectly baked.
- Cool Gradually: After baking, let your cheesecake cool in the oven with the door slightly ajar. This gradual cooling helps prevent cracks. Once cooled, refrigerate it for at least 4 hours to allow the flavors to meld.
- Experiment with Toppings: Don’t hesitate to get creative with toppings! Fresh fruits, sauces, or even a sprinkle of nuts can elevate your cheesecake. Choose toppings that complement the rich flavor of the cheesecake.
- Practice Patience: Allow your cheesecake to chill overnight if possible. This resting period enhances the flavors and improves the texture. It’s worth the wait for that perfect slice!
By following these tips, you’ll be well on your way to mastering the Basque Burnt Cheesecake. Each attempt will bring you closer to achieving that creamy, rich, and beautifully charred dessert that everyone will love. Happy baking!
Breakdown of Time for Basque Burnt Cheesecake Recipe
Prep Time
Preparing your Basque Burnt Cheesecake is a straightforward process. The prep time typically takes about 20-30 minutes. This includes gathering your ingredients, softening the cream cheese, and mixing everything together. Make sure to take your time during this step to ensure a smooth batter. A well-prepared mixture is key to achieving that creamy texture.
Cooking Time
The cooking time for your cheesecake is relatively short, ranging from 25 to 30 minutes. During this time, the cheesecake will bake at a high temperature, allowing the top to become beautifully browned while the center remains creamy. After baking, remember to leave the cheesecake in the oven for an additional 10 minutes. This helps it set properly without cracking.
Total Time
In total, you can expect the entire process to take around 4 hours and 30 minutes, including cooling and chilling time. After baking, allow the cheesecake to cool at room temperature for about 1 hour. Then, refrigerate it for at least 4 hours, or ideally overnight. This chilling period is essential for the flavors to meld and for the cheesecake to achieve its perfect texture. So, while the active cooking time is short, the waiting is well worth it for that delicious Basque Burnt Cheesecake!
Nutritional Information for Basque Burnt Cheesecake Recipe
Calories in Basque Burnt Cheesecake
When indulging in a slice of Basque Burnt Cheesecake, it’s good to know what you’re consuming. Each serving contains approximately 350 calories. This calorie count comes from the rich ingredients used, such as cream cheese and heavy cream. While it’s a decadent treat, enjoying it in moderation can fit into a balanced diet. Remember, this cheesecake is meant to be savored, so take your time with each delicious bite!
Protein Content in Basque Burnt Cheesecake
Protein is an essential nutrient, and Basque Burnt Cheesecake provides a modest amount. Each serving contains about 6 grams of protein. This protein primarily comes from the cream cheese and eggs used in the recipe. While it may not be a significant source of protein compared to other foods, it does contribute to the overall nutritional profile of this delightful dessert. Pairing it with a protein-rich meal can help balance your intake for the day.
Sodium Levels in Basque Burnt Cheesecake
Sodium is another important factor to consider in your diet. Each serving of Basque Burnt Cheesecake contains approximately 200 milligrams of sodium. This sodium content mainly comes from the cream cheese and added salt in the recipe. For most people, this level of sodium is manageable within a healthy diet. However, if you are watching your sodium intake, it’s wise to enjoy this cheesecake as an occasional treat rather than a regular indulgence.
FAQs about Basque Burnt Cheesecake Recipe
Can I make Basque Burnt Cheesecake ahead of time?
Absolutely! Making Basque Burnt Cheesecake ahead of time is a great idea. In fact, it often tastes even better after chilling overnight. This allows the flavors to meld beautifully. You can prepare it a day or two in advance, making it perfect for parties or special occasions. Just remember to store it in the refrigerator until you’re ready to serve.
What is the best way to store Basque Burnt Cheesecake?
To store your Basque Burnt Cheesecake, cover it with plastic wrap or aluminum foil. This helps keep it fresh and prevents it from absorbing any odors from the fridge. You can also place it in an airtight container. It’s best to keep it refrigerated. If stored properly, it can last for up to 5 days. Just make sure to let it sit at room temperature for a few minutes before serving for the best texture.
Advertisement
Can I use a different type of cheese for Basque Burnt Cheesecake?
While cream cheese is the traditional choice for Basque Burnt Cheesecake, you can experiment with other cheeses. Mascarpone cheese can be a delicious alternative, adding a rich and creamy texture. Ricotta cheese can also work, but it may change the texture slightly. If you decide to substitute, keep in mind that the flavor and consistency may vary, so it’s best to stick with cream cheese for the classic taste.
How do I know when my Basque Burnt Cheesecake is done?
Knowing when your Basque Burnt Cheesecake is done is key to achieving that perfect texture. The top should be deeply browned, almost charred, while the center should still jiggle slightly when you gently shake the pan. This indicates that it’s set but still creamy inside. If the center is too firm, it may be overbaked. Remember, it will continue to set as it cools, so don’t worry if it seems a bit underdone when you take it out of the oven!
Conclusion on Basque Burnt Cheesecake Recipe
In conclusion, the Basque Burnt Cheesecake is a delightful dessert that combines simplicity with rich flavors. Its unique charred top and creamy center make it a standout treat for any occasion. Whether you’re a seasoned baker or just starting out, this recipe is approachable and rewarding. With just a few key ingredients and straightforward steps, you can create a dessert that impresses family and friends alike.
As you explore the variations and tips provided, feel free to make this cheesecake your own. Experimenting with flavors and toppings can lead to exciting new creations. Remember, the joy of baking lies not only in the final product but also in the process itself. So, gather your ingredients, preheat your oven, and embark on this delicious baking adventure!
Once you’ve mastered the Basque Burnt Cheesecake, you’ll find it’s a versatile dessert that can be enjoyed year-round. Whether served at a festive gathering or as a sweet treat after dinner, it’s sure to be a hit. So, go ahead and indulge in this creamy, decadent delight. Happy baking!
Basque Burnt Cheesecake Recipe is a must-try dessert!
Ingredients
Method
- Preheat oven to 200ºC (fan-forced). Line an 8-inch springform pan with parchment paper, making sure the paper extends above the rim slightly for the signature rustic edge.
- Make the batter: In a large mixing bowl, combine the cream cheese and sugar. Whisk until smooth and fluffy.
- Add eggs one at a time, whisking well after each addition until fully incorporated.
- Pour in the cream and whisk until smooth. Add the vanilla extract and mix well.
- Sift in flour or cornstarch and whisk until the batter is fully combined and silky.
- Bake: Pour the batter into the prepared pan and bake for 50–55 minutes, or until the top is deeply golden brown and the center still has a gentle wobble.
- Cool and chill: Let the cheesecake cool at room temperature, then refrigerate overnight to set fully and intensify the flavor.
Notes
- Don’t overbake: The center should jiggle slightly when removed from the oven—this gives it that signature creamy texture once chilled.
- Rustic charm: Don’t worry if the top cracks or the parchment wrinkles—this cheesecake is all about character.
- Flavor deepens: The cheesecake tastes even better the next day after chilling and settling.
- Pan size matters: Using an 8-inch springform pan yields the best height and texture for this recipe.