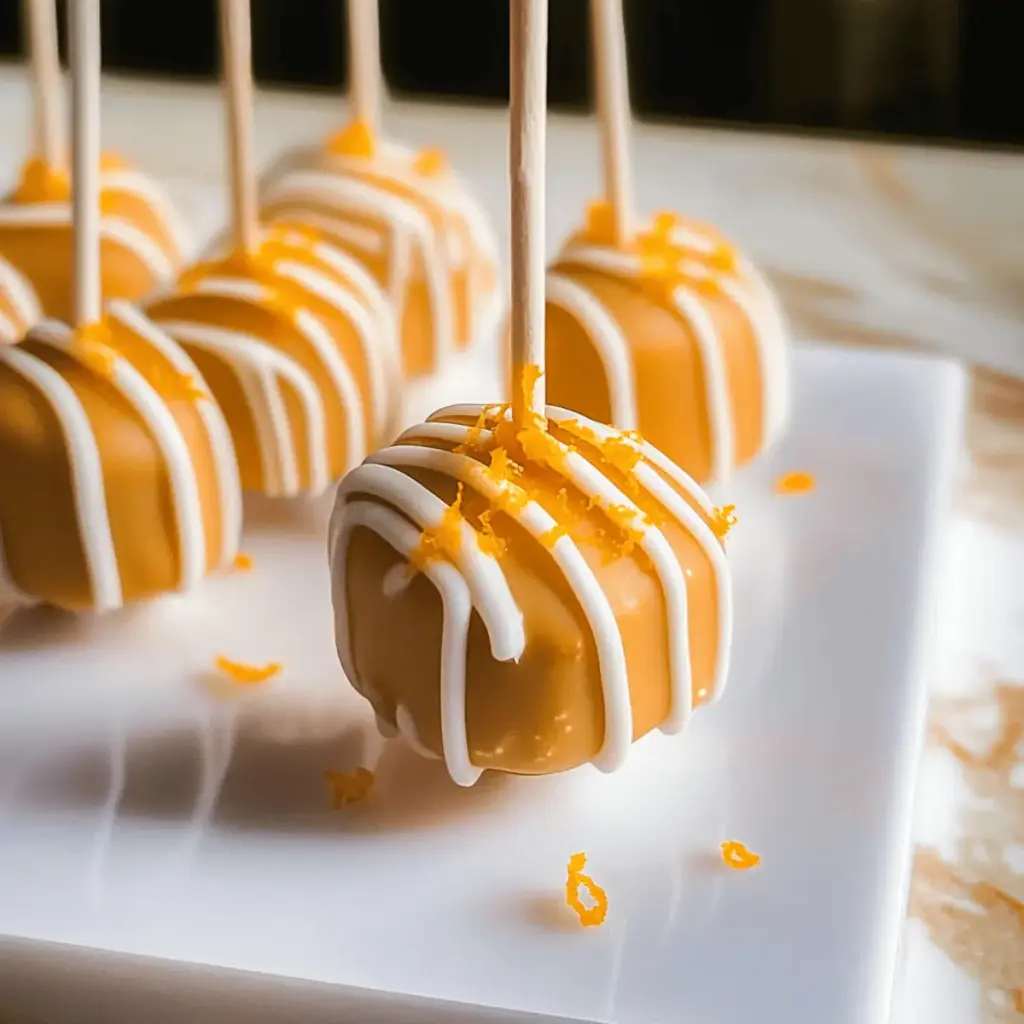
The sunny aroma of citrus blossoms wafts through my kitchen as I dip the vibrant cake pops, each one carefully rolled and chilled to perfection. Today, I’m excited to share my version of the ever-popular Starbucks Copycat Orange Cream Cake Pops. These delightful treats not only deliver the iconic creamy taste you love but also allow you to create them from scratch using wholesome ingredients. Perfect for any occasion, these homemade cake pops are both a quick prep for busy weeknights and a fun dessert for gatherings. With their sweet, citrusy flavor reminiscent of a classic creamsicle, they are sure to brighten anyone’s day. So, are you ready to dive into the world of homemade sweet treats? Let’s get started!
Why Are These Cake Pops So Special?
Bursting with flavor: Each bite of these Orange Cream Cake Pops is a refreshing explosion of citrus, making them a delightful treat for any dessert lover.
Quick and simple: Ideal for busy schedules, these pops are easy to whip up, combining straightforward steps with minimal effort.
Versatile delight: Perfect for parties, picnics, or a sweet afternoon snack, they’re sure to impress family and friends.
Wholesome ingredients: This recipe emphasizes fresh oranges and cream cheese, elevating the taste while keeping it nutritious.
Fun to make: Get the kids involved! Rolling and decorating these cake pops is an enjoyable activity for all ages.
Pair your delightful creations with a slice of Gingerbread Spice Cheesecake to elevate your dessert spread!
Orange Cream Cake Pop Ingredients
For the Cake Batter
• All-Purpose Flour – Provides structure to the cake. Substitute with gluten-free flour for a gluten-free version.
• Baking Powder – A leavening agent that helps the cake rise to perfection.
• Baking Soda – Reacts with buttermilk, adding lift and lightness.
• Salt – Enhances the overall flavor of the cake.
• Unsalted Butter – Adds richness and moisture; use dairy-free butter for a dairy-free option.
• Sugar – Sweetens the cake, balancing the citrus notes.
• Eggs – Bind ingredients and contribute to moisture.
• Vanilla Extract – Enhances flavor depth, making the cake pop even more delightful.
• Orange Zest – Adds bright citrus notes; always opt for fresh for the best flavor.
• Fresh Orange Juice – Moistens the cake while infusing vibrant orange flavor.
• Buttermilk – Keeps the cake deliciously moist. Substitute with regular milk plus 1 tsp vinegar or lemon juice for buttermilk.
For the Cream Cheese Frosting
• Cream Cheese – Forms the base of the frosting, delivering a creamy texture.
• Powdered Sugar – Sweetens and thickens the frosting to perfection.
For Coating and Decorating
• Candy Melts (Orange) – The sweet, bright finish for the cake pops; swap with white chocolate and orange food coloring if needed.
• Coconut Oil – Helps thin the candy melts for an even coating.
• Lollipop Sticks – Essential for serving as fun and tasty cake pops.
• White Chocolate Drizzle – Optional, adds elegance and extra sweetness.
• Extra Orange Zest – A lovely garnish that enhances flavor and presentation.
Now you’re all set to make these delightful Orange Cream Cake Pops! Each ingredient plays its part in creating a symphony of flavors and textures that will leave everyone wanting more. Happy baking!
Step‑by‑Step Instructions for Orange Cream Cake Pop
Step 1: Make the Cake Batter
Begin by creaming 1 cup of unsalted butter and 1 cup of sugar in a large mixing bowl until the mixture is light and fluffy, about 3-5 minutes. Add in 4 eggs, 1 teaspoon of vanilla extract, and 2 tablespoons of fresh orange zest, mixing until fully incorporated. In a separate bowl, whisk together 2 cups of all-purpose flour, 2 teaspoons of baking powder, 1 teaspoon of baking soda, and ½ teaspoon of salt, then gradually combine this with the wet mixture, alternating with ½ cup of fresh orange juice and 1 cup of buttermilk until the batter is smooth and well-blended.
Step 2: Bake the Cake
Pour the prepared cake batter into a greased 9×13 inch baking pan and spread it evenly. Bake in a preheated oven at 350°F (175°C) for 25-30 minutes, or until a toothpick inserted into the center comes out clean with a few moist crumbs. Allow the cake to cool in the pan for about 10 minutes before transferring it to a wire rack to cool completely. This baked cake will serve as the base for your delightful Orange Cream Cake Pops.
Step 3: Prepare the Frosting
In a mixing bowl, beat together 8 oz of cream cheese and ½ cup of unsalted butter until creamy and smooth, about 2-3 minutes. Gradually sift in 2 cups of powdered sugar, along with another teaspoon of vanilla extract and the remaining orange zest. Mix until the frosting is well combined and fluffy. Once the cake is completely cooled, crumble it into fine pieces and mix it into the frosting until a dough-like consistency forms for your Orange Cream Cake Pop filling.
Step 4: Form Cake Balls
Using your hands, roll the cake and frosting mixture into uniform balls, approximately 1 inch in diameter, ensuring consistency for even coating later. Place the balls on a baking sheet lined with parchment paper to prevent sticking, and then refrigerate them for at least 30 minutes to firm up. Chilling these cake balls is essential for easier handling and coating when you make your cake pops.
Step 5: Coat the Cake Pops
Melt 1 bag of orange candy melts with 1 tablespoon of coconut oil in a microwave-safe bowl, heating in 30-second intervals until smooth and fully combined. Remove the chilled cake balls from the fridge, then dip a lollipop stick into the melted candy melts before inserting it into the center of each cake ball, ensuring it holds together well. Dip each cake ball into the melted orange candy melts, ensuring they are completely covered, and gently tap off any excess before placing them upright into a styrofoam block to set.
Step 6: Decorate
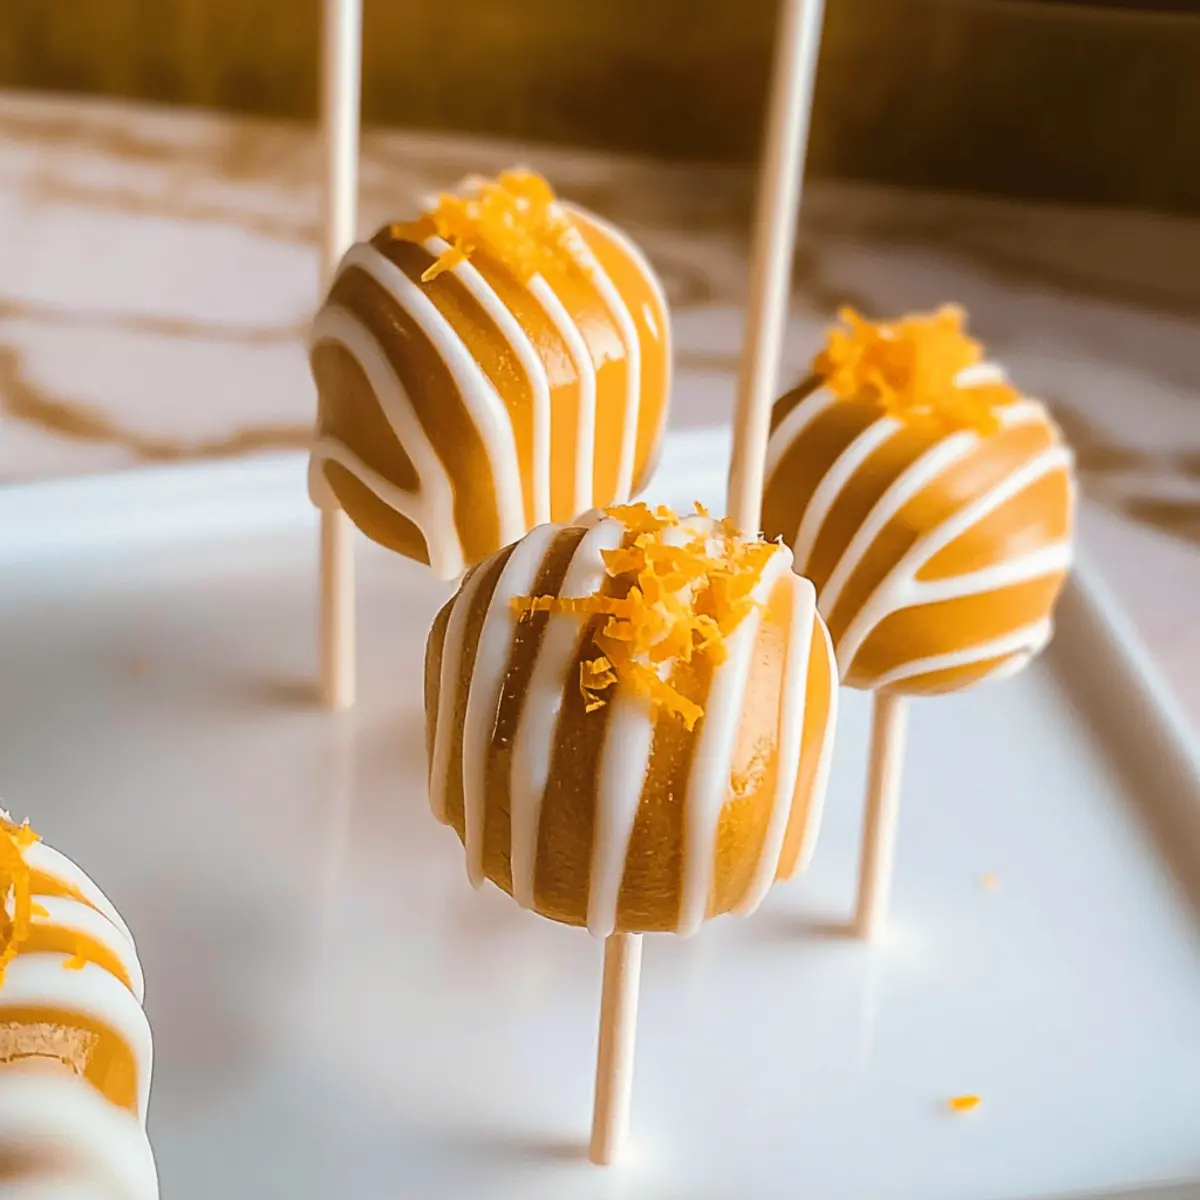
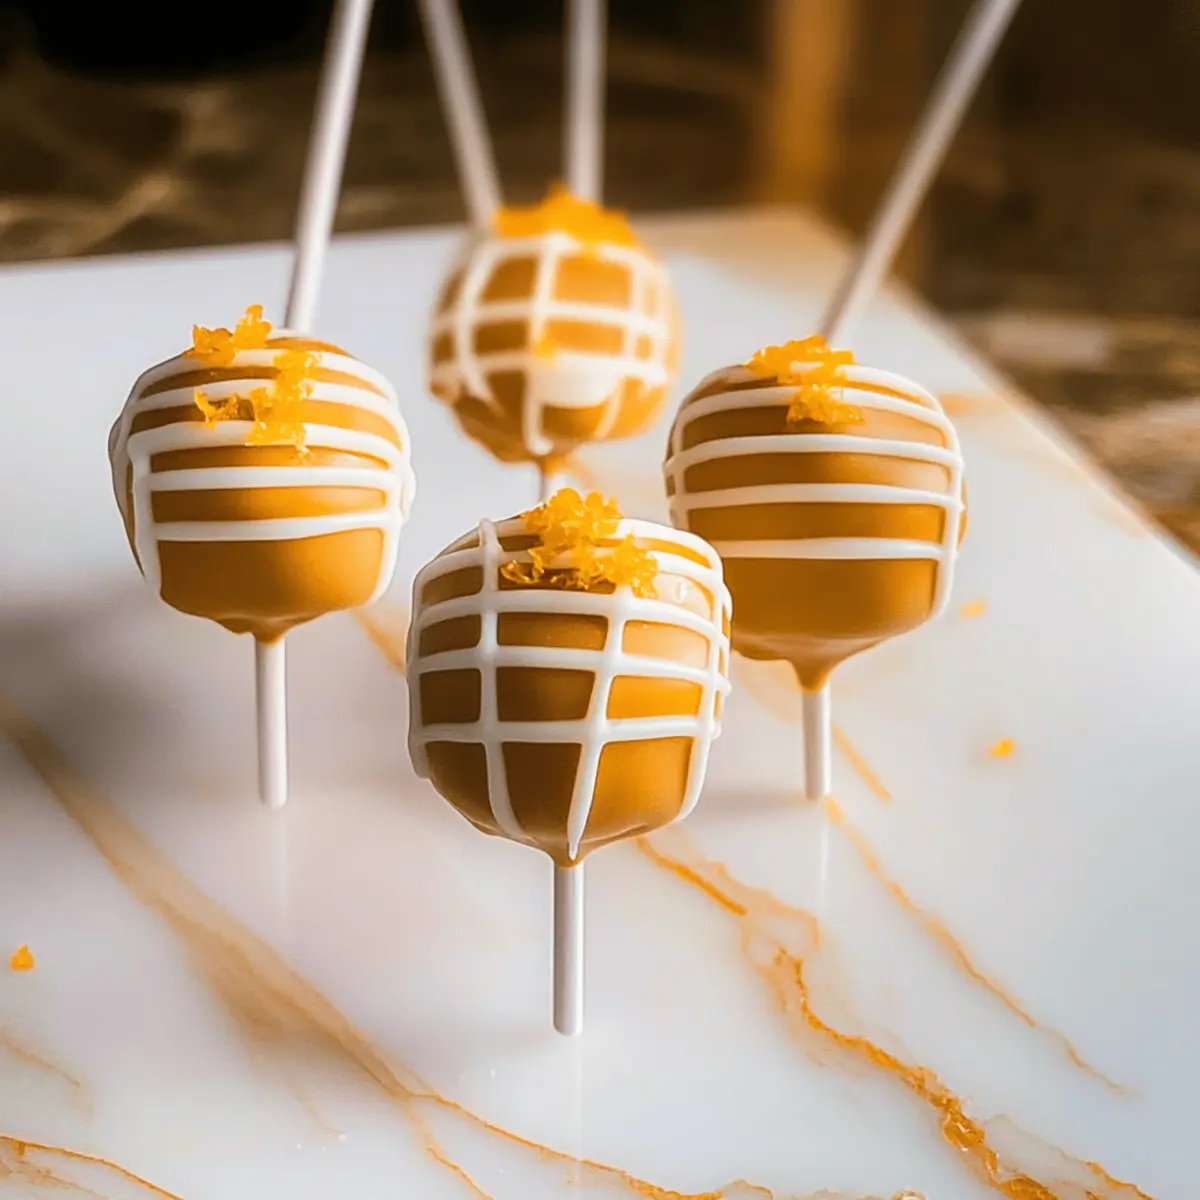
Once the candy coating has hardened, you can get creative with your decorations! Drizzle melted white chocolate over the coated cake pops for an elegant touch, and sprinkle with extra orange zest for added flavor and visual appeal. Allow the decorations to set completely before enjoying your homemade Orange Cream Cake Pops. These cheerful bites are perfect for gathering or a sweet treat to share with loved ones!
Make Ahead Options
These delightful Orange Cream Cake Pops are perfect for meal prep enthusiasts! You can make the cake batter and bake it up to 24 hours in advance, allowing it to cool completely before wrapping it tightly in plastic wrap to prevent drying out. Additionally, you can prepare the frosting and store it in the refrigerator for up to 3 days—simply bring it to room temperature and re-whip before mixing it with the crumbled cake. When you’re ready to assemble, just roll the cake and frosting mixture into balls and chill for 30 minutes before dipping. This prep in advance not only saves you time but ensures that your cake pops remain just as delicious as when freshly made!
Expert Tips for Orange Cream Cake Pops
• Use Fresh Ingredients: Fresh orange zest and juice make a huge difference. They enhance the citrus flavor and ensure your cake pops taste bright and delicious.
• Chill Before Dipping: Always chill your cake balls before coating them to prevent them from crumbling. A cold surface helps the candy melts adhere better.
• Melt Slowly: When melting candy melts, do it in small intervals and mix frequently. This prevents overheating and helps achieve a smooth, pourable consistency.
• Consistent Size: Roll your cake balls to uniform size (about 1 inch) for even cooking and coating. This keeps cooking times and coatings consistent.
• Add Flavor Boost: For a more intense orange flavor, incorporate a few drops of orange extract into the frosting. Just a little goes a long way in making these cake pops irresistible.
• Decoration Delight: Have fun with the decorations! Use sprinkles or colored chocolate drizzle to personalize your Orange Cream Cake Pops and make them festive for any occasion.
Orange Cream Cake Pop Variations
Feel free to get creative and tailor these cake pops to your tastes with these fun twists and swaps!
-
Gluten-Free: Replace all-purpose flour with a gluten-free blend for a delightful GF version that everyone can enjoy.
-
Dairy-Free: Swap out butter, cream cheese, and buttermilk with dairy-free alternatives like coconut cream and almond milk, keeping the creaminess intact.
-
Extra Citrus Burst: Add a few drops of orange extract to the batter for an intensified citrus flavor that will delight your taste buds.
-
Add Nuts: For a little crunch, mix in finely chopped macadamia nuts or pistachios into the cake batter before baking for added texture.
-
Chocolate Lovers: Drizzle with dark or white chocolate after the orange coating has set for an indulgent twist that will round out the flavor.
-
Zesty Variants: Try lemon or lime zest in place of orange zest to give a different citrusy kick to your cake pops.
-
Heat Things Up: Add a pinch of cayenne pepper to the frosting for an unexpected spicy contrast that balances beautifully with the sweetness.
-
Seasonal Fun: Decorate with themed sprinkles based on the season, making these cake pops perfect for festive celebrations or holidays.
Want more tasty ideas? Pair your delightful creations with a slice of Eggnog Bundt Cake for a seasonal feast!
What to Serve with Homemade Starbucks Copycat Orange Cream Cake Pops
Indulge in a vibrant array of flavors and textures that perfectly complement these delightful citrus cake pops!
- Creamy Vanilla Ice Cream: The smoothness of vanilla ice cream balances the citrus zing, providing a refreshing contrast to the cake pops.
- Sparkling Citrus Lemonade: Bright and bubbly, this drink enhances the orange notes while offering a thirst-quenching pairing for dessert.
- Homemade Whipped Cream: Light and airy, it adds a touch of sweetness and can be flavored with orange zest for extra harmony.
- Fruit Salad Medley: A mix of fresh berries and citrus slices adds a refreshing burst, echoing the sweet fruit flavors in the cake pops.
- Chocolate Dipped Strawberries: The richness of chocolate combines beautifully with the tangy sweetness of the cake pops, making for a luxurious treat.
- Ginger Snap Cookies: Their spicy crunch creates an inviting texture contrast and enhances the overall dessert experience.
- Iced Matcha Latte: Earthy and refreshing, this drink adds a sophisticated twist while balancing the sweetness of the cake pops.
- Coconut Macaroons: Chewy and sweet, they bring a different texture that beautifully complements the soft and zesty cake pops.
- Orange-Infused Tea: A warm cup with hints of orange works wonderfully, tying back to the citrus theme of the cake pops.
Embrace the joy of creating a delightful dessert spread that dazzles both the taste buds and the senses!
How to Store and Freeze Orange Cream Cake Pops
Fridge: Store your Orange Cream Cake Pops in an airtight container in the refrigerator for up to 1 week. This keeps them fresh and moist, ready for your sweet cravings.
Freezer: If making ahead, freeze the cake pops individually on a baking sheet until solid, then transfer them to a freezer-safe bag. They can be stored for up to 1 month.
Thawing: When ready to enjoy, thaw the frozen cake pops in the fridge overnight. Avoid thawing at room temperature to prevent a soggy coating.
Reheating: While these treats are best enjoyed cold or at room temperature, you can also gently microwave them for a few seconds if you prefer them warm.

Orange Cream Cake Pops Recipe FAQs
How do I choose the best oranges for this recipe?
Absolutely! When selecting oranges, look for ones that are firm, heavy for their size, and free from dark spots or blemishes. For the best flavor, opt for navel oranges, which are sweet and easy to zest. Always aim for fresh oranges, as they provide the optimal zing that enhances the cake pops.
Advertisement
How long can I store Orange Cream Cake Pops?
Your delightful Orange Cream Cake Pops can be stored in an airtight container in the refrigerator for up to 1 week. Make sure they are sealed well to maintain moisture and freshness, keeping them perfect for dessert cravings after dinner!
Can I freeze the Orange Cream Cake Pops?
Absolutely! To freeze, place the cake pops on a baking sheet and freeze until solid, about 1-2 hours. Then transfer them to a freezer-safe bag, and they’ll last for up to 1 month. When you’re ready to enjoy, thaw them in the fridge overnight for the best texture.
What should I do if my cake pops are crumbling?
Very! If you find your cake pops crumbling, it usually means your mixture is too dry or the balls weren’t chilled enough. Ensure the cake is well-combined with the cream cheese frosting to form a dough-like consistency. If they still crumble, try adding a bit more frosting, mixing in just a tablespoon at a time until you achieve the right texture.
Are these cake pops safe for kids and pets?
Yes! These Orange Cream Cake Pops are safe for kids, but be mindful of any allergies to dairy or gluten. For pets, it’s best to keep them away, as ingredients like sugar and chocolate can be harmful to them, especially in larger quantities.
Can I make a dairy-free version of these cake pops?
Absolutely! To make dairy-free Orange Cream Cake Pops, substitute the unsalted butter with a dairy-free butter option, swap the cream cheese for a dairy-free cream cheese alternative, and use non-dairy milk instead of buttermilk. Just ensure that all ingredients align with your dietary choices, and you’re good to go!

Delightful Orange Cream Cake Pops for Your Sweet Tooth
Ingredients
Equipment
Method
- Cream 1 cup of unsalted butter and 1 cup of sugar until light and fluffy, about 3-5 minutes. Mix in 4 eggs, vanilla extract, and 2 tablespoons of fresh orange zest.
- In a separate bowl, whisk together flour, baking powder, baking soda, and salt. Gradually combine with the wet mixture, alternating with orange juice and buttermilk until smooth.
- Pour the batter into a greased 9x13 inch baking pan and bake at 350°F for 25-30 minutes until a toothpick comes out clean. Cool for 10 minutes, then transfer to a wire rack to cool completely.
- Beat together cream cheese and 0.5 cup of unsalted butter until smooth. Gradually sift in powdered sugar, vanilla extract, and remaining orange zest, mixing until fluffy.
- Crumble the cooled cake into fine pieces and mix into frosting until a dough-like consistency forms.
- Roll mixture into 1 inch balls and place on parchment paper. Refrigerate for at least 30 minutes.
- Melt orange candy melts with coconut oil. Dip lollipop sticks into candy melts before inserting into cake balls. Coat each ball in melted candy melts and tap off excess.
- Allow to set upright in a styrofoam block. Drizzle with melted white chocolate and sprinkle with extra orange zest once hardened.