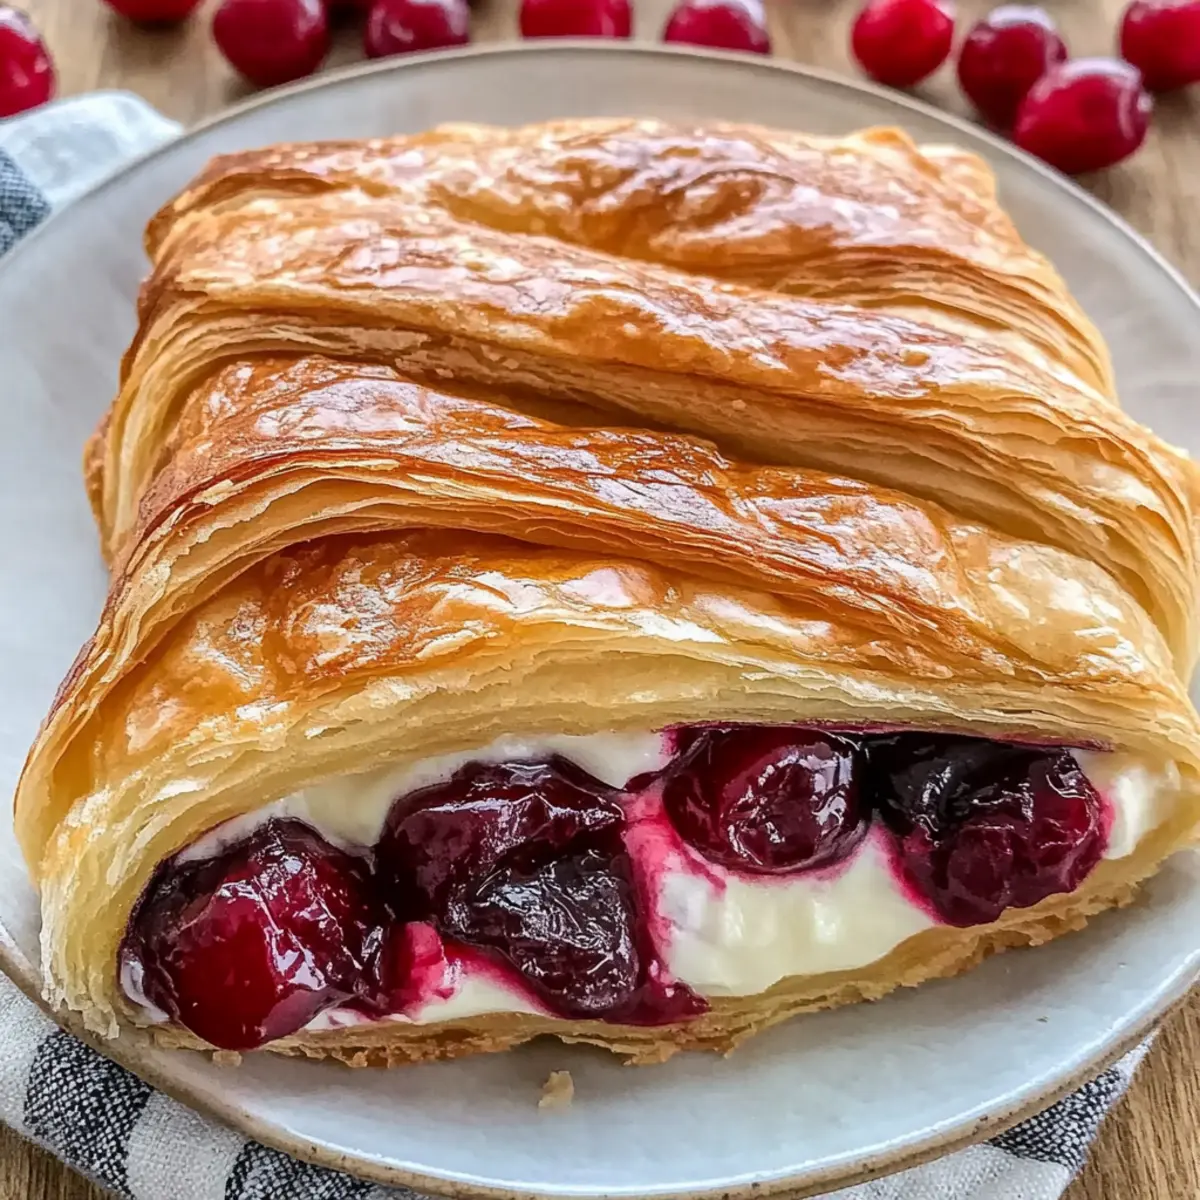
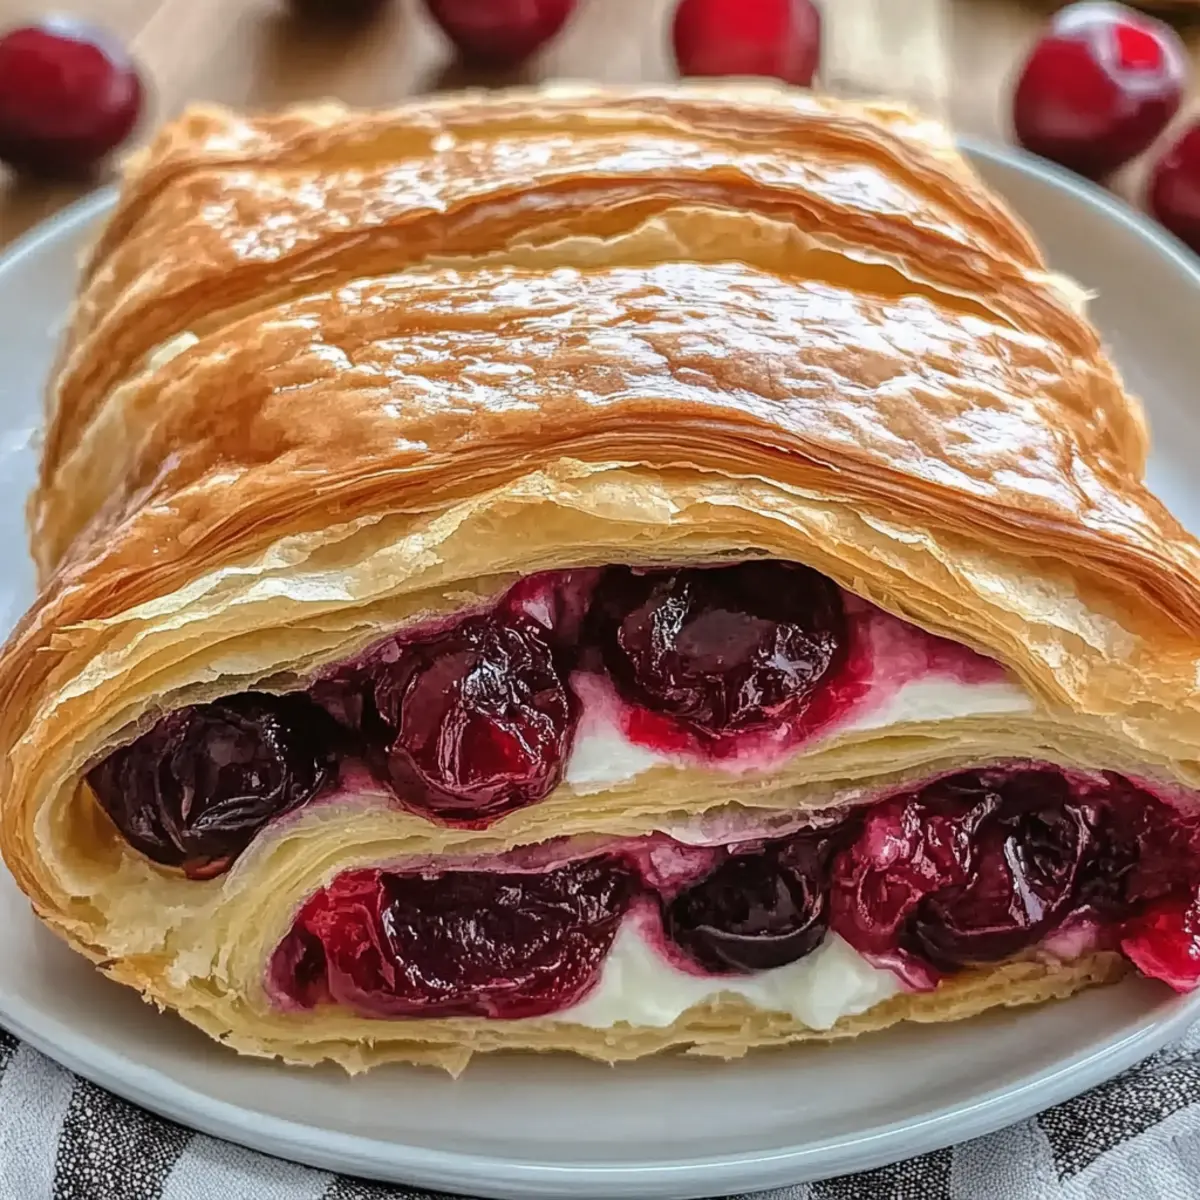
The aroma wafting through my kitchen reminded me of the quaint bakery around the corner, where every bite of their Cherry Cheese Danish felt like a warm hug. This delightful pastry, with its flaky layers and creamy cheese filling topped with luscious cherries, is a must-try for any home chef eager to elevate their baking. Not only is this Cherry Cheese Danish a showstopper for brunch gatherings or cozy breakfast moments, but it’s also surprisingly easy to make—especially with the option of using store-bought puff pastry! With each golden, crispy bite, you’ll experience the perfect balance of flaky pastry and creamy filling, making it an instant crowd-pleaser. Are you ready to bring a touch of bakery magic into your home?
Why is this Cherry Cheese Danish special?
Irresistible Flavors: The balance of sweet cherries and creamy cheese creates a harmonious explosion of taste in every bite.
Effortless Prep: With the option of store-bought puff pastry, making this treat is a breeze, perfect for even the busiest baking days.
Versatile Appeal: Enjoy it for breakfast, a brunch gathering, or even as a late-night snack—this Danish fits all occasions!
Golden & Flaky: Each layer bakes to a perfectly crispy exterior, reminiscent of your favorite local bakery. If you’re looking for more delightful desserts, check out my Homemade Danish Butter or No-Bake Biscoff Cheesecake for an effortless sweet fix!
Customizable Options: Try swapping cherry filling with blueberries or peaches for a twist, tailored to your taste preferences.
Cherry Cheese Danish Ingredients
-
For the Dough
Puff Pastry – A flaky, textured base; store-bought options save time and effort. -
For the Filling
Cream Cheese – Provides a rich, creamy consistency that’s essential for the filling; can be swapped with mascarpone or ricotta for a different flavor.
Granulated Sugar – Sweetens the cream cheese mix beautifully and enhances the flavor.
Vanilla Extract – A splash of this adds a delightful depth to the filling’s taste; don’t skip it! -
For the Topping
Cherry Pie Filling – Adds a vibrant burst of sweetness; choose homemade for a fresh touch or use canned for convenience.
Egg (for egg wash) – Creates that golden, shiny finish; substitute with milk if you prefer a non-egg option.
Feel the excitement build as you gather your ingredients! This Cherry Cheese Danish recipe is just a few steps away from bringing your cozy baking day to life.
Step‑by‑Step Instructions for Cherry Cheese Danish
Step 1: Preheat the Oven
Begin by preheating your oven to 375°F (190°C). This ensures that as you prepare your Cherry Cheese Danish, the oven is ready to create that perfectly flaky, golden pastry in no time. Make sure your oven rack is placed in the center for even baking.
Step 2: Prepare the Puff Pastry
On a lightly floured surface, roll out the thawed puff pastry until it’s smooth and pliable. Cut the pastry into four 4×4-inch squares to create the bases for your Cherry Cheese Danish. Make sure your squares are even in size for consistent baking results, setting the stage for delightful layers.
Step 3: Make the Cream Cheese Filling
In a mixing bowl, combine softened cream cheese, granulated sugar, and vanilla extract. Use a hand mixer or spatula to blend these ingredients until smooth and fluffy, about 2-3 minutes. This creamy filling is the heart of your Cherry Cheese Danish, so make sure it’s well combined for the best flavor.
Step 4: Assemble the Danishes
Take one puff pastry square and place a spoonful of the cream cheese mixture in the center, followed by a dollop of cherry pie filling. Gently fold the corners of the pastry towards the center, pinching them together to seal your Cherry Cheese Danish securely, creating an inviting pocket of deliciousness.
Step 5: Apply the Egg Wash
In a small bowl, whisk an egg to create an egg wash. With a pastry brush, gently coat the tops of each sealed Danish with the egg wash to promote a glossy, golden-brown finish when baked. This step is crucial for achieving an appetizing look that beckons to be enjoyed.
Step 6: Bake the Danishes
Place your assembled Cherry Cheese Danishes on a lined baking sheet, ensuring they’re spaced apart for even baking. Slide them into the preheated oven and bake for 20-25 minutes, or until they’re puffed up and beautifully golden brown. Keep an eye on them in the last few minutes to prevent over-browning.
Step 7: Cool and Serve
Once baked, remove the Cherry Cheese Danishes from the oven and let them cool on the baking sheet for about 5 minutes. This cooling period allows the filling to set slightly. They’re best enjoyed warm, so serve them fresh alongside your favorite cup of coffee or tea for a delightful treat.

Expert Tips for Cherry Cheese Danish
-
Thawing Properly: Ensure your puff pastry is completely thawed before using. This prevents tearing and ensures easy handling while assembling your Cherry Cheese Danish.
-
Chill for Flakiness: If possible, chill the rolled-out dough for a few minutes before filling. This helps maintain that signature flakiness and leads to a better rise while baking.
-
Watch for Doneness: Keep a close eye during the last few minutes of baking. Over-baking can lead to a dry Danish, while just the right time yields a delightful crispy exterior.
-
Filling Alternatives: Don’t hesitate to get creative! Swap out the cherry filling for blueberries or peaches to customize your Cherry Cheese Danish and suit your taste preferences.
-
Egg Wash Tips: Applying the egg wash gently can make a big difference—too much can lead to sogginess, while an even layer creates a beautiful golden finish.
-
Serving Warm: Although they can be enjoyed at room temperature, serving your Cherry Cheese Danish warm enhances the flavors and creates a delightful experience with every bite.
Storage Tips for Cherry Cheese Danish
- Room Temperature: Store your Cherry Cheese Danish in an airtight container at room temperature, where they will stay fresh for up to 2 days. This keeps the flaky texture intact.
- Fridge: If you need to extend freshness, keep the Danishes in the refrigerator for up to 4 days. Just be aware that the pastry may lose some of its crispiness.
- Freezer: For longer storage, freeze the unbaked, assembled Cherry Cheese Danishes. Wrap them tightly in plastic wrap and foil, then they can be frozen for up to 2 months.
- Reheating: To enjoy the Danishes warm again, preheat your oven to 350°F (175°C) and reheat them for about 10 minutes, ensuring they are warm and flaky.
Cherry Cheese Danish Variations
Feel free to personalize your Cherry Cheese Danish for a flavor experience that’s uniquely yours!
-
Blueberry Twist: Swap cherry filling for blueberry pie filling for a fresh twist on flavor.
Everything from the pops of berries to the creamy filling offers new delights in every bite. -
Peach Perfection: Use peach pie filling instead of cherry for a sunny, sweet alternative.
The peach adds a bright twist that complements the creaminess of the cheese, making it a summer favorite. -
Cinnamon Spice: Add a teaspoon of cinnamon or nutmeg to the cream cheese filling for warmth and spice.
The spices provide a cozy touch that pairs beautifully with the fruity filling, creating a comforting treat. -
Dairy-Free Delight: Substitute cream cheese with a dairy-free alternative like cashew cream for a vegan option.
You can still enjoy that creamy filling while catering to dietary restrictions, making it a crowd-pleaser for everyone! -
Lemon Zest: A teaspoon of lemon zest in the cream cheese filling will impart a bright citrus note.
This zingy twist elevates the taste profile, balancing the sweetness with a refreshing finish. -
Chocolate Drizzle: Top your finished Danish with a drizzle of melted chocolate or a sprinkle of chocolate chips.
This indulgent addition adds richness that chocolate lovers will adore, enhancing the overall experience. -
Almond Paste: Incorporate a thin layer of almond paste under the cream cheese filling for a nutty flavor.
The rich, marzipan-like essence works beautifully with the cherries, creating a more decadent dessert. -
Jalapeño Kick: For a daring twist, mix finely chopped jalapeños into your cream cheese filling for a bit of heat.
This unexpected addition adds complexity and a deliciously spicy contrast to the sweetness of the fruit.
For more creative takes on classics, explore my recipe for Homemade Mac Cheese or enjoy the creamy goodness of Honey Pepper Perfection. Your kitchen is your culinary playground—let your imagination run wild!
What to Serve with Cherry Cheese Danish
The delightful experience of biting into a warm Cherry Cheese Danish can be beautifully complemented by a variety of scrumptious sides and beverages.
- Fresh Fruit Salad: A medley of seasonal fruits adds brightness and freshness, balancing the richness of the Danish.
- Creamy Yogurt Parfait: Layers of yogurt, granola, and berries create a hearty yet refreshing option to enjoy alongside your pastry.
- Coffee or Espresso: A steaming cup of coffee enhances the flavors of the Danish, bringing out the sweet and creamy notes.
- Herbal Tea: Light herbal blends, like chamomile or mint, provide a soothing contrast to the sweet, rich flavors of the pastry.
- Whipped Cream: A dollop of fluffy whipped cream elevates the dessert experience, adding a light and airy texture to each bite.
- Ice Cream Scoop: Vanilla or cherry ice cream served on the side brings a delightful cold contrast that pairs perfectly with the warm pastry.
- Chocolate Drizzle: A swirl of chocolate sauce over your Danish adds decadent sweetness, making each bite even more indulgent.
- Nut Medley: A sprinkle of toasted nuts adds crunch and a savory note that beautifully balances the sweetness of the filling.
- Sparkling Water: A refreshing sparkling water with lemon or lime provides a crisp palate cleanser between bites.
- Granola Clusters: These crunchy clusters add texture and can be enjoyed alongside or crumbled over the Danish for an extra flavor kick.
Make Ahead Options
These Cherry Cheese Danishes are a fantastic make-ahead option for busy home cooks! You can prepare the puff pastry squares and the cream cheese filling up to 24 hours in advance. Simply roll out and cut the pastry, then store the squares in an airtight container in the refrigerator. Likewise, mix the cream cheese filling and keep it refrigerated until you’re ready to assemble. When you’re ready to bake, just place a spoonful of filling and cherry topping on each square, fold, brush with egg wash, and bake as directed. This way, you’ll get fresh, flaky danishes with minimal effort on hectic mornings, while still tasting just as delightful!

Cherry Cheese Danish Recipe FAQs
How do I know if my cherries are ripe enough for the filling?
Absolutely! Look for cherries that are firm, vibrant in color, and without dark spots all over. Ripe cherries should have a slightly glossy appearance and feel plump. If you’re using canned cherry pie filling, check that it’s not overly thick or dry, as the goal is to have a juicy complement to your creamy filling.
What is the best way to store leftover Cherry Cheese Danish?
Very good question! For optimal freshness, store your Cherry Cheese Danish in an airtight container at room temperature for up to 2 days. After that, if you need to keep them longer, transfer to the refrigerator where they’ll last up to 4 days. Just keep in mind the pastry may lose some of its crispiness.
Can I freeze Cherry Cheese Danish for later?
You bet! To freeze, I recommend wrapping the unbaked, assembled Danishes individually in plastic wrap, followed by a layer of foil to protect them from freezer burn. They can be stored in the freezer for up to 2 months. When you’re ready to bake, there’s no need to thaw—just pop them in the oven straight from the freezer and adjust the baking time as needed.
Advertisement
What should I do if my pastry turns out soggy?
If you find your Cherry Cheese Danish has a soggy base, it might be due to too much filling or underbaking. Next time, try to add filling in moderation and make sure your oven is properly preheated. Baking the Danishes on a preheated baking sheet can also help achieve that desired crispiness by giving the bottom a head start in cooking.
Does this recipe contain any allergens I should be aware of?
Definitely! This Cherry Cheese Danish contains dairy due to the cream cheese and egg used for the wash. If you have a dairy allergy, consider using non-dairy cream cheese alternatives. Always check labels for any added ingredients, especially in pre-made products like puff pastry and cherry filling.
Can I use other fruits for the filling?
The more the merrier! You can absolutely substitute cherry filling with other fruits like blueberries or peaches, which work wonderfully in this Danish. Just remember to adjust the amount of sugar depending on the sweetness of your chosen fruit. You might also consider adding a pinch of cinnamon or nutmeg for an extra flavor twist!
Delightful Cherry Cheese Danish for a Cozy Bake Day
Ingredients
Equipment
Method
- Preheat your oven to 375°F (190°C).
- Roll out the thawed puff pastry on a floured surface and cut into four 4x4-inch squares.
- Combine softened cream cheese, granulated sugar, and vanilla extract in a bowl and mix until smooth.
- Place a spoonful of the cream cheese mixture on each pastry square, topped with a dollop of cherry pie filling, and fold corners to seal.
- Whisk an egg and brush it over the tops of each assembled Danish.
- Bake the Danishes on a lined baking sheet for 20-25 minutes until golden brown.
- Cool for 5 minutes before serving warm.