Baking has a way of bringing people together. It’s a ritual that fills kitchens with warmth, laughter, and the irresistible aroma of something sweet in the oven. I still remember the first time I made shortbread cookies as a child. My grandmother, a patient and loving woman with flour-dusted hands, guided me through the simple yet magical process. There was no rush, no pressure—just the steady rhythm of kneading, rolling, and cutting. When we pulled the golden cookies from the oven, their buttery scent wrapped around me like a comforting hug.
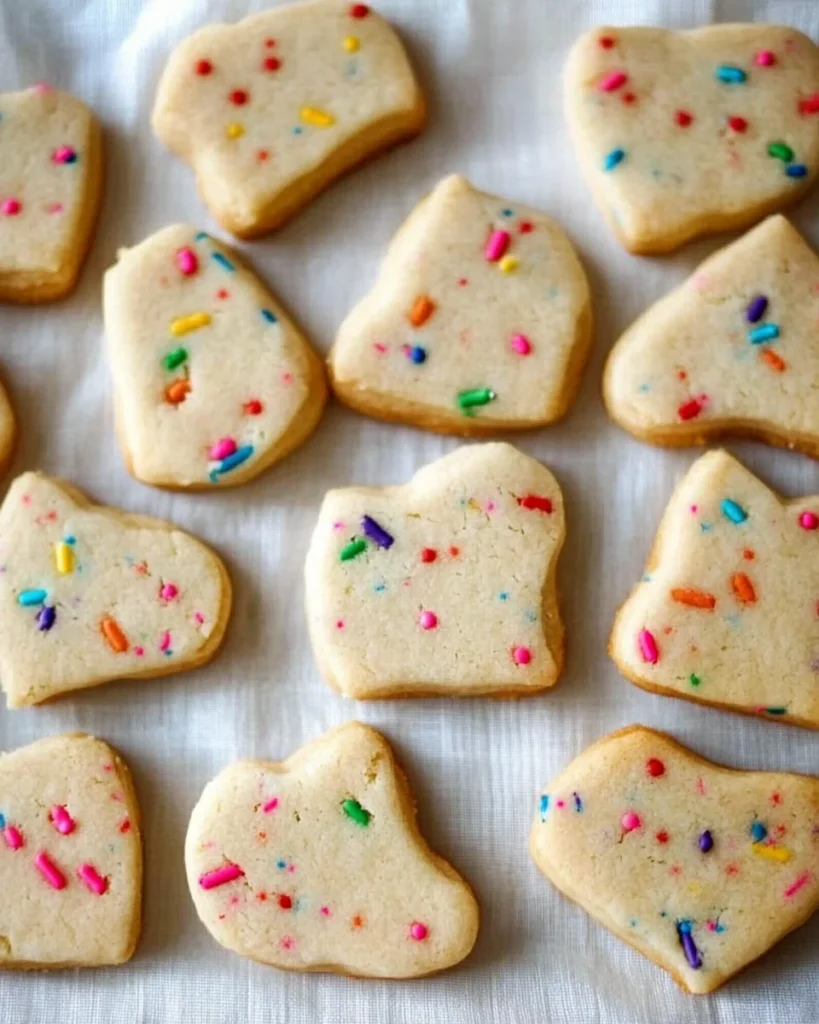
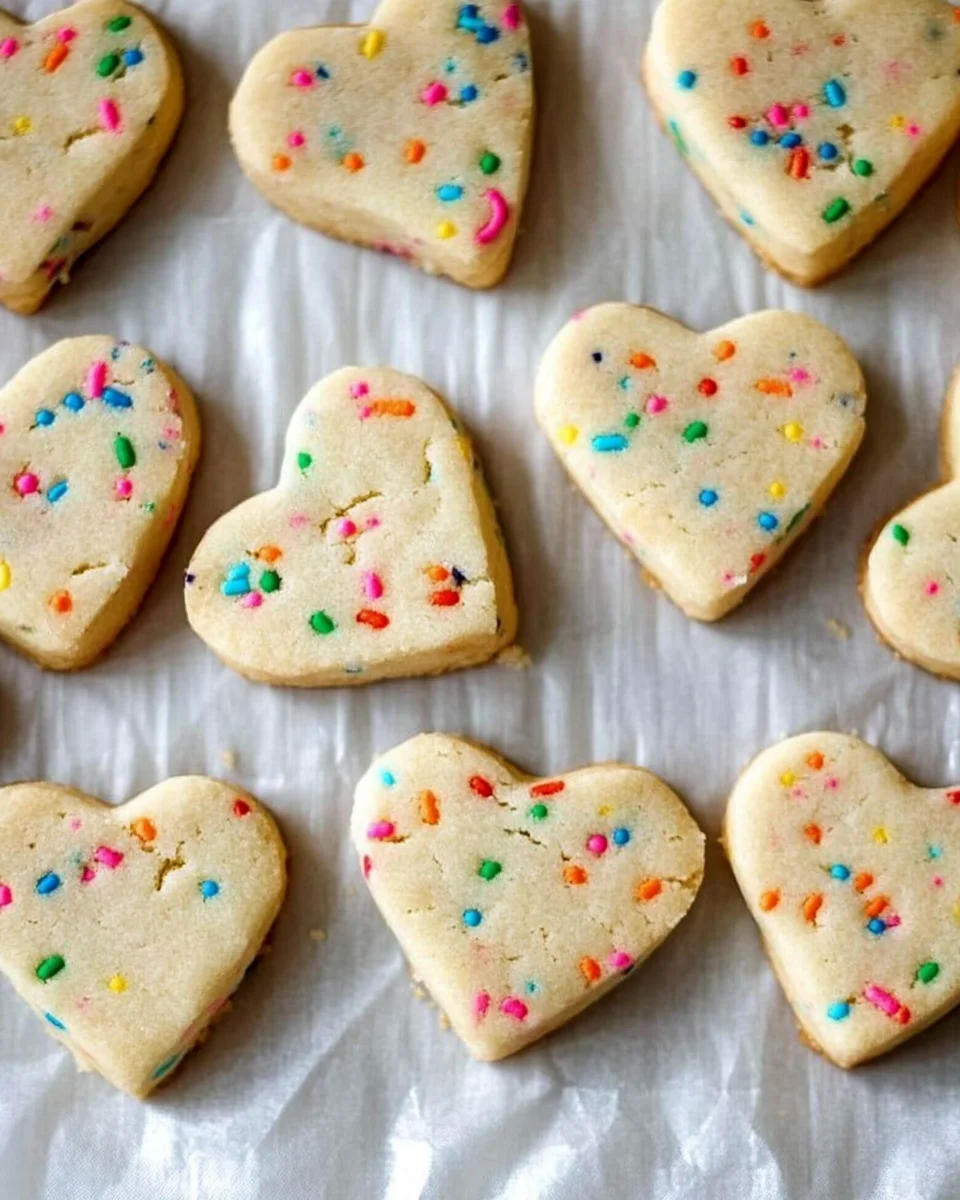
Now, as a parent, I find myself recreating those same moments with my own children. Every spring, we pull out the cookie cutters and a jar of vibrant sprinkles, ready to transform a humble dough into something joyful. Funfetti shortbread cut-out cookies have become a tradition—a reminder that some of life’s best moments are the simplest ones. These cookies are more than just a treat; they are edible memories, shared across generations.
What Makes Funfetti Shortbread Special?
Unlike standard sugar cookies, shortbread has a distinctive crumbly texture that melts in your mouth. It is rich, buttery, and subtly sweet, allowing the sprinkles to add not only color but also a playful crunch. The simplicity of shortbread—just butter, sugar, flour, and vanilla—makes it a perfect canvas for creativity. Whether shaped into bunnies for Easter, stars for birthdays, or classic circles for an everyday pick-me-up, these cookies bring a little extra joy to the table.
But what truly sets this recipe apart is its adaptability. Some bakers prefer to dip their finished cookies in chocolate, while others sandwich them with a layer of jam. You can experiment with different flavors, such as a hint of lemon or almond extract, or use themed sprinkles to match a holiday celebration. No matter how you personalize them, Funfetti shortbread cookies are always a hit.
Tips for the Perfect Shortbread
Baking shortbread may seem simple, but a few key techniques ensure the best results:
- Use Quality Butter – Since butter is the star ingredient, opt for high-quality, salted butter. It enhances the flavor and gives the cookies their signature richness.
- Chill the Dough – Refrigerating the dough is crucial for maintaining shape and texture. Cold dough prevents the cookies from spreading too much while baking.
- Roll with Care – Rolling the dough between two sheets of parchment paper prevents sticking and eliminates the need for excess flour, which can make the cookies tough.
- Mind the Bake Time – For a crisp texture, bake until the bottoms are golden brown. If you prefer a softer, melt-in-your-mouth cookie, remove them when they are just lightly golden.
- Sprinkle Placement – To ensure even distribution, mix some sprinkles into the dough and press a few on top after rolling. This prevents them from bleeding into the dough while baking.
Whimsical Ingredients
- 1 ½ cups salted butter (3 sticks)
- 1 cup granulated sugar
- 1 teaspoon pure vanilla extract
- 3 ½ cups all-purpose flour
- 4 tablespoons sprinkles (divided)
Bake Your Way to Bliss: Directions
- Mix the Magic – In a stand mixer with a paddle attachment, cream butter and sugar until smooth. Scrape down the bowl as needed.
- Flavor Boost – Add vanilla and mix well. Gradually incorporate flour, mixing on low until just combined.
- Sprinkle Joy – Stir in 3 tablespoons of sprinkles, ensuring even distribution.
- Shape & Chill – Divide dough into two equal balls, flatten into discs, wrap in plastic wrap, and refrigerate for at least 4 hours (or overnight).
- Prep & Preheat – Remove dough an hour before rolling to soften. Preheat oven to 350°F. Line two baking sheets with parchment paper.
- Roll & Sprinkle – Roll out the dough between two sheets of parchment paper to ¼ inch thick. Sprinkle the remaining tablespoon of sprinkles on top and press gently with the rolling pin.
- Cut & Chill Again – Use cookie cutters to cut out shapes. Transfer to baking sheets and chill for 15 minutes. Repeat with remaining dough and scraps.
- Bake to Perfection – Bake for 12 minutes, one sheet at a time on the middle oven rack, until the bottoms are light golden.
- Cool & Enjoy – Let cookies cool on the pan for 5 minutes, then transfer to a wire rack to cool completely.
Nutritional Bites (Per Cookie Estimate)
- Calories: ~120
- Fat: ~7g
- Carbohydrates: ~12g
- Sugar: ~5g
- Protein: ~1g
These fun and buttery shortbread cookies melt in your mouth and are perfect for celebrations or afternoon tea. Want to get extra creative? Try decorating them with icing!
Frequently Asked Questions
Can I Make These Cookies in Advance?
Absolutely. The dough can be prepared and refrigerated for up to three days before baking. If you want to plan even further ahead, you can freeze the dough for up to a month. Simply let it thaw in the fridge overnight before rolling it out.
How Long Do These Cookies Stay Fresh?
Stored in an airtight container at room temperature, these cookies remain fresh for about a week. If you want to extend their shelf life, freeze the baked cookies and defrost them as needed.
Can I Use Unsalted Butter?
Yes, but you may need to add a pinch of salt to balance the flavors. Salt enhances the richness of the shortbread, so don’t skip it entirely.
What Type of Sprinkles Work Best?
Jimmies (long, rod-shaped sprinkles) work best because they hold their shape and don’t bleed color into the dough. Avoid nonpareils (tiny round sprinkles), as they tend to dissolve and create streaks of color.
Can I Decorate These Cookies with Icing?
Yes! Although these cookies are delicious on their own, you can add buttercream or royal icing for extra decoration. This is especially fun for holidays and special occasions.
Why Did My Shortbread Turn Out Hard Instead of Buttery and Soft?
Overmixing the dough can develop too much gluten, resulting in a tough texture. Also, be sure not to overbake—shortbread should be just lightly golden, not deeply browned.
Can I Make These Without a Stand Mixer?
Yes! While a stand mixer makes the process easier, you can cream the butter and sugar by hand using a wooden spoon or an electric hand mixer. The key is to ensure the butter is at room temperature so it blends smoothly.
What’s the Best Way to Gift These Cookies?
Shortbread cookies make a wonderful homemade gift. Stack them neatly in a tin, wrap them in parchment paper with a decorative ribbon, or place them in clear cellophane bags for a thoughtful treat. Since they are sturdy, they travel well, making them perfect for care packages or holiday gifts.
Creative Variations to Try
If you love the idea of Funfetti shortbread but want to experiment with flavors, here are a few fun twists:
Advertisement
- Citrus Zest Delight – Add a teaspoon of lemon, orange, or lime zest for a refreshing burst of flavor.
- Chocolate Drizzle – Dip half of each cookie in melted dark or white chocolate and let them set for a decadent finish.
- Nutty Crunch – Mix in finely chopped almonds, pecans, or pistachios for added texture.
- Spiced Wonder – A dash of cinnamon or nutmeg gives the cookies a cozy, warm flavor.
- Jam-Filled Sandwiches – Spread raspberry or apricot jam between two cookies for a delightful treat.
Conclusion: Baking Memories, One Cookie at a Time
Funfetti shortbread cut-out cookies are more than just a dessert; they are a celebration of color, texture, and nostalgia. Whether you’re baking them for a special occasion or simply to brighten an ordinary afternoon, these cookies have a way of bringing smiles to those who enjoy them.
Baking is about more than following a recipe—it’s about creating experiences. It’s about the laughter that fills the kitchen when flour dusts the countertops, the joy of pressing cookie cutters into soft dough, and the anticipation of that first warm bite fresh from the oven. Every batch tells a story, and each sprinkle adds a little bit of magic.
So the next time you find yourself in the kitchen with a rolling pin in hand and a tray of unbaked cookies before you, take a moment to savor the process. Share it with someone you love. And remember that the best recipes aren’t just about taste—they’re about the moments we create along the way.
The Joy of Baking: A Nostalgic Journey with Funfetti Shortbread Cookies
Ingredients
Method
- Cream the Butter & Sugar – In a stand mixer with a paddle attachment, beat the butter and sugar until smooth, scraping down the bowl as needed.
- Add Vanilla & Flour – Mix in the vanilla extract. Gradually add flour, mixing on low speed until just combined.
- Incorporate Sprinkles – Stir in 3 tablespoons of sprinkles, ensuring even distribution throughout the dough.
- Shape & Chill – Divide the dough into two equal balls, flatten into discs, wrap in plastic wrap, and refrigerate for at least 4 hours (or overnight for best results).
- Prep & Preheat – Remove dough from the refrigerator an hour before rolling to soften slightly. Preheat oven to 350°F (175°C) and line two baking sheets with parchment paper.
- Roll & Sprinkle – Roll out the dough between two sheets of parchment paper to ¼ inch thick. Sprinkle the remaining tablespoon of sprinkles on top and gently press them in with a rolling pin.
- Cut & Chill Again – Use cookie cutters to cut out shapes. Transfer to the prepared baking sheets and chill in the refrigerator for 15 minutes to help retain their shape. Repeat with remaining dough and scraps.
- Bake to Perfection – Bake for 12 minutes, one sheet at a time on the middle oven rack, until the bottoms are light golden brown.
- Cool & Enjoy – Let cookies cool on the pan for 5 minutes, then transfer to a wire rack to cool completely before serving.
Notes
- Store in an airtight container at room temperature for up to one week.
- For extra flair, decorate with icing or a light dusting of powdered sugar.
- If using unsalted butter, add ¼ teaspoon salt to the dough.