Imagine walking into your kitchen on a chilly evening, greeted by the warm, inviting aroma of spiced apples bubbling away under a golden, buttery crust. A homemade Apple Cinnamon Cobbler is more than just a dessert—it’s a hug in a bowl. It’s the kind of treat that evokes memories of family dinners, cozy gatherings, and festive celebrations.
If you’re looking for a dessert that’s easy to make, bursting with flavor, and always a crowd-pleaser, this recipe is exactly what you need. Whether you’re a seasoned baker or just starting out, this step-by-step guide will show you how to make the perfect apple cobbler every time.
What is Apple Cinnamon Cobbler?
A Timeless Comfort Dessert
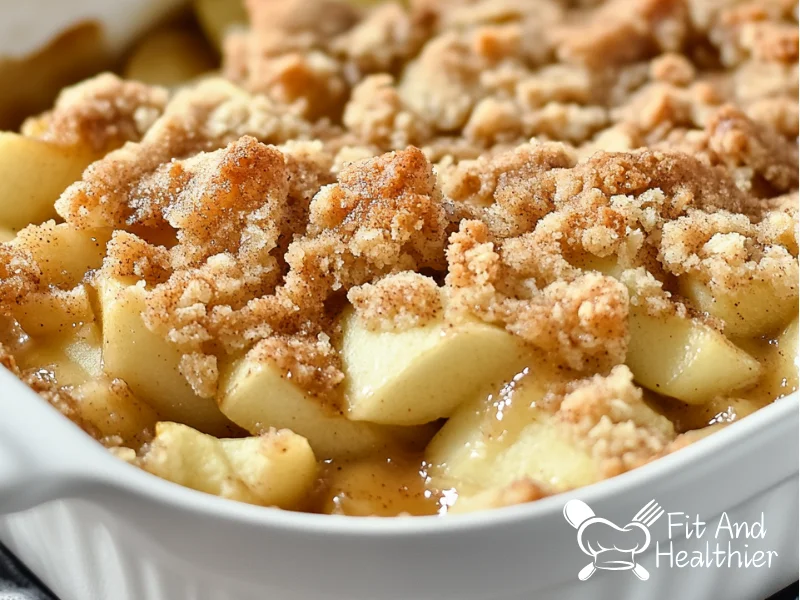
An apple cinnamon cobbler is a classic dessert with origins rooted in rustic, homey cooking. It consists of a spiced apple filling topped with a biscuit-like dough that bakes into a crispy, golden crust. The contrast between the soft, sweet apples and the buttery topping creates a dish that’s as satisfying as it is delicious.
Why It’s a Must-Try Recipe
- Simple Ingredients: Most items are pantry staples, making it easy to whip up on a whim.
- Versatile Appeal: Perfect for holidays, potlucks, or cozy nights in.
- Crowd Favorite: It’s loved by all ages, pairing beautifully with vanilla ice cream or whipped cream.
Ingredients for Classic Apple Cinnamon Cobbler
Here’s a complete list of the ingredients you’ll need for this delightful dessert:
Cobbler Filling
| Ingredient | Quantity |
| Granny Smith apples | 5 lbs (about 9 cups) |
| All-purpose flour | ½ cup |
| Brown sugar (packed) | ¾ cup |
| Granulated sugar | ¾ cup |
| Vanilla extract | 1 teaspoon |
| Ground nutmeg | ¾ teaspoon |
| Ground cinnamon | 1½ teaspoons |
| Salt | ¼ teaspoon |
Cobbler Topping
| Ingredient | Quantity |
| All-purpose flour | 2½ cups |
| Buttermilk | ½ cup |
| Egg | 1 |
| Cold butter (cubed) | ½ cup |
| Granulated sugar | 1½ cups |
| Sugar (for topping) | 2 tablespoons |
| Baking powder | 1 teaspoon |
| Salt | 1 teaspoon |
Step-by-Step Instructions for Apple Cinnamon Cobbler
Preparing the Filling
Step 1: Prep the Apples
- Start by peeling, coring, and slicing 5 lbs of Granny Smith apples into thin slices. Aim for about 9 cups of apples.
- Place the slices directly into a 9×13-inch baking dish.
Step 2: Mix the Filling
- Add ½ cup of all-purpose flour, ¾ cup of packed brown sugar, ¾ cup of granulated sugar, ¾ teaspoon of nutmeg, 1½ teaspoons of cinnamon, and ¼ teaspoon of salt to the apples.
- Drizzle with 1 teaspoon of vanilla extract and toss everything together until the apples are evenly coated.
Step 3: Level the Apples
- Gently press the apples into the baking dish to create an even layer.
Making the Cobbler Topping
Step 1: Combine the Dry Ingredients
- In a large mixing bowl, whisk together:
- 2½ cups of all-purpose flour
- 1½ cups of granulated sugar
- 1 teaspoon of baking powder
- 1 teaspoon of salt
Step 2: Mix the Wet Ingredients
- In a smaller bowl, whisk ½ cup of buttermilk and 1 egg until combined.
Step 3: Form the Dough
- Pour the buttermilk mixture into the dry ingredients.
- Using a pastry cutter or fork, combine the wet and dry ingredients until a rough dough forms. It’s okay if some dry spots remain.
Step 4: Assemble the Cobbler
- Spoon or spread the dough over the apples in the baking dish, ensuring even coverage.
- Scatter ½ cup of cubed cold butter evenly over the dough.
- Sprinkle 2 tablespoons of sugar on top for a caramelized crunch.
Baking the Cobbler
Step 1: Preheat Your Oven
- Preheat your oven to 375°F (190°C).
Step 2: Bake
- Place the baking dish in the oven and bake for 45–55 minutes or until the topping is golden brown and the filling is bubbling.
Step 3: Optional Broil
- For an extra crispy crust, broil the cobbler for 1–3 minutes. Keep a close eye on it to prevent burning.
Step 4: Cool and Serve
- Let the cobbler cool for at least 15 minutes before serving.
Tips for the Perfect Apple Cinnamon Cobbler
- Choose the Right Apples
- Granny Smith apples are ideal because their tartness balances the sweetness of the filling, and they hold their shape during baking.
- Cut Butter Cold
- Cold butter creates a flaky, tender topping. Use a pastry cutter for best results.
- Don’t Skip the Sugar Topping
- The sugar adds a delightful crunch and enhances the cobbler’s visual appeal.
- Serve Warm
- Pair the warm cobbler with vanilla ice cream or whipped cream for a classic combination.
Creative Variations for Apple Cinnamon Cobbler
- Add Crunch: Sprinkle chopped pecans or walnuts over the apples before adding the topping.
- Mixed Fruit Cobbler: Combine apples with pears, cranberries, or peaches for a unique twist.
- Gluten-Free Option: Use a gluten-free flour blend instead of all-purpose flour.
- Spiced Topping: Add a pinch of cinnamon or nutmeg to the dough for an extra layer of warmth.
FAQs About Apple Cinnamon Cobbler
Can I make this cobbler ahead of time?
Absolutely! You can assemble the cobbler and store it in the refrigerator for up to 24 hours before baking.
How do I store leftovers?
Store leftover cobbler in an airtight container in the refrigerator for up to 3 days. Reheat in the oven to restore the topping’s crispness.
Can I freeze apple cobbler?
Yes! Let the cobbler cool completely, then wrap it tightly in plastic wrap and aluminum foil. Freeze for up to 3 months. Thaw in the refrigerator overnight and reheat before serving.
What’s the difference between a cobbler and a crisp?
While both are fruit-based desserts, a cobbler has a biscuit-like topping, while a crisp features a crumbly topping made with oats and butter.
Conclusion
Making a Classic Apple Cinnamon Cobbler is a rewarding experience that fills your home with warmth and comfort. With its tender spiced apples and golden biscuit topping, this dessert is a guaranteed hit, whether you’re serving it at a holiday gathering or enjoying it on a quiet evening.
So, why wait? Gather your ingredients, preheat your oven, and let this timeless dessert work its magic in your kitchen. Don’t forget to top it with a scoop of vanilla ice cream for the ultimate treat.
Advertisement
Happy baking!


