A Sweet Memory Baked into Every Bite
There’s something magical about Easter traditions. The scent of fresh spring air, the pastel-colored eggs nestled in baskets, and the joyous laughter of children hunting for treats. But for many of us, one tradition stands above the rest—the Bunny Cake.
For me, Easter always meant gathering in my grandmother’s cozy kitchen, the counters dusted with flour, as she showed me how to transform simple cake rounds into a charming bunny. I was in charge of sprinkling the coconut fur, my fingers sticky with frosting, and I’d always sneak a few jelly beans before decorating. That bunny cake wasn’t just dessert; it was a symbol of family, creativity, and the joy of the holiday.
If you’re looking to bring that same warmth and nostalgia to your Easter table, this Bunny Cake is a delightful way to celebrate. Whether you’re making it with kids, for a family gathering, or just to embrace the festive spirit, it’s a treat that goes beyond taste—it’s about creating memories.
What Makes This Bunny Cake Special?
Bunny cakes have been a staple of Easter celebrations for decades. Their charm lies in their simplicity—basic cake rounds transformed into an adorable bunny with just a few cuts and decorations. But the beauty of this cake is that it can be as easy or as elaborate as you want it to be.
- Beginner-friendly: Use a boxed cake mix and pre-made frosting for a quick and easy version.
- Customizable: Choose from different flavors, frostings, and decorations to make it your own.
- Family Involvement: Perfect for kids who love decorating and getting creative.
- Showstopper Dessert: Its cute, festive design makes it the centerpiece of any Easter table.
Ingredients: The Magic Mix
- Cake Base: 2 8-inch round cakes (boxed mix or homemade), fully cooled
- Frosting: 2 cups buttercream frosting (store-bought or homemade)
- Bunny Fur: Shredded coconut
- Color Touch: Pink or red food coloring/gel
- Sweet Decorations: Sprinkles and jelly beans
Directions: Hop into Baking Mode
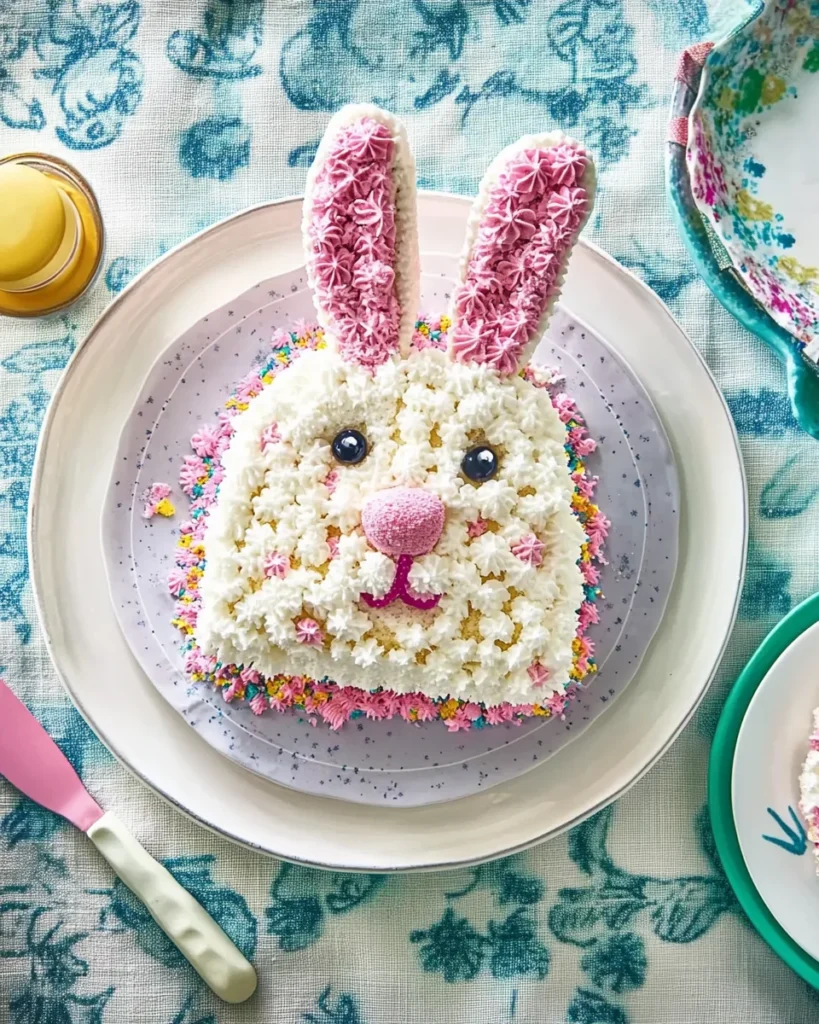
- Shape the Bunny: Take one round cake and cut out the bunny ears and bow tie using the cake pan as a guide. The other cake will remain whole as the face.
- Assemble the Bunny: Arrange the ears and bow tie around the whole cake to form a bunny face.
- Prepare the Frosting: Mix some of the buttercream with food coloring to create pink frosting for the bunny’s ears and face details.
- Frost the Cake: Spread the plain buttercream evenly over the entire bunny face. Don’t worry about perfection—coconut will cover it!
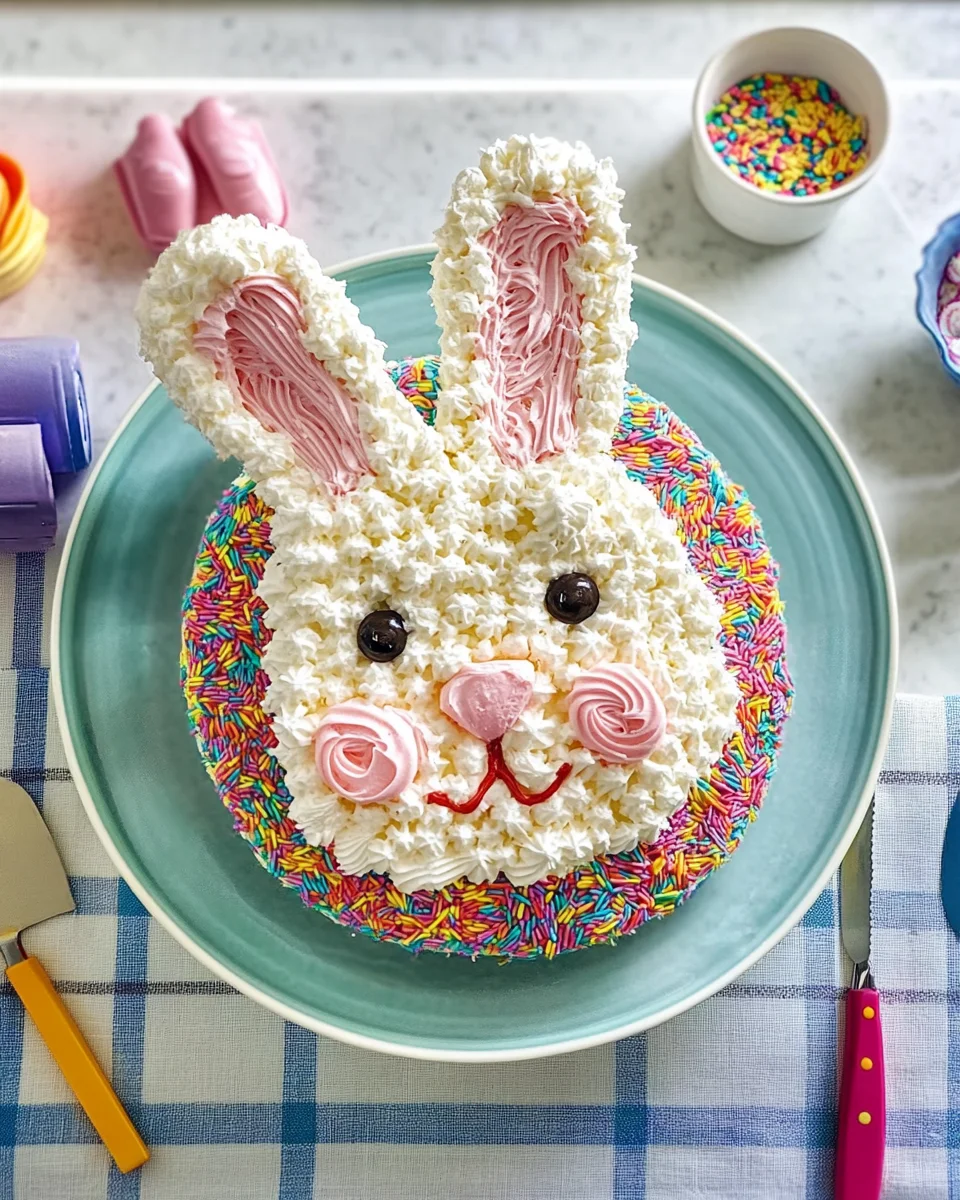
- Add the Fur: Sprinkle shredded coconut over the frosted face and ears for a fluffy bunny texture.
- Decorate Creatively: Use sprinkles and jelly beans to add facial details and embellish the bow tie. Pipe pink frosting to highlight the ears and facial features.
- Enjoy the Festivity: Serve and delight in this adorable Easter treat!
Nutritional Snapshot (Approximate Per Serving)
- Calories: ~300-400
- Fat: ~15g
- Carbohydrates: ~50g
- Protein: ~3g
- Sugar: High (it’s a dessert, after all!)
Would you like any fun variations or substitution ideas?
FAQs: Everything You Need to Know About Bunny Cakes
1. Can I Make the Bunny Cake Ahead of Time?
Absolutely! You can bake the cake rounds a day or two in advance and store them in an airtight container. You can even frost and decorate the cake a few hours before serving. If storing overnight, keep it covered in the fridge to maintain freshness.
2. How Do I Prevent the Cake from Crumbling When I Cut It?
If your cake is too soft, it may crumble when cutting out the bunny ears and bow tie. To avoid this, refrigerate the cake for about 30 minutes before slicing. A chilled cake holds its shape better and is easier to work with.
3. Can I Make a Bunny Cake Without Coconut?
Of course! While shredded coconut adds texture and gives the bunny its fluffy “fur,” you can skip it if you’re not a fan. Instead, use white sprinkles, white frosting with piped fur texture, or even crushed white chocolate for a similar effect.
4. What Are Some Alternative Cake Flavors?
Traditional vanilla or yellow cake is a classic choice, but you can experiment with:
- Carrot Cake: A festive nod to the Easter Bunny himself!
- Chocolate Cake: For a rich, decadent twist.
- Strawberry Cake: Adds a hint of fruity sweetness.
- Coconut Cake: Enhances the bunny’s “fur” theme.
5. How Do I Store Leftovers?
If you somehow resist finishing this adorable cake in one sitting, you can store leftovers in an airtight container at room temperature for a day or in the fridge for up to three days. If refrigerated, allow the cake to sit at room temperature for 20–30 minutes before serving to soften the frosting.
Creative Twists and Fun Variations
1. A Chocolate Bunny Cake
Swap out vanilla cake for chocolate, use chocolate frosting, and replace white coconut with chocolate shavings to create a cocoa-inspired bunny.
2. A Naturally Dyed Bunny
Instead of artificial food coloring, use beet juice for pink frosting, matcha powder for green accents, or blueberry puree for a pastel purple touch.
3. A Sprinkle Explosion Bunny
For a colorful, playful twist, mix rainbow sprinkles into the cake batter and cover the bow tie with extra sprinkles for a funfetti effect.
4. A Healthier Bunny Cake
For a more natural version, use whole wheat flour, a honey-sweetened frosting, and fruit decorations like berries and banana slices instead of jelly beans.
Advertisement
5. A Mini Bunny Family
Instead of making one big bunny, use smaller round cakes or even cupcakes to create an entire bunny family—perfect for individual servings at a party.
Tips for the Best Bunny Cake
- Use a sharp knife for cutting: A clean, sharp knife helps create smooth, even cuts when shaping the bunny.
- Chill before frosting: A cold cake is easier to frost without crumbling.
- Get kids involved: Let little hands add the finishing touches with sprinkles, candies, and coconut.
- Make a sturdy base: Frost the cake on the same tray or platter where you’ll serve it to avoid transferring mishaps.
Conclusion: More Than Just a Cake
Easter is a time of renewal, celebration, and togetherness, and few things capture that spirit like a homemade Bunny Cake. Whether you’re carrying on a family tradition or starting a new one, this cake is more than just a sweet treat—it’s a shared experience.
As I slice into my own Bunny Cake each year, I remember those childhood moments with my grandmother, the smell of vanilla in the air, and the simple joy of creating something special with loved ones. Now, it’s your turn to bake up some Easter memories—one bunny cake at a time.
The Bunny Cake: A Nostalgic Easter Tradition
Ingredients
Method
- Shape the Bunny: Take one round cake and cut out the bunny ears and bow tie using the cake pan as a guide. The other cake will remain whole as the face.
- Assemble the Bunny: Arrange the ears and bow tie around the whole cake to form a bunny face.
- Prepare the Frosting: Mix some of the buttercream with food coloring to create pink frosting for the bunny’s ears and face details.
- Frost the Cake: Spread the plain buttercream evenly over the entire bunny face. Don’t worry about perfection—coconut will cover it!
- Add the Fur: Sprinkle shredded coconut over the frosted face and ears for a fluffy bunny texture.
- Decorate Creatively: Use sprinkles and jelly beans to add facial details and embellish the bow tie. Pipe pink frosting to highlight the ears and facial features.
- Enjoy the Festivity: Serve and delight in this adorable Easter treat!
Notes
- Make ahead! You can bake the cakes a day in advance and assemble them on the day of serving.
- For a coconut-free option, skip the shredded coconut and use textured frosting techniques instead.
- Want extra flavor? Use flavored extracts in your frosting, such as vanilla, almond, or coconut.
- Get creative! Swap jelly beans for chocolate chips or mini marshmallows for decoration.