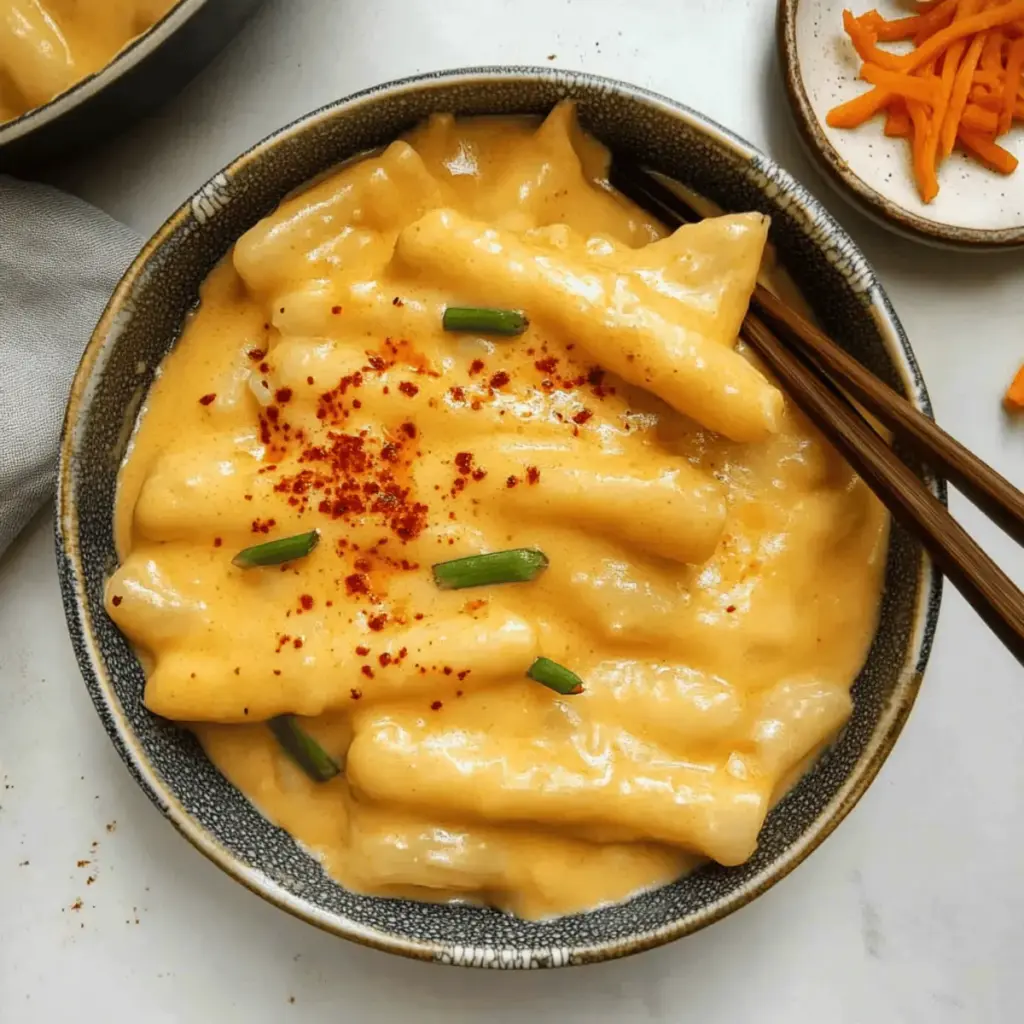
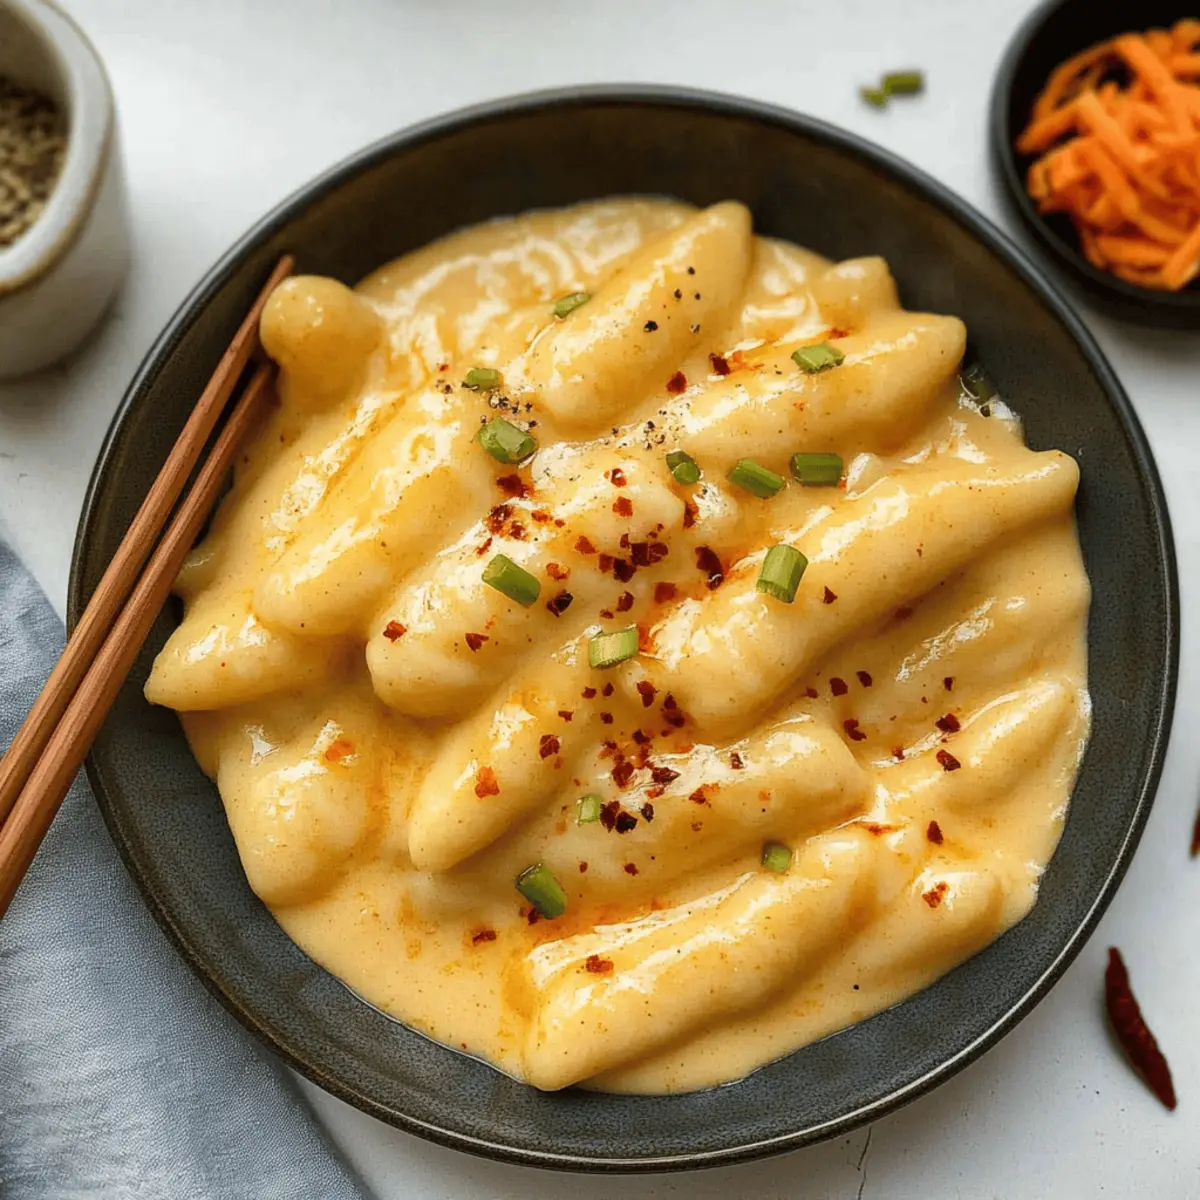
As I stood in my kitchen, a warm breeze wafted in, teasing my senses with the promise of a comforting meal. That’s when I decided to whip up a batch of Vegan Cheese Tteokbokki, a delightful twist on the beloved Korean street food. With its chewy rice cakes wrapped in a rich, creamy cheese sauce, this dish is not only a satisfying comfort food option but also quick and easy to prepare—perfect for those cozy nights or an indulgent snack. Whether you’re looking to impress friends or simply enjoy something heartwarming at home, this vegan version is full of flavor and free from guilt. Intrigued? Let’s dive into this cheesy goodness and elevate your cooking game!
Why will you love Vegan Cheese Tteokbokki?
Comforting and Creamy: This Vegan Cheese Tteokbokki delivers a cozy, warm feeling that wraps around you like a hug. Quick to Prepare: Ready in under 30 minutes, it’s perfect for busy weeknights or spontaneous cravings. Nutritious Twist: With a base of wholesome ingredients like cashews and nutritional yeast, you can indulge without the guilt. Versatile Options: Customize with your favorite veggies or adjust the spice level for a personal touch. If you’re a fan of rich flavors, you might also enjoy pairing it with a side of kimchi for a traditional flair. Don’t forget to check out my Homemade Mac Cheese for another comforting dish!
Vegan Cheese Tteokbokki Ingredients
For the Rice Cakes
- Rice Cakes (Garaetteok) – Provides the chewy base for the dish; look for cylindrical, white rice cakes at Asian grocery stores.
For the Cheese Sauce
- Potato – Adds creaminess and body to the cheese sauce; can substitute with sweet potato for a sweeter flavor.
- Carrot – Provides sweetness and color in the cheese sauce; optional if you want a simpler taste.
- Cashews – Contributes to the creamy texture of the cheese sauce; sunflower seeds are a nut-free alternative.
- Nutritional Yeast – Adds a cheesy flavor without dairy; feel free to replace with vegan cheese shreds if preferred.
- Miso Paste – Enhances umami flavor in the cheese sauce; soybean or chickpea miso are great options for variations.
- Tapioca Starch – Critical for achieving a stretchy, cheese-like consistency; no direct substitute is recommended for the best texture.
- Seasonings (spices, Korean red pepper flakes) – For flavor enhancement; adjust to taste for your preferred spice level.
Step‑by‑Step Instructions for Vegan Cheese Tteokbokki
Step 1: Prepare Rice Cakes
Begin by boiling a large pot of water. Once boiling, add the rice cakes (garaetteok) and cook for about 5–7 minutes, or until they are tender but still have a bit of chew. Drain the rice cakes and set them aside in a bowl, ensuring they don’t stick together.
Step 2: Make Cheese Sauce
In a blender, combine the cooked potato and optional carrot, cashews, nutritional yeast, miso paste, and any desired spices. Blend until the mixture is completely smooth and creamy, adding a splash of water if needed to help with blending. This delicious cheese sauce is the heart of your Vegan Cheese Tteokbokki.
Step 3: Cook Cheese Sauce
Transfer the blended mixture into a medium-sized pot and heat over medium heat. Stir continuously for about 5–7 minutes until the sauce thickens and becomes stretchy. Observe the color and texture—once it starts to bubble and achieves a velvety consistency, it’s ready for the next step.
Step 4: Combine
Carefully toss the cooked rice cakes into the pot with the cheese sauce. Stir gently, ensuring every piece of rice cake is generously coated in the creamy sauce. Cook for another 2-3 minutes on low heat, allowing the flavors to meld together beautifully while keeping an eye on the thickness.
Step 5: Serve
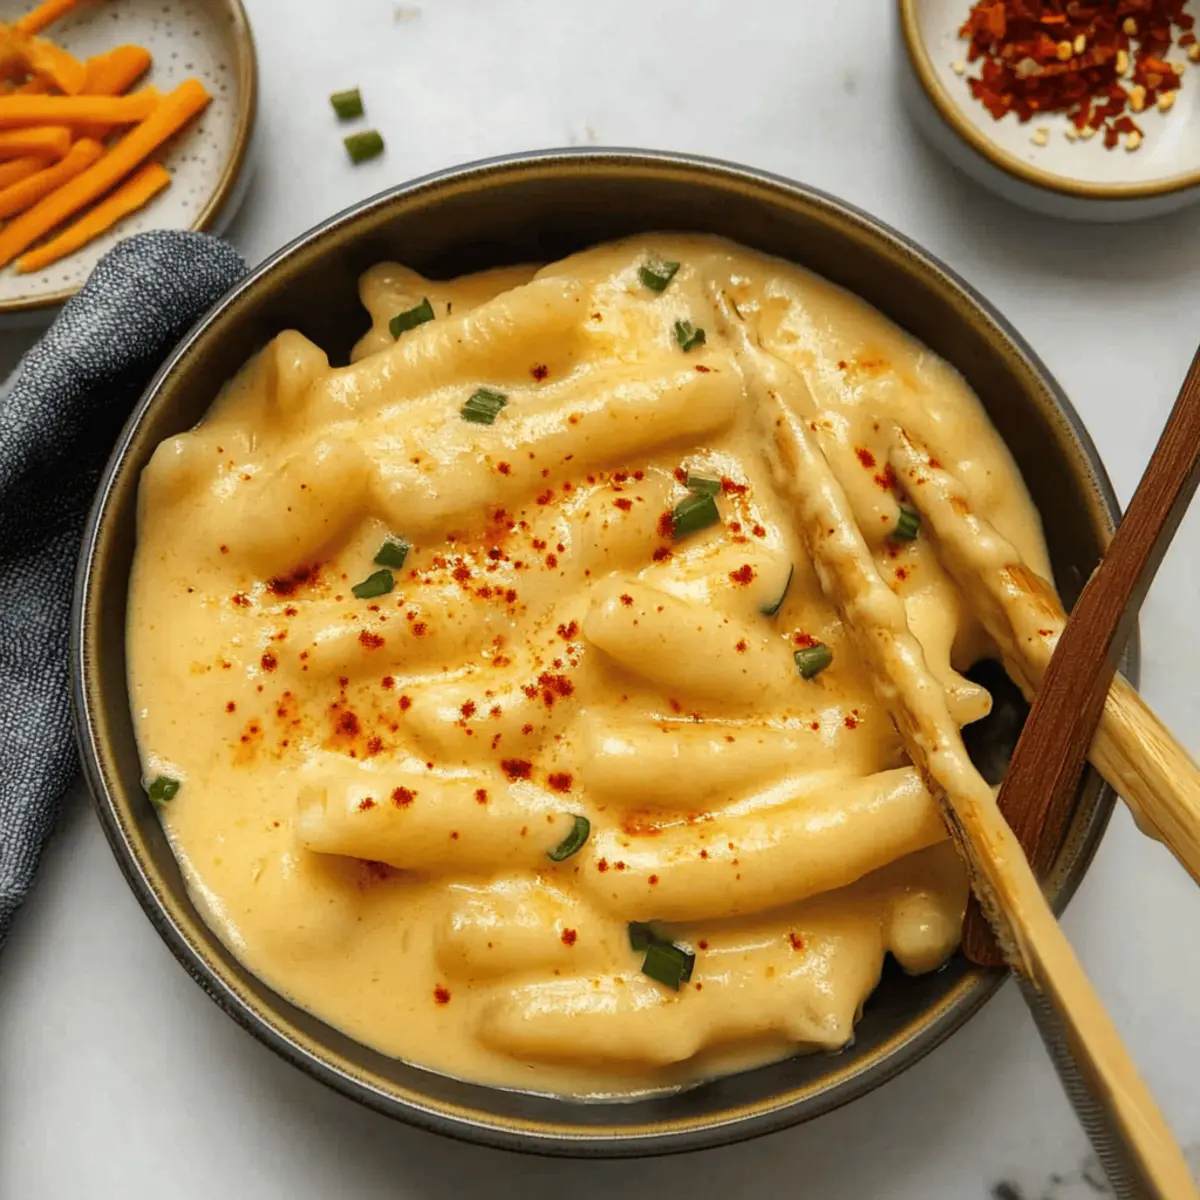
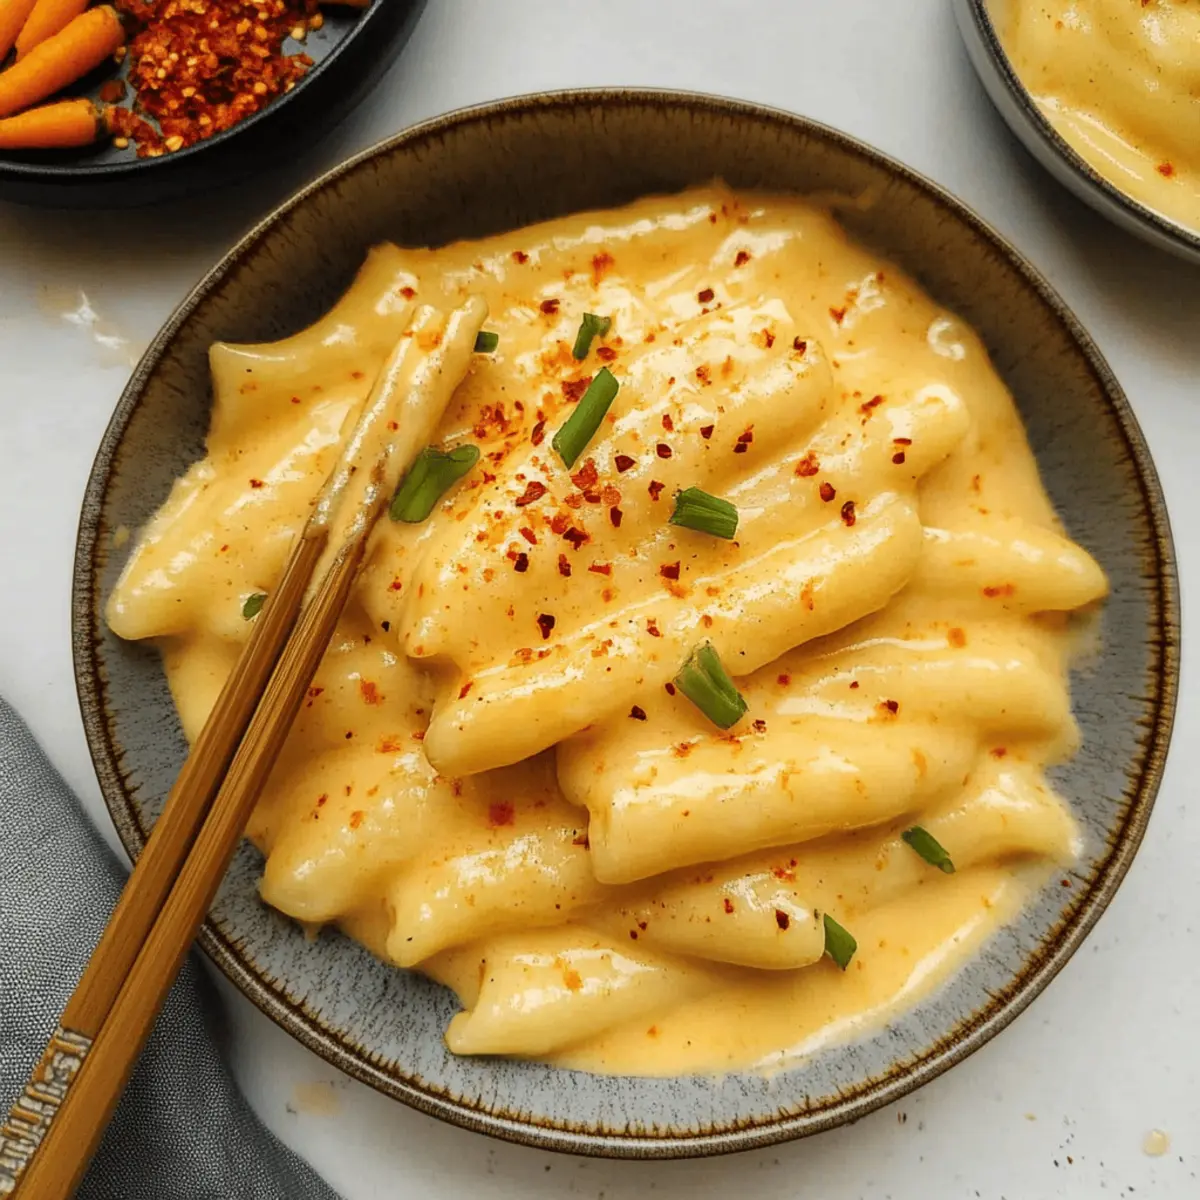
Once combined, remove the Vegan Cheese Tteokbokki from heat and transfer it to a serving dish. For an extra touch, garnish with a sprinkle of Korean red pepper flakes or your favorite herbs. Enjoy this comforting dish immediately while it’s hot, and savor every cheesy bite!
Make Ahead Options
These Vegan Cheese Tteokbokki are perfect for meal prep enthusiasts! You can prepare the cheese sauce up to 3 days in advance by blending the cooked potato, carrot, cashews, nutritional yeast, and miso paste, then store it in an airtight container in the refrigerator. The rice cakes can be cooked and kept in the fridge for up to 24 hours; just toss them with a little bit of water to prevent sticking. When you’re ready to enjoy, simply reheat the cheese sauce on the stovetop over medium heat, stirring frequently to regain that creamy texture, and combine with the reheated rice cakes. This way, you’ll have a delicious, comforting meal with minimal effort on busy weeknights!
Vegan Cheese Tteokbokki Variations
Feel free to customize this delightful dish to suit your taste buds!
-
Spicy Cheese Sauce: Add Korean red pepper flakes to the cheese sauce for a fiery kick. This twist elevates the dish and brings it to life. If you love heat, you’ll enjoy this zesty variation!
-
Alternate Veggies: Incorporate cooked veggies like zucchini or bell peppers for added nutrients and color. They not only enhance flavor but also provide a lovely crunch. Get creative and make it your own!
-
Sweet Potato Swap: Replace the standard potato with sweet potato in the cheese sauce for a sweeter, more earthy flavor. This subtle change can transform the entire dish and marry beautifully with the rice cakes.
-
Nut-Free Creation: Substitute cashews with sunflower seeds or tahini for a nut-free version. You’ll still achieve that creamy texture while catering to allergies. Your comfort food shouldn’t come with restrictions!
-
Cheesy Glaze: For an extra cheesy layer, top the cooked tteokbokki with vegan cheese shreds before serving. Melt them under the broiler for a bubbly, delightful finish. It’s comfort food with an indulgent twist!
-
Garlic Lover’s Delight: Add minced garlic to the cheese sauce for a fragrant flavor boost. A few cloves can significantly elevate your tteokbokki experience. This will awaken your taste buds and keep you coming back for more!
-
Herb Infusion: Sprinkle fresh herbs like cilantro or green onions on top for a refreshing garnish. This will add a pop of color and brightness to each serving. Simple, but oh-so flavorful!
-
Savory Soy Sauce Drizzle: Drizzle a touch of soy sauce over your tteokbokki before serving for a deeper umami flavor. This addition will enhance every bite, making it even more irresistible.
Don’t forget to pair your Vegan Cheese Tteokbokki with a side of kimchi for a traditional touch! If you love experimenting with flavors, check out my recipes for Savory Satisfying BLT or Creamy Honey Pepper Chicken Mac and Cheese. Enjoy your culinary adventure!
Expert Tips for Vegan Cheese Tteokbokki
-
Cook Rice Cakes Right: Ensure you cook the rice cakes until they’re soft and tender; undercooking may lead to a chewy texture that isn’t pleasant.
-
Smooth Sauce Blending: When making the cheese sauce, blend thoroughly to avoid any lumps. A smooth texture is key for that creamy Vegan Cheese Tteokbokki experience.
-
Stir Constantly: While cooking the cheese sauce, stir continuously to prevent it from sticking to the pot and burning. This ensures a perfectly stretchy consistency.
-
Adjust Spice: If you’re unsure about the heat level, start with a small amount of Korean red pepper flakes, and add more to less zealous spice lovers.
-
Ingredient Substitutions: Feel free to experiment with different vegetables in the sauce to cater to your taste. Zucchini or bell peppers can add nutrition and delicious flavor!
Storage Tips for Vegan Cheese Tteokbokki
Fridge: Store any leftover Vegan Cheese Tteokbokki in an airtight container for up to 3 days. Make sure to allow it to cool before sealing to avoid condensation.
Freezer: For longer storage, freeze the tteokbokki in a freezer-safe container for up to 2 months. It’s best to freeze without the cheese sauce to maintain texture.
Reheating: When ready to enjoy, reheat on the stovetop over medium heat with a splash of water to loosen the sauce, stirring until heated through.
Quality Check: Before consuming leftovers, check for any off smells or changes in texture to ensure freshness. Enjoy!
What to Serve with Vegan Cheese Tteokbokki
Looking to create the perfect meal to accompany your cheesy, comforting dish?
-
Kimchi: This traditional Korean side dish adds a spicy, tangy kick that beautifully contrasts the creamy cheese sauce. The crunch of the kimchi provides a delightful texture balance.
-
Steamed Broccoli: Lightly steamed broccoli offers a fresh, nutritious element, brightening the plate with color and enhancing the overall healthiness of your meal. The slight bitterness of broccoli complements the rich tteokbokki wonderfully.
-
Sesame Spinach Salad: This simple salad adds a refreshing twist with its sesame dressing, which cuts through the richness of the tteokbokki. Crunchy, vibrant, and healthy, it’s an ideal side that adds wellness to comfort.
-
Rice Paper Rolls: Filled with fresh veggies and served with a light dipping sauce, these rolls offer a refreshing contrast in both texture and flavor, keeping the meal light and fun.
-
Korean Fried Cauliflower: Crispy, spicy, and savory, this dish pairs delightfully with your tteokbokki, inviting an exciting crunch while delivering bold flavors that jive well together.
-
Herbal Tea: A cup of warm herbal tea cleanses the palate, enhancing the meal’s flavors. Opt for something light like mint or chamomile to keep the evening cozy.
-
Mango Sorbet: The sweet and fruity flavor of mango sorbet serves as a refreshing dessert, providing a perfect sweet ending to your savory feast. This light treat will leave you feeling satisfied yet not overly stuffed.
Vegan Cheese Tteokbokki Recipe FAQs
How do I choose the best rice cakes for Vegan Cheese Tteokbokki?
Absolutely! Look for cylindrical, white rice cakes known as Garaetteok at Asian grocery stores. They should be plump and firm, without any dark spots or signs of spoilage. Fresh rice cakes are crucial for achieving that delightful chewy texture.
How should I store leftovers of Vegan Cheese Tteokbokki?
You can store any leftovers in an airtight container in the refrigerator for up to 3 days. Let them cool completely before sealing to avoid condensation, which can make the rice cakes soggy. I often reheat on the stovetop with a little water to keep the sauce creamy.
Advertisement
Can I freeze Vegan Cheese Tteokbokki?
Very! To freeze, place the prepared dish in a freezer-safe container without the cheese sauce for best results—this helps maintain the texture of the rice cakes. Freeze for up to 2 months. When you’re ready to enjoy it, thaw in the refrigerator overnight and reheat on the stovetop with a splash of water.
What if my cheese sauce doesn’t thicken properly?
No worries! If your cheese sauce isn’t thickening, ensure you’re cooking it over medium heat while stirring constantly. Add a bit more tapioca starch mixed with cold water for extra thickening. Remember, consistency is key, so patience while heating is essential for that perfect cheesy texture.
Are there any allergen concerns with Vegan Cheese Tteokbokki?
Absolutely! This recipe is mainly nut-free if you substitute sunflower seeds for cashews. However, always check the labels, especially for store-bought ingredients. If you have soy allergies, be cautious with the miso paste; opt for chickpea miso as a safe alternative. Always adjust the ingredients according to your dietary needs.
Can I adjust the spice level in the sauce?
Very much! The spice in Vegan Cheese Tteokbokki comes from Korean red pepper flakes. If you prefer a milder flavor, start with a small amount and gradually increase it to your taste. You can also leave it out entirely for a non-spicy version, and the dish will still be deliciously cheesy!

Creamy Vegan Cheese Tteokbokki for Cozy Nights In
Ingredients
Equipment
Method
- Begin by boiling a large pot of water. Once boiling, add the rice cakes (garaetteok) and cook for about 5–7 minutes, or until they are tender but still have a bit of chew. Drain and set aside.
- In a blender, combine the cooked potato and optional carrot, cashews, nutritional yeast, miso paste, and any desired spices. Blend until the mixture is completely smooth and creamy.
- Transfer the blended mixture into a medium-sized pot and heat over medium heat. Stir continuously for about 5–7 minutes until the sauce thickens and becomes stretchy.
- Carefully toss the cooked rice cakes into the pot with the cheese sauce. Stir gently to ensure every piece is coated. Cook for another 2-3 minutes on low heat.
- Once combined, remove from heat and transfer to a serving dish. Garnish with a sprinkle of Korean red pepper flakes or your favorite herbs.