
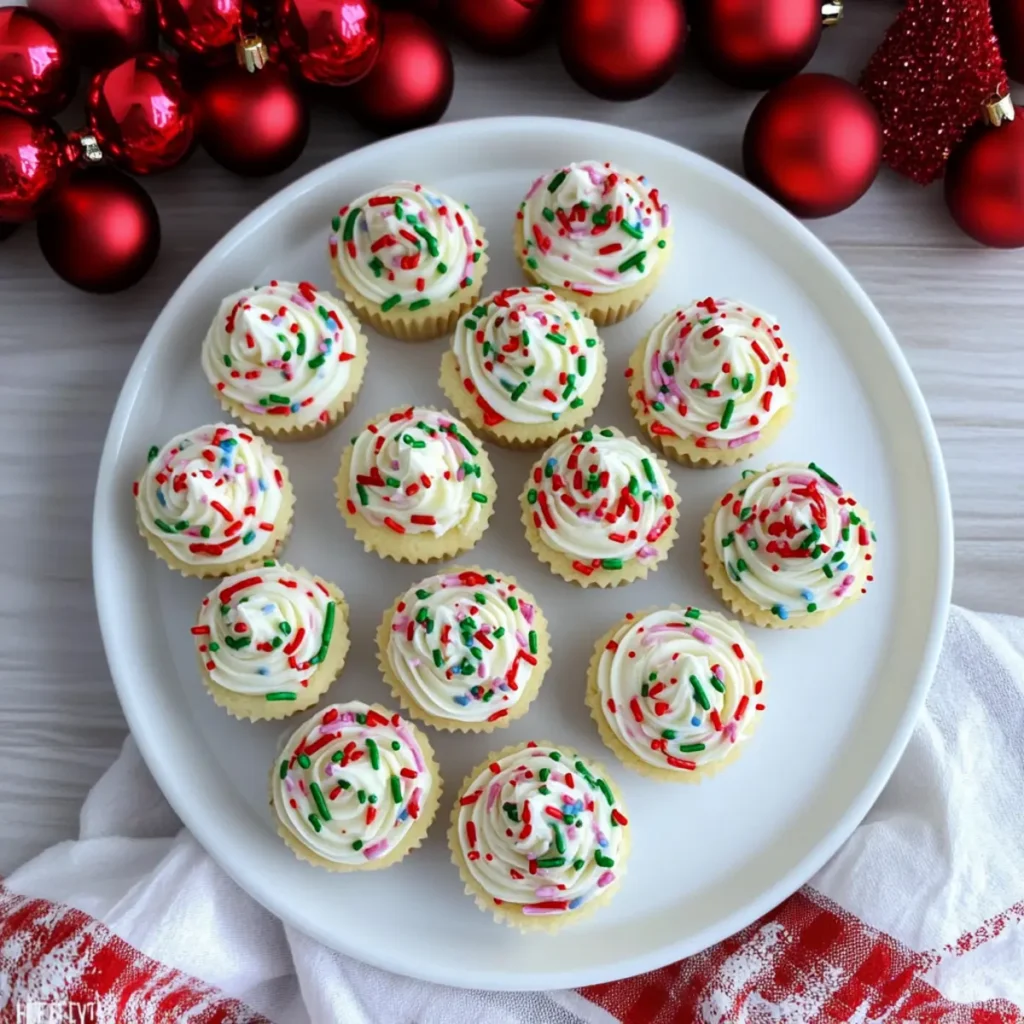
As I stood in my kitchen surrounded by the sounds of festive music and the smell of holiday spices, I realized something magical was happening: the joy of baking. These Christmas Sprinkle Cookie Cups are the ultimate way to capture that festive spirit! Perfect for anyone longing for a homemade treat without the fuss, this easy recipe combines a rich, buttery cookie base with a delightful swirl of creamy frosting and a joyful cascade of sprinkles. No complex techniques required—just a little mixing, baking, and decorating! Not only are these cookie cups irresistibly fun to make, but they also bring a colorful charm to your holiday gatherings, making them a must-have addition to any dessert spread. Ready to whip up these delightful treats and impress your loved ones? Let’s dive into the festive fun!

Why Are Christmas Sprinkle Cookie Cups Irresistible?
Simplicity is key! With no rolling required, you can enjoy baking even on the busiest holiday days. Colorful and Festive, these cookie cups add a joyful touch to your holiday treat platters, making them visually appealing for guests. Deliciously Buttery flavor paired with creamy frosting ensures every bite feels like a festive celebration. Plus, they’re Versatile—switch up sprinkles or flavors for any occasion! Finally, they’re a Crowd-Pleaser; everyone loves a cheerful cookie, and these are perfect for sharing at parties or family gatherings. Love cookies? Then you’ll adore these delightful Gingerbread Cupcakes Christmas too!
Christmas Sprinkle Cookie Cups Ingredients
For the Cookie Cups
- Unsalted Butter (1 1/4 cups) – Adds richness and moisture; substitute with margarine for a dairy-free option.
- Powdered Sugar (1 1/2 cups) – Sweetens the dough and forms the base for frosting; use coconut sugar for a less refined option.
- Baking Powder (1 teaspoon) – Essential for a light cookie texture; no direct substitutes, but baking soda can work if adjusted properly.
- Salt (1/2 teaspoon) – Enhances overall flavor; try sea salt for a gourmet touch.
- Egg (1) – Binds ingredients and adds moisture; for vegan, use 1/4 cup applesauce or a flax egg.
- Vanilla Extract (1 teaspoon) – Adds warm flavor; almond extract can be a delightful substitution.
- All-Purpose Flour (2 1/2 cups) – Provides structure to the cookie; substitute with a gluten-free blend if needed.
- Red Sprinkles (1/4 cup) – Decorative element; swap with any colored sprinkles for variety.
- Green Sprinkles (1/4 cup) – Decorative element; opt for different colored sprinkles based on your theme.
For the Frosting
- Unsalted Butter (1/2 cup) – The foundational fat for frosting; margarine can be a good substitute.
- Powdered Sugar (2 1/2 cups) – Sweetens and thickens frosting; natural sweeteners can give a healthier touch.
- Vanilla (1 teaspoon) – Flavor enhancer for frosting; vanilla bean paste offers a richer alternative.
- Salt (1/2 teaspoon) – Balances the frosting’s sweetness; use fine sea salt for best results.
- Milk (2-3 tablespoons) – Adjusts frosting consistency; plant-based milk works for a dairy-free option.
- Additional Sprinkles for Garnish – Adds festive charm; a variety of colors makes it merry and bright.
Step‑by‑Step Instructions for Christmas Sprinkle Cookie Cups
Step 1: Preheat the Oven
Begin by preheating your oven to 350°F (175°C). While the oven warms up, grab your mini muffin pans and generously spray them with baking spray to ensure easy removal of your cookie cups later. Preparing the pans ahead of time helps streamline the process for your delightful Christmas Sprinkle Cookie Cups.
Step 2: Cream the Butter
In a large mixing bowl, add the softened unsalted butter and beat it with an electric mixer on medium speed for about 1 minute, until it is creamy and light in color. This initial step is crucial as it creates a fluffy base for your cookie dough, setting the stage for that rich buttery flavor we all love.
Step 3: Combine the Dry Ingredients
Next, carefully add the powdered sugar, baking powder, and salt to the bowl with the creamed butter. Mix on low speed for about 2-3 minutes, or until the mixture is fully combined and creamy. At this point, you’ll enjoy the sweet aroma filling your kitchen as you prepare the dough for the scrumptious cookie cups.
Step 4: Add the Egg and Vanilla
Now, it’s time to incorporate the egg and vanilla extract into your mixture. Blend until just combined; be sure not to overmix. This addition adds moisture and flavor, creating the foundation for your Christmas Sprinkle Cookie Cups. The batter will begin to come together beautifully, ready for the next step.
Step 5: Mix in the Flour
Gradually add the all-purpose flour into the mix, stirring until just combined to maintain the dough’s light texture. You may want to switch to a spatula for this part to fold the flour in gently. The dough should be thick and somewhat sticky, waiting for the vibrant sprinkles to bring it to life!
Step 6: Divide and Color the Dough
Divide your cookie dough into two equal portions. Gently mix red sprinkles into one half and green sprinkles into the other half until fully incorporated. This step not only adds festive color but also makes the cookie cups visually stunning. The playful colors will make these treats even more exciting to bake and eat!
Step 7: Shape the Dough in Pans
Roll the colored dough into 1-inch balls and place each ball into the prepared mini muffin pans, pressing them down gently with your thumb. This forms the cup shape essential for your Christmas Sprinkle Cookie Cups. Aim for an even distribution to ensure all your cookie cups bake uniformly and puff up perfectly!
Step 8: Bake the Cookie Cups
Slide the filled muffin pans into your preheated oven and let them bake for about 8-10 minutes. Keep an eye on them; once the edges turn golden brown, it’s time to take them out! The delightful aroma will fill your kitchen, signaling that these festive treats are almost ready for frosting.
Step 9: Press and Cool
Upon removing the cookie cups from the oven, use a measuring teaspoon to gently press down the centers of each cup to create a little well for frosting. Allow them to cool for about 5 minutes in the pan before carefully transferring them to a wire rack. This cooling process helps the cookie cups firm up while retaining their delightful shape.
Step 10: Prepare the Frosting
For the frosting, combine the softened unsalted butter, powdered sugar, vanilla extract, and salt in a clean mixing bowl. Beat until smooth and creamy, adding milk gradually to achieve your desired frosting consistency. This luscious frosting will complement your Christmas Sprinkle Cookie Cups perfectly, ensuring each bite is indulgently sweet.
Step 11: Frost the Cookie Cups
Once your cookie cups have completely cooled, it’s time to frost them. Using a piping bag or a zip-top bag with the corner snipped off, pipe the frosting onto each cup generously. This adds a festive touch and enhances the overall charm of your Christmas Sprinkle Cookie Cups, making them irresistible.
Step 12: Garnish and Serve
Finish by generously sprinkling additional festive sprinkles on top of the frosted cookie cups for that extra pop of color. These vibrant and delightful Christmas Sprinkle Cookie Cups are now ready to share and impress at your holiday gatherings. Arrange them on a platter, and enjoy the joy they bring to everyone who takes a bite!

Christmas Sprinkle Cookie Cups Variations
Feel free to get creative with these delightful cookie cups and personalize them to match your taste and occasion!
Themed Sprinkles: Switch red and green sprinkles for pastel hues during Easter. They’ll add charm for any spring celebration!
Chocolate Chip Delight: Fold in mini chocolate chips before baking for a delicious surprise in every bite. The melty chocolate will complement the buttery cookie beautifully.
Nutty Crunch: Add chopped nuts, like walnuts or pecans, to the dough for extra texture. This variation brings a lovely crunch that contrasts with the softness of the cookie cups.
Flavorful Extracts: Try using peppermint extract in the frosting for a holiday twist or almond extract for a warm, nutty flavor. Both options will elevate the aroma and taste!
Gluten-Free Adaptation: Swap the all-purpose flour for a gluten-free blend to accommodate dietary restrictions without sacrificing flavor. This way, everyone can join in the festive fun!
Caramel Surprise: After baking, drizzle caramel sauce into the center hole before frosting for a gooey treat. This addition turns the cookie cups into a truly indulgent delight.
Spiced Variation: Add a pinch of cinnamon or nutmeg to the dough for a cozy flavor profile. These spices lend warmth, perfect for those chilly holiday nights.
Frosting Play: Switch out the vanilla frosting for cream cheese frosting for a delightful tang. This option pairs exceptionally well with the sweetness of the cookie and adds a festive touch.
These variations not only make your Christmas Sprinkle Cookie Cups truly unique but allow you to create a joyful experience, just like these Sugar Cookie Cheesecake bars that combine two favorite flavors in one!
Make Ahead Options
These Christmas Sprinkle Cookie Cups are perfect for busy home cooks who want to save time during the holiday rush! You can prepare the cookie dough up to 24 hours in advance; simply wrap it tightly in plastic wrap and refrigerate. This allows the flavors to develop beautifully. Additionally, you can bake the cookie cups and store them in an airtight container at room temperature for up to 3 days before frosting. When you’re ready to serve, whip up the frosting fresh and pipe it onto the cooled cookie cups for that creamy, delightful finish. With these make-ahead tips, you’ll enjoy all the festive fun without the last-minute stress!
What to Serve with Christmas Sprinkle Cookie Cups
The perfect festive feast deserves delightful companions that enhance these cheerful treats.
Hot Cocoa Bar: A warm, rich cup of hot cocoa complements the sweet cookies perfectly, providing a cozy holiday vibe. Add whipped cream and marshmallows for a special touch!
Winter Fruit Salad: Crisp apples, juicy oranges, and pomegranate seeds offer a refreshing contrast to the cookies’ sweetness, making for a balanced dessert spread.
Mini Cheesecakes: The creamy texture and tangy flavor of mini cheesecakes create a luscious pairing that will have everyone coming back for more.
Spiced Apple Cider: This comforting drink, infused with cinnamon and citrus, warms the soul and perfectly complements the festive spirit of the cookies.
Chocolate-Dipped Pretzels: The salty crunch of pretzels coated in chocolate adds a fun texture contrast, making for an exciting nibble after your sweet cookie cups.
Peppermint Bark: A festive twist with layers of chocolate and crushed peppermint can elevate your dessert table, bringing additional holiday flavors to enjoy.
Gingerbread Cookies: The warm spices in gingerbread offer a delightful pairing with your cookie cups, harmonizing beautifully in taste and enhancing the holiday cheer.
Eggnog: This silky, spiced beverage is a classic holiday staple and pairs beautifully with the sweetness of your Christmas Sprinkle Cookie Cups.
Sugar Cookies: Pairing with other cookies provides a festive spread, making a cookie platter that satisfies every sweet tooth at your holiday gathering.
Holiday Pudding: This creamy, rich dessert adds a touch of tradition and indulgence that offsets the playful sweetness of the cookie cups, creating an unforgettable holiday experience.
How to Store and Freeze Christmas Sprinkle Cookie Cups
Room Temperature: Store frosted cookie cups in an airtight container at room temperature for up to 3 days to maintain their delicious taste and texture.
Fridge: If you want to keep your treats a bit longer, place the cookie cups in the fridge for up to a week—but remember to bring them back to room temperature before serving for the best flavor.
Freezer: You can freeze the cookie cups without frosting for up to 3 months. Just wrap them tightly in plastic wrap and then in aluminum foil to prevent freezer burn. Frosting should be added fresh when you’re ready to enjoy them!
Reheating: If you wish to enjoy a warm treat, simply microwave your cookie cups for about 10-15 seconds. This little touch will revive the softness and make them an even more delightful dessert!
Helpful Tricks for Christmas Sprinkle Cookie Cups
Watch the Bake: Keep an eye on your cookie cups as they bake; they can quickly go from golden to overbaked.
Pressing the Centers: Use a measuring teaspoon to gently press down the centers right after baking for the perfect cup shape to hold frosting.
Room Temperature Ingredients: Ensure your butter and egg are at room temperature for a smooth, well-mixed dough, contributing to the best Christmas Sprinkle Cookie Cups texture.
Cooling Time: Let the cookie cups cool properly before frosting. If they’re too warm, the frosting will melt and lose its shape.
Frosting Consistency: Adjust your frosting consistency with milk—start with less to achieve a thicker frosting if you prefer!
Storage Solutions: Store your frosted cookie cups in an airtight container at room temperature for optimal freshness without losing their delightful texture.

Christmas Sprinkle Cookie Cups Recipe FAQs
How do I choose the right sprinkles for my cookie cups?
When selecting sprinkles, look for high-quality, vibrant colors that won’t bleed when baked. Nonpareils or jimmies work well because they hold their shape. I love using festive colors like red and green for the holiday season, but feel free to get creative with your favorite themes!
How should I store my Christmas Sprinkle Cookie Cups?
For best results, store your frosted cookie cups in an airtight container at room temperature for up to 3 days. If you need a longer storage option, keep them in the fridge for up to a week. Remember to let them come to room temperature before serving to fully enjoy their delightful flavor.
Can I freeze the Christmas Sprinkle Cookie Cups?
Absolutely! You can freeze the cookie cups without frosting for up to 3 months. To do so, wrap each cup tightly in plastic wrap, then place them in a resealable bag or airtight container to prevent freezer burn. When you’re ready to enjoy them, frost them fresh for that perfect sweet finish!
What do I do if my cookie cups don’t hold their shape?
If your cookie cups spread too much while baking, it could be due to overmixing the dough or not chilling the dough beforehand. To ensure a perfect shape, make sure to mix the flour gently and consider chilling the dough for about 30 minutes before forming them into balls.
Are there any dietary considerations I should keep in mind?
When making Christmas Sprinkle Cookie Cups, feel free to substitute ingredients to accommodate dietary restrictions. For a vegan version, replace the egg with 1/4 cup of applesauce or a flax egg. You can also use dairy-free margarine and plant-based milk in the frosting. Always check for allergies regarding sprinkles or any other ingredients you plan to use!
How long can I keep the frosting before using it?
Homemade frosting can be stored in the fridge for about 1 week in an airtight container. Just give it a good stir before using it to refresh its texture. If it’s too thick, you can add a splash of milk to get it back to the desired consistency, ensuring those Christmas Sprinkle Cookie Cups look as good as they taste!

Delightful Christmas Sprinkle Cookie Cups You Can't Resist
Ingredients
Equipment
Method
- Preheat your oven to 350°F (175°C). Spray mini muffin pans with baking spray.
- In a large mixing bowl, beat softened unsalted butter on medium speed until creamy and light in color.
- Add powdered sugar, baking powder, and salt to the creamed butter; mix on low speed until combined and creamy.
- Incorporate the egg and vanilla extract; blend until just combined, being careful not to overmix.
- Gradually add all-purpose flour, stirring until just combined to maintain a light texture.
- Divide dough into two portions; mix red sprinkles into one half and green sprinkles into the other until fully combined.
- Roll dough into 1-inch balls and place in the prepared pans, pressing down gently to form cup shapes.
- Bake for about 8-10 minutes, until edges turn golden brown.
- Press down the centers of each cup after baking, then cool for 5 minutes in the pan before transferring to a wire rack.
- For the frosting, beat softened unsalted butter, powdered sugar, vanilla, and salt until creamy, adding milk to adjust consistency.
- Once cookie cups are cool, pipe frosting onto each cup generously.
- Sprinkle additional festive sprinkles on top before serving.